1. Introduction
Thank you for choosing the vidaXL Fence Gate Assen. This heavy-duty ornamental garden gate is designed to provide a secure and aesthetically pleasing entryway to your garden, patio, or terrace. Constructed from powder-coated steel, it offers durability and resistance against rust. This manual provides essential information for the safe assembly, installation, operation, and maintenance of your new gate.

Image 1.1: The vidaXL Fence Gate Assen with arched top and two posts, installed as a garden entryway.
2. Safety Information
Please read and understand all safety instructions before assembly and installation. Failure to follow these instructions may result in injury or damage to the product.
- Always wear appropriate personal protective equipment (PPE) such as gloves and safety glasses during assembly and installation.
- Ensure the installation surface is stable and capable of supporting the gate's weight and operational forces.
- Keep children and pets away from the work area during installation.
- Do not attempt to modify the gate or its components. Use only original parts supplied by vidaXL.
- Periodically inspect the gate for any signs of wear, damage, or loose fasteners. Address any issues promptly.
3. Package Contents
Verify that all components are present and undamaged before beginning assembly. If any parts are missing or damaged, contact vidaXL customer service.
- 1 x Gate Panel with Arched Top
- 2 x Gate Posts
- Hinges (pre-attached or separate, depending on model variant)
- 1 x Heavy-Duty Locking System
- 3 x Matching Keys
- Mounting Hardware (bolts, screws, anchors as required)
4. Setup and Installation
This section outlines the general steps for installing your vidaXL Fence Gate. Specific site conditions may require adjustments.
4.1 Tools Required (Not Included)
- Measuring Tape
- Level
- Drill with appropriate bits (for masonry or wood, depending on surface)
- Wrenches/Spanners
- Pencil/Marker
- Post-hole digger (if concreting posts)
4.2 Installation Steps
- Prepare the Site: Clear the area where the gate will be installed. Ensure the ground is level and stable. Determine the exact position for the two gate posts, allowing for the gate's width and necessary clearance for opening and closing.
- Install Gate Posts:
- For Concrete Installation: Dig two post holes to the recommended depth (consult local building codes). Place the posts in the holes, ensuring they are plumb (perfectly vertical) using a level. Pour concrete around the posts and allow it to cure completely before proceeding (typically 24-48 hours).
- For Surface Mounting: If posts have base plates, mark and drill pilot holes for the mounting hardware. Secure the posts firmly to the ground using appropriate anchors and bolts. Ensure posts are plumb.

Image 4.1: Overview of the gate installation process, showing posts and gate panel.
- Attach Hinges: The gate comes with sturdy hinges. Attach the gate panel to one of the installed posts using the provided hinges and hardware. Ensure the gate swings freely and is level.
- Install Locking System: Mount the heavy-duty locking system to the gate panel and the second post according to the manufacturer's instructions. Ensure the latch aligns correctly and the gate closes securely. Test the lock with the provided keys.
- Final Adjustments: Check all connections and fasteners to ensure they are tight. Verify that the gate opens and closes smoothly without dragging or binding. Make any necessary adjustments to the hinges or latch.

Image 4.2: Detail of the robust hinge mechanism for the gate.
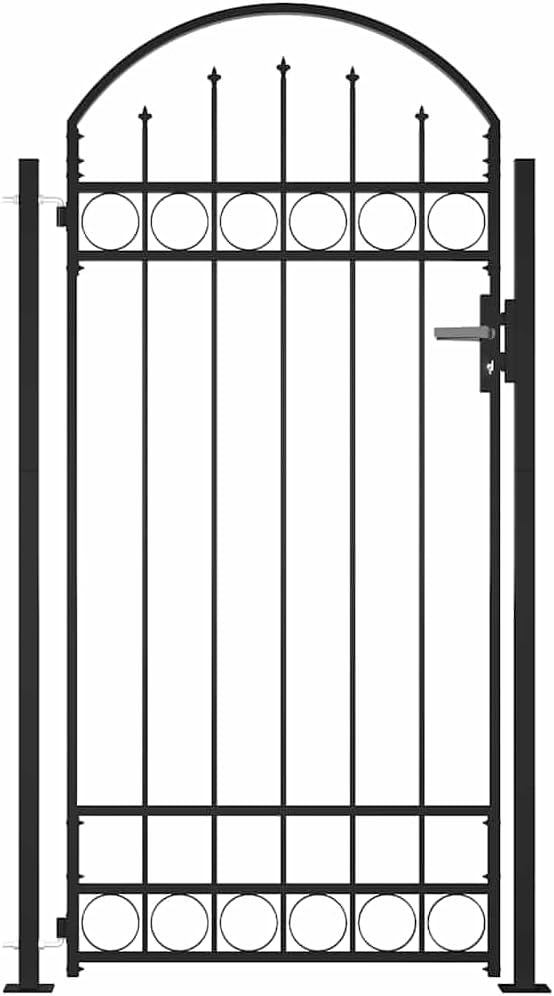
Image 4.3: Detail of the gate's integrated lock and handle.
5. Operating Instructions
The vidaXL Fence Gate is designed for straightforward operation.
- Opening the Gate: Insert the key into the lock cylinder and turn to unlock. Depress the handle or turn the knob (depending on lock type) to disengage the latch, then push or pull the gate open.
- Closing the Gate: Gently push or pull the gate until it aligns with the strike plate on the receiving post. The latch should engage automatically.
- Locking the Gate: Once the gate is closed, turn the key in the lock cylinder to secure it. Remove the key.
6. Maintenance
Regular maintenance will ensure the longevity and optimal performance of your gate.
- Cleaning: Clean the gate periodically with a mild soap solution and a soft cloth. Rinse thoroughly with water and dry to prevent water spots. Avoid abrasive cleaners or harsh chemicals that could damage the powder coating.
- Inspection: Annually, or more frequently in harsh environments, inspect all welds, fasteners, hinges, and the locking mechanism for signs of wear, corrosion, or damage.
- Lubrication: Apply a silicone-based lubricant to the hinges and the internal mechanism of the lock cylinder every 6-12 months to ensure smooth operation and prevent rust.
- Rust Prevention: If any scratches or chips appear in the powder coating, touch them up with appropriate rust-inhibiting paint to prevent corrosion.
7. Troubleshooting
Refer to this section for solutions to common issues.
| Problem | Possible Cause | Solution |
|---|---|---|
| Gate does not close properly | Misaligned posts or latch, obstruction, loose hinges. | Check post alignment with a level. Adjust hinges or latch strike plate. Remove any obstructions. Tighten hinge fasteners. |
| Gate is stiff to open/close | Lack of lubrication, rust on hinges, gate dragging on ground. | Lubricate hinges. Clean any rust. Adjust gate height if possible, or clear ground obstruction. |
| Lock is difficult to operate | Lock mechanism dirty or dry, key worn, misalignment. | Lubricate lock cylinder with graphite or silicone spray. Try a different key. Check for proper alignment of the latch. |
| Rust spots appearing | Scratches in powder coating, prolonged exposure to moisture. | Clean affected area, sand lightly if necessary, and apply rust-inhibiting touch-up paint. Ensure proper drainage around the gate. |
8. Specifications
Key technical details for the vidaXL Fence Gate Assen, Model 145751.
| Feature | Detail |
|---|---|
| Model Number | 145751 |
| Material | Alloy Steel with powder-coated finish |
| Color | Black |
| Gate Panel Size (W x H) | 41.3" x 80.3" (105 cm x 204 cm) |
| Overall Dimensions (W x H, including posts) | Approximately 41.3" x 80.3" (105 cm x 204 cm) - Note: Actual width may vary slightly based on post spacing. |
| Item Weight | 20.32 Kilograms |
| Mounting Type | Hardware Mount |
| Closure Type | Latch with key lock |

Image 8.1: Detailed dimensions of the gate panel and posts.
9. Warranty and Support
vidaXL products are manufactured to high-quality standards. For information regarding warranty terms, product support, or to purchase replacement parts, please visit the official vidaXL website or contact their customer service department. Keep your purchase receipt as proof of purchase.
Contact Information: Refer to your purchase documentation or the official vidaXL website for the most current contact details.


