1. Introduction
The Technoline WS 8016 is a modern digital radio-controlled wall clock designed to provide accurate time, date, indoor temperature, and humidity readings. Its clear LCD display ensures excellent readability from various angles. This manual provides detailed instructions for setting up, operating, and maintaining your device.
Key Features:
- DCF-77 Radio-Controlled Time with Manual Setting Option
- 12/24 Hour Time Display
- Time Zone Setting
- Date and Day of the Week Display (7 languages)
- Indoor Temperature Display in °C or °F
- Indoor Humidity Display in %RH
- Two Alarms
- Wall Mount or Tabletop Placement
2. Package Contents
Please check the package contents to ensure all items are present:
- 1 x Technoline WS 8016 Digital Radio Wall Clock
- 2 x AA Mignon LR06 Batteries
- 1 x Instruction Manual (this document)
3. Setup
3.1 Battery Installation
- Locate the battery compartment on the back of the clock.
- Open the battery compartment cover.
- Insert the two (2) AA Mignon LR06 batteries, observing the correct polarity (+ and - markings).
- Close the battery compartment cover securely.
Upon battery insertion, the clock will automatically begin searching for the DCF-77 radio signal.
3.2 Initial Radio Signal Reception
The clock will attempt to synchronize with the DCF-77 radio signal, which transmits the official time. This process may take several minutes. During this time, the radio signal icon will flash on the display.
- For best reception, place the clock near a window and away from electronic devices that may cause interference.
- Once the signal is successfully received, the time and date will be set automatically, and the radio signal icon will appear solid.
3.3 Manual Time Setting (if radio signal is unavailable)
If the radio signal cannot be received, or if you are in a region outside the DCF-77 reception area, you can set the time and date manually. Refer to the 'Operating Instructions' section for detailed steps on manual adjustments.
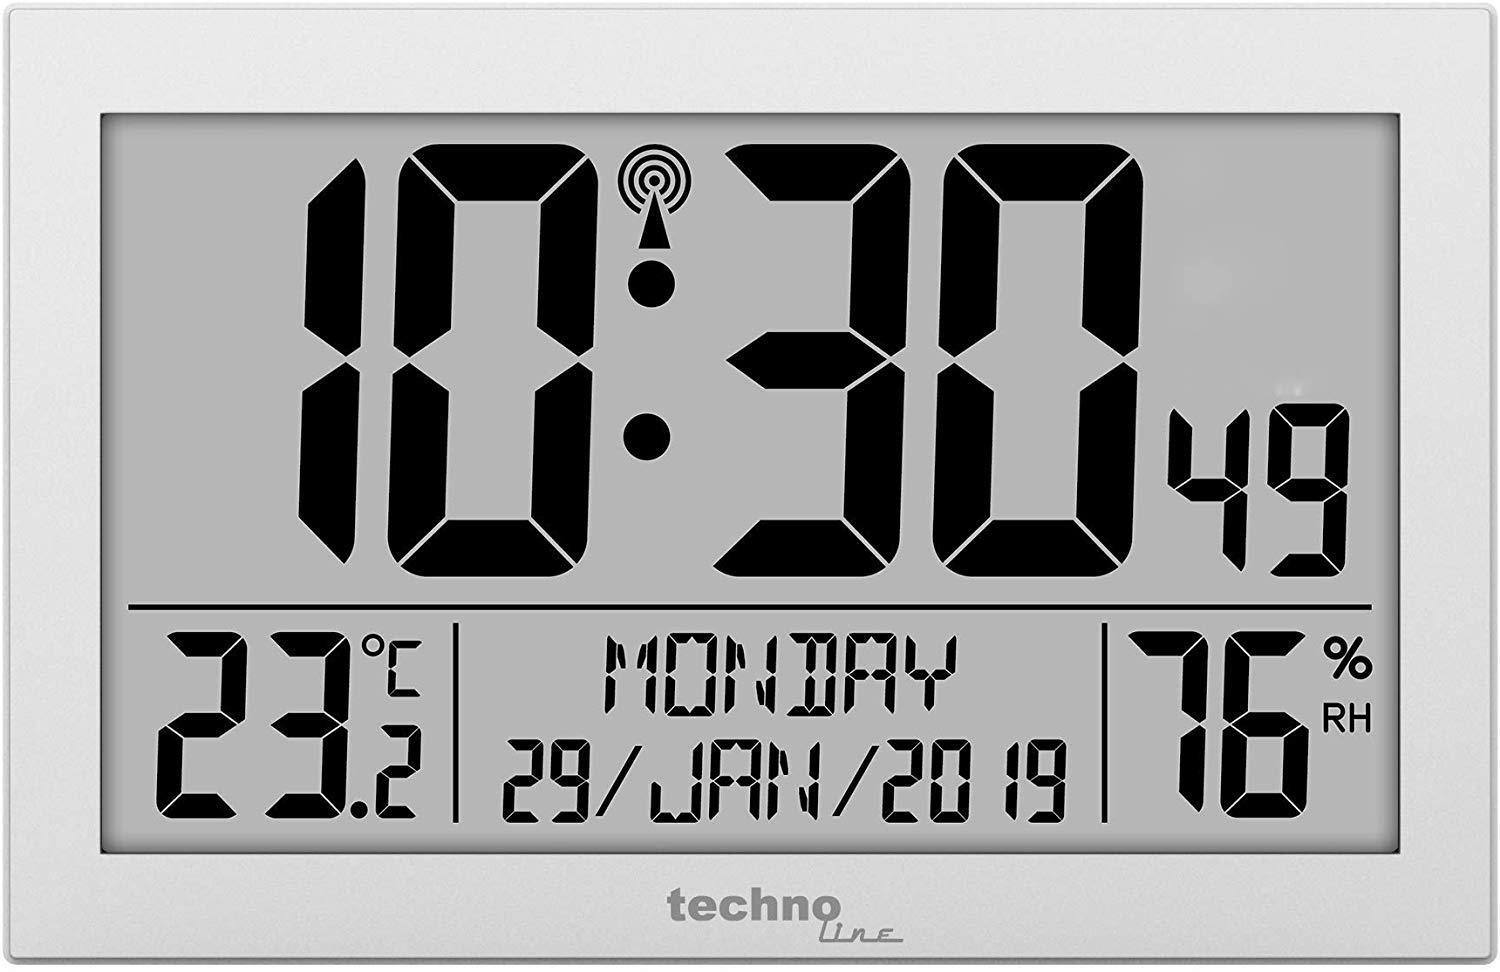
Figure 1: Front view of the Technoline WS 8016 Digital Radio Wall Clock, displaying time, date, temperature, and humidity.
4. Operating Instructions
The Technoline WS 8016 features several buttons, typically located on the back or side, for various settings. Common buttons include MODE, SET, UP/+, DOWN/-.
4.1 Setting Time and Date Manually
- Press and hold the MODE button for a few seconds to enter setting mode. The first adjustable value (e.g., time zone or hour) will flash.
- Use the UP/+ or DOWN/- buttons to adjust the value.
- Press MODE again to confirm the setting and move to the next adjustable value (e.g., minute, year, month, day).
- Repeat steps 2 and 3 until all desired settings (time zone, 12/24 hour format, hour, minute, year, month, day, day of week language) are configured.
- Press MODE one last time or wait for a few seconds for the clock to exit setting mode automatically.
4.2 12/24 Hour Format Selection
In normal display mode, press the UP/+ button to toggle between 12-hour (with AM/PM indicator) and 24-hour time formats.
4.3 Day of Week Language
During manual setting, you can select the display language for the day of the week from 7 available options. Cycle through the options using the UP/+ or DOWN/- buttons when the language setting is flashing.
4.4 Temperature Unit (°C/°F)
In normal display mode, press the DOWN/- button to switch the indoor temperature display between Celsius (°C) and Fahrenheit (°F).
4.5 Setting Alarms
The clock features two independent alarms (Alarm 1 and Alarm 2).
- Press the MODE button repeatedly until 'AL1' or 'AL2' appears on the display.
- Press and hold the SET button (or a dedicated ALARM SET button) to enter alarm setting mode. The alarm hour will flash.
- Use the UP/+ or DOWN/- buttons to adjust the alarm hour.
- Press SET to confirm and move to the alarm minute. Adjust with UP/+ or DOWN/-.
- Press SET again to confirm and exit alarm setting.
- To activate or deactivate an alarm, press the UP/+ or DOWN/- button while 'AL1' or 'AL2' is displayed. An alarm icon will appear when activated.
- When an alarm sounds, press any button to snooze or silence it. If no button is pressed, the alarm will sound for a set duration and then automatically turn off.
5. Mounting Options
5.1 Wall Mounting
The Technoline WS 8016 can be easily mounted on a wall.
- Locate the hanging hole on the back of the clock.
- Insert a screw or nail into your desired wall location, ensuring it is securely fastened and protrudes sufficiently to hold the clock.
- Carefully hang the clock onto the screw/nail.
5.2 Tabletop Placement
For tabletop use, the clock features an integrated stand.
- Extend the stand located on the back of the clock.
- Place the clock on a flat, stable surface.
6. Maintenance
6.1 Cleaning
To clean the clock, use a soft, dry cloth. Do not use abrasive cleaners or solvents, as these may damage the display or casing.
6.2 Battery Replacement
When the display becomes dim or the clock functions erratically, it is time to replace the batteries. Follow the battery installation steps in Section 3.1. Always replace both batteries at the same time with new ones of the same type.
7. Troubleshooting
- No Display or Dim Display:
Check if the batteries are inserted correctly and are not depleted. Replace batteries if necessary. - Clock Not Receiving Radio Signal:
Ensure the clock is placed in an optimal location, away from electronic interference and near a window. Allow sufficient time (up to 24 hours) for initial synchronization. If the signal is consistently weak, consider setting the time manually. - Incorrect Time/Date:
Verify that the time zone setting is correct. If the radio signal is not received, manually adjust the time and date as described in Section 4.1. - Temperature/Humidity Readings Seem Inaccurate:
Ensure the clock is not exposed to direct sunlight, heat sources, or drafts, which can affect sensor readings. Allow the clock to stabilize in its environment for accurate readings.
8. Specifications
| Model | Technoline WS 8016 |
| Dimensions (W x H x D) | 225 x 143 x 24 mm (approx. 8.86 x 5.63 x 0.94 inches) |
| Weight | 480 g (approx. 1.06 lbs) |
| Power Supply | 2 x AA Mignon LR06 Batteries |
| Time Control | DCF-77 Radio Controlled |
| Temperature Range | Indoor (specific range not provided, typical room temperature) |
| Humidity Range | Indoor (specific range not provided, typical room humidity) |
| Material | Silver |
9. Warranty and Support
This product is covered by a standard manufacturer's warranty. Please refer to the warranty card included with your purchase or contact your retailer for specific warranty terms and conditions.
For technical support or further assistance, please contact the retailer where you purchased the Technoline WS 8016 or visit the official Technoline website for contact information.