1. Introduction
Welcome to the Vocal-Star VS-800 Bluetooth CDG Karaoke Machine user manual. This guide provides detailed instructions for setting up, operating, and maintaining your karaoke system. Please read this manual thoroughly before use to ensure proper functionality and to maximize your enjoyment of the VS-800.
Important Safety Information
- Do not expose the unit to rain or moisture.
- Do not block ventilation openings.
- Use only attachments/accessories specified by the manufacturer.
- Unplug the unit during lightning storms or when unused for long periods.
- Refer all servicing to qualified service personnel.
2. Package Contents
Please check that all the following items are included in your package:
- Vocal-Star VS-800 Karaoke Machine
- Remote Control
- RCA Cable
- 2 x Wired Microphones
- Party Songs Disc (if included with your specific package)
- Power Cable
3. Product Overview
The Vocal-Star VS-800 is a versatile multi-format karaoke recording player designed for home entertainment. It features a wide range of connectivity options and playback capabilities.

Figure 3.1: Vocal-Star VS-800 Karaoke Machine, showing the main unit, packaging, tablet, microphones, and remote control.
Key Features
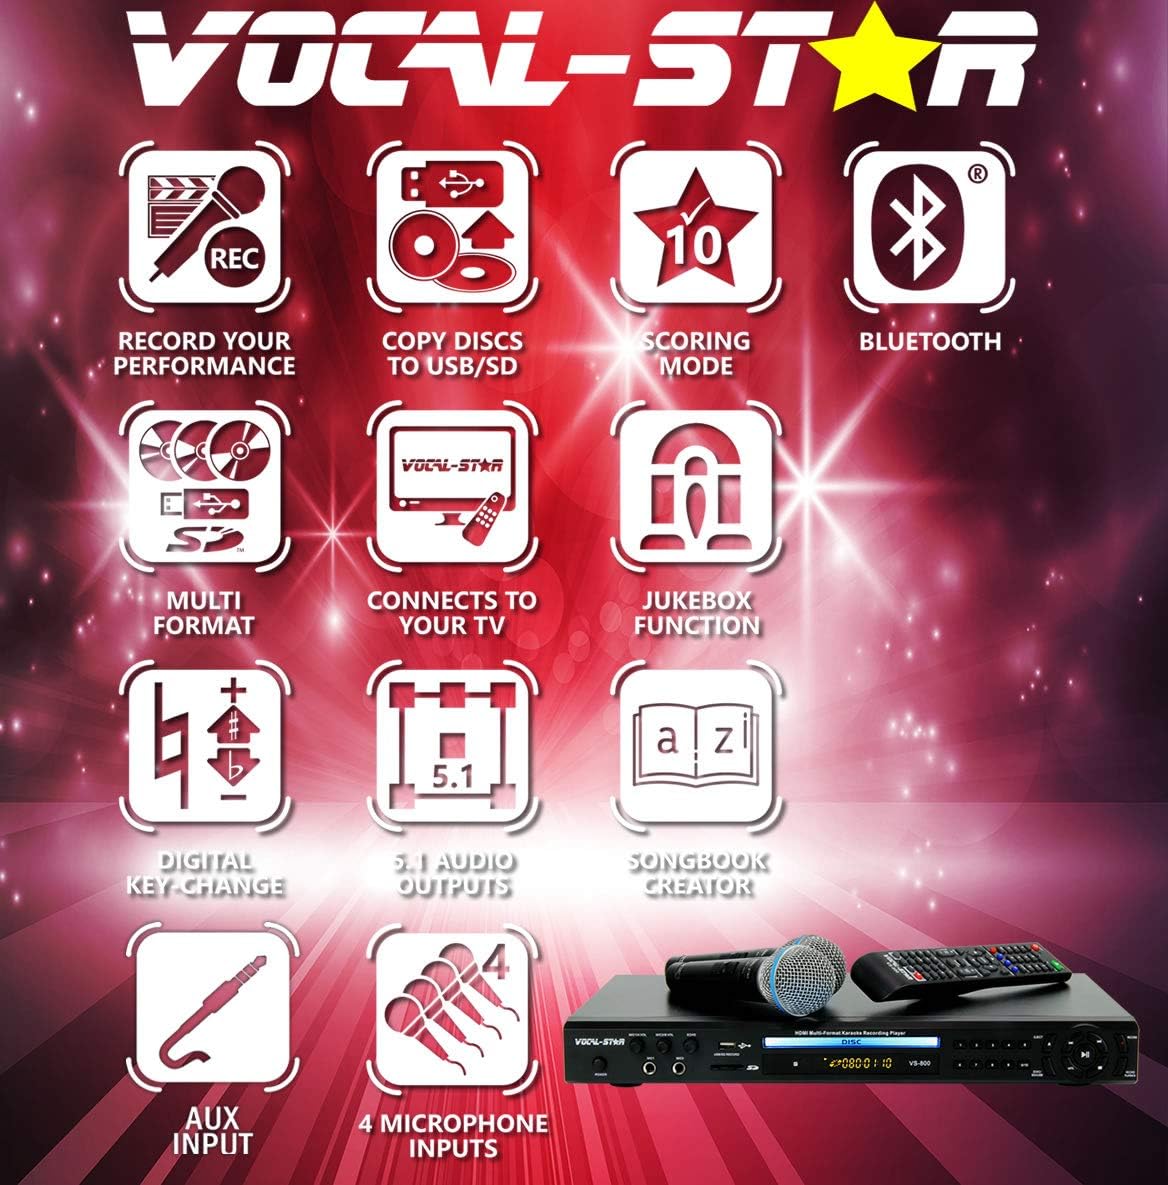
Figure 3.2: Visual representation of the VS-800's key features, including recording performance, copying discs to USB/SD, scoring mode, Bluetooth connectivity, multi-format support, TV connection, Jukebox function, digital key-change, 5.1 audio outputs, songbook creator, AUX input, and 4 microphone inputs.
- Multi-Format Playback: Supports CDG, MP3G, and other digital audio/video formats.
- Bluetooth Connectivity: Stream music wirelessly from your smartphone, tablet, or laptop.
- 4 Microphone Inputs: Connect up to four microphones for group performances.
- Recording Function: Record your singing performances to USB or SD card.
- Scoring Mode: Get a score for your singing performance.
- Jukebox Feature: Organize and play your digital music library.
- Songbook Creator: Generate a text file song list for easy reference.
- Digital Key Change: Adjust the song's key to match your vocal range.
- Various Outputs: HDMI, RCA, S-Video, Coaxial, Optical, 5.1 Channel Audio, VGA.
Microphones Included

Figure 3.3: Two wired Vocal-Star MP-508 dynamic vocal microphones, designed for quality sound in lead and backup vocal applications.
4. Setup Instructions
Follow these steps for the initial setup of your Vocal-Star VS-800 system.
4.1 Connecting to a Display (TV/Monitor)
The VS-800 offers multiple video output options:
- HDMI Output: For the best video and audio quality, connect an HDMI cable from the VS-800's "HD OUT" port to your TV's HDMI input.
- RCA (Composite Video) Output: Connect the yellow RCA cable from the VS-800's "CVBS" port to your TV's yellow video input.
- S-Video Output: Connect an S-Video cable from the VS-800's "S-VIDEO" port to your TV's S-Video input.
- VGA Output: Connect a VGA cable from the VS-800's "VGA OUTPUT" port to a compatible monitor or projector.

Figure 4.1: Rear panel connections of the VS-800, highlighting HDMI, RCA, S-Video, Coaxial, Optical, 5.1 Channel Audio, and VGA outputs.
4.2 Connecting Audio (Optional)
If you are not using HDMI, or wish to connect to an external audio system:
- RCA (Stereo Audio) Output: Connect red and white RCA cables from the VS-800's "ML AUDIO OUTPUT" (or "MR") ports to your amplifier's or TV's audio inputs.
- 5.1 Channel Output: For surround sound, connect the appropriate RCA cables from the "5.1CH OUTPUT" ports to a compatible 5.1 channel amplifier.
- Digital Audio Output: Use the "COAXIAL DIGITAL" or "OPTICAL DIGITAL" ports for digital audio connection to a compatible receiver.
4.3 Connecting Microphones
The VS-800 features four microphone inputs:
- Insert the microphone cables into the "MIC1", "MIC2", "MIC A", or "MIC B" inputs on the front or rear panel of the unit.
- Adjust microphone volume using the "MIC1/A VOL" and "MIC2/B VOL" knobs on the front panel.
- Adjust the echo effect using the "ECHO" knob.

Figure 4.2: Front and rear views of the VS-800 highlighting the four microphone input jacks and associated volume/echo controls.
4.4 Powering On
- Connect the power cable to the VS-800 and then to a power outlet.
- Press the "POWER" button on the front panel or the remote control to turn on the unit.
5. Operating Instructions
5.1 Disc Playback (CDG/DVD/CD)
- Open the disc tray by pressing the "OPEN/CLOSE" button on the front panel or remote.
- Place a CDG, DVD, or CD disc gently into the tray with the label side facing up.
- Press "OPEN/CLOSE" again to close the tray. The unit will automatically begin reading the disc.
- Use the remote control for playback functions (Play, Pause, Stop, Skip, etc.).
5.2 Bluetooth Connectivity
Stream audio wirelessly from your Bluetooth-enabled devices.
- Ensure the VS-800 is powered on.
- Press the "MODE" button on the remote or front panel until "Bluetooth" mode is selected. The Bluetooth indicator light will flash.
- On your smartphone, tablet, or laptop, go to Bluetooth settings and search for available devices.
- Select "VS-800" from the list to pair. Once paired, the Bluetooth indicator light will become solid.
- You can now play audio from your device through the VS-800.

Figure 5.1: A smartphone screen showing the Bluetooth settings, with "VS-800" listed as a discoverable device, demonstrating the Bluetooth pairing process.
5.3 USB/SD Playback and Jukebox Feature
Play digital media files from a USB drive or SD card.
- Insert a USB drive into the "USB" port or an SD card into the "SD" slot on the front panel.
- The unit will automatically switch to USB/SD mode or you may need to select it using the "MODE" button.
- Navigate through your files and folders using the remote control's arrow keys and "OK" button.
- The Jukebox feature allows you to browse and select songs from your digital library displayed on the screen.

Figure 5.2: A television screen connected to the VS-800, showing a list of MP3+G songs, illustrating the Jukebox feature for selecting and playing digital tracks.
5.4 Recording Your Performance
- Ensure a USB drive or SD card is inserted.
- During playback, press the "RECORD" button on the remote control. The unit will begin recording your microphone input along with the music.
- Press "RECORD" again to stop recording. Your recorded performance will be saved as an audio file on the USB/SD device.
5.5 Scoring Mode
- Activate the scoring mode via the remote control (refer to remote layout for specific button, often labeled "SCORE").
- Sing along to a track, and the system will provide a score based on your pitch accuracy.
5.6 Creating a Songbook
Generate a text file list of songs on your USB/SD device.
- With a USB drive or SD card inserted, navigate to the file browser.
- Look for an option to "Create Songlist" or "Songbook Creator" in the menu.
- Confirm the action, and a "SONGLIST.TXT" file will be created on your device, which you can view and edit on a PC.
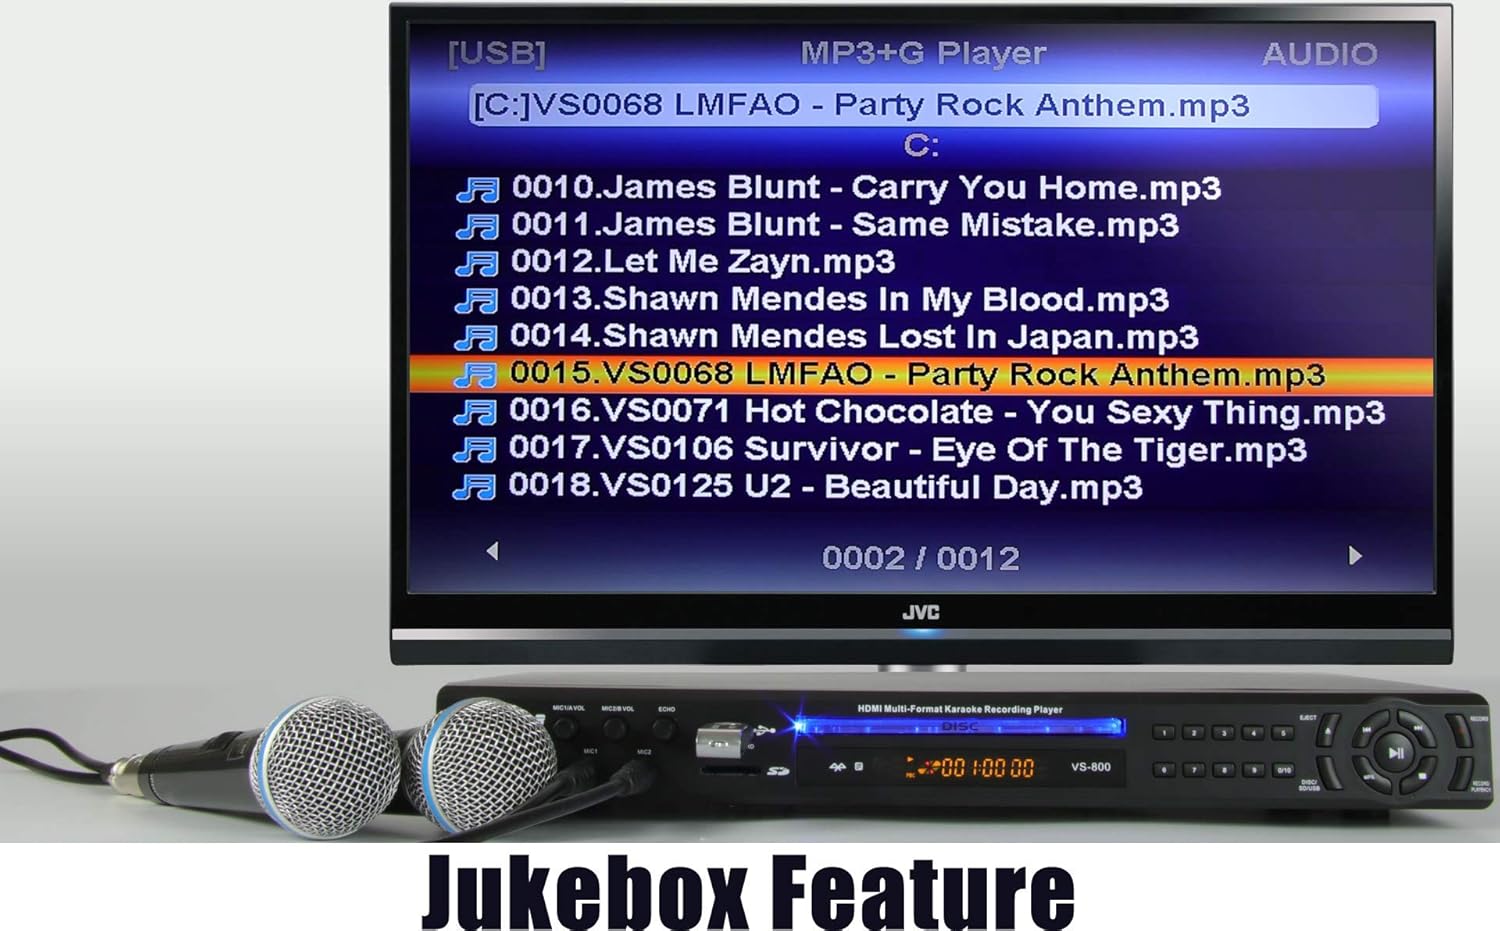
Figure 5.3: A television screen displaying a confirmation message that a "SONGLIST.TXT" file has been created on the memory device, indicating the successful use of the Songbook Creator feature.
5.7 Digital Key Change
- During song playback, use the "KEY+" and "KEY-" buttons on the remote control to adjust the musical key of the track.
- This allows you to raise or lower the pitch of the song to better suit your vocal range.
6. Maintenance
Proper care and maintenance will ensure the longevity of your VS-800 Karaoke Machine.
- Cleaning: Use a soft, dry cloth to clean the exterior of the unit. Do not use liquid cleaners or aerosol sprays.
- Disc Tray: Keep the disc tray free of dust and debris. Avoid touching the lens inside the disc tray.
- Ventilation: Ensure the ventilation openings are not blocked to prevent overheating.
- Storage: When not in use for extended periods, store the unit in a cool, dry place away from direct sunlight.
7. Troubleshooting
If you encounter any issues with your VS-800, please refer to the following common problems and solutions before contacting support.
| Problem | Possible Cause / Solution |
|---|---|
| No power | Ensure the power cable is securely connected to the unit and the power outlet. Check if the power outlet is working. |
| No sound from speakers | Check audio cable connections (RCA, HDMI). Ensure TV/amplifier volume is up and not muted. Select the correct input source on your TV/amplifier. |
| No sound from microphones | Ensure microphones are securely plugged in. Increase "MIC VOL" knobs on the unit. Check if microphones have an on/off switch and are turned on. |
| No video output | Check video cable connections (HDMI, RCA, S-Video, VGA). Ensure TV is set to the correct input source. |
| Bluetooth pairing issues | Ensure the VS-800 is in Bluetooth mode and discoverable. Turn off and on Bluetooth on your device. Move your device closer to the VS-800. |
| Remote control unresponsive or laggy | Replace batteries in the remote control. Ensure there are no obstructions between the remote and the unit's IR sensor. Point the remote directly at the unit. |
| Audio delay with microphones (echo cannot be fully removed) | This can sometimes occur with certain TV/audio setups. Try connecting the VS-800's audio output directly to an external amplifier or sound system instead of through the TV. Adjust the "ECHO" knob to its minimum setting. |
8. Specifications
| Feature | Detail |
|---|---|
| Brand | Vocal-Star |
| Model Number | VS-800 |
| Color | Black |
| Connectivity Technology | Bluetooth, HDMI |
| Special Features | Bluetooth, Echo Effect |
| Compatible Devices | Phone, Tablet, Laptop |
| Recommended Uses | Home |
| Power Source | Corded Electric |
| Voltage | 120 Volts |
| Included Components | 1 (Main Unit) |
9. Warranty and Support
Vocal-Star products are designed for reliability and performance. For specific warranty details and support, please refer to the warranty card included with your product or visit the official Vocal-Star website.
Some purchases may qualify for an extended warranty. For example, a 2-year warranty may be available upon product registration or review submission, as noted by some users.
For technical assistance or service inquiries, please contact Vocal-Star customer support through their official channels.


