
1. Introduction
This manual provides essential instructions for the assembly, operation, and maintenance of your vidaXL Greenhouse Tent Plant Shelter, model VDXL_48836. This spacious greenhouse is designed to protect a variety of plants from cold weather, offering a controlled environment for growth. It features a robust aluminum frame and UV-resistant, thermally insulated polycarbonate panels.
Please read this manual thoroughly before assembly and use to ensure safe and correct operation and to maximize the lifespan of your greenhouse.
2. Safety Information
- Caution: Handle all components with care due to potential weight and sharp edges.
- Always wear protective gloves and safety glasses during assembly and use to prevent injury.
- Securely fix the greenhouse to a stable surface to prevent it from bending or being damaged by wind. Proper anchoring is crucial.
- Avoid prolonged exposure to direct UV rays during assembly, as some components may be sensitive before full installation.
- Ensure the assembly area is clear of obstructions and children.
- Do not climb on the greenhouse structure.
- In case of strong winds or heavy snow, take appropriate measures to secure or reinforce the greenhouse.
3. Package Contents
Before beginning assembly, please verify that all parts listed in your product's packing list are present and undamaged. If any parts are missing or damaged, contact vidaXL customer support immediately.
Typical components include:
- Aluminum frame profiles
- Polycarbonate panels
- Fasteners (screws, nuts, bolts)
- Door assembly components
- Connectors and seals
- Instruction manual (this document)
4. Assembly Instructions
Assembly requires at least two people. Ensure you have adequate space and the necessary tools (e.g., screwdriver, wrench, rubber mallet, safety glasses, gloves).
4.1 Prepare the Foundation
Choose a level, stable site for your greenhouse. A solid foundation (e.g., concrete slab, treated timber base) is recommended for long-term stability and anchoring.
4.2 Assemble the Base Frame
Connect the base frame profiles according to the diagrams in your specific assembly guide. Ensure all corners are square and securely fastened.

Figure 4.2.1: Detail of a base corner joint, illustrating the connection of aluminum profiles.
4.3 Erect the Wall Frames
Attach the vertical and horizontal wall frame profiles to the base frame. Gradually build up the structure, ensuring each section is stable before proceeding.

Figure 4.3.1: Example of an upper frame corner joint during assembly.
4.4 Install Polycarbonate Panels
Carefully slide the polycarbonate panels into the designated channels of the aluminum frame. Ensure the UV-protected side of the panels faces outwards (refer to panel markings). Remove any protective films from the panels.
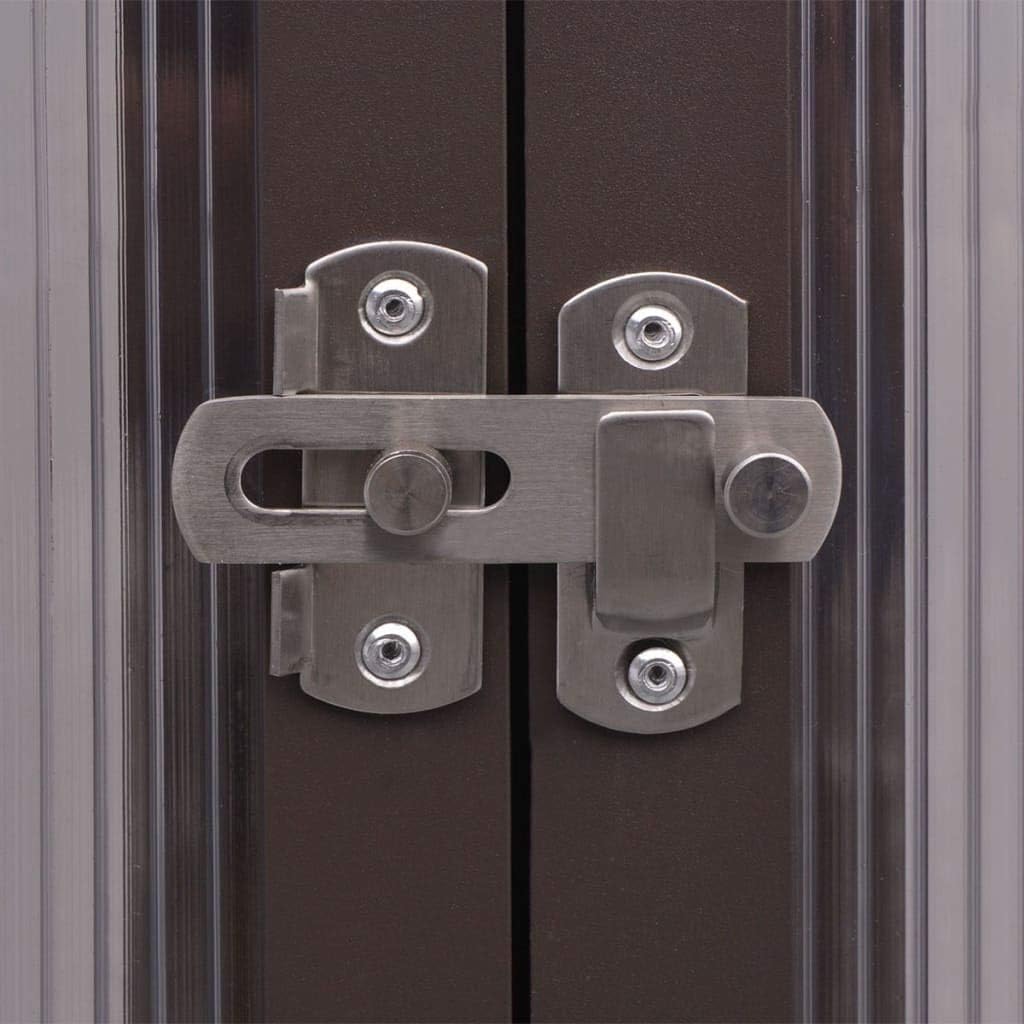
Figure 4.4.1: Partially assembled greenhouse showing panel installation.
4.5 Assemble the Roof Structure
Assemble the roof frame sections on the ground if possible, then carefully lift and secure them to the wall frames. Install the roof polycarbonate panels.

Figure 4.5.1: Interior view of the completed roof structure.

Figure 4.5.2: Detail of the door latch mechanism.
4.6 Install Door and Finalize
Install the door assembly, ensuring it opens and closes smoothly. Attach any remaining seals or caps. Double-check all fasteners for tightness.

Figure 4.6.1: Fully assembled vidaXL Greenhouse Tent Plant Shelter.
5. Operating Instructions
5.1 Ventilation
To regulate temperature and humidity, open the door or any available vents (if applicable) during warm periods. Proper ventilation prevents overheating and fungal diseases.
5.2 Temperature Control
The polycarbonate panels provide thermal insulation, helping to maintain stable internal temperatures. Monitor internal temperatures, especially during extreme weather, and adjust ventilation or add supplemental heating/cooling as needed for your plants.
5.3 Plant Placement
Arrange plants inside the greenhouse to optimize light exposure and air circulation. Consider the specific light and temperature requirements of each plant species.
6. Maintenance
- Cleaning: Clean the polycarbonate panels regularly with mild soap and water to ensure maximum light transmission. Avoid abrasive cleaners or tools that could scratch the panels.
- Frame Inspection: Periodically inspect the aluminum frame for any signs of corrosion, loose fasteners, or damage. Tighten any loose bolts and replace damaged parts promptly.
- Panel Inspection: Check polycarbonate panels for cracks or damage. Replace damaged panels to maintain insulation and structural integrity.
- Anchoring: Regularly verify that the greenhouse remains securely anchored to its foundation, especially after strong winds.
- Winter Care: In areas with heavy snowfall, gently remove accumulated snow from the roof to prevent structural stress.
7. Troubleshooting
| Problem | Possible Cause | Solution |
|---|---|---|
| Greenhouse feels unstable or wobbly. | Loose fasteners; inadequate anchoring; uneven foundation. | Tighten all bolts and screws. Ensure proper anchoring to a stable, level foundation. Reinforce if necessary. |
| Water leakage inside. | Improperly seated panels; damaged seals; gaps in frame. | Check all panel installations and ensure they are fully seated in their channels. Inspect and replace any damaged seals. Apply silicone sealant to persistent gaps. |
| Excessive heat buildup. | Insufficient ventilation. | Open doors and vents (if present) to increase airflow. Consider adding automatic vent openers or shade cloth during peak sun hours. |
| Difficulty opening/closing door. | Misalignment; debris in tracks; damaged hinges/latch. | Check door alignment and adjust if needed. Clean tracks of any debris. Lubricate hinges. Inspect latch for damage. |
8. Specifications
| Model Number: | VDXL_48836 |
| Brand: | vidaXL |
| Overall Dimensions (L x W x H): | 240 x 211 x 232 cm (approximately 2.4L x 2.11W x 2.32H meters) |
| Material (Frame): | Aluminum |
| Material (Panels): | Polycarbonate (PC) |
| Panel Thickness: | 3.8 mm |
| UV Resistance: | Yes |
| Thermal Insulation: | Yes |
| Temperature Range: | -20 °C to 70 °C |
| Number of Doors: | 1 |
| Item Weight: | 31.67 kg |
9. Warranty and Support
For warranty information, please refer to the warranty card included with your purchase or visit the official vidaXL website. Keep your proof of purchase for any warranty claims.
If you encounter any issues not covered in the troubleshooting section or require further assistance, please contact vidaXL customer support. Contact details can typically be found on the vidaXL website or your purchase documentation.