1. Introduction
This manual provides detailed instructions for the installation, operation, and maintenance of your FREELICHT 6-Pack Red LED Exit Signs with Emergency Lights. Please read this manual thoroughly before installation and retain it for future reference. These exit signs are designed to provide clear emergency egress path illumination in commercial and public buildings.

Image: FREELICHT Exit Sign with Emergency Lights in a commercial hallway, demonstrating typical usage scenarios.
2. Safety Information
- Electrical Safety: Installation should be performed by a qualified electrician in accordance with national and local electrical codes. Ensure power is disconnected at the circuit breaker before installation or servicing.
- UL 924 Compliance: This product complies with UL 924 Emergency Lighting and Exit Sign Regulations, ensuring safety and performance standards.
- Durable Construction: The injection-molded thermoplastic housing is 5VA flame retardant and impact resistant, designed to operate in adverse conditions such as fire or earthquake.
- Battery Safety: The unit contains a NiCd battery. Do not dispose of batteries in fire. Follow local regulations for battery disposal.

Image: The exit sign is designed for reliability in emergencies, including fire, earthquake, and severe weather conditions.
3. Package Contents
Verify that all components are present and undamaged upon opening the package:
- 6 x FREELICHT Red LED Exit Signs with Emergency Lights
- Mounting hardware (screws, wall anchors, mounting plate)
- NiCd Battery (pre-installed or included separately)
- Removable directional arrows
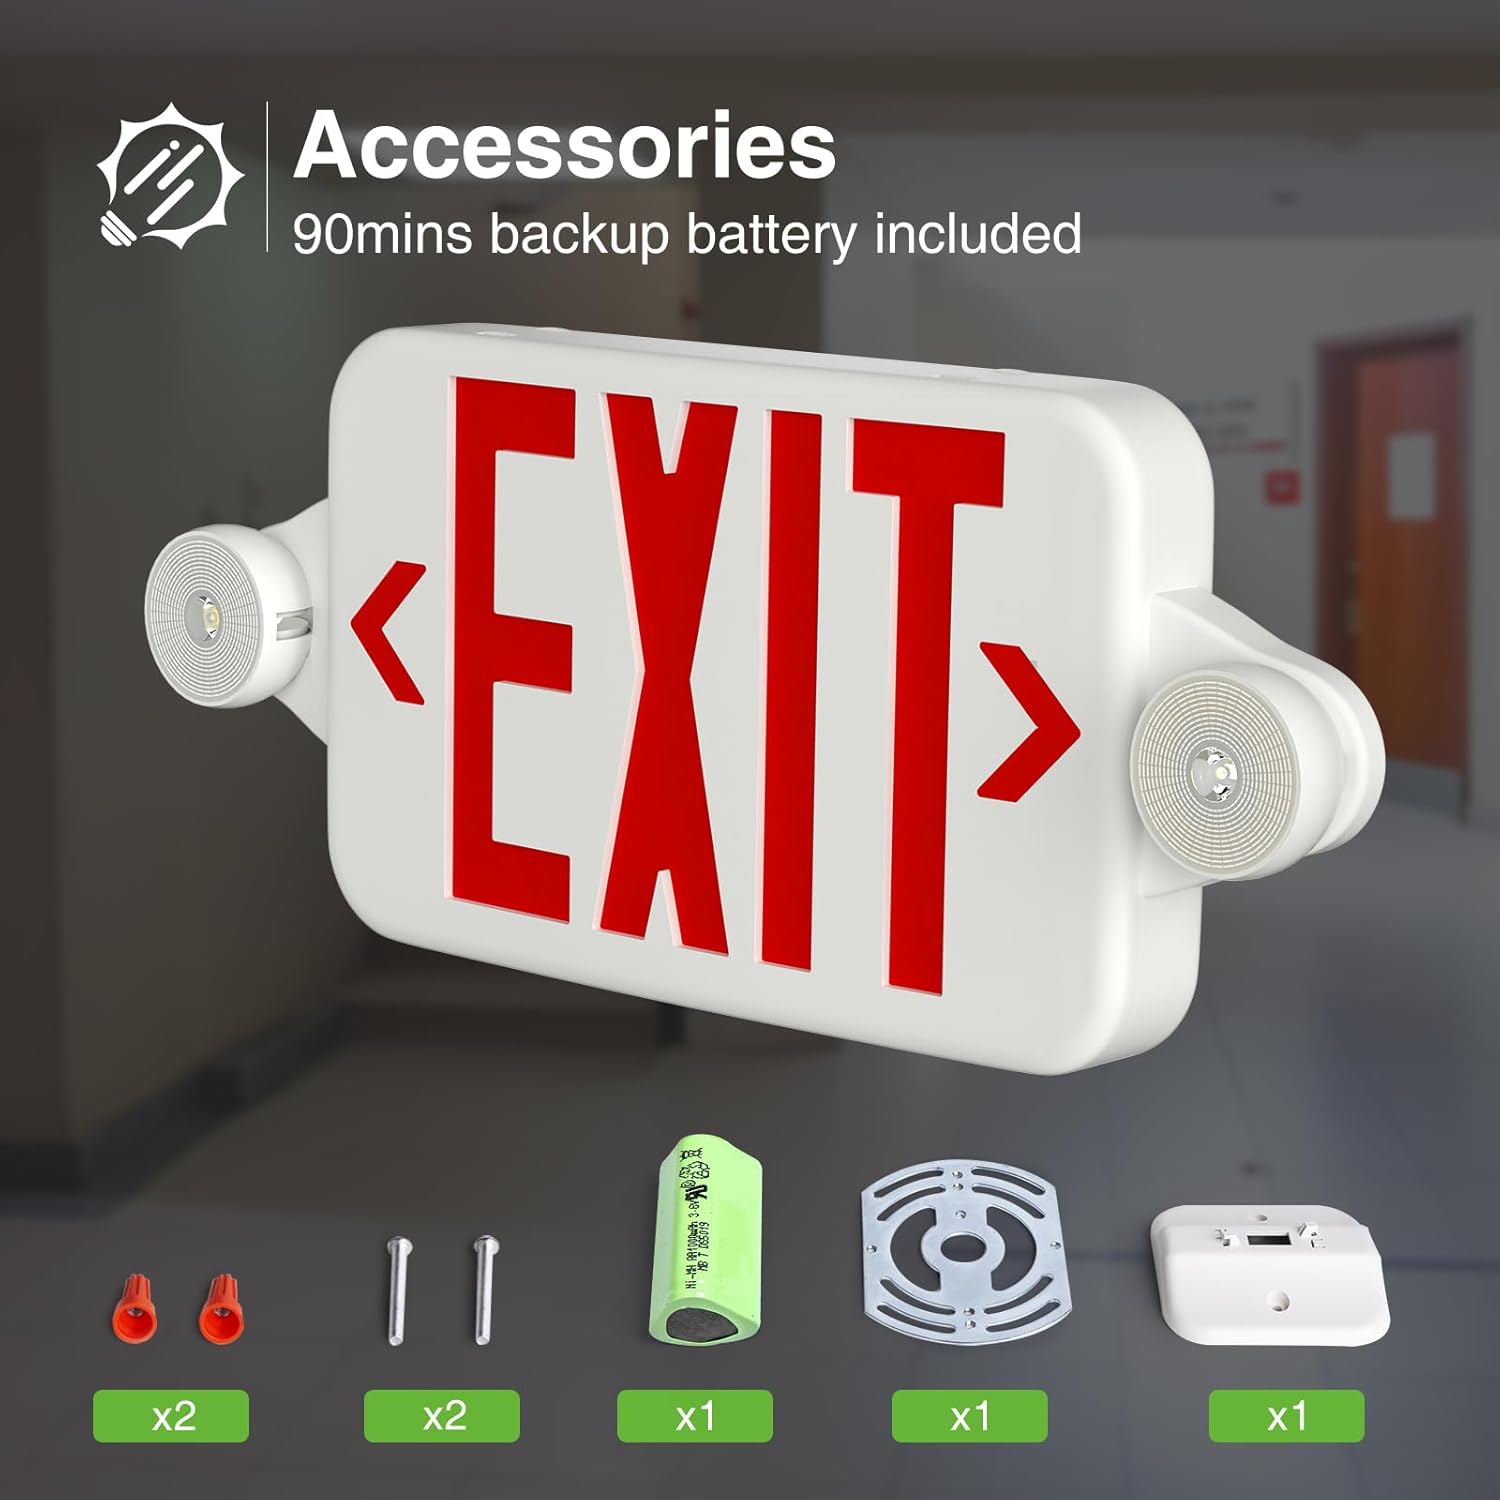
Image: Contents of the FREELICHT Exit Sign package, showing the main unit and all included accessories for installation.
4. Features
- High-Quality Housing: Constructed from injection-molded thermoplastic, featuring 5VA flame retardant and high-impact resistance for durability.
- 90-Minute Battery Backup: Equipped with a high-density NiCd battery, providing a minimum of 90 minutes of emergency operation for the LED lights during power outages.
- Adjustable LED Heads: Two adjustable LED emergency light heads can rotate 360 degrees horizontally and 90 degrees vertically to direct light where needed.
- Universal Voltage: Operates on a universal AC voltage of 120V-277V, suitable for various commercial applications.
- Removable Directional Arrows: Includes removable arrows on each side of the 'EXIT' text, allowing customization to indicate the correct egress direction.
- Test Button & Charge Indicator: Features a test button to verify emergency lighting functionality and an indicator light to confirm power connection and charging status.

Image: The rotatable LED light heads offer flexible illumination, with 180-degree horizontal and 90-degree vertical adjustment.

Image: Removable arrows allow for clear indication of the exit direction, easily adjusted by the user.
5. Setup and Installation
Follow these steps for proper installation. Ensure power is off before beginning.
5.1 Pre-Installation Test
Before mounting, it is recommended to test the unit's functionality.
- Open the cover of the exit sign.
- Connect the battery plug to the circuit board.
- Connect the unit to a power source (120V or 277V AC). The red indicator light should illuminate.
- Press the 'TEST' button. The emergency lights should turn on.
- Disconnect the power. The emergency lights should remain on for at least 90 minutes, indicating battery backup functionality.
Video: FREELICHT Exit Sign with Emergency Lights - This video demonstrates the features and basic testing of the exit sign, including the emergency light function.
5.2 Opening the Unit and Wiring
- Using a screwdriver, carefully open the cover of the exit sign and remove any packaging materials or accessories.
- Connect the red and black wires from the unit to the battery.
- Connect the appropriate wires (black for 120V, red for 277V, white for common) to your building's AC power source. Ensure connections are secure.

Image: Visual guide illustrating the four main steps of installation: opening the cover, connecting the battery, connecting to power, and completing the mount.
Video: Installation Guide for FREELICHT Exit Sign with Emergency Lights - This video provides a detailed walkthrough of the installation process, including wiring and mounting.
5.3 Mounting Options
The unit supports both wall and ceiling mount installations.
- Wall Mount: Secure the mounting plate to the wall using the provided screws and anchors. Route the wiring through the appropriate opening. Attach the exit sign housing to the mounting plate.
- Ceiling Mount: Secure the mounting plate to the ceiling using the provided screws and anchors. Route the wiring through the appropriate opening. Attach the exit sign housing to the mounting plate.

Image: Illustration of the two primary installation methods: wall mounting and ceiling mounting, demonstrating flexibility for different environments.
5.4 Directional Arrows
Insert or remove the plastic directional arrows as needed to indicate the exit path. The arrows are designed to be easily popped in or out of the 'EXIT' panel.
6. Operating Instructions
- Normal Operation: When connected to AC power, the 'EXIT' sign will illuminate continuously, and the battery will charge. The red indicator light on the unit will confirm power connection.
- Emergency Operation: In the event of a power failure, the unit will automatically switch to battery backup mode, illuminating the 'EXIT' sign and activating the emergency lights for a minimum of 90 minutes.
- Test Function: Press the 'TEST' button on the unit to simulate a power outage. The emergency lights should turn on, and the 'EXIT' sign should remain illuminated. Release the button to return to normal operation. This test verifies the battery and lamp functionality.

Image: The test button and indicator light on the exit sign, used for verifying emergency functionality and power status.
7. Maintenance
- Battery Care: The NiCd battery is designed for long life. Regular testing (monthly) is recommended to ensure proper function. If the battery fails to hold a charge or provide adequate backup time, it may need replacement.
- Cleaning: Clean the exterior of the exit sign with a soft, dry, or slightly damp cloth. Do not use abrasive cleaners or solvents.
- Periodic Inspection: Periodically inspect the unit for any physical damage, loose connections, or signs of wear. Address any issues promptly.
8. Troubleshooting
- Sign Not Illuminating:
- Check the AC power supply to the unit.
- Ensure the battery is properly connected.
- Verify the circuit breaker is on.
- Emergency Lights Not Working During Power Outage:
- Press the 'TEST' button to confirm battery functionality.
- Ensure the battery has been charged for at least 24 hours after initial installation or a prolonged power outage.
- If the issue persists, the battery may need replacement.
- Flickering Lights:
- Check all electrical connections for looseness.
- Ensure stable AC power supply.
9. Specifications
| Attribute | Specification |
|---|---|
| Brand | FREELICHT |
| Model Number | Exit Sign |
| Item Weight | 10.4 pounds (for 6-pack) |
| Product Dimensions | 16.93 x 7.09 x 0.39 inches (unit) / (16.6 x 7) inch (sign face) |
| Color | Red |
| Material Type | Plastic |
| Light Type | LED |
| Voltage | AC 120/277V |
| Battery Backup | 90 minutes (NiCd battery) |
| Certifications | UL Listed, 5VA Flame Retardant |

Image: Detailed dimensions of the exit sign, including overall length, height, and thickness.
10. Warranty and Support
- Warranty: FREELICHT offers a 5-year limited manufacturer's support for this product.
- Customer Support: For any questions, concerns, or technical assistance, please contact FREELICHT customer support. Our team aims to provide a professional response within 24 hours.
- Contact Information: Refer to the product packaging or the official FREELICHT website for the most current contact details.