
Introduction
This manual provides essential instructions for the installation, operation, and maintenance of your PHO ET-LAEF100 replacement projection lamp. This lamp is designed for use with various Panasonic projector models, including PT-EW550, EW650, EX520, EX620, EZ590, FW530, FX500, FZ570, PT-SLX64C, PT-EW650L, PT-EX620T, and PT-SLX64CLB. Please read these instructions carefully before proceeding to ensure proper and safe usage.
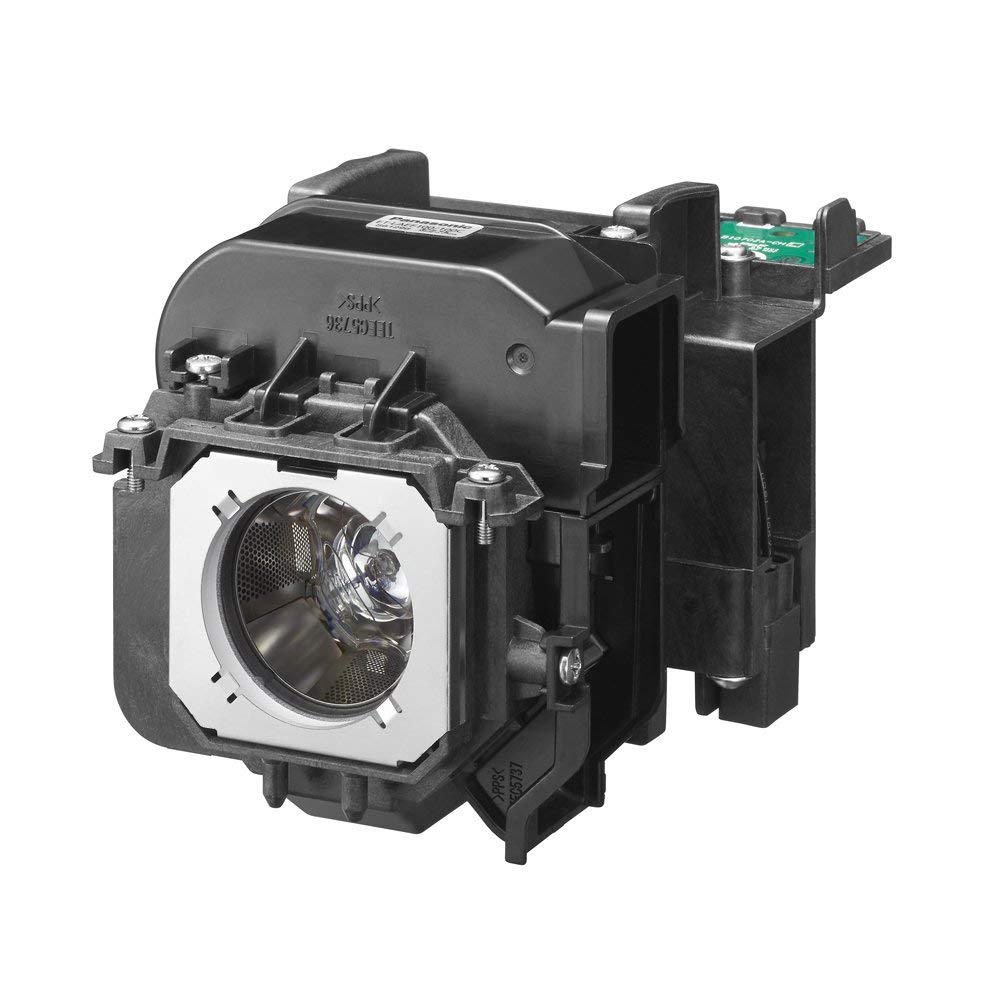
Image: PHO ET-LAEF100 Replacement Projection Lamp with Housing. This image shows the complete lamp assembly, including the bulb and its protective housing, ready for installation.
Installation: Lamp Replacement Procedure
Follow these steps to safely replace the projection lamp in your Panasonic projector or TV. Always ensure the device is powered off and cooled down before beginning.
Step No.1: Prepare Tools
Gather the necessary tools. You will typically need a manual screwdriver to remove the panel. It is also recommended to have a soft, non-abrasive cloth, such as a micro-fiber cleaning cloth, to avoid any contact with your fingers and the lamp assembly during handling.

Image: Illustration showing the initial steps of lamp replacement, including opening the projector panel with a screwdriver. This image depicts the first stage of accessing the lamp compartment.
Step No.2: Power Down and Disconnect
Turn off your TV or Projector. Allow the unit to cool down properly for at least 10 minutes. After cooling, remove the power cord from the outlet and completely disconnect the unit from any power source.
Step No.3: Remove Lamp Compartment Door
Locate and remove the lamp compartment door. On most projectors, the lamp compartment is usually found underneath the unit. For Rear Projection TVs, it is typically located in the rear towards the bottom left or right side. Remove any screws holding the compartment door in place and then remove the door.
Step No.4: Remove Lamp Assembly
Carefully pull out the old lamp assembly. Disconnect any power cords that may still be connected to the lamp assembly. Set the old lamp aside, ensuring it is not confused with the new lamp.

Image: Illustration demonstrating the removal of the old lamp assembly from its compartment. This image shows the process of carefully extracting the used lamp.
Step No.5: Clean Lamp Compartment
While the projector is open, use a soft cloth or micro-fiber cleaning cloth to gently remove any loose dust from the lamp compartment. Dust accumulation can affect performance and lifespan.
Step No.6: Insert New Lamp Assembly
Carefully reconnect any power cables to the new lamp if present. Slide the new lamp into the compartment, ensuring it is in the same orientation as the original lamp was removed.
Step No.7: Replace Lamp Compartment Door
Set the lamp compartment door back into place. Securely screw it in without overtightening the screws.

Image: Illustration depicting the reinstallation of the lamp compartment door after inserting the new lamp. This image shows the final steps of securing the lamp compartment.
Step No.8: Reset Lamp Timer
After replacing the lamp, it is crucial to reset the lamp timer in your projector's menu. Refer to your projector's specific instruction manual for details on how to perform this reset.
Step No.9: Completion
You have successfully replaced the lamp. Enjoy your projector or TV again. It is advisable to keep a backup lamp handy for unexpected situations.
Operation and Important Warnings
WARNING: Adhering to these guidelines will help ensure the longevity and safe operation of your projector lamp.
- Do not allow the TV or projector to overheat. Excessive temperature stress is a primary cause of lamp failure.
- Allow the projector lamp to cool for at least 10 minutes after powering down. Never move the TV or projector during this cooling period or while the lamp is on. The lamp is highly susceptible to damage when hot.
- Operate your TV or projector in a clean, relatively dust-free environment to prevent clogging of fans and air filters.
- Ensure plenty of space around the projector's fan or exhaust to allow excess heat to disperse properly.
- Utilize the "economy / standard mode" if it is available with your TV or projector model and is appropriate for your situation. This mode typically decreases projector brightness but significantly extends the lamp's lifespan.
- Never leave a TV or projector in very hot or very cold environments, such as inside a car on a summer or winter day.

Image: A graph illustrating the average light output (brightness) during the lifespan of an "Economy Lamp" compared to a "PHO Lamp". The PHO lamp shows a more gradual and sustained brightness over its operational life.
Maintenance
Regular maintenance helps extend the life of your projector and lamp:
- Cleaning the Lamp Compartment: As mentioned in the installation steps, periodically clean the lamp compartment with a soft, dry, non-abrasive cloth to remove dust.
- Air Filter Maintenance: Regularly clean or replace the projector's air filters according to your projector's manual. Clogged filters restrict airflow, leading to overheating and reduced lamp life.
- Environmental Control: Ensure the projector operates in a well-ventilated, dust-free environment with stable temperatures. Avoid extreme heat or cold.
Troubleshooting Tips
If you encounter issues with your projector lamp, consider the following:
- Lamp Not Lighting Up:
- Ensure the lamp is correctly seated and all connections are secure.
- Verify the lamp compartment door is fully closed and secured.
- Check if the lamp timer has been reset. Some projectors prevent lamp ignition if the timer is not reset after replacement.
- Confirm the projector is receiving power.
- Overheating Warnings:
- Check for proper ventilation around the projector.
- Clean air filters and ensure no obstructions are blocking air intake or exhaust vents.
- Ensure the projector is not operating in an excessively hot environment.
- Dim Image or Poor Color:
- Confirm the projector is not in an "economy" or "low power" mode if full brightness is desired.
- Check projector settings for brightness and color calibration.
- Ensure the lamp is not nearing the end of its expected lifespan.
For persistent issues, consult your projector's specific user manual or contact PHO customer support.
Product Specifications
| Feature | Detail |
|---|---|
| Brand | PHO |
| Model Number | ET-LAEF100 |
| Wattage | 100 watts |
| Bulb Type | Original bulbs from OEM manufacturers (UHP, NSH, P-VIP, SHP, HS) |
| Housing Material | High temperature resistant raw materials |
| Special Feature | Long Lasting |
| Item Weight | 12.1 ounces |
| Package Dimensions | 5.39 x 5.2 x 5.16 inches |
| Compatible Projectors | Panasonic PT-EW550, EW650, EX520, EX620, EZ590, FW530, FX500, FZ570, PT-SLX64C, PT-EW650L, PT-EX620T, PT-SLX64CLB |
Warranty Information
PHO provides the following warranty for the ET-LAEF100 replacement projection lamp:
- Money Back Guarantee: 30 Days
- Product Warranty: 365 Days
Please retain your proof of purchase for warranty claims. For detailed terms and conditions, refer to the official PHO website or contact customer support.
Customer Support
For technical assistance, warranty claims, or any questions regarding your PHO ET-LAEF100 replacement lamp, please contact PHO customer support.
You can visit the official PHO store for more information: PHO Store on Amazon