1. Introduction
This manual provides comprehensive instructions for the safe and efficient operation of your OptiMate 6 Ampmatic 12V 5A battery charger and maintainer. This device is designed for automatic charging, testing, and maintenance of 12V STD, AGM, and GEL batteries ranging from 3 to 240Ah, making it suitable for motorcycles, cars, trucks, boats, and RVs. Please read this manual thoroughly before use to ensure proper functionality and safety.
2. Safety Information
Always prioritize safety when operating electrical equipment. Failure to follow these instructions may result in electric shock, fire, or serious injury.
- Read all instructions before using the charger.
- Use the charger in a well-ventilated area.
- Avoid sparks or flames near the battery, as batteries can produce explosive gases.
- Wear eye protection and protective clothing when working with batteries.
- Keep the charger out of reach of children.
- Do not charge frozen batteries. Allow them to thaw before charging.
- Disconnect the AC power from the charger before connecting or disconnecting the battery leads.
- Ensure correct polarity: connect the red (+) lead to the positive battery terminal and the black (-) lead to the negative battery terminal.
- Do not expose the charger to rain or excessive moisture. The unit has an IP54 rating, meaning it is protected from dust and splashing water, but it is not fully waterproof.
3. Package Contents
Your OptiMate 6 Ampmatic package includes the following items:
- OptiMate 6 Ampmatic Charger Unit
- Fused Battery Clamps (for temporary connection)
- Fused Eyelet Connectors (for permanent connection)

Image: Included battery clamps and fused eyelet connectors.
4. Product Overview
The OptiMate 6 Ampmatic is an advanced battery charger and maintainer designed to optimize battery performance and extend battery life. It features Ampmatic control, which automatically adjusts the charge current based on the battery's size and condition. The charger employs a 9-step charging program, including a unique pulse absorption mode and 24-7 intelligent maintenance.

Image: Front view of the OptiMate 6 Ampmatic charger.

Image: Packaging highlighting key features and charging process.
5. Setup and Connection
Follow these steps to safely connect your OptiMate 6 Ampmatic charger to a 12V battery:
- Ensure AC Power is Disconnected: Before making any connections to the battery, ensure the charger's AC power cord is unplugged from the wall outlet.
- Choose Connection Method: Select either the battery clamps for temporary connection or the fused eyelet connectors for a more permanent installation.
- Connect to Battery:
- Connect the RED (+) lead from the charger to the POSITIVE (+) terminal of the battery.
- Connect the BLACK (-) lead from the charger to the NEGATIVE (-) terminal of the battery.
- Connect to AC Power: Once the battery connections are secure, plug the charger's AC power cord into a suitable wall outlet (100-240V). The charger will automatically begin its program.
Image: Connection diagram for the OptiMate charger.
6. Operating Instructions
The OptiMate 6 Ampmatic operates fully automatically. Once connected to the battery and AC power, it will initiate its 9-step program to diagnose, recover, charge, and maintain the battery.
6.1. Ampmatic Control
The unique Ampmatic control automatically adjusts the charge current to match the battery's size and condition. Smaller batteries receive less current, while larger batteries receive more, ensuring optimal and safe charging without overcharging.
6.2. 9-Step Charging Program
The charger progresses through the following stages, indicated by LEDs:
- SAVE (0.5V Activation): Automatically starts charging from as low as 0.5V to recover deeply discharged batteries.
- SAVE (Desulfation): Recovers sulfated batteries, restoring their capacity.
- CHARGE (Bulk Charge): Delivers a constant current charge to bring the battery to approximately 75% capacity.
- OPTIMIZE (Pulse Absorption): A unique pulsed absorption mode that optimizes battery performance by ensuring all cells are brought to the same capacity. This stage brings the battery to 100% charge.
- MAINTAIN (24-7 Intelligent Maintenance): Once fully charged, the charger enters a long-term maintenance mode, delivering small pulses of current to keep the battery at optimal charge without overcharging, ensuring maximum battery life.
Image: Visual representation of the 9-step charging process.
6.3. State of Health (S.O.H.) Test
The OptiMate 6 performs a battery State Of Health test, which indicates the battery's ability to hold charge. This test helps determine if the battery is in good condition or if it requires further attention or replacement.
7. Maintenance
7.1. Charger Care
- Keep the charger clean and free from dust and debris.
- Store the charger in a dry, cool place when not in use.
- Inspect cables and connectors regularly for any signs of damage. Do not use if damaged.
7.2. Battery Care
- Ensure battery terminals are clean and free of corrosion for optimal connection.
- The OptiMate 6's 24-7 intelligent maintenance program ensures your battery remains optimally charged, preventing sulfation and extending its lifespan.
8. Troubleshooting
If you encounter issues with your OptiMate 6 Ampmatic charger, refer to the following common solutions:
- Charger Not Activating: Ensure the AC power cord is securely plugged into a live outlet and the battery connections are correct (red to positive, black to negative). The charger requires a minimum battery voltage of 0.5V to initiate the recovery program.
- Battery Not Charging: Verify that the battery is not severely damaged or short-circuited. The charger may indicate an error if the battery is beyond recovery. Check for loose connections.
- Unusual LED Patterns: Refer to the LED indicator guide on the charger or packaging for specific error codes or charging stage indications.
- Charger Feels Warm: It is normal for the charger to feel warm during operation, especially during the bulk charge phase. However, if it becomes excessively hot or emits smoke, disconnect it immediately and contact support.
9. Specifications
| Model Number | TM-180SAE |
| Brand | OptiMate |
| Input Voltage | 100-240 Volts AC (Global Input) |
| Output Voltage | 12 Volts DC |
| Charge Current | 5A (Ampmatic) |
| Battery Types | 12V STD, AGM, GEL |
| Battery Capacity | 3 to 240Ah |
| Number of Ports | 1 |
| Weight | 1.24 Kilograms |
| IP Rating | IP54 (Weatherproof Case) |
| Manufacturer | TecMate International NV/SA |
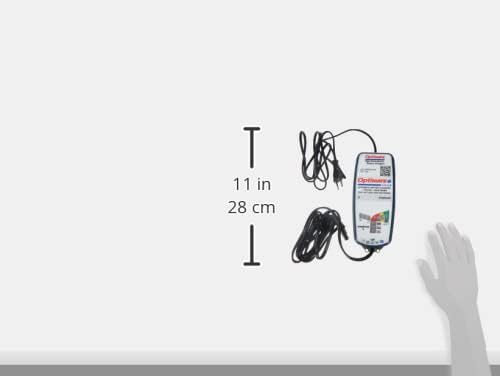
Image: Charger size comparison.
10. Warranty and Support
10.1. Warranty Information
The OptiMate 6 Ampmatic comes with a 3-year product replacement warranty. For detailed warranty terms and conditions, please visit the official TecMate website.

Image: Back of the charger with warranty details.
10.2. Support and Resources
For further information, product registration, or technical support, please visit the official OptiMate website or the TecMate warranty page:
- OptiMate 6 Product Page: http://www.optimate1.com/om6
- TecMate Warranty Information: http://www.tecmate.com/warranty