
Product Overview
The DNA MOTORING STEPB-ZTL-8174-SS running boards are designed to provide a functional and durable step for your vehicle. These running boards are constructed from high-quality, rust-resistant stainless steel and feature ABS plastic covered slip-resistant step pads for secure footing. They are engineered for a direct, no-drill installation on compatible vehicles.
Compatibility:
- Dodge Ram 1500 Quad (Extended) Cab 2009-2010
- Ram 1500 Quad (Extended) Cab 2011-2018
- Ram 1500 Classic Quad (Extended) Cab 2019-2021

Figure 1: Truck Cab Configuration Guide. Ensure your vehicle matches the Quad Cab type for proper fitment.
Package Contents
Verify that all components are present before beginning installation. If any parts are missing or damaged, contact customer support immediately.
- 2 x Running Boards (Left and Right)
- Vehicle-Specific Mounting Brackets (typically 6 brackets)
- Hardware Kit (bolts, washers, nuts, rivnuts)

Figure 2: Typical package contents including running boards, mounting hardware, and instructions.
Safety Information
- Always wear appropriate personal protective equipment (PPE) during installation, including safety glasses and gloves.
- Ensure the vehicle is parked on a level surface and the parking brake is engaged before starting work.
- Do not exceed the maximum weight capacity of 1500 pounds for the pair of running boards.
- The step pads are designed to be slip-resistant; however, exercise caution in wet or icy conditions.
- Periodically check all mounting hardware for tightness to ensure safe operation.
Setup and Installation
Installation is designed to be a no-drill process, utilizing existing factory mounting points on your vehicle. While installation can often be completed in under an hour, actual time may vary based on experience and vehicle condition. It is recommended to have a second person assist during installation.
Required Tools (Not Included):
- Socket wrench set
- Torque wrench
- Measuring tape
- Marker or chalk
- Rivnut installation tool (if rivnuts are used and not pre-installed)
Installation Steps:
- Identify Mounting Points: Locate the factory mounting points along the rocker panel or frame of your vehicle. These are typically pre-drilled holes.
- Install Brackets: Attach the vehicle-specific mounting brackets to the identified factory mounting points. Ensure the correct bracket is used for each position (front, middle, rear, driver side, passenger side). Some brackets may be specific to the driver or passenger side.
- Secure Brackets: Hand-tighten all bolts and nuts to secure the brackets to the vehicle frame. Do not fully tighten at this stage.
- Attach Running Boards: Carefully position the running board onto the installed brackets. Align the slots on the running board with the mounting points on the brackets.
- Adjust and Align: Adjust the running board for proper alignment and desired protrusion from the vehicle. Ensure it is level and evenly spaced.
- Final Tightening: Once satisfied with the alignment, fully tighten all mounting hardware to the manufacturer's recommended torque specifications (refer to your vehicle's service manual if specific torque values are not provided with the running boards).
- Repeat for Other Side: Follow the same steps for installing the running board on the opposite side of the vehicle.

Figure 3: Mounting brackets and hardware. Note the design of the brackets and how they attach to the running board.
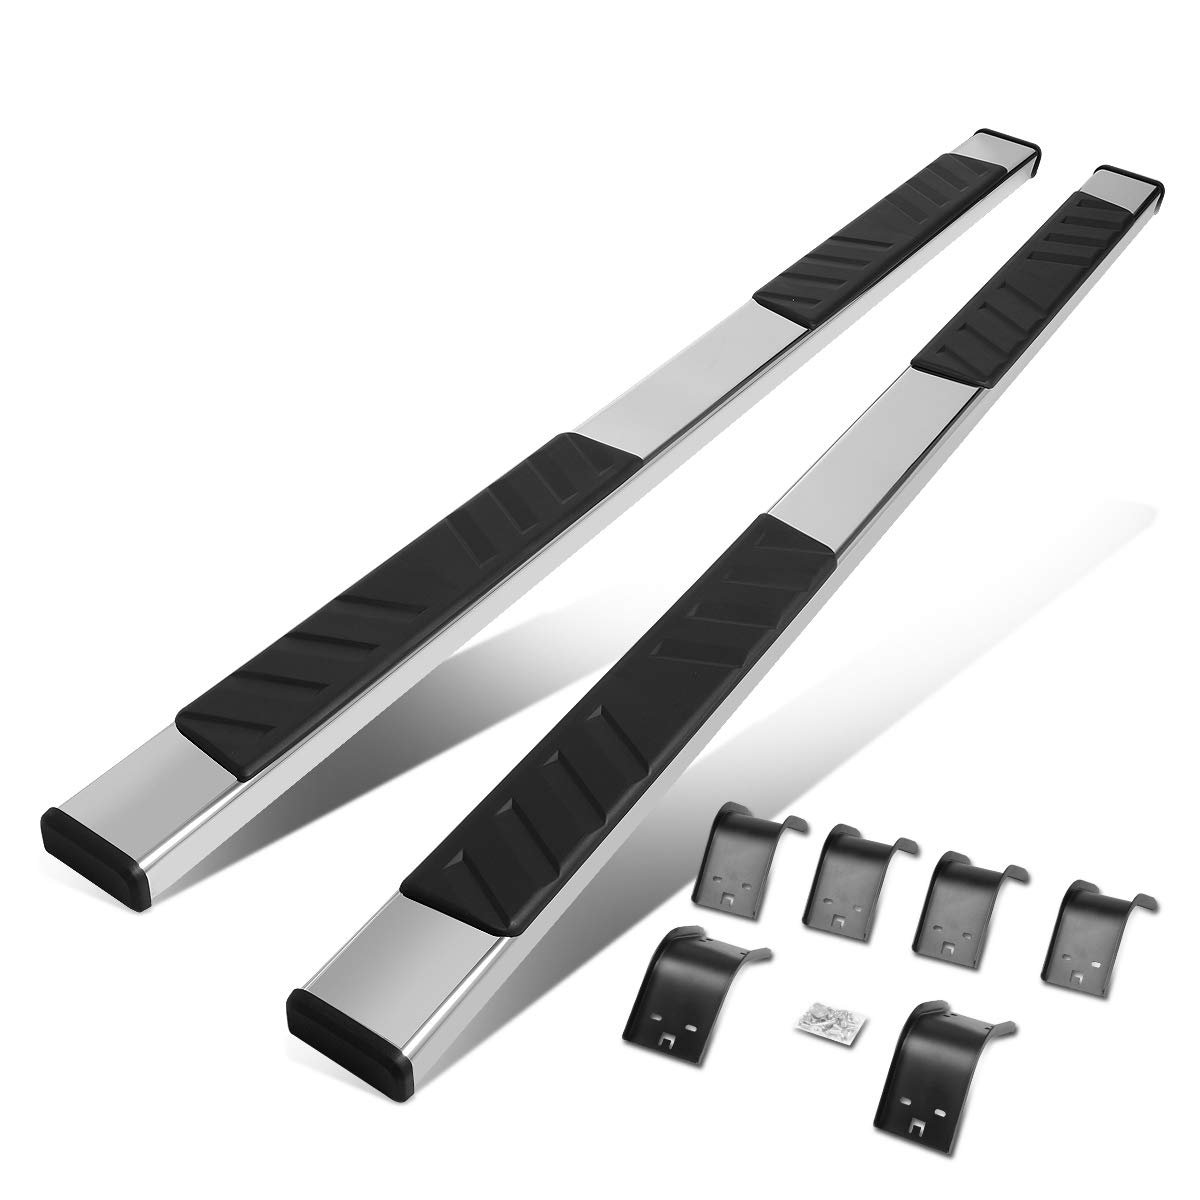
Figure 4: Detail of the running board surface, highlighting the step pad and overall construction.
Important Notes on Rivnut Installation:
Some installations may require the use of rivnuts (also known as rivet nuts or nutserts) to create threaded mounting points in existing holes. If your kit includes rivnuts and no specific installation tool, a dedicated rivnut tool is highly recommended for proper and secure installation. Attempting to install rivnuts without the correct tool can lead to improper seating, stripping, or damage to the rivnut and vehicle frame.

Figure 5: Details of the running board's end cap and slip-resistant step pads.
Operating Instructions
These running boards provide a stable and convenient step for entering and exiting your vehicle. Step onto the slip-resistant pads firmly and evenly. Avoid placing excessive weight on the edges of the running boards. Always maintain three points of contact (two hands and one foot, or two feet and one hand) when using the step to ensure stability.
Maintenance
- Cleaning: Clean the stainless steel surfaces with a mild automotive soap and water. Avoid abrasive cleaners or harsh chemicals that could damage the finish. For stubborn dirt, a stainless steel cleaner can be used. Rinse thoroughly and dry with a soft cloth to prevent water spots.
- Step Pads: Clean the ABS plastic step pads with soap and water to remove dirt and debris, which can reduce their slip-resistant properties.
- Hardware Check: Periodically (e.g., every 3-6 months or after off-road use) inspect all mounting bolts and nuts for tightness. Re-tighten any loose hardware to ensure the running boards remain securely attached.
- Corrosion Inspection: Although made from rust-resistant stainless steel, inspect for any signs of corrosion, especially in areas exposed to road salt or harsh weather. Address any corrosion promptly to maintain product longevity.
Troubleshooting
| Problem | Possible Cause | Solution |
|---|---|---|
| Running boards feel loose or wobble. | Loose mounting hardware. | Inspect all bolts and nuts. Re-tighten to recommended torque specifications. |
| Difficulty aligning running boards. | Brackets installed incorrectly or not fully adjusted. | Ensure brackets are on the correct side (driver/passenger) and position (front/middle/rear). Loosen hardware, adjust alignment, then re-tighten. |
| Rivnuts do not secure properly or strip. | Incorrect rivnut size for vehicle holes, or improper installation without a dedicated rivnut tool. | Verify rivnut size matches vehicle holes. Use a proper rivnut installation tool. If rivnuts are damaged, they may need to be replaced with appropriate alternatives or professional assistance sought. |
| Brackets interfere with factory components. | Minor manufacturing variations or specific vehicle sub-models. | Double-check vehicle compatibility. In some rare cases, minor modifications to the bracket or professional installation may be required. Contact customer support for guidance. |
Specifications
- Model Number: STEPB-ZTL-8174-SS
- Material: Stainless Steel, ABS Plastic
- Exterior Finish: Polished
- Color: Black (step pads), Silver (bars)
- Width: 5 Inches
- Weight Capacity (Maximum): 1500 Pounds
- Number of Items: 2 (pair of running boards)
- GTIN (UPC): 194286022112
- Manufacturer: DNA Motoring
Warranty and Support
For warranty information regarding the DNA MOTORING STEPB-ZTL-8174-SS running boards, please contact the seller directly. For technical support or assistance with installation, refer to the contact information provided by your retailer or the manufacturer's official website.
