
1. Introduction and Overview
The Brook Hitbox Cable 5-pin is an essential accessory designed to streamline the wiring process for custom Hitbox and arcade stick builds. This cable provides a direct and efficient connection between your pushbuttons and a compatible Brook Fighting Board, ensuring reliable and responsive input for fighting and arcade games.
It is specifically engineered for use with Hitbox layouts and features .110 female connectors, making it compatible with most standard Sanwa Denshi, Seimitsu, or GamerFinger pushbuttons.
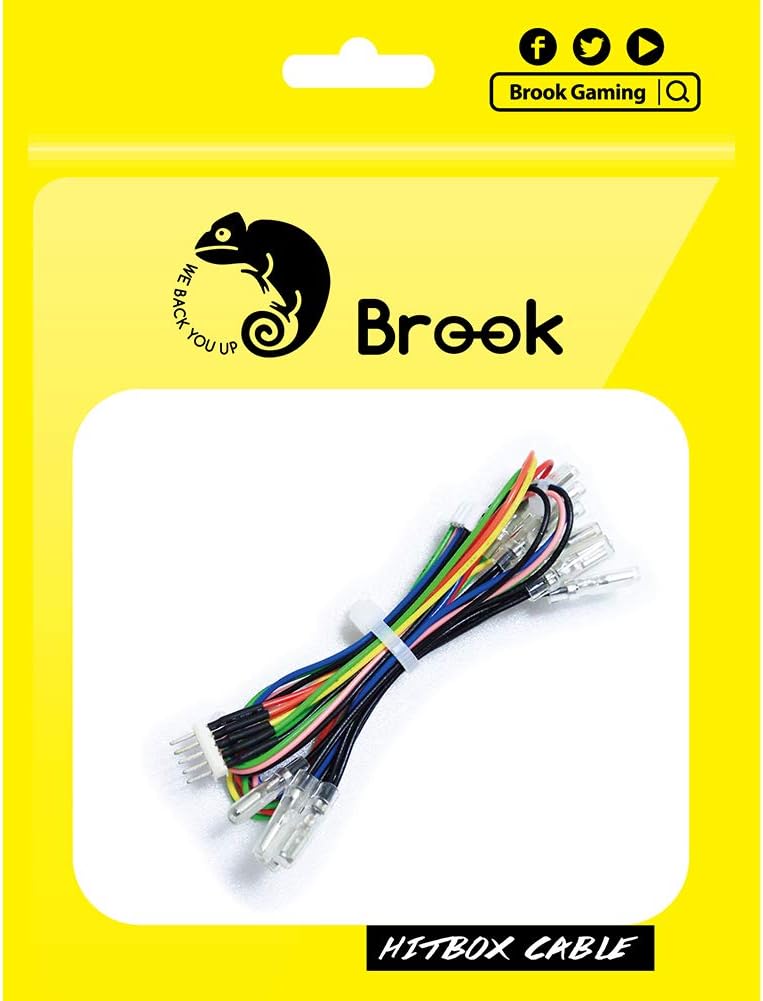
Figure 1: Brook Hitbox Cable 5-pin in its retail packaging, showcasing the product and branding.

Figure 2: A detailed view of the Brook Hitbox Cable 5-pin, showing the multi-colored wires and the 5-pin connector on one end and individual .110 female connectors on the other.
2. Setup and Installation
Proper installation of the Hitbox Cable is crucial for optimal performance. Follow these steps to connect the cable to your Brook Fighting Board and pushbuttons.
2.1 Connecting to the Brook Fighting Board
- Identify the 5-pin connector on the Brook Hitbox Cable.
- Locate the corresponding 5-pin input port on your Brook Fighting Board. This port is typically labeled for button inputs.
- Carefully align the 5-pin connector with the port on the fighting board and push firmly until it is securely seated. Ensure the connector is oriented correctly to avoid bending pins.

Figure 3: Illustration of connecting the 5-pin connector of the Hitbox Cable to a Brook Fighting Board.
2.2 Connecting to Pushbuttons
The individual wires of the Hitbox Cable terminate in .110 female connectors, designed to attach to the terminals of standard arcade pushbuttons.
- For each pushbutton, identify the two terminals on the switch mechanism.
- Connect one .110 female connector from the Hitbox Cable to each terminal of the pushbutton. The specific wiring for each button (e.g., action buttons, directional buttons) will depend on your Hitbox layout and the pinout of your fighting board.
- Refer to the pinout diagram for your Brook Fighting Board to ensure correct button assignments.

Figure 4: A user connecting the individual .110 female connectors to the terminals of arcade pushbuttons within a custom build.

Figure 5: A diagram illustrating the typical 20-pin and 4-pin guide for Brook Fighting Boards, showing pin assignments for various button and directional inputs. Note: Button functions may vary depending on the specific Fighting Board version.

Figure 6: A visual representation of how the Hitbox Cable connects to the Fighting Board Cable, illustrating the modular connection point.
3. Operation
Once the Brook Hitbox Cable 5-pin is correctly installed and connected to your pushbuttons and Brook Fighting Board, the system is ready for use. The cable acts as a conduit, transmitting the electrical signals from your button presses to the fighting board, which then processes these inputs for your gaming device.
No specific operational steps are required for the cable itself beyond proper installation. Its function is passive, ensuring reliable signal transmission.
4. Maintenance
The Brook Hitbox Cable 5-pin is designed for durability. Minimal maintenance is required to ensure its longevity and continued performance:
- Keep Connections Secure: Periodically check that all connectors (.110 female connectors to buttons, and the 5-pin connector to the fighting board) are firmly seated. Loose connections can lead to intermittent input issues.
- Avoid Excessive Bending: While flexible, avoid sharp or excessive bends in the cable, especially near the connectors, as this can damage the internal wiring over time.
- Keep Clean and Dry: Ensure the cable and its connectors remain free from dust, dirt, and moisture. Use a dry, soft cloth for cleaning if necessary.
5. Troubleshooting
If you encounter issues after installing the Hitbox Cable, consider the following troubleshooting steps:
- Button Not Responding:
- Verify that the .110 female connectors are securely attached to both terminals of the pushbutton.
- Ensure the 5-pin connector is fully inserted into the fighting board.
- Check the fighting board's pinout diagram to confirm the correct wire is connected to the correct button input.
- Test the pushbutton itself to ensure it is functional.
- Intermittent Inputs:
- This often indicates a loose connection. Re-seat all connectors firmly.
- Inspect the wires for any visible damage or fraying.
- Compatibility Issues:
- Ensure your pushbuttons use .110 inch (2.8mm) terminals.
- Confirm that your fighting board is a Brook Fighting Board series product, as this cable is designed for optimal compatibility with Brook boards.
If problems persist, refer to the user manual of your specific Brook Fighting Board or contact Brook customer support.
6. Specifications
| Brand | Brook |
| Model Number | Hitbox Cable |
| Cable Type | Flat Ribbon |
| Connector Type | .110 Female Connector (5-pin harness) |
| Item Weight | 0.02 Kilograms (0.704 ounces) |
| Package Dimensions | 6.3 x 5.91 x 0.39 inches |
| Manufacturer | Brook |
| Date First Available | January 6, 2020 |
7. Warranty and Support
The Brook Hitbox Cable 5-pin comes with a Brook one-year warranty from the date of purchase. This warranty covers manufacturing defects under normal use.
For warranty claims, technical support, or further assistance, please visit the official Brook website or contact Brook customer service through their designated support channels. You can also find more information and assistance by visiting the Brook Store on Amazon.