
GOPLUS TQ46883DE
GOPLUS 3-Wheel Foldable Golf Trolley User Manual
Model: TQ46883DE
1. Introduction
Thank you for choosing the GOPLUS 3-Wheel Foldable Golf Trolley. This manual provides essential information for the safe and efficient use of your new golf trolley. Please read these instructions carefully before assembly and operation, and retain them for future reference.
2. Product Overview
The GOPLUS 3-Wheel Foldable Golf Trolley is designed for ease of use and durability on the golf course. Key features include:
- Robust Construction: Made from high-quality aluminum tubing and sturdy metal fittings, ensuring stability and a load capacity of up to 15 kg.
- Ergonomic Adjustable Handle: The handle's angle and height can be adjusted to suit user preference, providing comfortable pushing and pulling.
- Durable Wheels with Foot Brake: Three hard-covered, wear-resistant wheels offer flexible mobility and traction on various terrains. A foot brake on the rear wheel ensures secure parking.
- User-Friendly Design: Features adjustable fasteners to secure golf bags of various sizes and an integrated umbrella holder.
- Compact Folding: Easily folds into a compact size for convenient storage and transport.
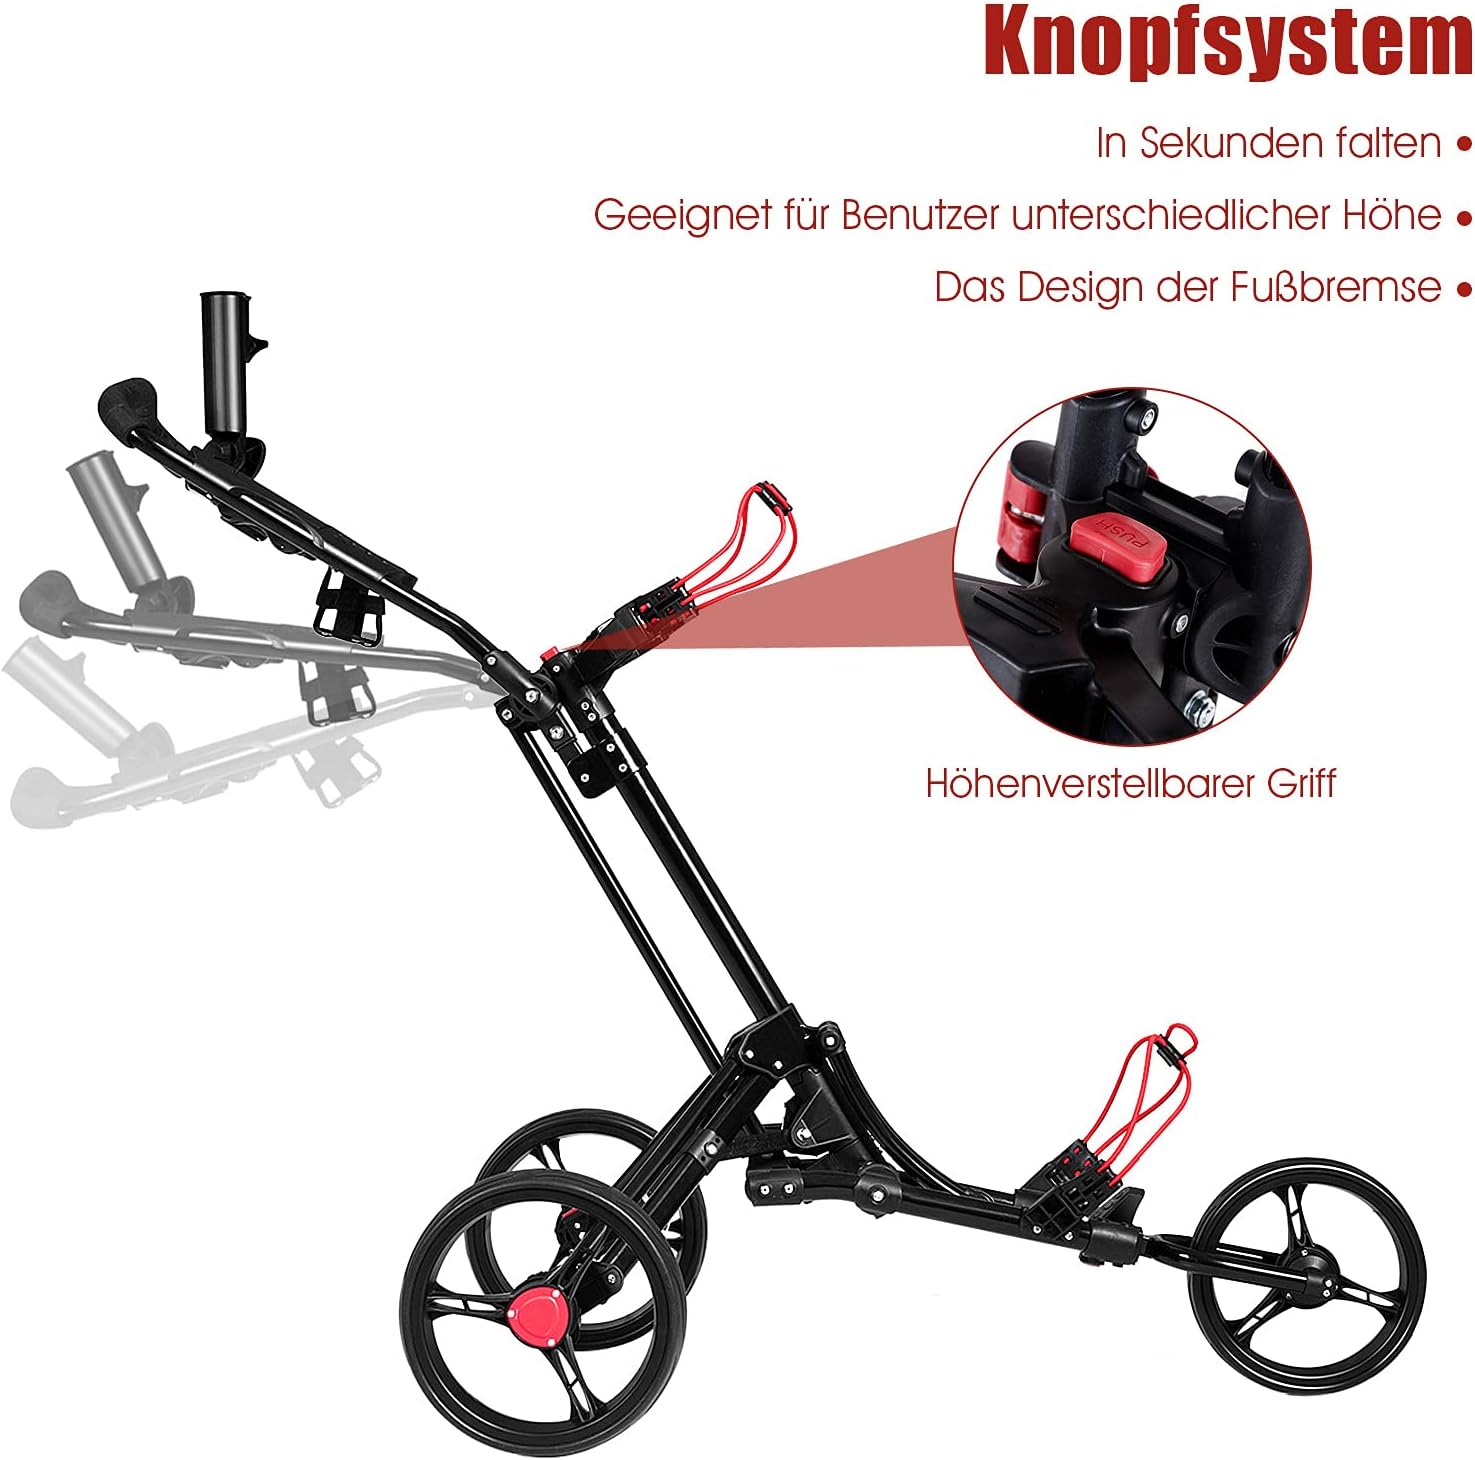
Figure 2.1: The GOPLUS 3-Wheel Foldable Golf Trolley, ready for use.
3. Setup and Assembly
3.1 Unfolding the Trolley
- Place the folded trolley on a flat surface.
- Locate the main folding mechanism (often a button or lever near the handle base).
- Press the button or release the lever to unlock the frame.
- Gently extend the frame until it clicks into its fully open position. Ensure all locking mechanisms are engaged.
3.2 Attaching Wheels (if detachable)
The wheels are typically pre-attached. If your model requires wheel attachment:
- Align the wheel axle with the corresponding slot on the trolley frame.
- Push the wheel firmly until it locks into place. Verify that the wheel is securely attached by gently pulling on it.
3.3 Adjusting the Handle
The handle features an adjustable angle and height for user comfort.
- To adjust the handle height, locate the adjustment mechanism (usually a quick-release clamp or button) on the handle shaft.
- Release the mechanism, adjust the handle to your desired height, and secure the mechanism firmly.
- To adjust the handle angle, use the pivot point near the top of the handle. Release the locking mechanism, set the angle, and re-secure.

Figure 3.1: Details of the button system, adjustable handle, and foot brake.
3.4 Securing the Golf Bag
The trolley is equipped with adjustable straps or bungee cords to hold your golf bag securely.
- Place your golf bag onto the trolley's support brackets.
- Use the upper and lower adjustable fasteners to firmly secure the golf bag to the trolley frame. Ensure the bag is stable and does not shift during movement.
3.5 Attaching the Umbrella Holder
The umbrella holder can be attached to the designated slot on the handle assembly.
- Insert the umbrella holder into its mounting point.
- Tighten any securing screws or clamps to ensure the holder is stable.
- Insert your golf umbrella into the holder when needed.
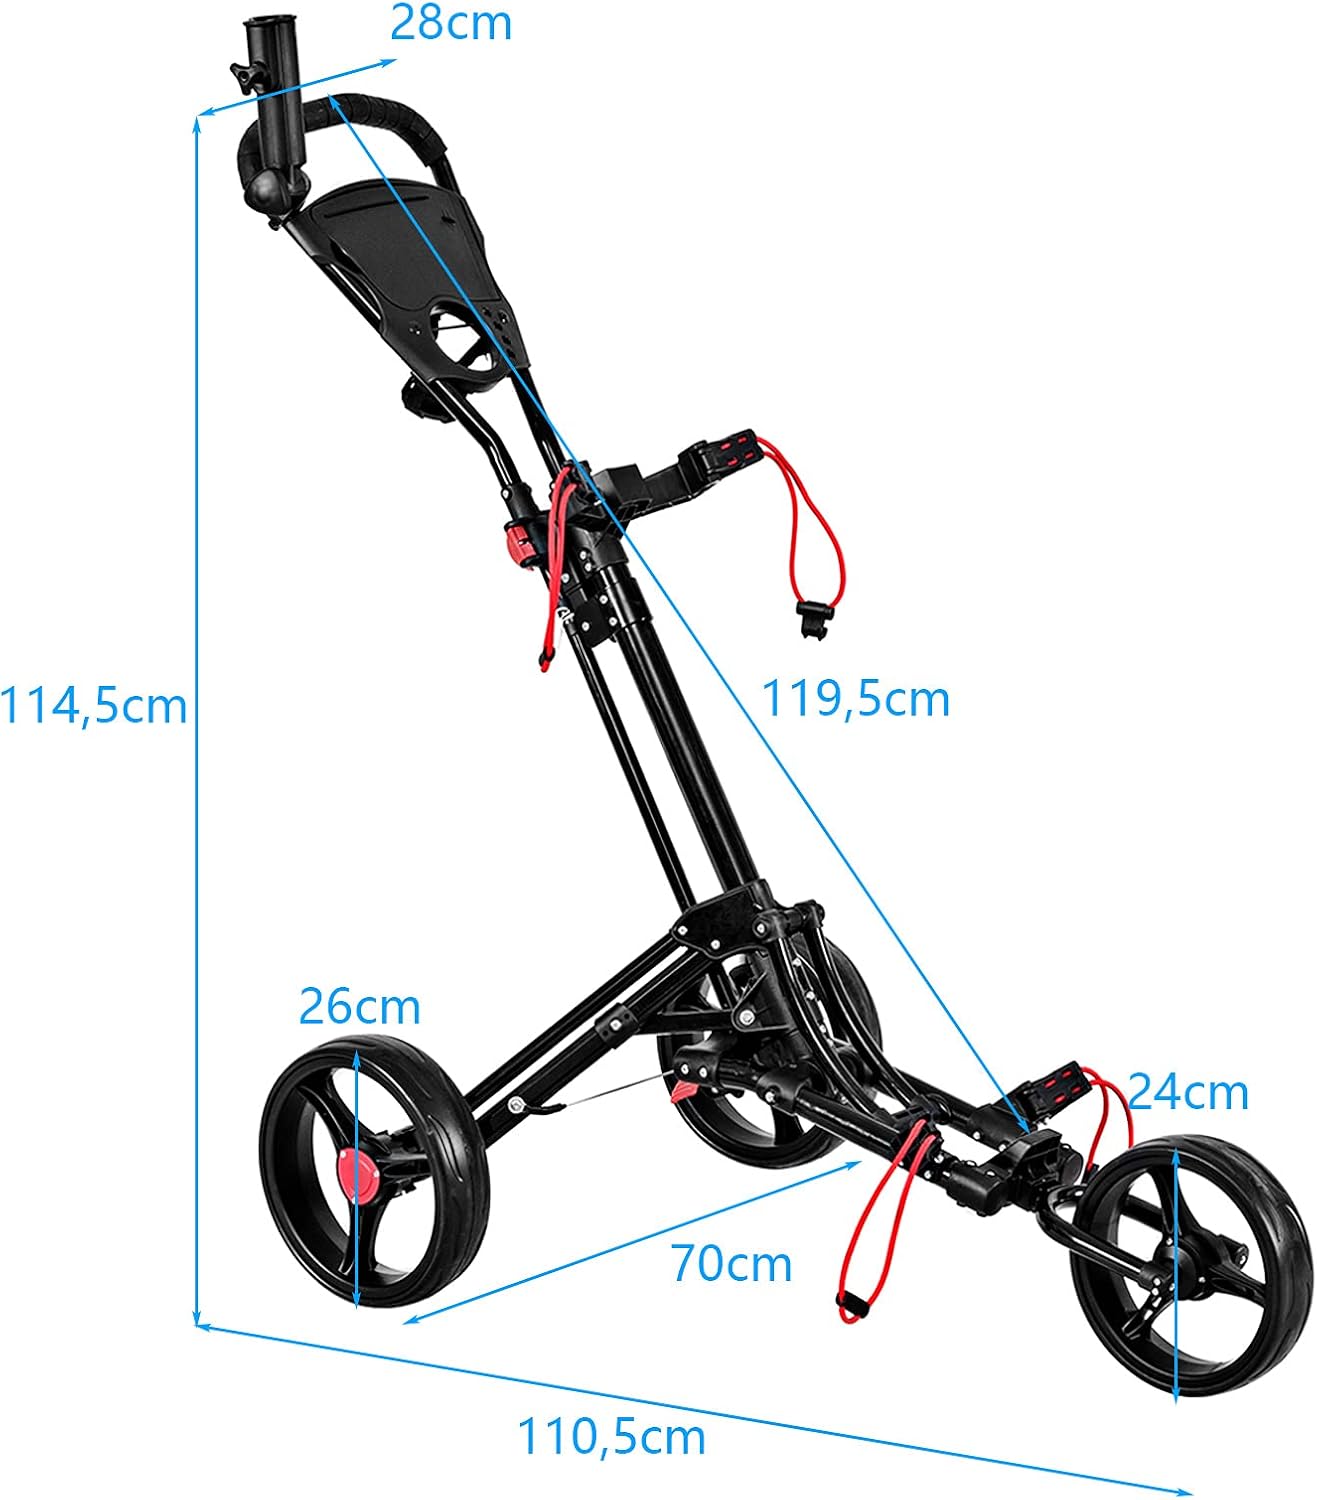
Figure 3.2: Handle area showing accessory holders and umbrella attachment.
4. Operating Instructions
4.1 Moving the Trolley
Once your golf bag is securely attached and the handle is adjusted, you can push or pull the trolley across the golf course. The three wheels provide stable movement on various terrains.

Figure 4.1: Wheel performance on various surfaces.
4.2 Using the Foot Brake
To park the trolley, engage the foot brake located on the rear wheel. Press down on the brake pedal until it locks into position. To release the brake, press the pedal again.
Always engage the brake when parking the trolley, especially on inclines, to prevent unintended movement.
4.3 Folding the Trolley for Storage
To fold the trolley for compact storage or transport:
- Remove any golf bags or accessories from the trolley.
- Release the handle adjustment mechanisms and lower the handle to its lowest position.
- Locate the main folding button or lever (as used during unfolding).
- Press the button or release the lever and carefully collapse the frame until it is fully folded. Ensure all parts are securely nested.

Figure 4.2: Storing the folded trolley in a car trunk.

Figure 4.3: Trolley in use with an umbrella for sun or rain protection.
5. Maintenance
5.1 Cleaning
Regularly clean your golf trolley to ensure its longevity and appearance.
- Wipe down the frame with a damp cloth after each use to remove dirt and debris.
- For stubborn dirt, use a mild soap solution and rinse thoroughly. Avoid harsh chemicals that may damage the finish.
- Ensure the trolley is completely dry before folding and storing.
5.2 Wheel Care
Inspect the wheels periodically for any signs of wear or damage. Clean any grass, mud, or debris from the wheel axles to ensure smooth rotation.
If wheels begin to squeak, a small amount of silicone-based lubricant can be applied to the axle points. Avoid oil-based lubricants that can attract dirt.
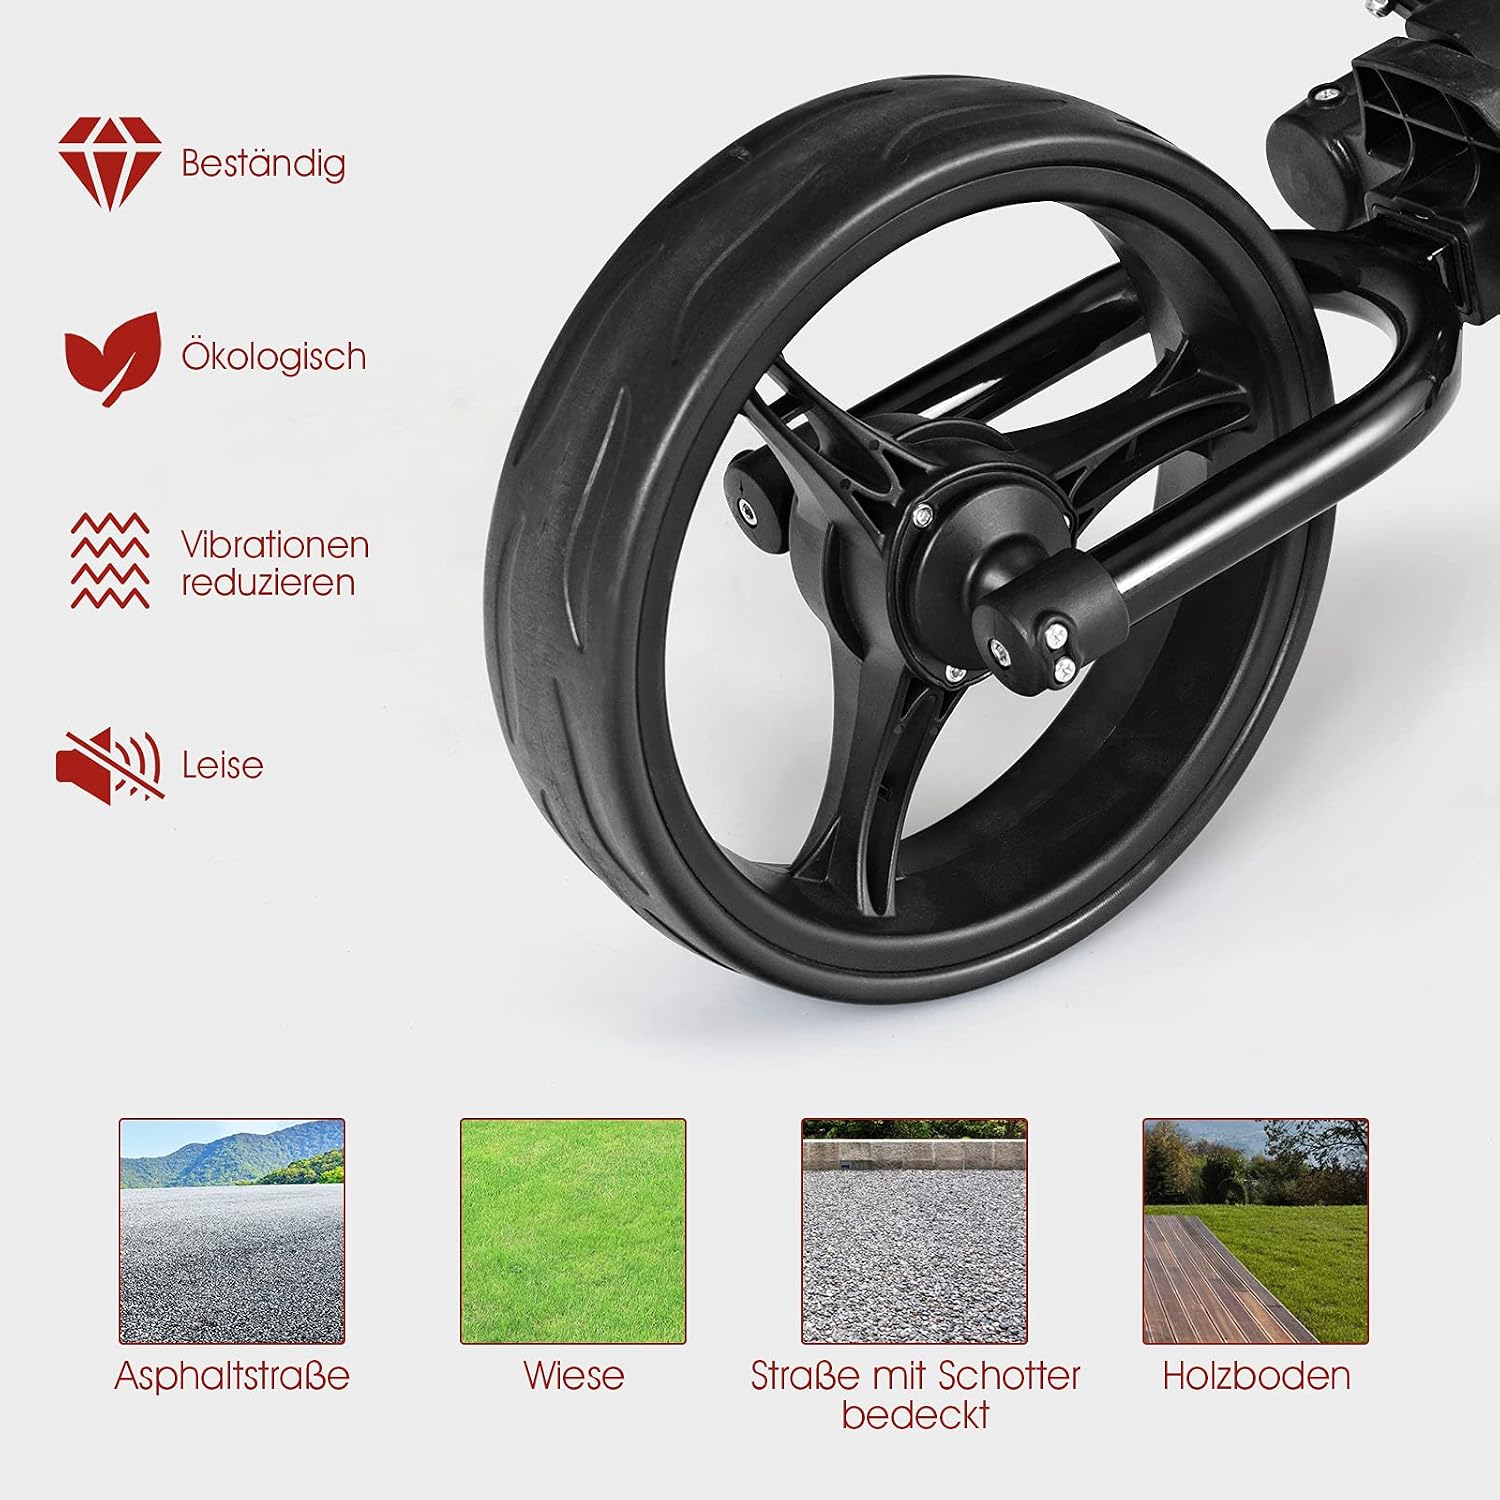
Figure 5.1: Inspecting the trolley wheel for maintenance.
5.3 Storage
Store the folded trolley in a dry, cool place, away from direct sunlight and extreme temperatures, to prevent material degradation.
6. Troubleshooting
6.1 Trolley Does Not Fold/Unfold Smoothly
- Ensure all locking mechanisms are fully disengaged before attempting to fold or unfold.
- Check for any obstructions or debris in the folding joints.
- Apply a small amount of silicone lubricant to the pivot points if movement is stiff.
6.2 Wheels Squeak
- Clean the wheel axles and bearings to remove any accumulated dirt or sand.
- Apply a silicone-based lubricant to the wheel axles.
6.3 Trolley Feels Unstable
- Verify that the trolley frame is fully extended and all locking mechanisms are securely engaged.
- Ensure your golf bag is properly seated and secured with both upper and lower fasteners.
- Check that all wheels are firmly attached.
7. Specifications
| Feature | Detail |
|---|---|
| Brand | GOPLUS |
| Model Number | TQ46883DE |
| Material | Aluminum, PP |
| Expanded Dimensions (L x W x H) | 70 cm x 125.2 cm x 113.5 cm |
| Folded Dimensions (L x W x H) | 40.5 cm x 46.5 cm x 77.5 cm |
| Product Weight | Approx. 9.1 kg |
| Load Capacity | 15 kg |

Figure 7.1: Key dimensions of the golf trolley.
8. Warranty and Support
For warranty information and customer support, please refer to the documentation provided at the time of purchase or contact GOPLUS customer service directly. Keep your proof of purchase for any warranty claims.
Ask a question about this manual
Ask about setup, troubleshooting, compatibility, parts, safety, or missing instructions. Manuals+ will review the question and use this page’s manual context to help answer it.