1. Introduction
The SXDD KD-661C Wireless Pet Fence System is designed to provide a safe and effective containment solution for your pets. This system utilizes a wireless transmitter to create a customizable boundary, and a receiver collar worn by your dog. When your dog approaches the boundary, the system delivers a series of warnings (beep, then static stimulation) to encourage them to return to the safe zone. This manual provides detailed instructions for setting up, operating, and maintaining your wireless pet fence system.
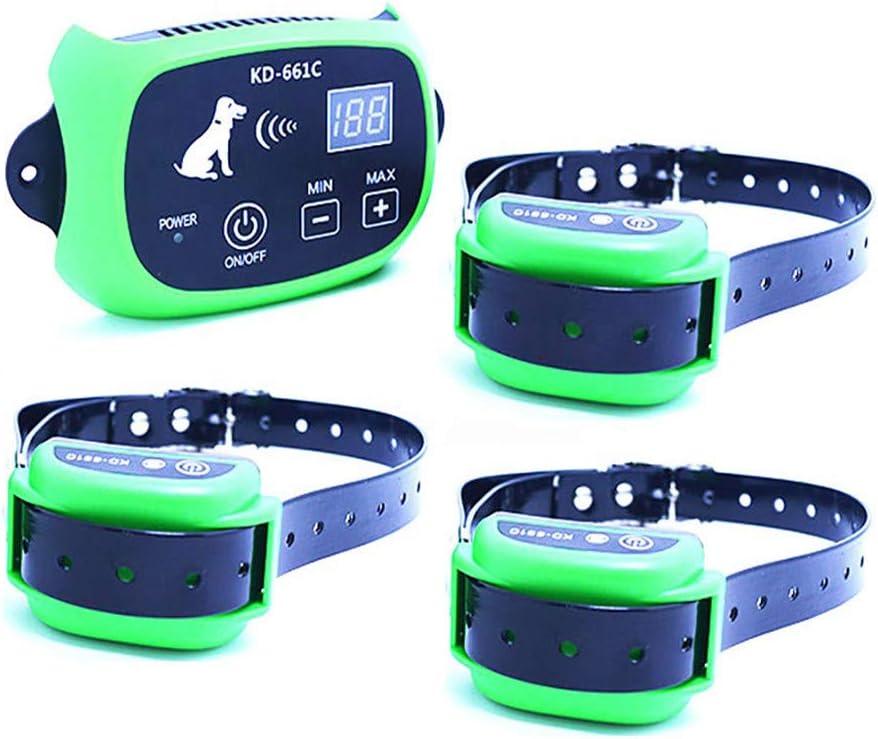
Figure 1.1: The SXDD KD-661C Wireless Pet Fence System, showing the main transmitter unit and three receiver collars.
2. Package Contents
Please verify that all items listed below are included in your package:
- 1 x Transmitter (Built-in rechargeable lithium battery)
- 1/2/3 x Collar Receiver (Built-in rechargeable lithium battery - quantity depends on system purchased)
- 1/2/3 x Test Light Tool (quantity depends on system purchased)
- 4 x Screws
- 1 x User's Manual (English)
- 1 x Charger
- 1/2/3 x Strap (quantity depends on system purchased)
- 4/8/12 x Metal Probes (quantity depends on system purchased)
- 20 x Flag

Figure 2.1: All components included in the SXDD Wireless Pet Fence System package.
3. Specifications
| Name | Wireless Pet Fence |
| Type | 1 Dog System, 2 Dog System, 3 Dog System (depending on purchase) |
| Color | Green |
| Transmitter Size | 14.0 x 8.5 x 3.2 CM |
| Receiver Size | 6.5 x 3.9 x 3.2 CM |
| Maximum Range | 500 meters (from transmitter as center) |
| Signal Strength Adjustment | 0-100 levels (corresponding to 20-500 meters) |
| Charger Voltage | 110-220V |
| Collar Size Range | 8 to 21 inches (suitable for dogs 10 to 110 lbs, over 3 months old) |
| Battery | Built-in rechargeable lithium battery (Transmitter & Receiver) |
4. Setup Guide
4.1 Charging the Devices
Before initial use, fully charge both the transmitter and all receiver collars. Connect the charger to the charging port on each device. The power indicator LED on the transmitter and receiver will indicate charging status.

Figure 4.1: Both the transmitter and receiver collars are equipped with built-in rechargeable lithium batteries for convenient use in various environments.
4.2 Transmitter Placement
Place the transmitter in a central location within the desired containment area. For optimal performance, ensure it is elevated and free from large metal objects or other electronic devices that could interfere with the signal. The transmitter acts as the center of the circular boundary.
4.3 Setting the Boundary Range
The transmitter allows you to adjust the signal strength from 0 to 100 levels. This directly corresponds to the radius of the containment area, ranging from 20 meters to 500 meters. Use the 'MIN' and 'MAX' buttons on the transmitter to adjust the signal level. The LCD display will show the current signal strength.

Figure 4.2: Transmitter controls, including the power indicator LED, ON/OFF button, display for transmitter signal levels, and buttons to increase/decrease signal level.
4.4 Fitting the Receiver Collar
Ensure the receiver collar is fitted snugly on your dog's neck, allowing two fingers to fit comfortably between the strap and the dog's skin. The contact points on the receiver should make direct contact with the dog's skin. Adjust the strap as needed. The collar is suitable for dogs weighing 10 to 110 lbs and over 3 months old.

Figure 4.3: Detailed view of the receiver collar, highlighting the contact points, rubber cover for the charging port, and the ON/OFF button with power LED.
4.5 Setting Up Boundary Flags
Use the provided boundary flags to create a visual perimeter for your dog. Place them at regular intervals around the edge of the desired containment area. This helps your dog understand the boundaries during training.

Figure 4.4: Illustration of a dog within the wireless fence boundary, demonstrating the signal coverage from the transmitter.
4.6 Testing the System
Before placing the collar on your dog, test the system using the provided test light tool. Hold the test light across the contact points of the receiver collar and walk towards the boundary. The receiver should first emit a beep, and then the test light should illuminate, indicating static stimulation. This confirms the system is functioning correctly.
5. Operating Instructions
5.1 How the System Works
When your dog approaches the set boundary, the receiver collar will activate a progressive warning sequence:
- Beep Warning: The receiver first emits an audible warning beep.
- Static Stimulation: If the dog continues to move beyond the warning zone, the system will deliver a mild static stimulation. The intensity of this stimulation is proportional to the dog's proximity to the boundary line; the closer the dog is to the boundary, the stronger the stimulation.
This sequence is designed to encourage your dog to return to the safe zone. The receiver will continue to work until your dog returns within the set range.

Figure 5.1: The three-step correction process of the receiver: 1. Beep Warning, 2. Vibration (implied by progressive stimulation), and 3. Static Shock.
5.2 Training Your Dog
It is crucial to train your dog to understand the system. Start with short training sessions, guiding your dog around the boundary flags. When the collar beeps, gently guide your dog back into the safe zone. Never force your dog into the correction zone. Consistent, positive reinforcement training will help your dog quickly learn the boundaries.

Figure 5.2: The system is designed to be safe and harmless, using beep and static shock with gradually stronger intensity to guide your pet.
5.3 Multiple Dog Operation
One transmitter can support an unlimited number of receiver collars simultaneously without interference. This allows you to contain multiple dogs within the same wireless boundary, provided each dog wears a compatible receiver collar.
6. Maintenance
6.1 Charging
Regularly charge both the transmitter and receiver collars to ensure optimal performance. The battery life will vary depending on usage.
6.2 Cleaning
Periodically clean the receiver collar, especially the contact points, to remove dirt, debris, or oil buildup. Use a damp cloth and mild soap if necessary. Ensure the contact points are dry before use.
6.3 Waterproof Receiver
The receiver collar is designed to be waterproof, allowing your dog to swim or play in wet conditions without damaging the device. However, ensure the charging port is securely covered when not charging.
Figure 6.1: The receiver collar is waterproof, allowing your dog to swim while wearing it.
6.4 Collar Fit Check
Regularly check the fit of the receiver collar on your dog. A loose collar may not deliver consistent stimulation, while a too-tight collar can cause discomfort or skin irritation. Adjust as your dog grows or changes weight.
7. Troubleshooting
7.1 No Correction from Receiver
- Check Battery: Ensure both the transmitter and receiver collar are fully charged.
- Check Collar Fit: Verify the receiver collar is snug and the contact points are touching the dog's skin.
- Adjust Signal Strength: Increase the signal strength on the transmitter to expand the boundary and ensure the dog is entering the correction zone.
- Test with Test Light: Use the test light tool to confirm the receiver is functioning.
7.2 Inconsistent Boundary or Range
- Transmitter Placement: Ensure the transmitter is placed centrally, elevated, and away from large metal objects, dense foliage, or other electronic devices that may cause interference.
- Environmental Factors: Large hills, dense buildings, or strong electromagnetic fields can affect the signal. Try relocating the transmitter.
- Signal Strength: Adjust the signal strength on the transmitter to fine-tune the boundary.
7.3 Receiver Not Charging
- Check Charger: Ensure the charger is properly connected to a working power outlet and to the receiver's charging port.
- Inspect Charging Port: Check for any debris or damage in the charging port of the receiver.
- Try Different Charger: If available, try using a different compatible charger to rule out a faulty charger.