CARMATOR HBW1255
CARMATOR Craftsman Compatible Garage Door Opener Remote HBW1255 User Manual
Model: HBW1255
Frequency: 390 MHz
Introduction
This manual provides instructions for the CARMATOR 3-button garage door opener remote, model HBW1255. This remote is designed for use with specific garage door openers operating at 390 MHz, featuring a red or orange learn button. It is compatible with Craftsman, Chamberlain, and LiftMaster models manufactured between 1997 and 2005.
Please read these instructions carefully before attempting to program or operate your new remote control.
Compatibility Information
This remote is compatible with garage door openers that have a RED or ORANGE learn button and operate at 390 MHz. These models were typically manufactured between 1997 and 2005.
Important: Verify your garage door opener's learn button color before proceeding. This remote will not work with other learn button colors (e.g., yellow, purple, green) or frequencies.
Compatible models include, but are not limited to:
- Sears Craftsman: 139.53681B, 139.53680
- Chamberlain: 950CB, 953CB, 956CB
- LiftMaster: 91LM, 92LM, 970LM, 971LM, 972LM, 973LM, 974LM

This image illustrates the importance of checking your garage door opener for a red or orange learn button to ensure compatibility. Other learn button colors are marked as incompatible.

This diagram confirms that the remote is compatible with garage door openers featuring red or orange learn buttons, manufactured between 1997 and 2005, operating at 390 MHz.
Package Contents
Your package should contain the following items:
- 1 x CARMATOR 3-Button Remote Control (HBW1255)
- 2 x CR2032 Batteries (pre-installed in remote control)
- 1 x Visor Clip
- 1 x Instruction Manual
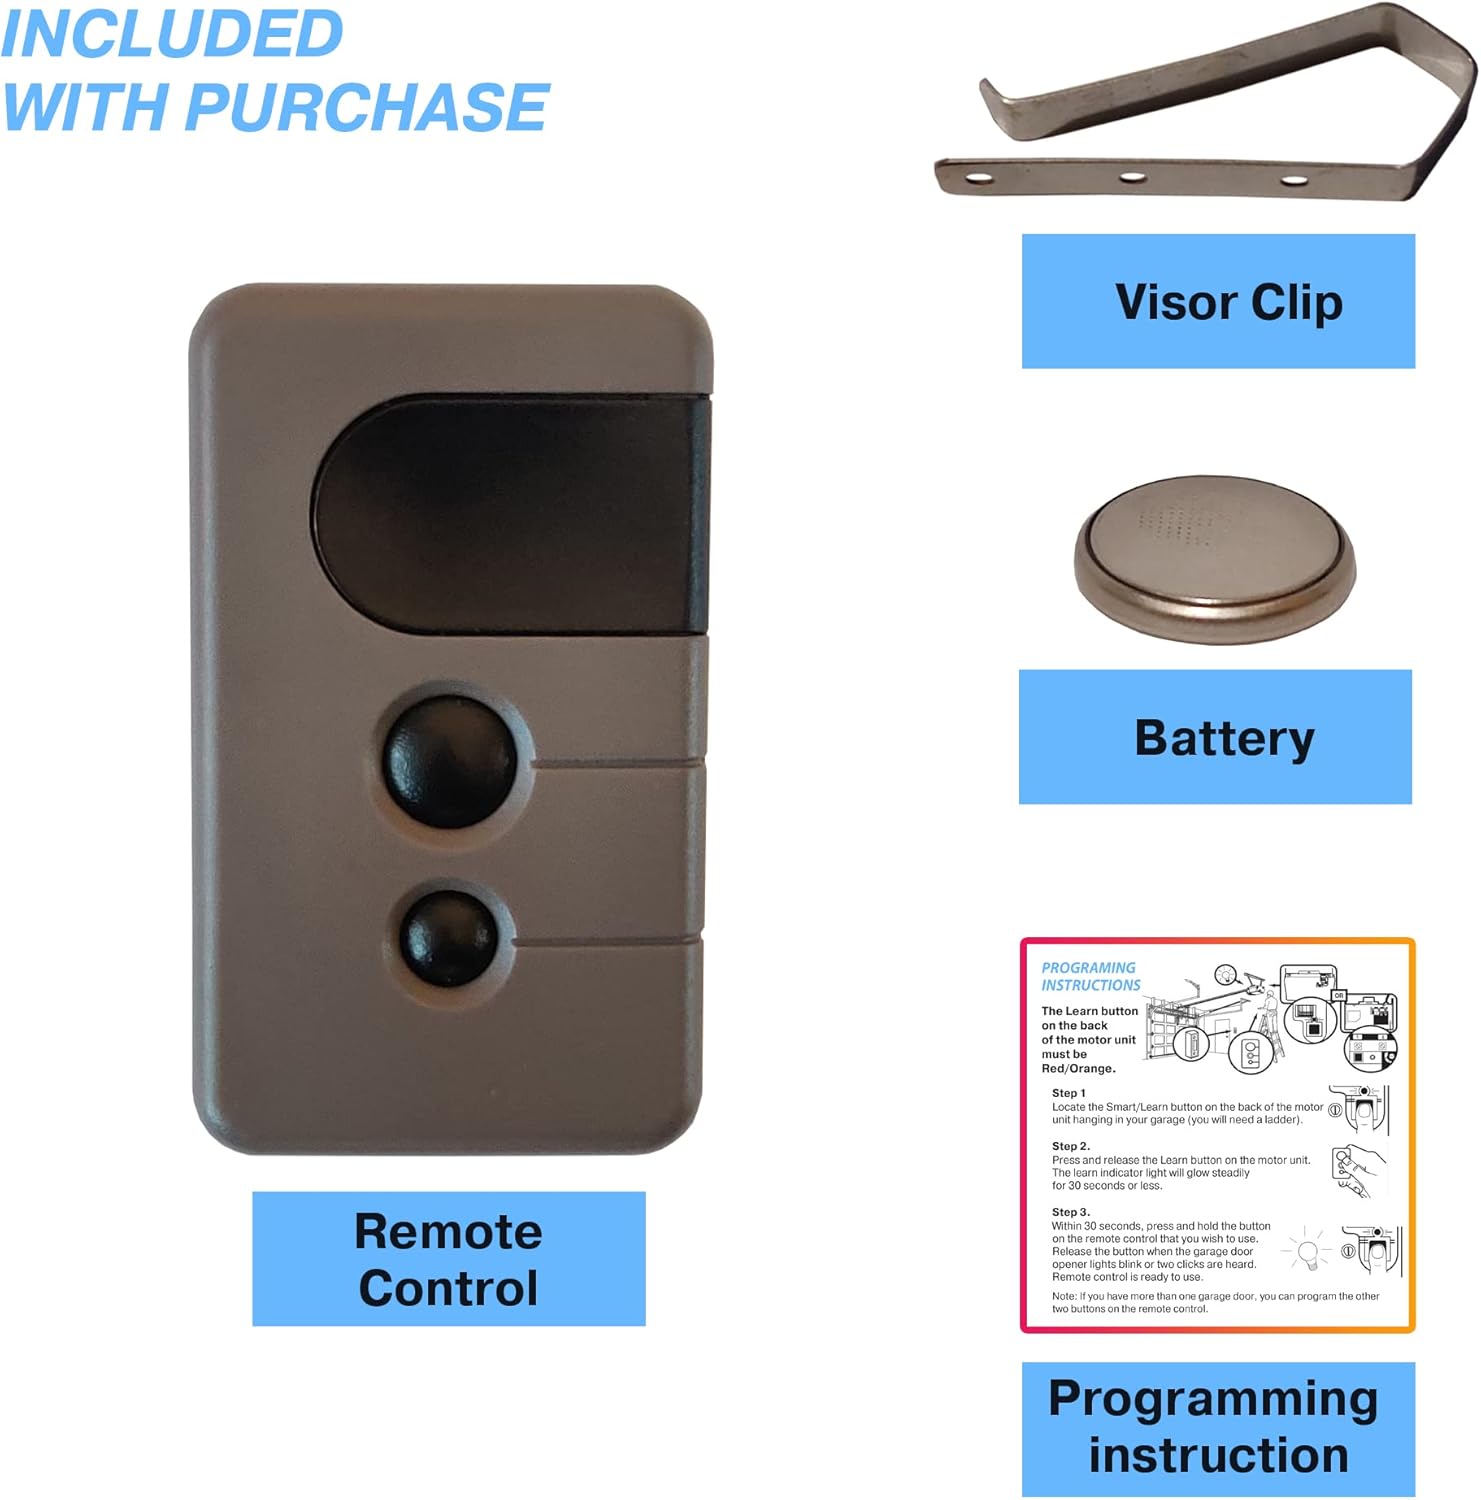
This image displays the items included with your purchase: the remote control, a visor clip for vehicle attachment, a CR2032 battery (pre-installed), and the instruction manual.
Setup and Programming
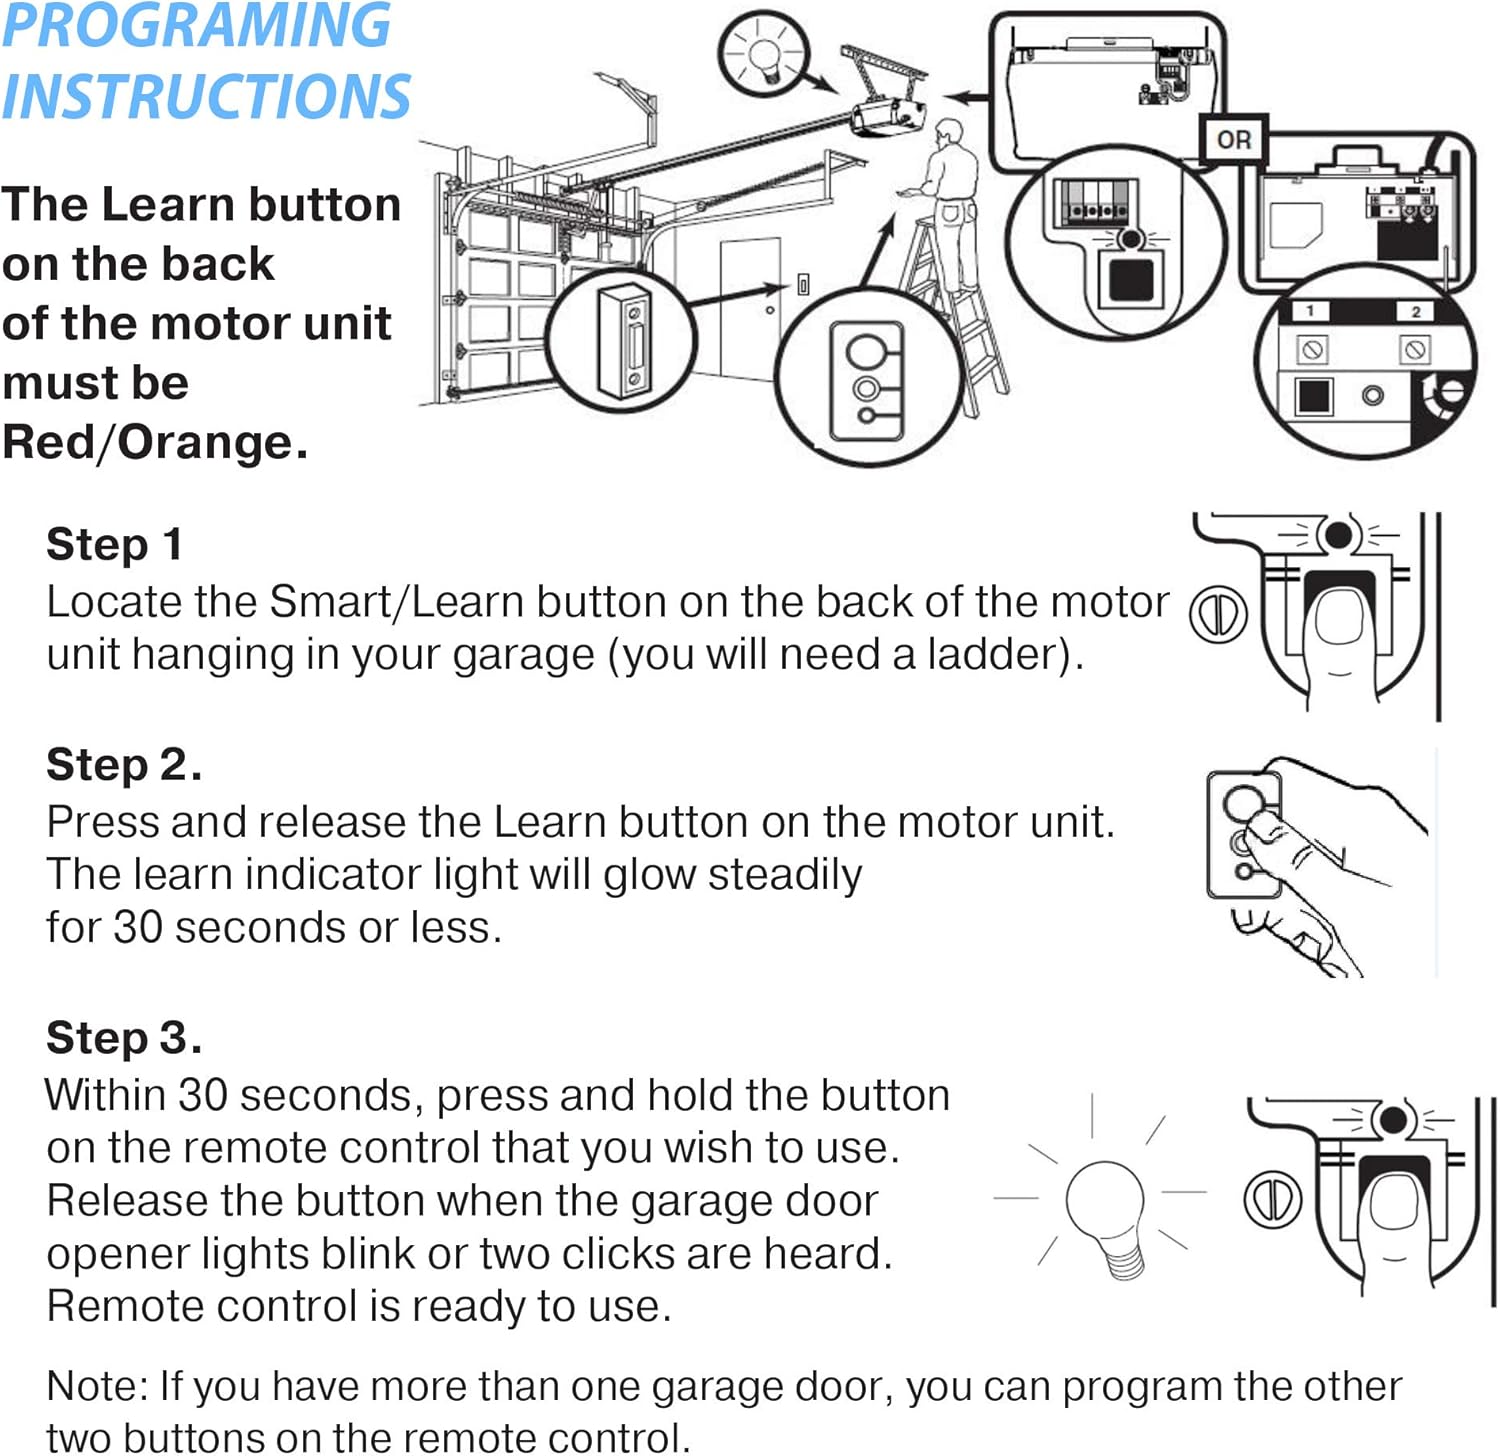
Follow these steps to program your CARMATOR remote control to your garage door opener. Ensure your garage door opener has a red or orange learn button.
- Locate the Learn Button: Find the Smart/Learn button on the back or side of the motor unit hanging in your garage. You may need a ladder to reach it. The learn button will be either red or orange.
- Activate Learn Mode: Press and immediately release the Learn button on the motor unit. The learn indicator light will glow steadily for approximately 30 seconds.
- Program the Remote: Within 30 seconds of activating learn mode, press and hold the button on the CARMATOR remote control that you wish to use to operate your garage door.
- Confirm Programming: Release the remote button when the garage door opener lights blink or two clicks are heard. This indicates successful programming.
- Test the Remote: Press the programmed button on your remote control to ensure it operates the garage door.
Note: If you have more than one garage door, you can program the other two buttons on the remote control to operate additional openers by repeating steps 1-4 for each opener.

This diagram visually guides you through the programming process, from locating the learn button on the motor unit to pressing the remote button for synchronization.
This video demonstrates the easy-to-follow programming instructions for the CARMATOR garage door opener remote. It shows how to locate the learn button on the garage door opener and synchronize it with the remote control.
Operating Instructions
Once programmed, operating your CARMATOR remote control is straightforward:
- Open/Close: Press the programmed button on the remote control once to open or close your garage door.
- Stop: If the door is in motion, press the programmed button again to stop the door.
- Reverse: If the door is stopped, pressing the button again will reverse its direction.
For optimal performance, ensure there is a clear line of sight between the remote and the garage door opener motor unit, although the remote is designed for a long sensing distance.

This image shows the CARMATOR 3-button remote control, designed for easy handling and attachment to a car visor using the included clip.

This image provides an angled view of the remote, emphasizing its three buttons and the 390 MHz operating frequency, compatible with red and orange learn button systems.
This image depicts a user holding the remote control, ready to operate a garage door, illustrating typical usage.
Maintenance
Battery Replacement
The remote control uses two CR2032 lithium batteries. When the remote's range decreases or it stops responding, it's time to replace the batteries.
- Open the Casing: Use a small coin or screwdriver to gently pry open the remote control casing.
- Remove Old Batteries: Carefully remove the old CR2032 batteries. Note their orientation.
- Insert New Batteries: Insert two new CR2032 batteries, ensuring the positive (+) side faces up.
- Close the Casing: Snap the remote control casing back together securely.
- Test: Test the remote to ensure it functions correctly.
Cleaning
Wipe the remote control with a soft, dry cloth. Avoid using harsh chemicals or abrasive cleaners.
Troubleshooting
| Problem | Possible Cause | Solution |
|---|---|---|
| Remote does not work after programming. |
|
|
| Remote range is poor. |
|
|
| Garage door opener lights blink but door does not move. | Safety sensors are obstructed or misaligned. | Check the safety sensors at the bottom of your garage door tracks. Clear any obstructions and ensure they are properly aligned. |
Specifications
- Model: HBW1255
- Frequency: 390 MHz
- Compatibility: Garage door openers with Red/Orange Learn Button (1997-2005 models)
- Battery Type: 2 x CR2032 Lithium (included)
- Dimensions: Approximately 2 x 7 x 8 inches (Note: These are likely package dimensions; actual remote is smaller)
- Weight: Approximately 1.76 ounces
- Included Components: Remote control, visor clip, batteries, instruction manual
Warranty and Support
For warranty information or technical support, please refer to the contact details provided with your purchase or visit the CARMATOR official website. Keep your purchase receipt for warranty claims.