1. Introduction
This manual provides detailed instructions for the assembly, operation, and maintenance of your Bracwiser MD7842 Dual Monitor Arm Stand. This stand is designed to securely hold two monitors, ranging from 13 to 27 inches in size and up to 22 lbs (10 kg) per arm, optimizing your workspace and improving ergonomic positioning.

Figure 1: Bracwiser MD7842 Dual Monitor Arm Stand in use.
2. Safety Information
- Read all instructions carefully before assembly and installation.
- Ensure your desk or mounting surface can support the combined weight of the stand and your monitors.
- Do not exceed the maximum weight capacity of 22 lbs (10 kg) per arm.
- Verify that your monitors are VESA compatible (75x75mm or 100x100mm).
- Tighten all screws and bolts securely. Periodically check for tightness.
- Keep children and pets away during assembly.
- Use appropriate tools as specified in the instructions.
3. Package Contents
Please check that all components are present and undamaged:
- 1 x Monitor Mount (main assembly)
- 1 x Mounting Hardware Kit (screws, washers, spacers, Allen keys)
- 1 x User Manual (this document)
4. Specifications
| Feature | Specification |
|---|---|
| Model | MD7842 |
| Mounting Type | Tabletop Mount (C-Clamp or Grommet) |
| Material | Alloy Steel |
| Compatible Screen Size | 13 - 27 inches (per monitor) |
| Maximum Load Capacity | 22 lbs (10 kg) per arm |
| VESA Compatibility | 75x75mm, 100x100mm |
| Movement Type | Rotate, Swivel, Tilt |
| Tilt Angle | ±80 degrees |
| Swivel Angle | ±90 degrees (3 joints) |
| Rotation | 360 degrees |
| Pole Height | 31.5 inches (800mm) |
5. Setup and Installation
Follow these steps to assemble and install your Bracwiser MD7842 monitor arm stand.
5.1. Desktop Compatibility
The stand supports two installation methods: C-Clamp and Grommet mount. Ensure your desk meets the following requirements:
- C-Clamp: Maximum desk thickness of 3.39 inches (86mm).
- Grommet Mount: Desk hole diameter greater than 1.65 inches (42mm).
- Suitable for wood desks. Not recommended for plastic or glass desks.
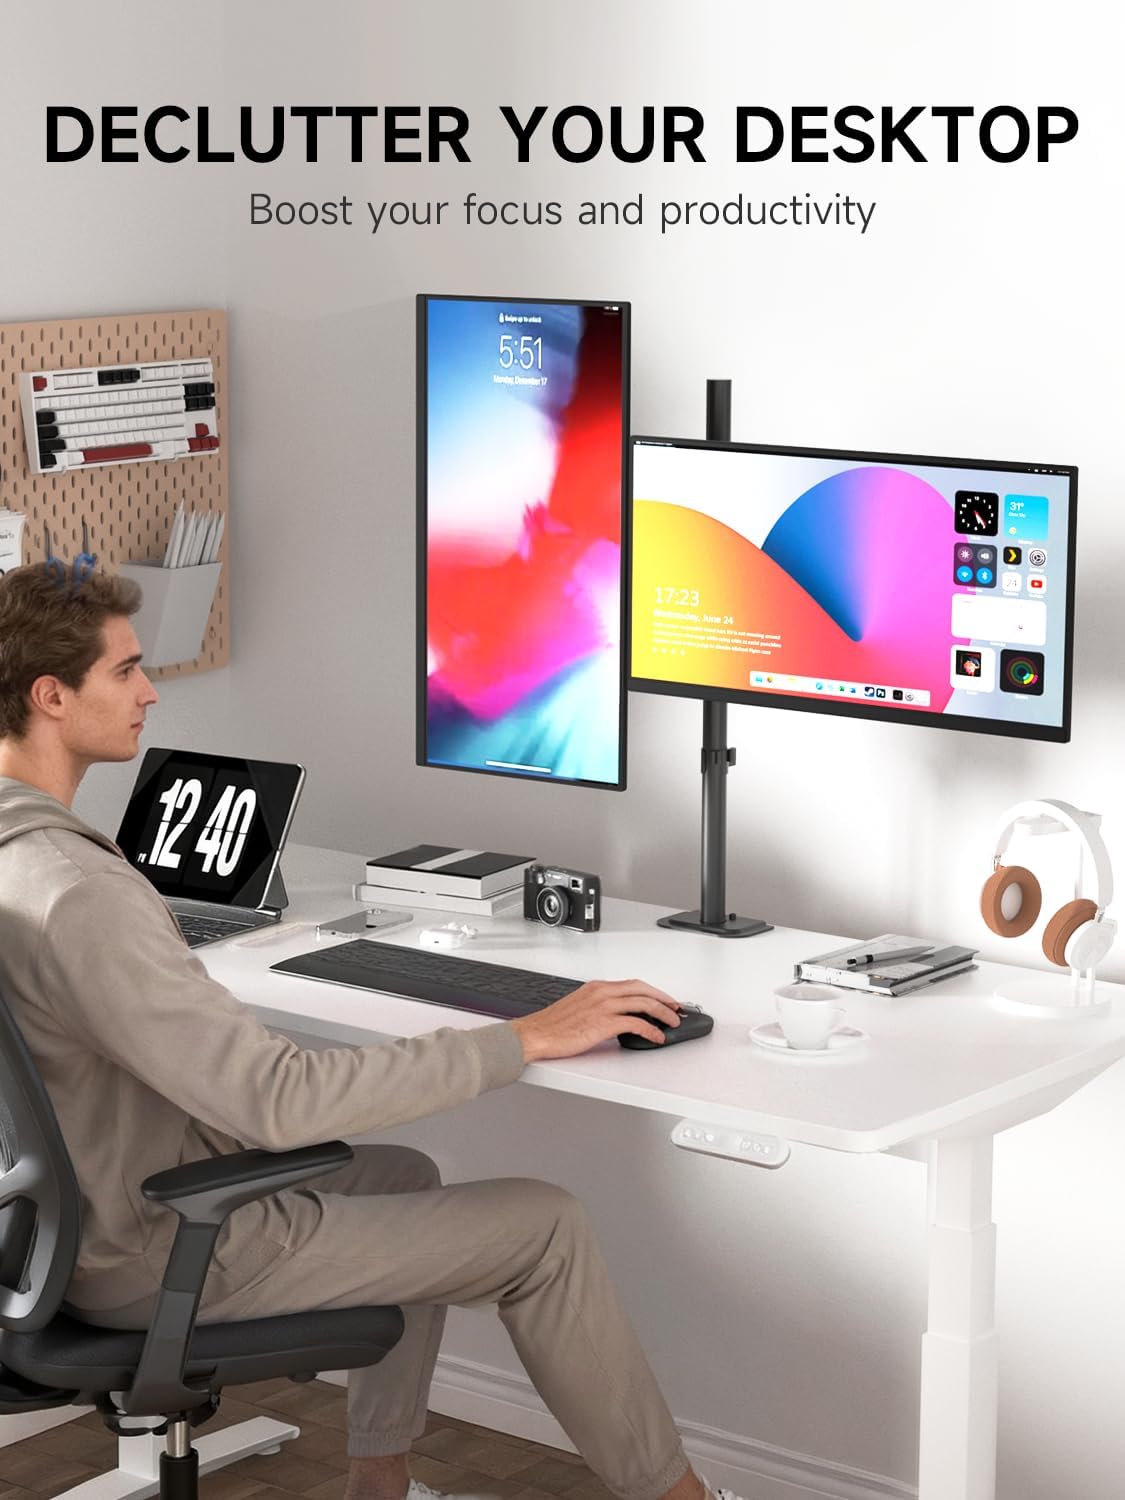
Figure 2: Desktop compatibility for C-Clamp and Grommet mounting.
5.2. VESA Compatibility
Before attaching your monitors, confirm they have VESA mounting holes of either 75x75mm or 100x100mm. If your monitor does not have VESA holes, a VESA adapter (not included) may be required.

Figure 3: Checking VESA pattern on your monitor.
5.3. Assembly Steps
For a visual guide, please refer to the assembly video below:
Video 1: Assembly instructions for the Bracwiser MD7842 Dual Monitor Stand.
- Install the Desk Clamp: Attach the C-clamp or grommet base to your desk. Ensure it is securely tightened to prevent movement.
- Assemble the Pole: Connect the two pole sections and tighten the bolt with the provided Allen key. Insert the assembled pole into the desk clamp.
- Attach Monitor Arms: Loosen the screws on the pipe clamps of the monitor arms. Slide the arms onto the pole at your desired height. Tighten the screws to secure the arms.
- Attach VESA Plates to Monitors: Secure the VESA plates to the back of your monitors using the appropriate screws from the hardware kit. Ensure all screws are tightened.
- Mount Monitors to Arms: Slide the monitors (with attached VESA plates) onto the monitor arms. Secure them by tightening the locking screws.

Figure 4: General installation overview.
6. Operating Instructions
The Bracwiser MD7842 offers extensive adjustability to achieve optimal viewing angles and ergonomic positioning.
6.1. Adjusting Monitor Position
Your monitor arm allows for the following adjustments:
- Height Adjustment: Loosen the screws on the pole clamp to slide the entire arm assembly up or down the 31.5-inch pole. Re-tighten securely.
- Tilt: Adjust the monitor vertically by tilting it up or down by ±80 degrees.
- Swivel: Pivot the monitor horizontally by ±90 degrees at three different joints along the arm.
- Rotation: Rotate the monitor 360 degrees to switch between landscape and portrait orientations.
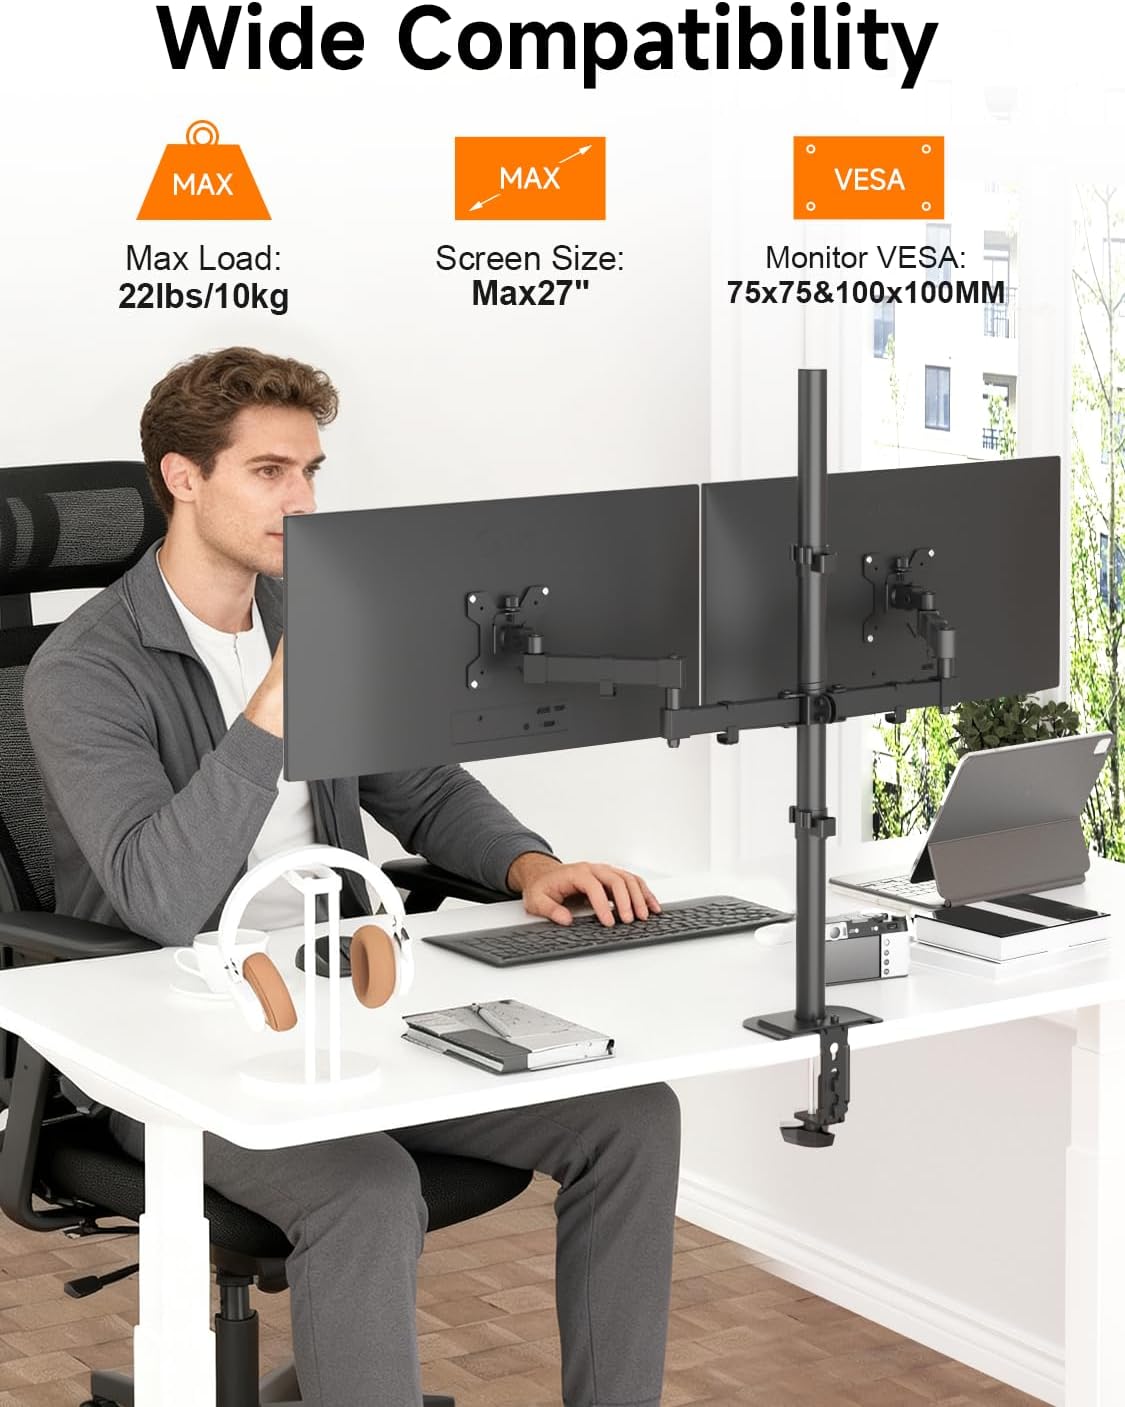
Figure 5: Full adjustability of the monitor arm.
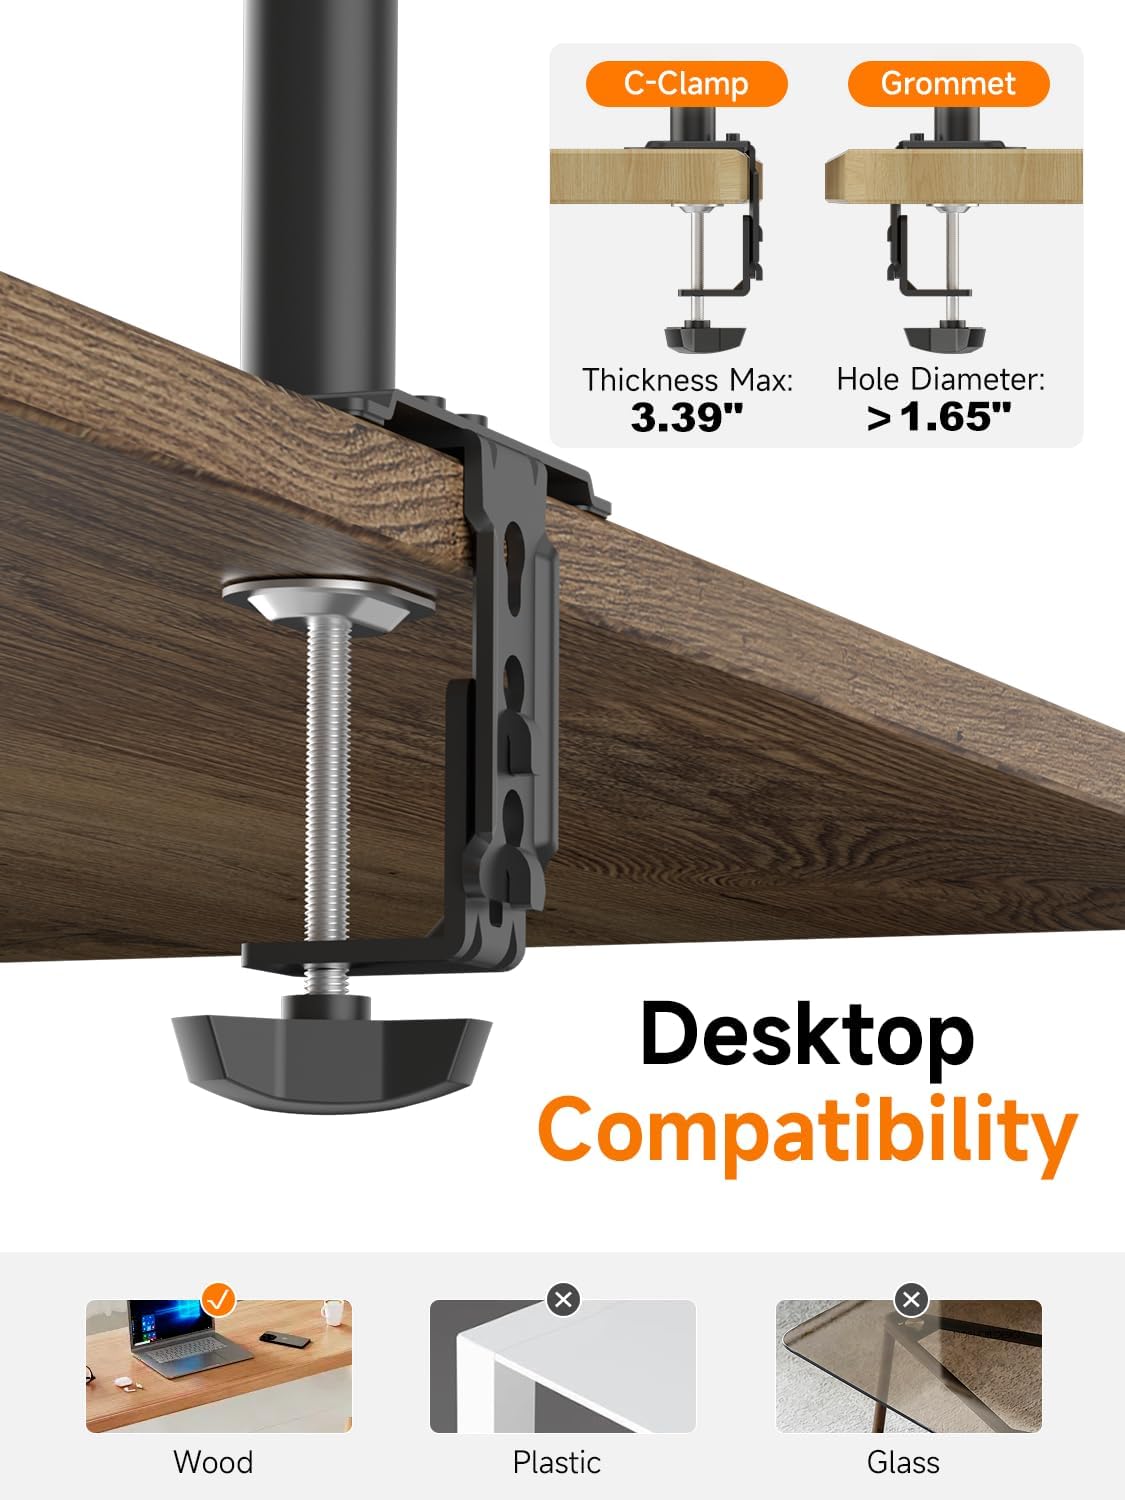
Figure 6: The 31.5-inch tall pole allows for flexible height adjustments.
For a visual demonstration of the stand's display capabilities and adjustments, please watch the video below:
Video 2: Demonstration of the Bracwiser MD7842 Dual Monitor Stand's display and adjustment features.
6.2. Ergonomic Benefits
Proper adjustment of your monitor height and angle can help reduce neck and eye strain, contributing to a healthier work posture.

Figure 7: Ergonomic monitor positioning to reduce neck pain.
7. Cable Management
The stand includes integrated cable clips on the pole and arms to help organize your monitor cables, creating a cleaner and more organized workspace. A storage slot for Allen keys is also provided on the pole for convenience.

Figure 8: Cable management and Allen key storage.
8. Maintenance
- Cleaning: Wipe the stand with a soft, damp cloth. Avoid abrasive cleaners or solvents.
- Tightness Check: Periodically check all screws and bolts to ensure they remain tight, especially after making adjustments or moving the stand.
- Lubrication: No lubrication is typically required for the moving parts.
9. Troubleshooting
- Monitors are not stable/sagging: Ensure all mounting screws and pole clamps are fully tightened. Verify that the monitor weight does not exceed the 22 lbs (10 kg) per arm capacity.
- Difficulty adjusting monitor angle: Loosen the head screw on the VESA plate attachment slightly to adjust the angle, then re-tighten appropriately.
- Stand is wobbly: Check that the desk clamp or grommet mount is securely fastened to the desk. Ensure the desk surface is stable.
- Monitors are not level: Adjust the height of each monitor arm individually on the pole, or fine-tune the tilt mechanism on the VESA plate.
10. Warranty and Support
For any product-related inquiries, technical support, or warranty information, please contact Bracwiser customer service through the retailer where the product was purchased or visit the official Bracwiser website. Protection plans may also be available for extended coverage.


