
1. Introduction
This manual provides essential instructions for the safe and efficient operation of your ACMOMO 12V/220V LCD 2CH HiFi Audio Stereo Amplifier. Please read this manual thoroughly before using the device and retain it for future reference.
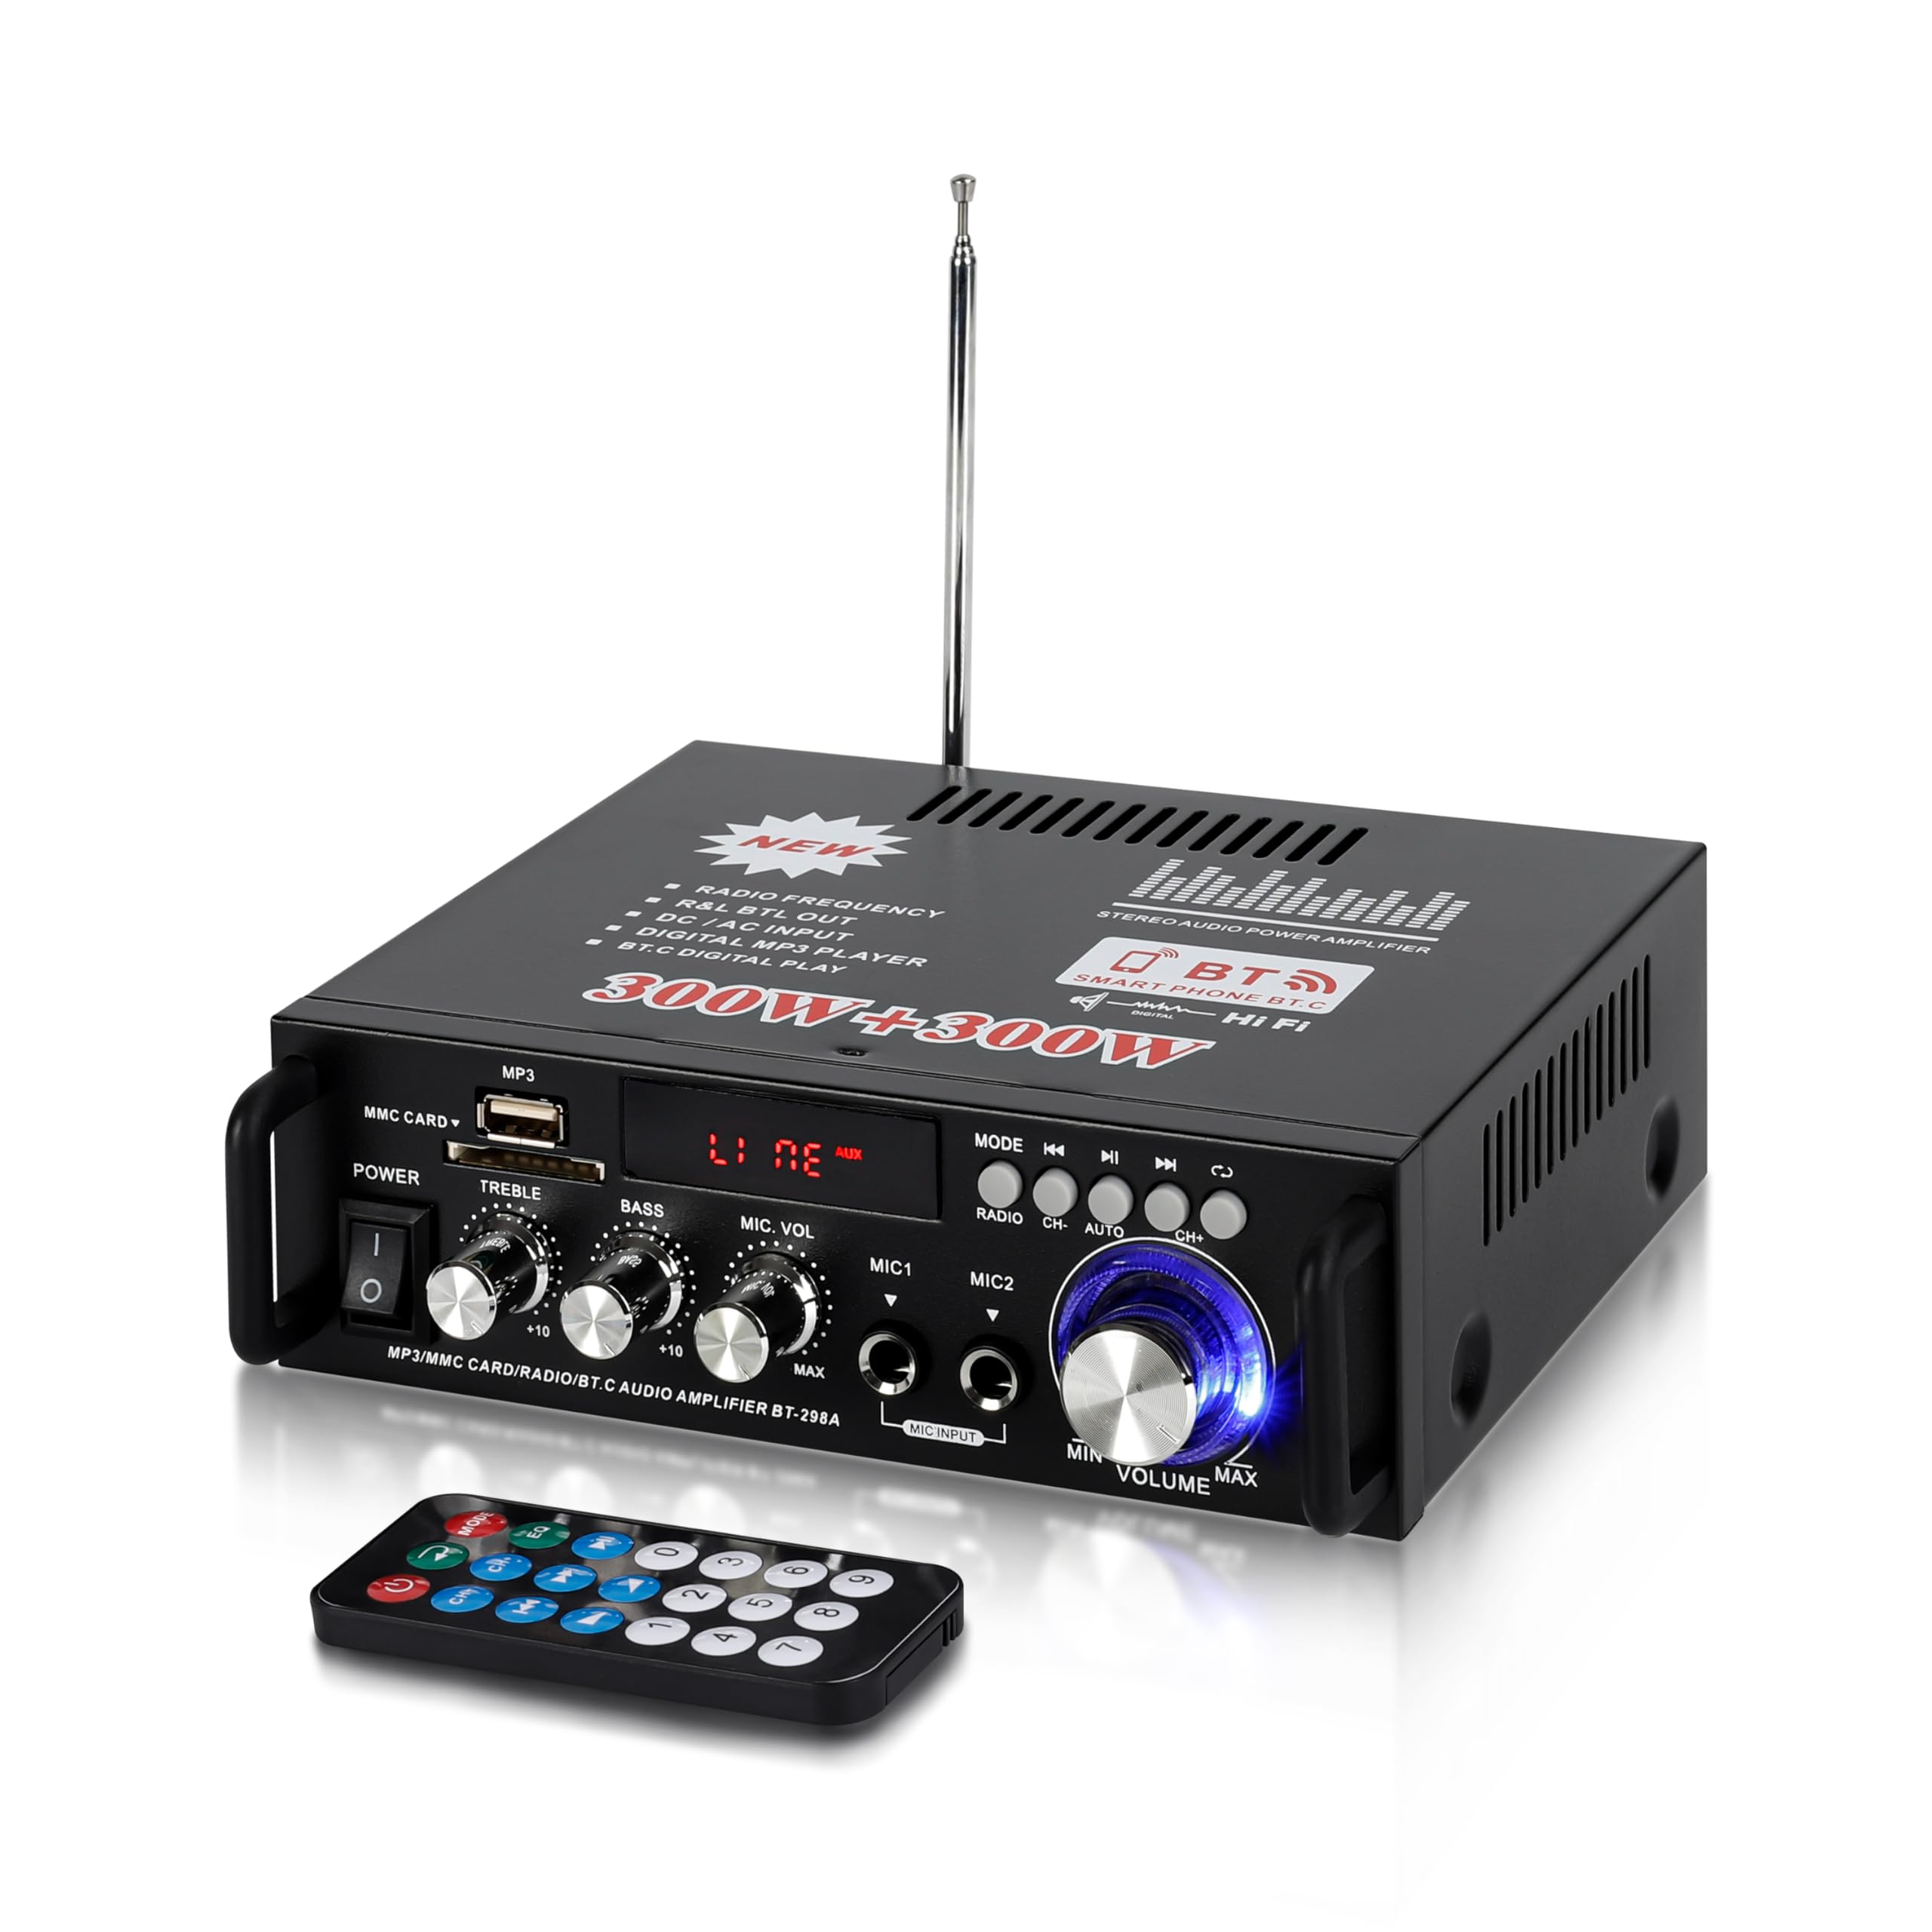
The ACMOMO audio amplifier is designed for both home and car use, offering versatile audio amplification in a compact form factor. This image shows the amplifier in a typical home setup.
2. Safety Instructions
- Ensure the power supply voltage matches the requirements specified on the amplifier.
- Do not expose the amplifier to rain, moisture, or extreme temperatures.
- Avoid placing the unit near heat sources or in direct sunlight.
- Do not open the amplifier casing. Refer all servicing to qualified personnel.
- Keep the unit away from children.
- Disconnect the power supply before making any connections or disconnections.
3. Package Contents
Verify that all items are present in the package:
- 1x ACMOMO Home/Car Audio Amplifier (EU plug)
- 1x Remote Control (batteries not included)
- 1x User Manual
4. Product Overview
The ACMOMO amplifier features a compact design with versatile connectivity options for various audio sources. It includes controls for volume, tone, and microphone inputs, along with an integrated LCD display.

This diagram illustrates the various controls and connection points on the amplifier. The front panel includes Power, Treble, Bass, Microphone Volume, Microphone Inputs (MIC1, MIC2), Main Volume, Mode selection, Playback controls, USB port, SD card slot, and an LCD display. The rear panel features Audio Input, Right Speaker output, Left Speaker output, 12V interface, 220V power cable input, and Radio Antenna connection.
Front Panel Controls:
- Power Switch: Turns the unit on/off.
- Treble Control: Adjusts high-frequency audio levels.
- Bass Control: Adjusts low-frequency audio levels.
- Microphone Volume: Controls the volume of connected microphones.
- MIC1/MIC2 Inputs: 6.35mm jack inputs for microphones.
- Main Volume: Adjusts the overall output volume.
- Mode Button: Switches between input sources (BT, USB, SD, FM, AUX).
- Playback Controls: Previous, Play/Pause, Next, Single Cycle.
- USB Port: For connecting USB flash drives.
- SD Card Slot: For inserting SD memory cards.
- LCD Display: Shows current mode, track information, and other status indicators.
Rear Panel Connections:
- Audio Input (RCA): For connecting external audio sources (e.g., CD player, TV).
- Speaker Outputs (L/R): For connecting passive speakers.
- 12V Interface: DC power input for car use.
- 220V Power Cable Input: AC power input for home use.
- Radio Antenna: For FM radio reception.
5. Setup
5.1 Power Connection
- For Home Use (220V): Connect the provided power cable to the 220V power input on the rear panel and then to a standard wall outlet.
- For Car Use (12V): Connect a 12V DC power source (e.g., car battery) to the 12V interface on the rear panel. Ensure correct polarity.
Caution: Do not connect both 12V and 220V power sources simultaneously.
5.2 Speaker Connection
- Connect your passive speakers to the Left and Right speaker output terminals on the rear panel.
- Ensure correct polarity (+ to + and - to -) for optimal sound quality.
- The amplifier supports speakers with an impedance of 4-16 ohms.
5.3 Audio Input Connection
- External Devices (AUX): Connect your audio source (e.g., CD player, DVD player, TV) to the RCA Audio Input jacks on the rear panel using an RCA cable.
- Microphones: Insert 6.35mm microphone jacks into the MIC1 or MIC2 inputs on the front panel.
6. Operating Instructions
6.1 Power On/Off
Press the Power switch on the front panel to turn the amplifier on or off.
6.2 Source Selection
Press the 'Mode' button on the front panel or the remote control to cycle through available input sources: Bluetooth (BT), USB, SD Card, FM Radio, and AUX.
6.3 Volume and Tone Adjustment
- Main Volume: Rotate the large 'Volume' knob on the front panel to adjust the overall sound level.
- Treble/Bass: Use the 'Treble' and 'Bass' knobs to fine-tune the high and low frequencies of the audio output.
- Microphone Volume: Adjust the 'MIC VOL' knob to control the volume of connected microphones.
6.4 Bluetooth Operation

The amplifier supports Bluetooth 5.0 for stable wireless audio streaming. This allows connection to smartphones, tablets, and other Bluetooth-enabled devices within a range of up to 10 meters (32 feet).
- Switch the amplifier to 'BT' mode using the 'Mode' button. The LCD display will show 'BLUE'.
- Enable Bluetooth on your smartphone, tablet, or other device.
- Search for available devices and select 'BT-AUDIO' (or similar name) to pair.
- Once paired, you can stream audio wirelessly to the amplifier.
6.5 USB/SD Card Playback
- Insert a USB flash drive into the USB port or an SD card into the SD card slot.
- The amplifier will automatically switch to USB/SD mode and begin playing MP3 files. If not, press the 'Mode' button to select the correct source.
- Use the 'Previous', 'Play/Pause', and 'Next' buttons to control playback.
6.6 FM Radio Operation
- Extend the radio antenna on the rear panel for better reception.
- Switch the amplifier to 'FM' mode using the 'Mode' button.
- Use the playback control buttons (e.g., 'Play/Pause' for auto-scan, 'Previous/Next' for manual tuning) to find and select radio stations.
6.7 Microphone Use (Karaoke)
- Connect one or two microphones to the MIC1 and MIC2 inputs.
- Adjust the 'MIC VOL' knob to control the microphone volume.
- You can play background music from any source (BT, USB, SD, AUX) while using the microphones.
7. Maintenance
- Clean the amplifier with a soft, dry cloth. Do not use liquid cleaners or aerosols.
- Ensure proper ventilation around the unit to prevent overheating.
- When not in use for extended periods, disconnect the power cable.
8. Troubleshooting
- No Power: Check if the power cable is securely connected and the power outlet is functional. Ensure the power switch is in the 'ON' position.
- No Sound: Verify that speakers are correctly connected and the volume is turned up. Check the selected input source and ensure the audio source is playing.
- Bluetooth Pairing Issues: Ensure the amplifier is in 'BT' mode and your device's Bluetooth is enabled and discoverable. Try restarting both devices.
- USB/SD Not Playing: Ensure the USB drive or SD card contains compatible audio files (MP3 format). Try reinserting the storage device.
- Poor FM Reception: Extend the antenna fully. Try repositioning the amplifier or antenna for better signal.
- Microphone Not Working: Ensure microphones are properly plugged into MIC1/MIC2 and the 'MIC VOL' knob is adjusted.
9. Specifications

The amplifier measures approximately 18 cm (7.08 inches) in length, 13.7 cm (5.35 inches) in width, and 5.5 cm (2.16 inches) in height, making it a compact unit suitable for various setups.
| Feature | Specification |
|---|---|
| Model Number | Jiayida ACMOMO SP01 |
| Rated Power | 80W + 80W |
| Peak Power | 300W + 300W |
| Standard Impedance | 4-16 ohms |
| Frequency Response | 20Hz - 20KHz (±3DB) |
| Signal-to-Noise Ratio | ≥ 90DB (A power) |
| Total Harmonic Distortion | ≤ 0.5% (normal working conditions) |
| Signal Input Sensitivity | 200MV (± 30MV) |
| MIC Input Sensitivity | 9MV (± 2MV) |
| Recording Level Output | ≈1V |
| Auxiliary Level Output | ≈1V |
| Voltage | 12V / 220V (optional) |
| Number of Channels | 2 |
| Package Dimensions | 19 x 18.8 x 6.6 cm; 1.19 kilograms |
| Manufacturer | Jiayida ACMOMO |
10. Warranty and Support
For warranty information or technical support, please refer to the documentation provided at the point of purchase or contact your retailer. Specific warranty terms may vary by region and retailer.