Introduction
This manual provides essential instructions for the safe and efficient operation, maintenance, and troubleshooting of your JADPES 1200W Portable Electric Clothes Dryer. Please read this manual thoroughly before using the appliance and retain it for future reference.
Important Safety Instructions
- Read all instructions before using the appliance.
- Do not operate the dryer with a damaged cord or plug. If the appliance is not working properly, has been dropped or damaged, contact customer support.
- Do not block air openings. Ensure proper ventilation during operation.
- Do not use this appliance near water or in excessively damp environments.
- Unplug the appliance from the outlet when not in use and before cleaning.
- This appliance is not intended for use by persons (including children) with reduced physical, sensory or mental capabilities, or lack of experience and knowledge, unless they have been given supervision or instruction concerning use of the appliance by a person responsible for their safety.
- Do not cover the air outlet during operation.
- The appliance features overheat protection: it will automatically stop heating if the temperature exceeds 70°C and restart after cooling. It will shut down if the temperature reaches 105°C.
Product Overview
Familiarize yourself with the components of your portable electric clothes dryer.

Figure 1: Front view of the JADPES Portable Electric Clothes Dryer. This image shows the compact design of the dryer, featuring a white and black casing with a central control dial and an air outlet on top.

Figure 2: Top-down view of the dryer, including the power cord. This image highlights the integrated power cord and the overall footprint of the device.

Figure 3: Bottom view of the dryer, showing the air intake grille. This view illustrates the ventilation design at the base of the unit.
Setup
- Unpacking: Carefully remove the dryer from its packaging. Retain packaging for storage or future transport.
- Placement: Place the dryer on a stable, flat, heat-resistant surface. Ensure there is adequate space around the unit for proper air circulation. Do not place it directly on carpets or soft surfaces that might block the bottom air intake.
- Power Connection: Plug the power cord into a standard 220V electrical outlet. Ensure the outlet matches the dryer's voltage requirements.
- Model Variation: Please note that new and old types of this product may be shipped randomly. Both types function identically.

Figure 4: Comparison showing the "New Type" and "Old Type" models of the dryer. The primary difference is the design of the power cord and plug, but functionality remains the same.
Operating Instructions
Drying Clothes
- Prepare Clothes: Ensure clothes are spin-dried to remove excess water before placing them near the dryer.
- Position Dryer: Place the dryer beneath or near clothes hung on a drying rack. Ensure the air outlet is directed towards the garments.
- Set Timer: Turn the control dial clockwise to set the desired drying time, up to 180 minutes. The dryer will begin operation.

Figure 5: Detailed view of the control dial, indicating time settings from 30 to 180 minutes, and an 'Off' position.
- Monitor Drying: Periodically check the clothes. Drying time will vary based on fabric type, load size, and humidity.
- Completion: The dryer will automatically shut off once the set time has elapsed. Turn the dial to the "OFF" position when finished.
Using as a Warmer
The appliance can also function as a warmer for small spaces or items like shoes.
- Position: Place the dryer in the desired area or near items to be warmed.
- Set Timer: Turn the control dial to the desired operating time.
- Safety: Ensure adequate ventilation and do not cover the air outlet.
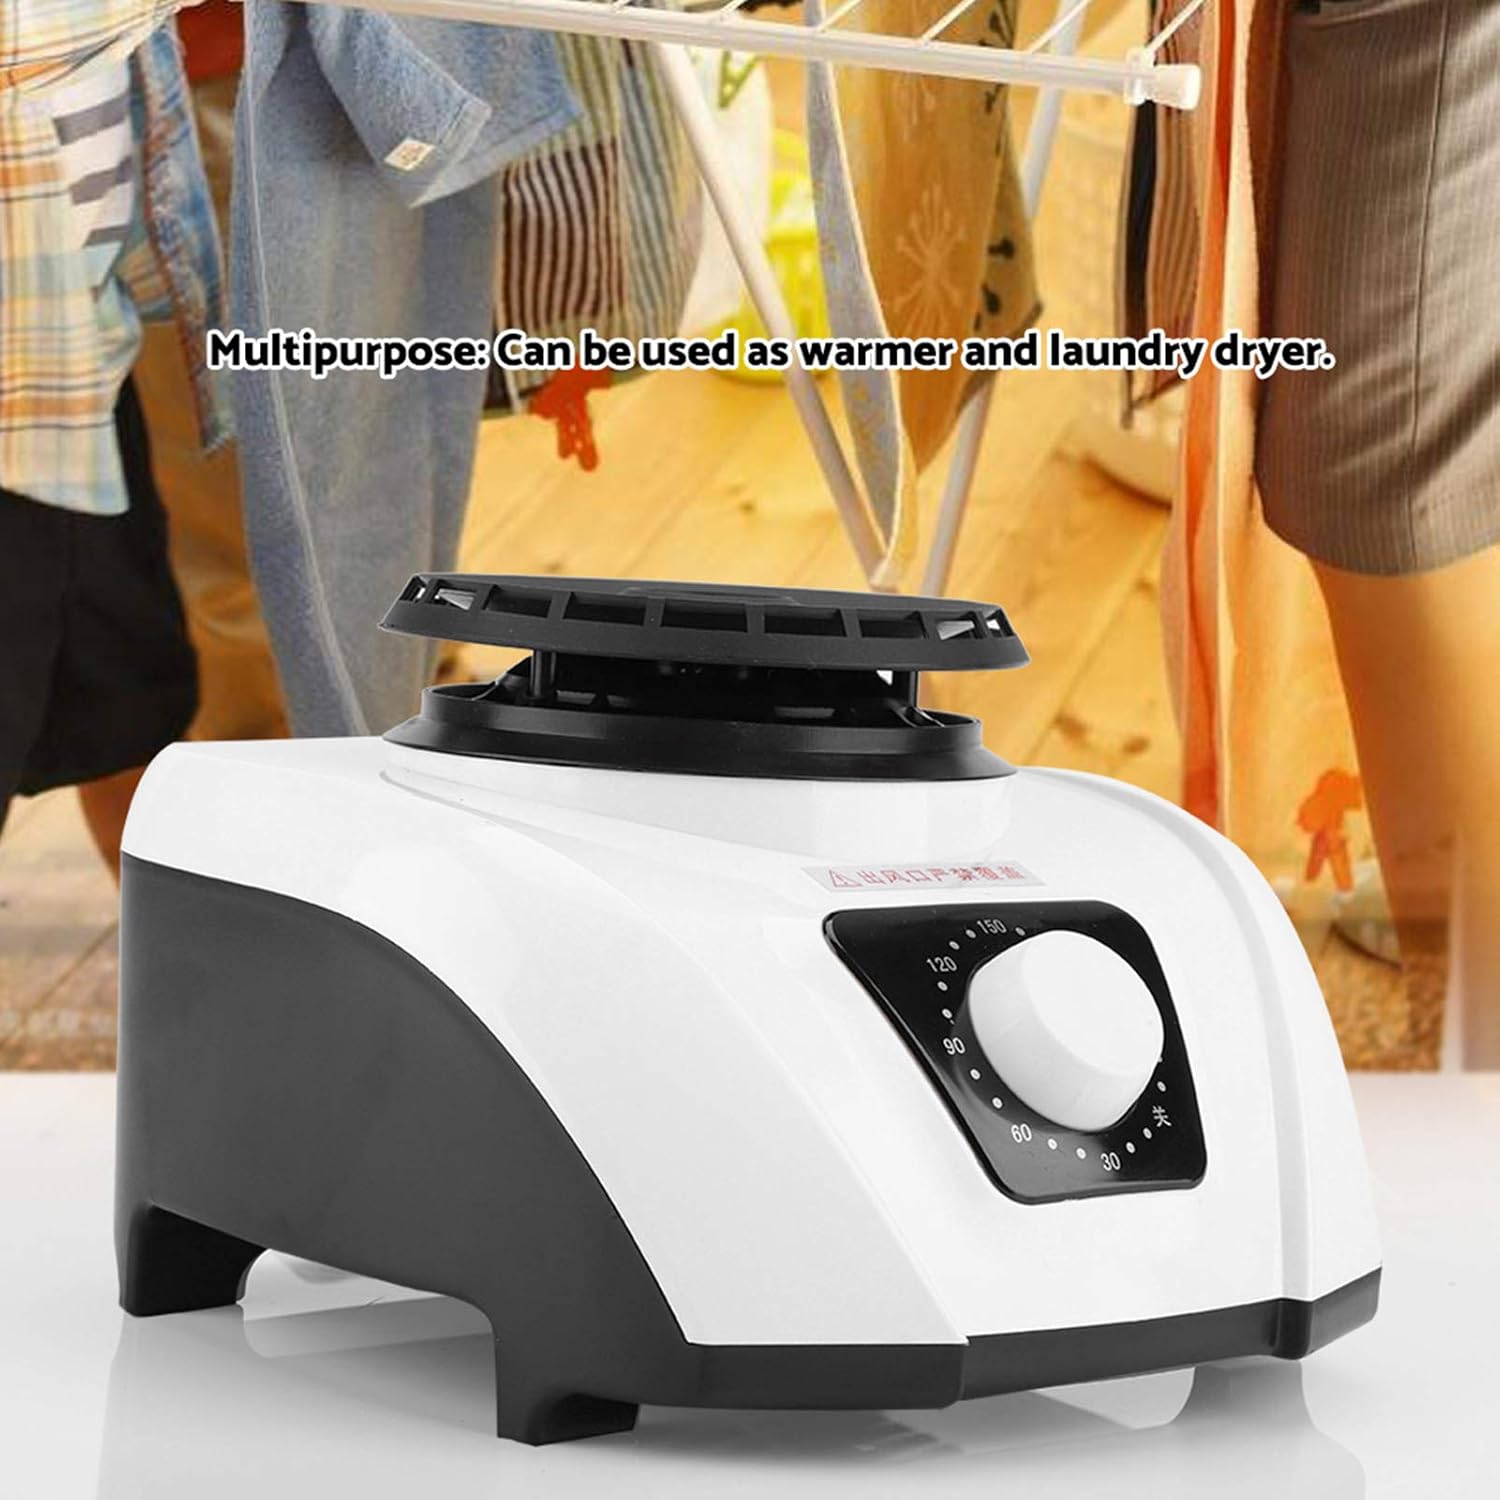
Figure 6: The dryer in use, demonstrating its multipurpose functionality as both a clothes dryer and a warmer. It is shown positioned under hanging clothes and also providing warmth in a living space.
Maintenance
- Cleaning: Before cleaning, ensure the dryer is unplugged and completely cool. Wipe the exterior with a soft, damp cloth. Do not use abrasive cleaners or immerse the unit in water.
- Air Intake/Outlet: Periodically check the air intake grille (bottom) and air outlet (top) for dust or lint accumulation. Gently clean with a soft brush or vacuum cleaner attachment.
- Storage: When not in use, store the dryer in a cool, dry place, away from direct sunlight and moisture.
Troubleshooting
| Problem | Possible Cause | Solution |
|---|---|---|
| Dryer does not turn on. | Not plugged in; power outlet issue; timer not set. | Ensure the power cord is securely plugged into a working 220V outlet. Turn the timer dial to a desired setting. |
| Dryer stops unexpectedly. | Overheat protection activated; timer expired. | Allow the unit to cool down. Ensure air intake/outlet are not blocked. Check if the set timer has run out. |
| Insufficient drying performance. | Clothes too wet; room humidity too high; air circulation blocked. | Ensure clothes are thoroughly spin-dried. Improve room ventilation. Ensure the dryer's air intake and outlet are clear. Increase drying time. |
Specifications
| Feature | Detail |
|---|---|
| Brand | JADPES |
| Model Number | Jadpestd8x7i012u |
| Power | 1200W |
| Voltage | 220V (Chinese plug) |
| Material | PPS |
| Color | White |
| Timer | Up to 180 minutes |
| Dimensions (Approx.) | 21 x 18 cm (8.3 x 7.1 inches) |
| Item Weight | 1.79 pounds |
| Overheat Protection | Automatic stop at 70°C, restart after cooling; shut down at 105°C. |

Figure 7: Image illustrating the approximate dimensions of the dryer: 21cm (8.27in) in length and 18cm (7.1in) in width.
Warranty and Support
Specific warranty details are not provided in this manual. For warranty information, technical support, or service inquiries, please refer to the documentation included with your purchase or contact the retailer/manufacturer directly.