
1. Introduction
Thank you for purchasing the VILUXY Industrial 3-Light Semi Flush Mount Ceiling Light. This manual provides essential information for the safe installation, operation, and maintenance of your new lighting fixture. Please read these instructions thoroughly before beginning installation and retain them for future reference.
2. Safety Information
- WARNING: To avoid electric shock, ensure power is turned off at the circuit breaker or fuse box before installation or servicing.
- All wiring must be in accordance with national and local electrical codes. If you are unsure about wiring, consult a qualified electrician.
- Use only bulbs of the specified type and wattage (3 x 60W MAX E26 Bulb, not included).
- Do not exceed the maximum wattage.
- This fixture is designed for indoor use only.
- Handle glass components with care to prevent breakage.
- Keep flammable materials away from the light fixture when in operation.
3. Package Contents
Verify that all components are present before beginning installation.
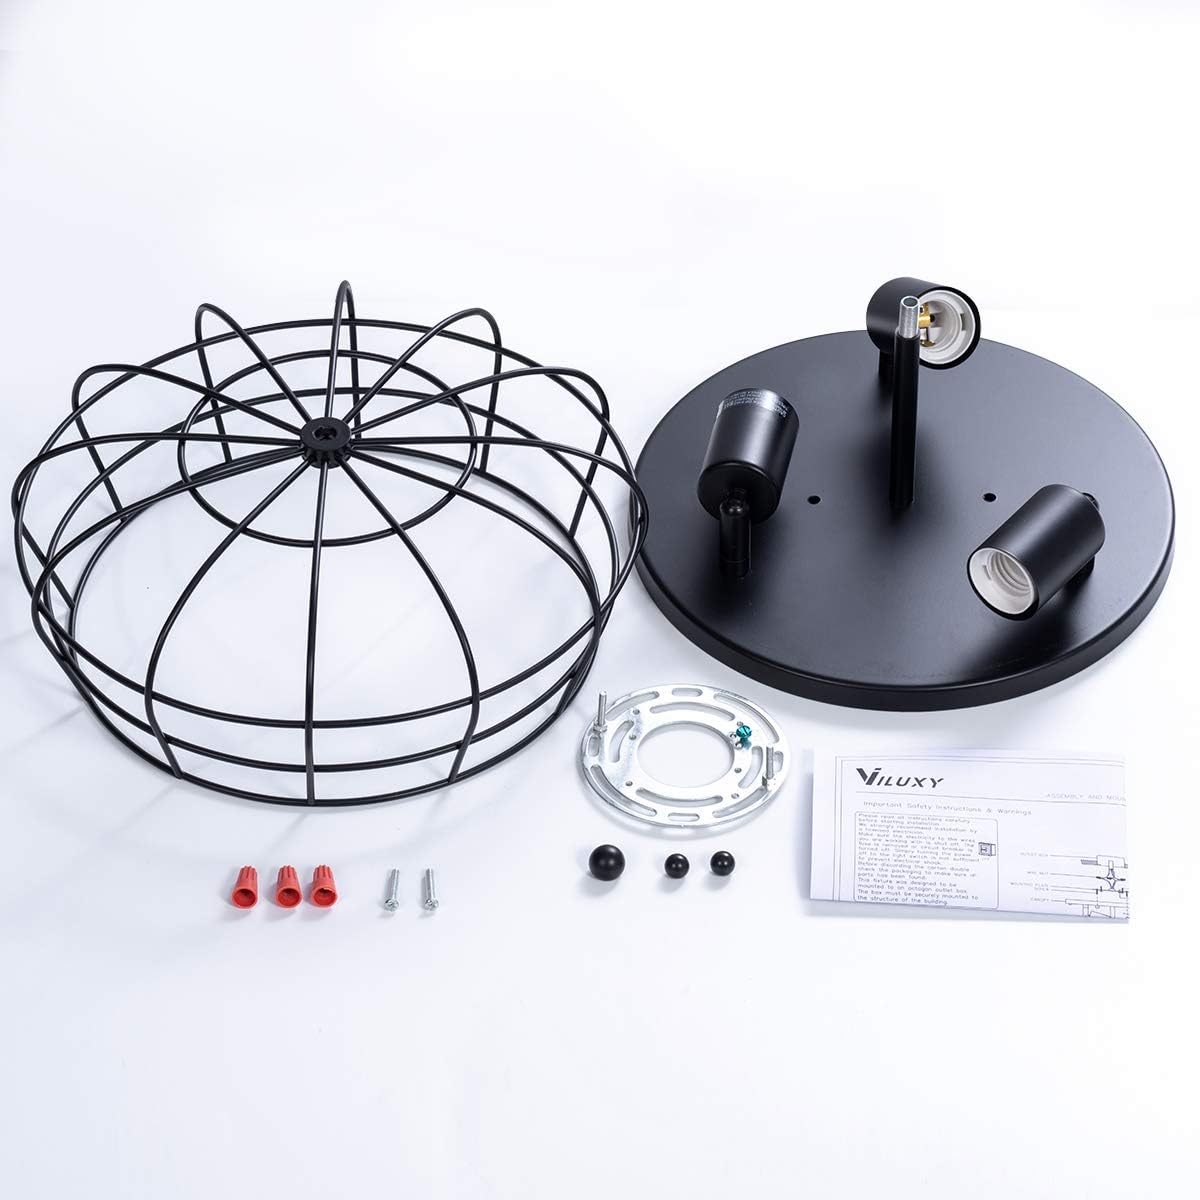
Image: All components included in the package, such as the mounting plate, wire nuts, screws, light base, metal cage, and instruction manual.
- Mounting Plate
- Wire Nuts
- Mounting Screws
- Light Fixture Base with Sockets
- Metal Cage Lampshade
- Decorative Nuts
- Instruction Manual
4. Specifications
| Feature | Detail |
|---|---|
| Model Number | HU-XI-201 |
| Brand | VILUXY |
| Dimensions | 12.57"L x 12.57"W x 6.02"H |
| Material | Metal |
| Color | Black |
| Style | Industrial |
| Light Source Type | Incandescent, Halogen, LED, Compact Fluorescent |
| Bulb Base | E26 |
| Number of Lights | 3 |
| Max Wattage per Bulb | 60W |
| Voltage | 110 Volts |
| Special Feature | Dimmable (dimmer switch sold separately) |
| Installation Type | Flush Mount |
| Indoor/Outdoor Usage | Indoor |

Image: Diagram showing the dimensions of the VILUXY HU-XI-201 ceiling light fixture, including a diameter of 12.57 inches and a height of 6.02 inches.
5. Installation Instructions
Tools Required (Not Included): Screwdriver, Wire Strippers, Electrical Tape, Ladder, Safety Glasses.
- Turn Off Power: Before starting, ensure the power to the junction box is turned off at the circuit breaker or fuse box.
- Prepare Mounting Plate: Attach the mounting plate to the junction box using the provided screws. Ensure it is securely fastened.
- Connect Wires:
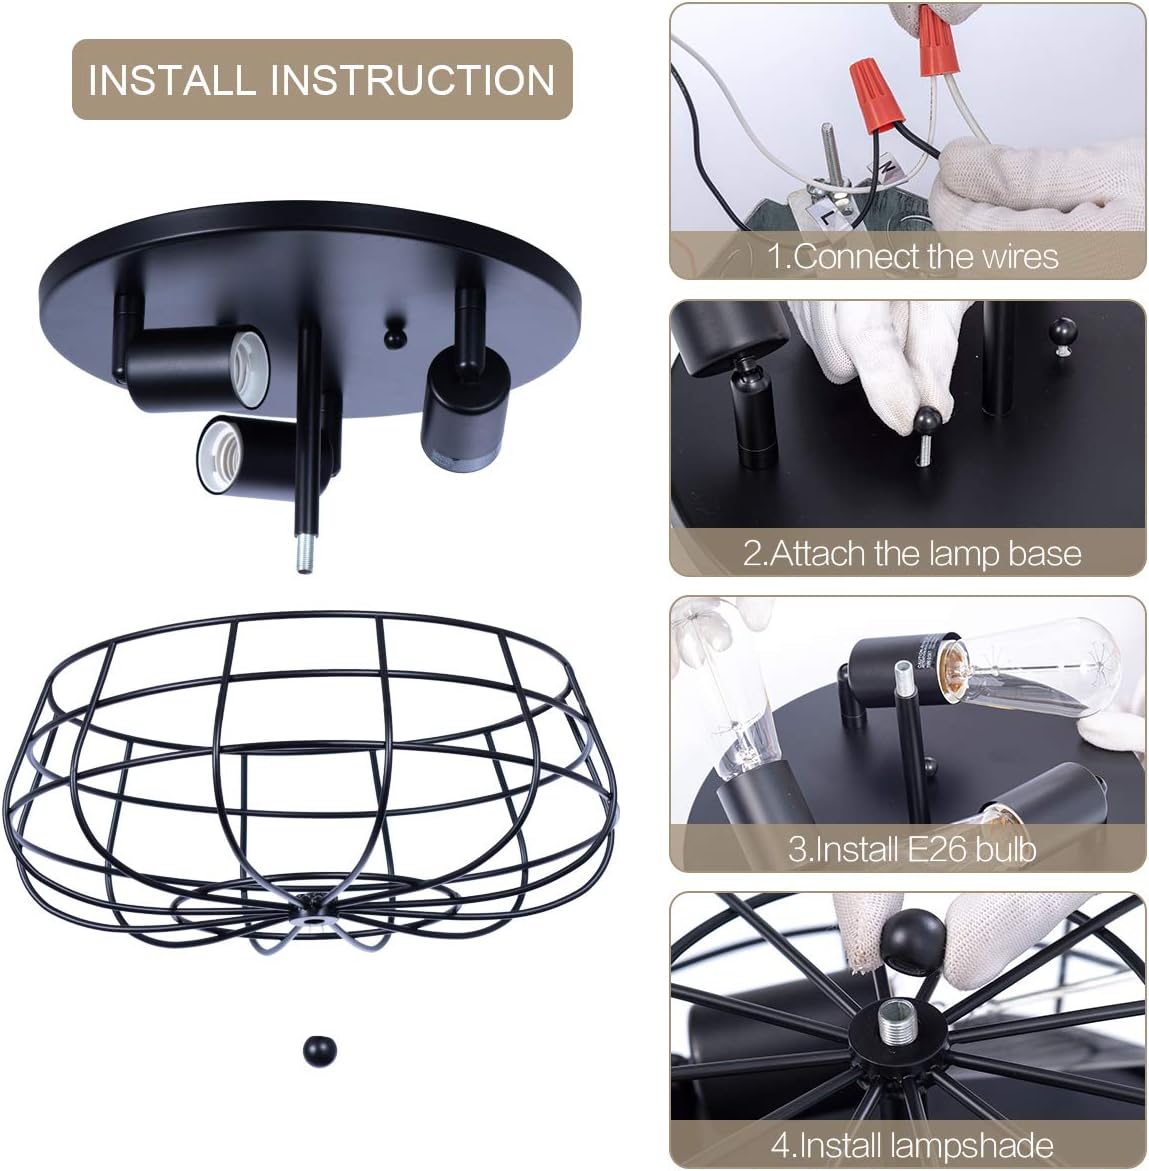
Image: A hand connecting electrical wires using wire nuts, illustrating the first step of the installation process.
- Connect the black wire from the fixture to the black wire (Live) from the junction box.
- Connect the white wire from the fixture to the white wire (Neutral) from the junction box.
- Connect the ground wire from the fixture to the ground wire from the junction box.
- Secure all connections with wire nuts and electrical tape.
- Attach Lamp Base:Carefully tuck the wires into the junction box. Align the holes on the fixture base with the screws on the mounting plate and secure with the provided decorative nuts.
Image: A hand securing the light fixture base to the ceiling mounting plate with screws, showing the second step of installation.
- Install Bulbs:Screw three E26 base bulbs (not included) into the sockets. Ensure they are tightened securely.
Image: A hand screwing an E26 bulb into one of the light sockets on the fixture base, demonstrating the third step of installation.
- Install Lampshade:Attach the metal cage lampshade to the fixture base using the small decorative nuts.
Image: A hand attaching the metal cage lampshade to the light fixture base, completing the final step of assembly.
- Restore Power: Turn the power back on at the circuit breaker.
6. Operating Instructions
This VILUXY ceiling light is operated via a standard wall switch (not included). For dimming functionality, install a compatible dimmer switch (sold separately) and use dimmable E26 bulbs.
- Turning On/Off: Use the wall switch connected to the fixture to turn the light on or off.
- Dimming (Optional): If a dimmer switch is installed, rotate or slide the dimmer control to adjust the light intensity.
7. Maintenance
- Cleaning: Always turn off the power before cleaning. Wipe the fixture with a soft, dry cloth. Do not use abrasive cleaners or solvents as they may damage the finish.
- Bulb Replacement:
- Turn off power to the fixture.
- The upgraded version of this fixture features a removable design at the bottom of the cage, allowing for easier bulb replacement without fully disassembling the cage.
- Unscrew the old bulb and replace it with a new E26 bulb (max 60W).
- Ensure the new bulb is securely tightened.
- Restore power.
8. Troubleshooting
| Problem | Possible Cause | Solution |
|---|---|---|
| Light does not turn on. |
|
|
| Light flickers. |
|
|
| Fixture hums. |
|
|
9. Warranty and Support
VILUXY products are designed for quality and durability. For warranty information or technical support, please contact VILUXY customer service through the retailer where the product was purchased or visit the official VILUXY website.
Contact Information: Refer to your purchase documentation or the VILUXY brand store on Amazon for the most current support details.
10. Product Applications
The VILUXY HU-XI-201 Industrial 3-Light Semi Flush Mount Ceiling Light is versatile and suitable for various indoor environments, adding a modern industrial and vintage aesthetic.
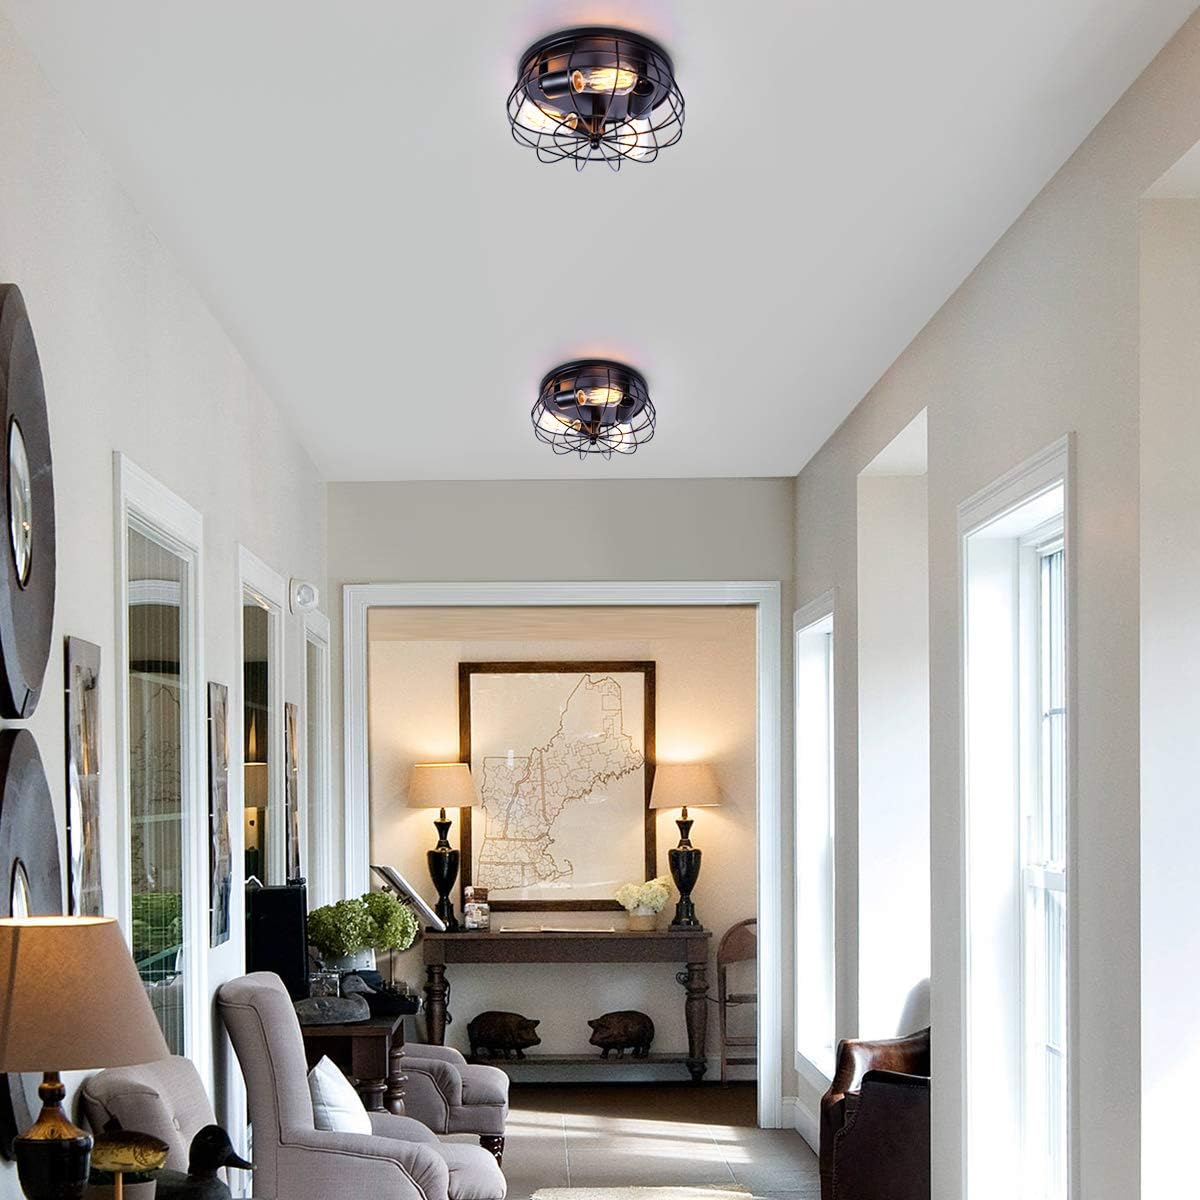
Image: The VILUXY ceiling light illuminating a modern hallway, showcasing its suitability for transitional spaces.

Image: The VILUXY ceiling light providing ambient lighting in a contemporary kitchen with white cabinetry and a dark island.

Image: The VILUXY ceiling light mounted in a bedroom with a dark accent wall and wooden bed frame, complementing the decor.

Image: The VILUXY ceiling light enhancing the ambiance of a cozy living room or home office space with armchairs and bookshelves.