1. Safety Instructions
Please read all instructions carefully before using the Mueller Ultra-Grind Conical Burr Grinder. Retain this manual for future reference.
- Keep out of the reach of children.
- Use the appliance only as directed in this manual.
- Do not immerse the motor base in water or any other liquid.
- Ensure the appliance is unplugged before cleaning or when not in use.
- Avoid contact with moving parts.
- Do not operate the grinder with a damaged cord or plug, or after the appliance malfunctions or has been damaged in any manner.
- This grinder is equipped with an overheat protection feature. If the grinder is used for 3 minutes continuously, it will enter a sleep mode for the next 30 minutes to prevent heating up. During this time, the Start/Stop button will flash, and the grinder will not be operable. Allow it to cool down before resuming use.
- It is suggested to operate this appliance for less than 90 seconds per cycle, with a minimum of 90 seconds rest time between each cycle.
2. Product Overview & Features
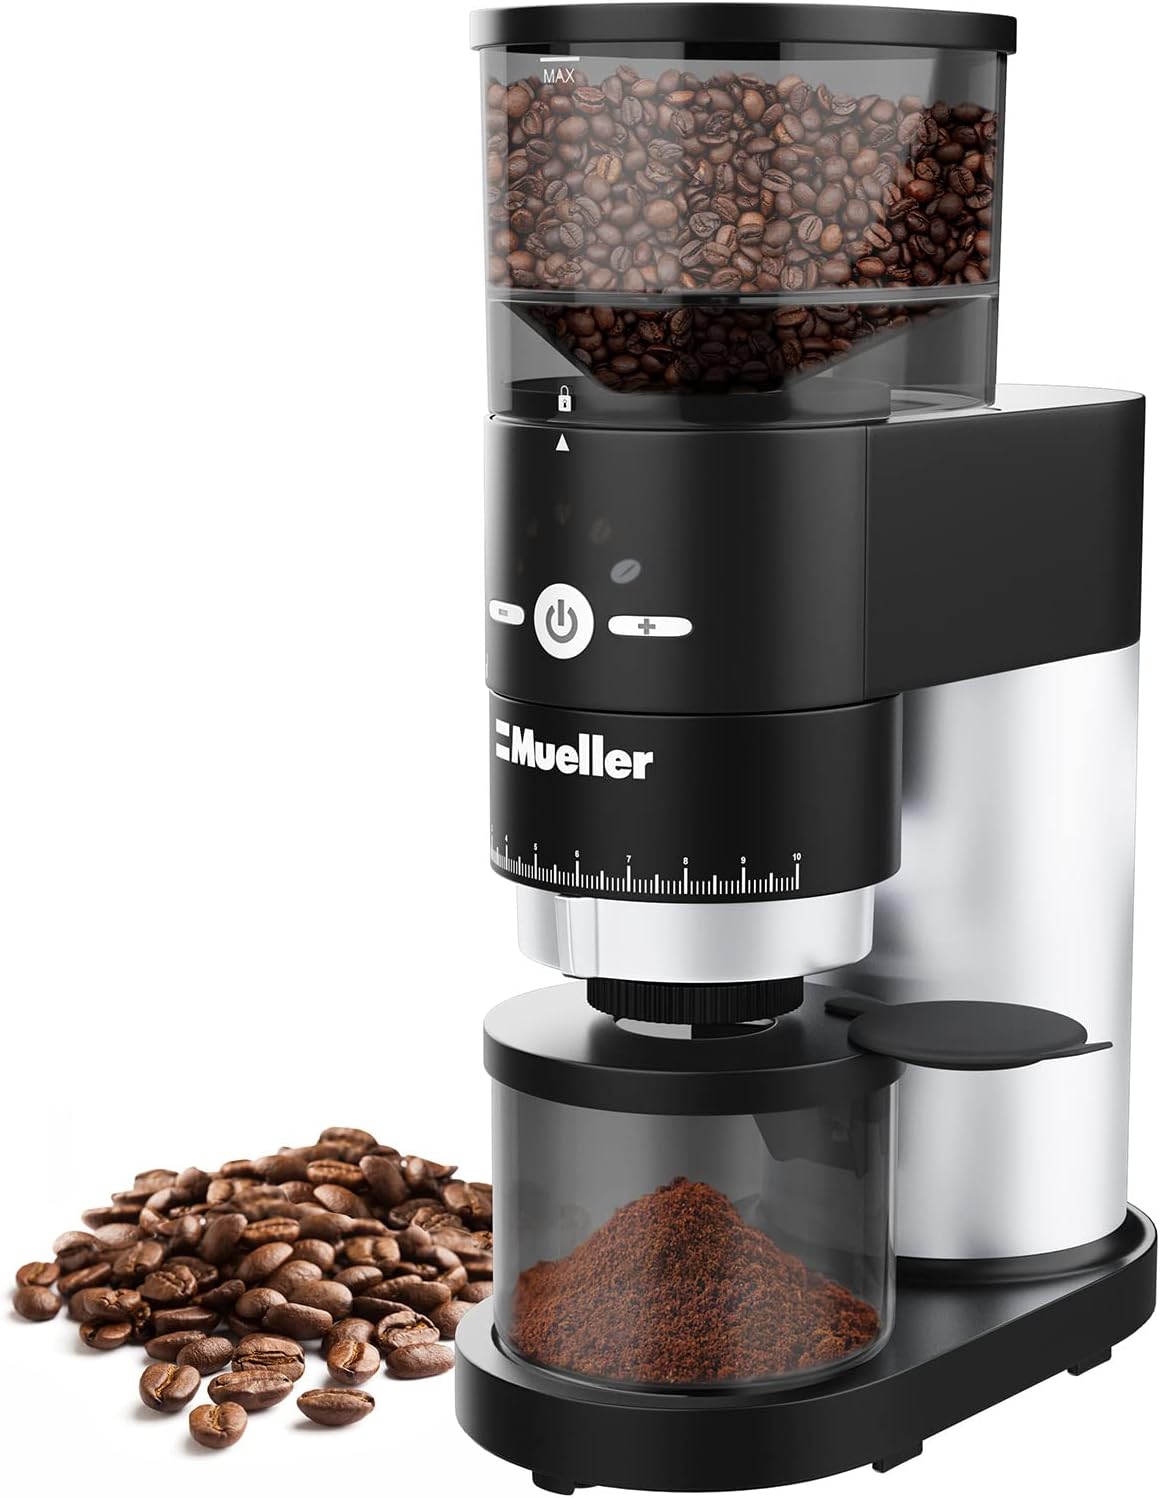
The Mueller Ultra-Grind Conical Burr Grinder is designed to provide precise and uniform coffee grinding for optimal flavor extraction.
- Highest Quality: Features a hardened alloy steel conical burr for precise grind size control and uniform grinding.
- Large Capacity: Coffee bean hopper and removable grounds container can produce 30-32 cups of coffee.
- Precision Grinding: Gear reduction motor grinds slowly with reduced noise, preserving coffee flavor.
- Easy to Clean: Removable top burr and detachable PowderBlock grinding chamber for effortless cleaning.
- One Button Touch Operation: On/Off button with auto-stop at the end of the grinding cycle.
3. Components
Your Mueller Ultra-Grind Conical Burr Grinder comes with the following components:
- Main Grinder Unit (with bean hopper and control panel)
- Grounds Container (removable)
- Lid for Grounds Container
- Cleaning Brush
- Coffee Scoop
- Funnel Bracket (for direct grinding into portafilter)
4. Setup
- Unpack all components and remove any packaging materials.
- Place the main grinder unit on a stable, flat, and dry surface.
- Ensure the grounds container is properly seated in its designated slot at the base of the grinder.
- Plug the power cord into a standard electrical outlet.
5. Operating Instructions
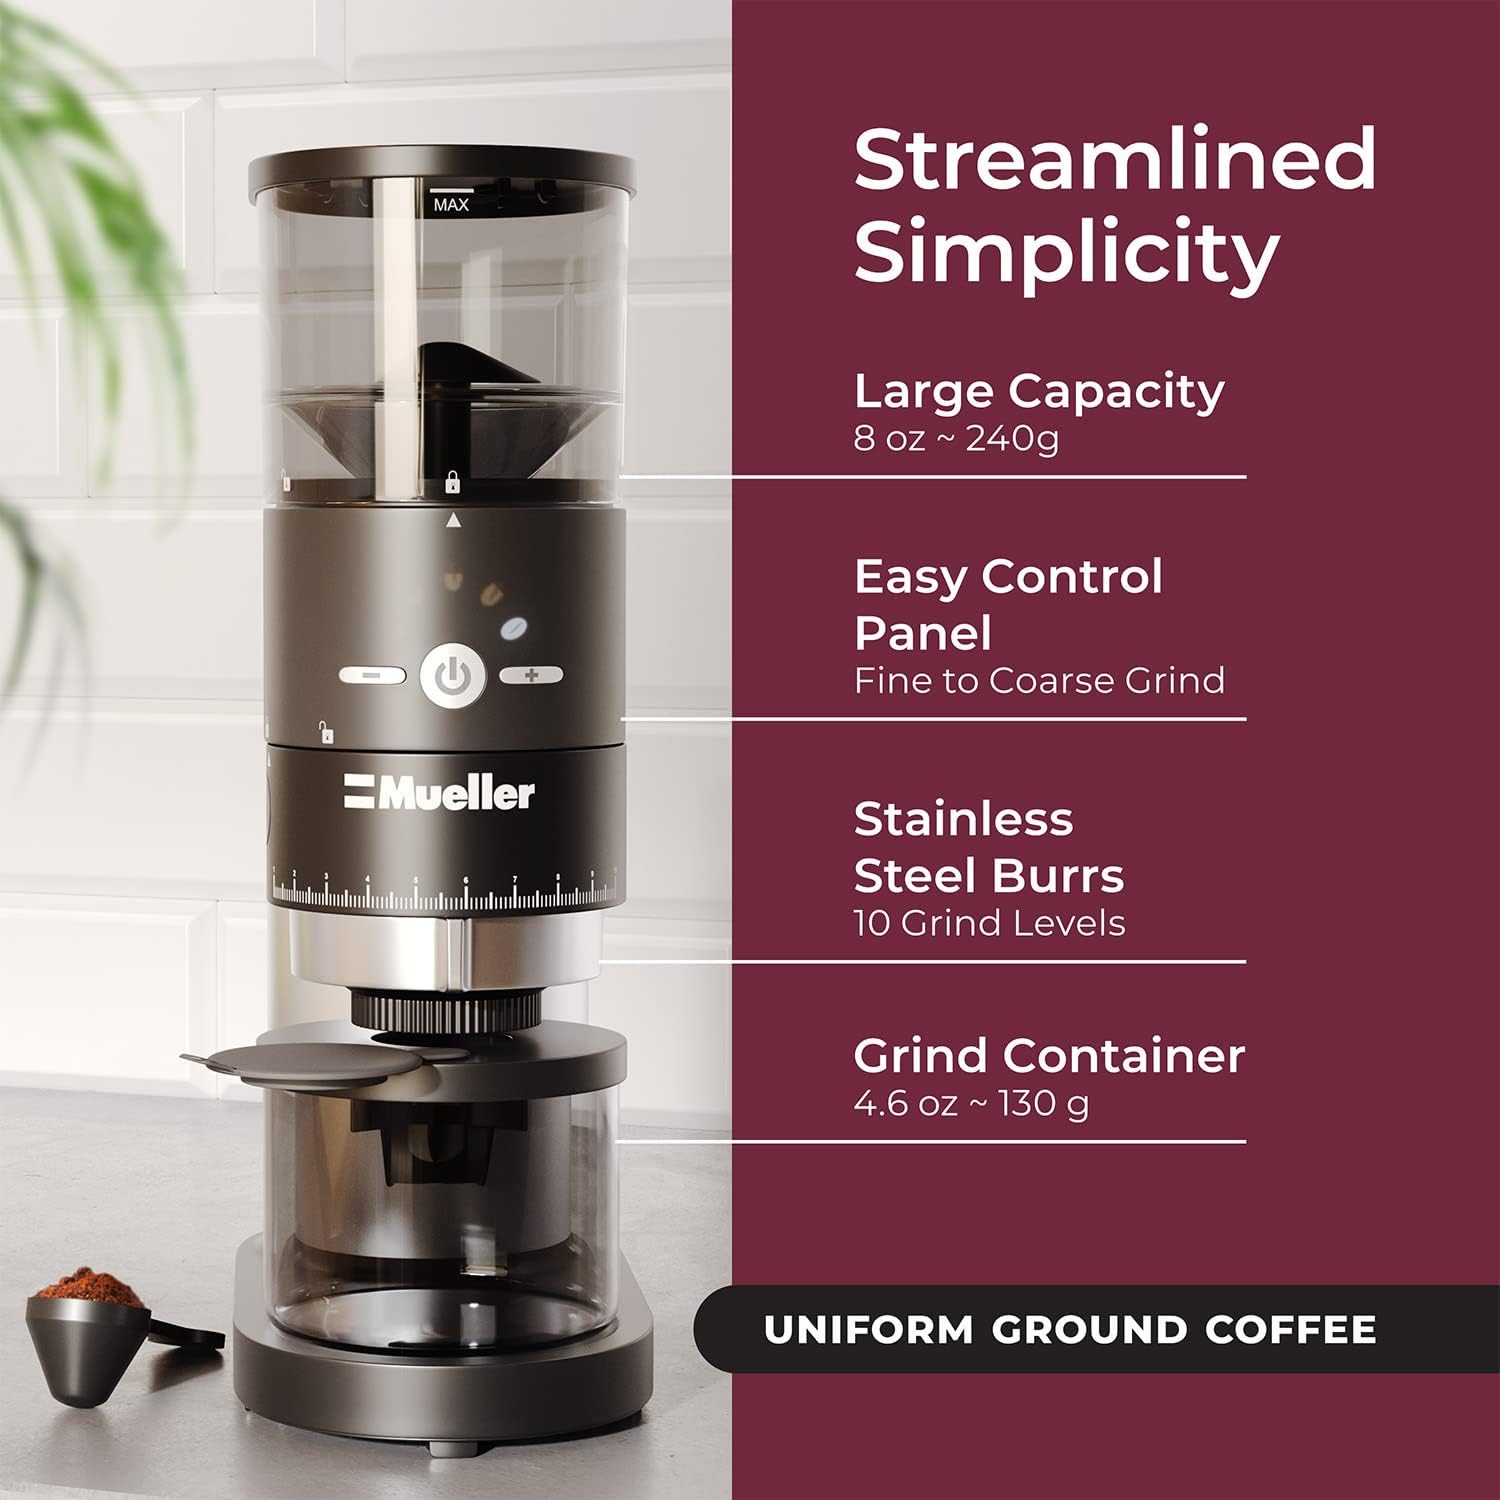
- Fill the Bean Hopper: Open the lid of the bean hopper and pour in your desired amount of whole coffee beans. Do not exceed the 'MAX' fill line. Close the lid securely.
- Select Grind Size: Rotate the grind control dial located below the control panel to your desired setting. The dial offers 10 levels, from 'Fine' (1) to 'Coarse' (10). Refer to the table below for recommended settings.
- Adjust Grinding Quantity: Use the '+' and '-' buttons on the control panel to select the desired grinding time, which corresponds to the amount of coffee to be ground (e.g., 8, 10, 12 cups). The selected quantity will be indicated by illuminated coffee bean icons.
- Start Grinding: Press the power button (center button) to begin grinding. The grinder will automatically stop once the selected quantity has been ground.
- Manual Grinding (for Espresso): For direct grinding into an espresso portafilter, attach the funnel bracket to the grinder's base. Place your portafilter under the spout. Press and hold the power button to manually grind. Release the button to stop.


Recommended Grind Settings:
| Grind Type | Levels | Brewing Method |
|---|---|---|
| Fine Grind | 1-3 | Espresso, Turkish Coffee |
| Medium Grind | 4-7 | Drip Coffee, Siphon, Percolator |
| Coarse Grind | 8-10 | French Press |
6. Cleaning and Maintenance
Regular cleaning ensures optimal performance and extends the life of your grinder.
- Unplug the Appliance: Always ensure the grinder is unplugged from the power outlet before cleaning.
- Remove Grounds Container: Slide out the grounds container from the base. Empty any remaining ground coffee.
- Remove Top Burr: Unlock the top burr by rotating it counter-clockwise (indicated by the unlock icon) and lift it out.
- Clean Components: Use the included cleaning brush to remove any coffee grounds from the top burr, the grinding chamber, and the grounds container. The detachable PowderBlock grinding chamber can be easily removed for thorough cleaning.
- Wipe Exterior: Wipe the exterior of the main unit with a damp cloth. Do not use abrasive cleaners or immerse the unit in water.
- Reassemble: Once all parts are clean and dry, reassemble the grinder by placing the top burr back into the grinding chamber and locking it by rotating clockwise. Insert the grounds container.
7. Troubleshooting
- Grinder does not turn on:
- Ensure the power cord is securely plugged into a working outlet.
- Check if the bean hopper and grounds container are correctly assembled and locked into place. The grinder has a safety mechanism that prevents operation if parts are not properly aligned.
- If the grinder was recently used for an extended period, it might be in overheat protection mode. Allow 30 minutes for it to cool down.
- Grinder stops during operation:
- The selected grinding cycle might have completed.
- The grinder may have entered overheat protection mode. Allow it to cool down.
- Check if the bean hopper is empty or if beans are stuck. Gently shake the grinder or use the cleaning brush to dislodge any blockages.
- Coffee grounds are not uniform:
- Ensure the burrs are clean and free from old coffee residue.
- Adjust the grind size setting. Experiment with different settings to find the ideal uniformity for your brewing method.
- Excessive static cling of grounds:
- This can be a common issue with coffee grinders. Try lightly tapping the grounds container before removing it to settle the grounds.
- Ensure beans are at room temperature.
8. Specifications
| Specification | Detail |
|---|---|
| Brand | Mueller |
| Model Number | CG900-BLACK |
| Color | Black |
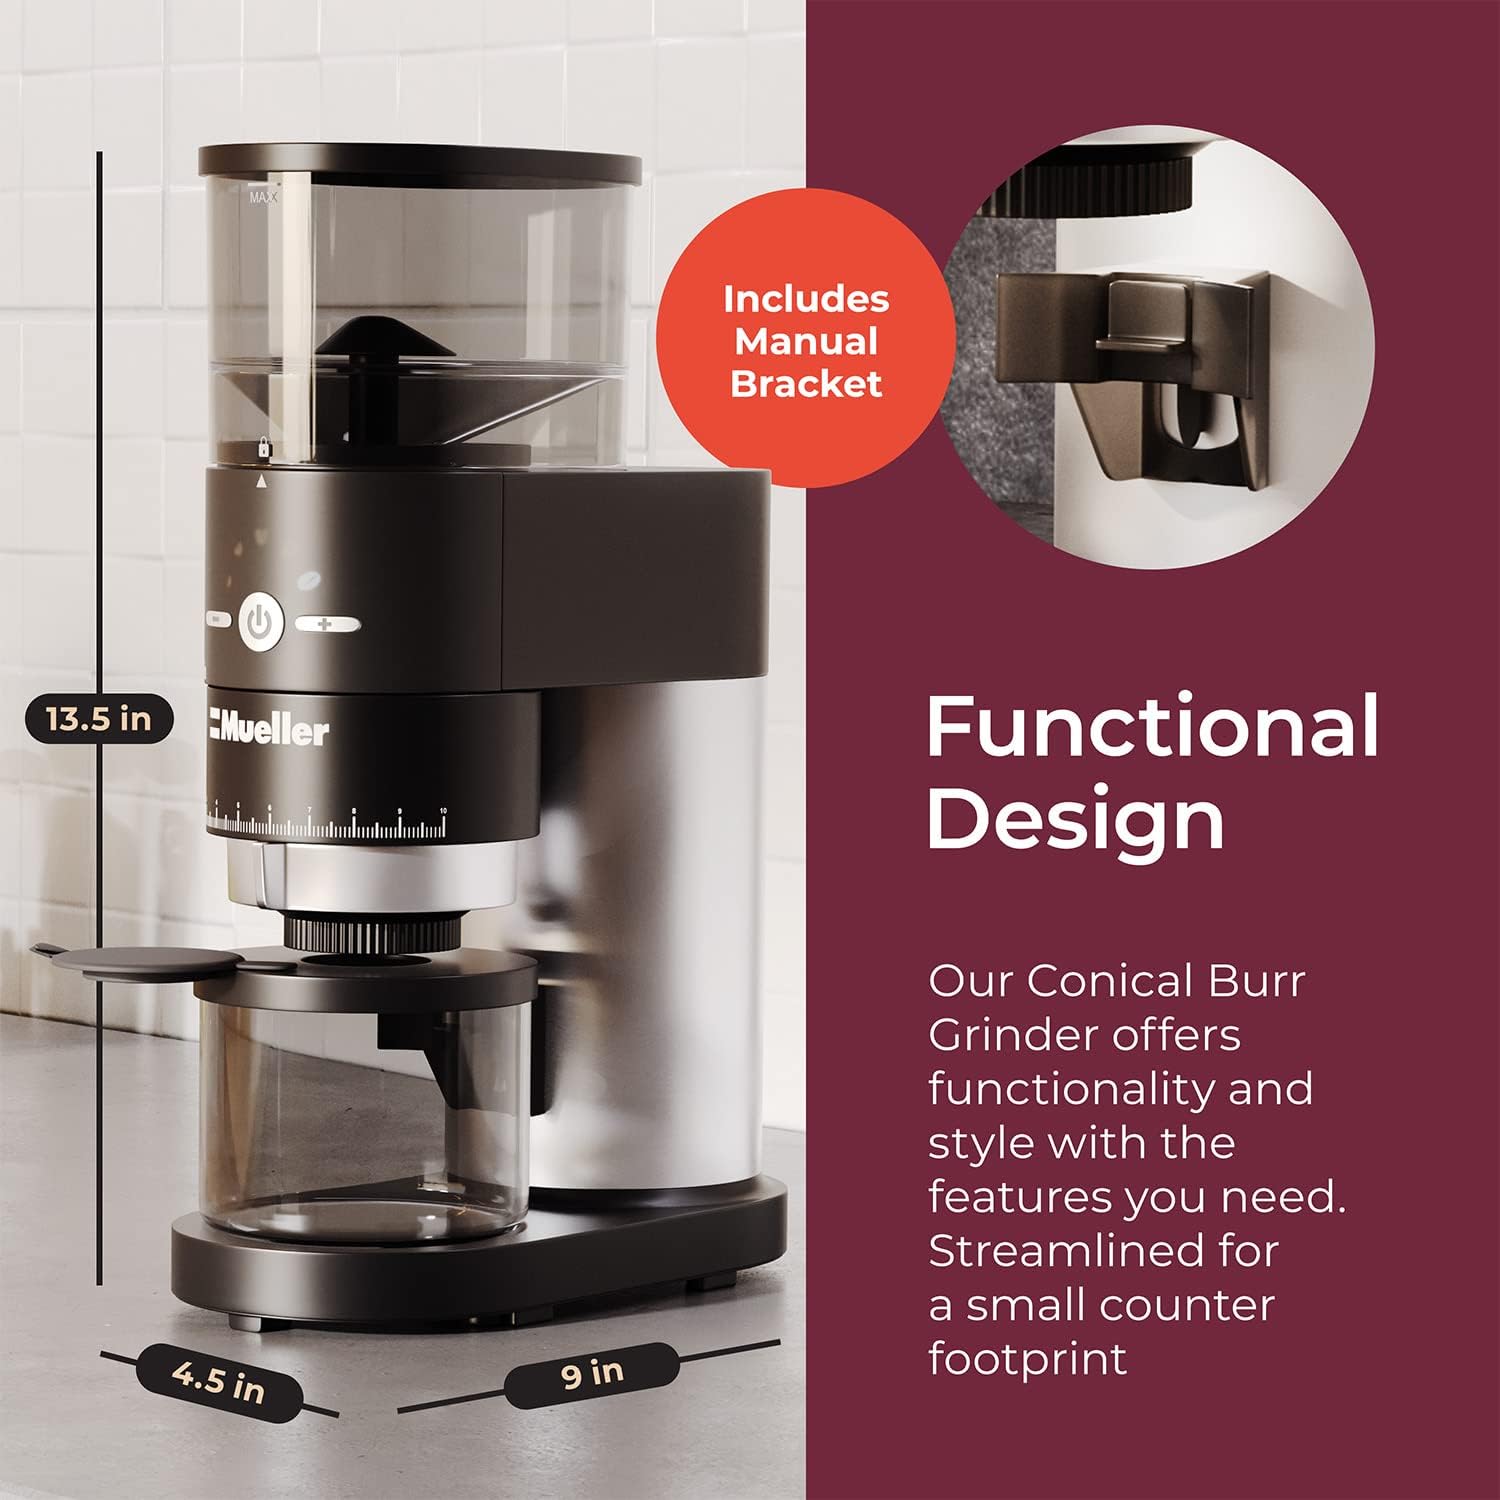
| Product Dimensions | 9"L x 4.5"W x 13.5"H |
| Item Weight | 8.02 pounds |
| Voltage | 230 Volts (AC) |
| Manufacturer | Mueller Austria |
9. Warranty and Support
For warranty information and customer support, please refer to the documentation included with your product packaging or visit the official Mueller Austria website. Keep your purchase receipt for warranty claims.