1. Introduction
The Kaemeasu Digital Infrared Thermometer KM-550 is a non-contact device designed for safe and accurate temperature measurement across a wide range of surfaces. It utilizes infrared technology to provide instant readings without physical contact, making it suitable for various industrial, automotive, and household applications. This manual provides essential information for the proper use, maintenance, and troubleshooting of your thermometer.

Image: The Kaemeasu Digital Infrared Thermometer KM-550, showcasing its design and key features like measurement range and accuracy.
2. Safety Information
- Non-Medical Device: This thermometer is intended for industrial and household use only. It is not suitable for measuring human body temperature.
- Laser Safety: The device emits a laser beam for targeting. Avoid direct exposure of the laser light to eyes, as it can cause eye damage. Do not point the laser at people or animals.
- Handling: Do not immerse the unit in water. Protect it from extreme temperatures, humidity, and dust.
- Battery Safety: Ensure correct battery polarity when installing. Remove batteries if the device will not be used for an extended period. Dispose of used batteries responsibly.

Image: A visual warning indicating that the thermometer is non-medical and cautioning against direct laser exposure to eyes.
3. Product Overview
3.1 Components

Image: A detailed diagram highlighting the external components of the thermometer, including the battery cover, infrared lens, and measure key.
- Infrared Lens: Detects infrared radiation to measure temperature.
- Laser Hole: Emits the laser pointer for targeting.
- Measure Key: Press and hold to take a temperature reading.
- Battery Cover: Provides access to the battery compartment.
3.2 LCD Display and Buttons
Image: A close-up view of the thermometer's LCD display and control buttons, with labels for each function.
- LCD Display: Shows temperature readings, battery status, and other indicators.
- Unit Switch Button (℃/℉): Toggles between Celsius and Fahrenheit temperature units.
- Laser Pointer On/Off Button: Activates or deactivates the laser targeting pointer.
- Display Backlight On/Off Button: Turns the LCD backlight on or off for visibility in different lighting conditions.
LCD Display Icons:
- Battery-low-power signal
- Data hold icon (HOLD)
- Laser signal
- ℃/℉ Symbol (Temperature unit indicator)
- Current temperature reading
4. Setup
4.1 Battery Installation
The Kaemeasu KM-550 thermometer requires two AAA batteries (included). To install or replace batteries:
- Locate the battery cover on the handle of the thermometer.
- Open the battery cover.
- Insert two AAA batteries, ensuring correct polarity (+/-) as indicated inside the compartment.
- Close the battery cover securely.
The thermometer will automatically power on once batteries are correctly installed.

Image: The product packaging, illustrating the included thermometer, custom pouch, and AAA batteries.
5. Operating Instructions
5.1 Taking a Temperature Measurement
To measure temperature:
- Point the infrared lens towards the target surface.
- Press and hold the Measure Key (trigger). The laser pointer will activate (if enabled) to help aim.
- The temperature reading will appear on the LCD display within 0.5 seconds.
- Release the Measure Key to hold the reading on the display (Data Hold function). The 'HOLD' icon will appear.
For accurate readings, ensure the distance to the target is appropriate for the 12:1 Distance to Spot Size ratio. This means that at a distance of 12 units, the measurement area is 1 unit in diameter.

Image: Examples of non-contact temperature measurement, showing the thermometer being used on hot frying oil and cold ice.
5.2 Unit Switching (℃/℉)
Press the ℃/℉ button to switch the temperature unit between Celsius and Fahrenheit as needed.
5.3 Laser Pointer and Backlight Control
- Press the Laser Pointer On/Off button to activate or deactivate the laser for precise targeting.
- Press the Display Backlight On/Off button to turn the LCD backlight on or off, improving visibility in low-light conditions.
5.4 Auto Power Shut Off
The thermometer features an automatic power shut-off function. If no operation is performed for approximately 15 seconds, the device will power off to conserve battery life.
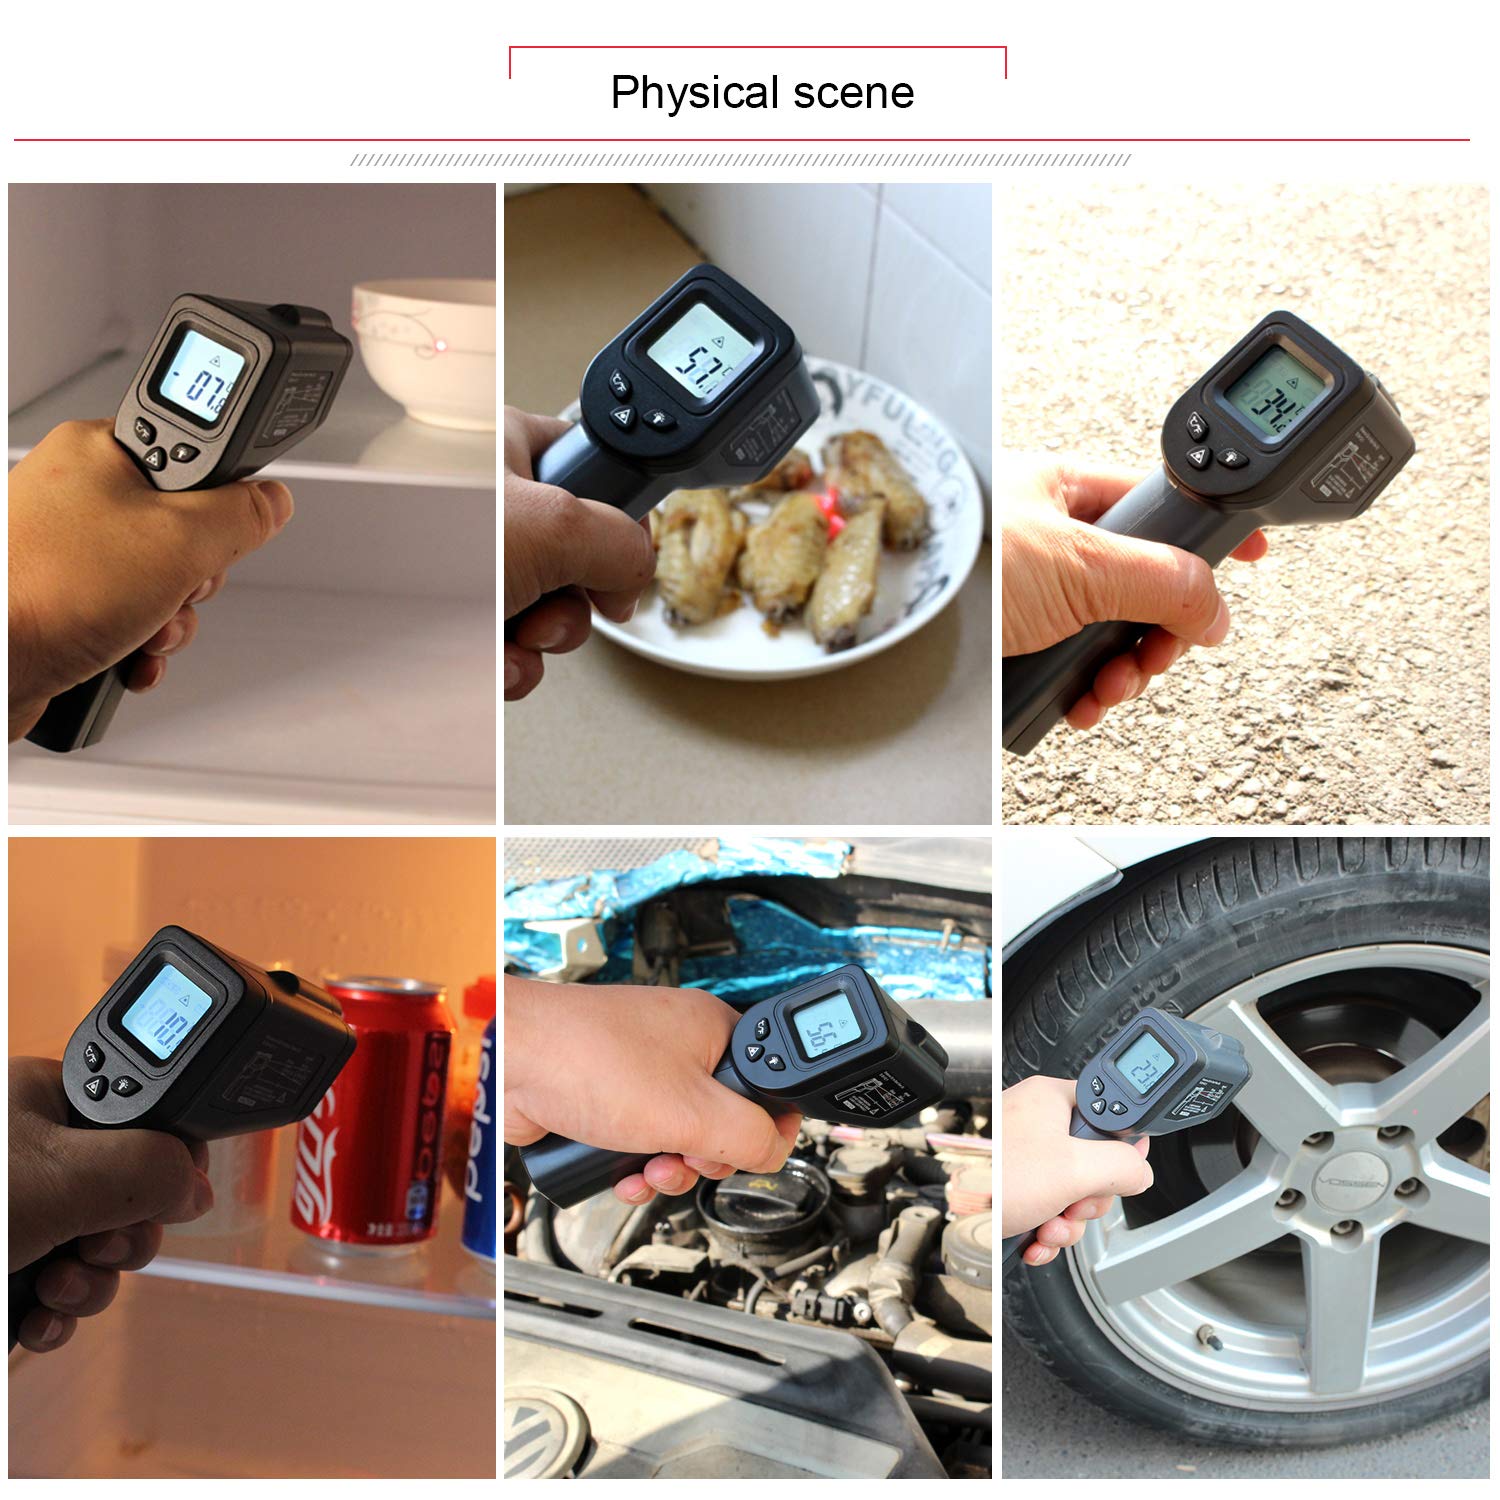
Image: A collage of images demonstrating the thermometer's use in various settings, such as checking refrigerator temperature, food, engine parts, and tire temperature.
6. Maintenance
- Cleaning: Wipe the device clean with a soft, damp cloth. Do not use abrasive cleaners or solvents. Ensure the infrared lens is kept clean and free of dust or debris for accurate readings.
- Storage: Store the thermometer in a dry, cool place, away from direct sunlight and extreme temperatures. Remove batteries if storing for extended periods.
- Calibration: The device is factory calibrated. If you suspect inaccuracies, refer to professional calibration services.

Image: The thermometer being used in a calibration test environment, comparing its reading to a standard reference.
7. Troubleshooting
- No Display: Check battery installation and ensure batteries are not depleted. Replace if necessary.
- Inaccurate Readings: Ensure the infrared lens is clean. Verify the distance to spot size ratio is appropriate for the target. Ensure the target's emissivity is close to 0.95 (fixed for this model).
- Laser Not Working: Check if the laser pointer is enabled using its dedicated button.
- 'HI' or 'LO' on Display: This indicates the measured temperature is outside the device's specified range (-50℃ to 550℃ / -58℉ to 1022℉).
8. Specifications
| Temperature Range | -50℃ to 550℃ (-58℉ to 1022℉) |
| Accuracy | ≥100℃, ±2% / ≤100℃, ±2℃ |
| Distance to Spot Size (D:S) | 12:1 |
| Emissivity | 0.95 (Fixed) |
| Response Time | 0.5 seconds |
| Power Supply | 2 x AAA Batteries |
| Auto Power Shut Off | 15 seconds (no operation) |
| Item Weight | 120 g |
| Product Dimensions | 7.8 x 16.5 x 4.05 cm |
| Special Features | Non-Contact, Laser Target Pointer, Backlight |
| Display Type | Digital |
| Included Components | Thermometer, Custom Pouch, Batteries |
9. Warranty and Support
For warranty information or technical support, please refer to the documentation provided with your purchase or contact Kaemeasu customer service directly. Keep your purchase receipt as proof of purchase.