1. Introduction
This manual provides comprehensive instructions for the My Fan Parts UC7225T remote control and its accompanying wall holder. It covers essential information regarding product compatibility, setup, operation, maintenance, and troubleshooting to ensure proper functionality and user experience.
2. Product Overview
2.1. Components
The product package typically includes the following items:
- My Fan Parts UC7225T Remote Control
- Wall Holder
2.2. Remote Control Layout
The UC7225T remote control features an ergonomic design with clearly labeled buttons for various fan and light functions.

Image 1: Front view of the My Fan Parts UC7225T remote control, displaying power, fan speed, timer, fan direction, and light control buttons.
The back of the remote control provides essential identification information, including the model number and regulatory details.

Image 2: Back view of the My Fan Parts UC7225T remote control, showing the model number UC7225T, FCC ID, and IC ID.
2.3. Wall Holder
A wall holder is included for convenient storage of the remote control when not in use.

Image 3: Black wall mount holder designed for the UC7225T remote control.
3. Compatibility Information
This remote control is designed as a direct replacement for existing UC7225T and TR198A remote models only. It is crucial that your old remote visually matches the UC7225T for proper functionality. Other remotes, even if similar in appearance, may not be compatible.

Image 4: UC7225T remote control emphasizing the importance of visual matching for compatibility.
4. Setup
4.1. Battery Installation
The remote control requires two AAA batteries (not included).
- Locate the battery compartment cover on the back of the remote control.
- Slide the cover open.
- Insert two AAA batteries, ensuring the positive (+) and negative (-) terminals align correctly with the markings inside the compartment.
- Slide the battery compartment cover back into place until it clicks securely.
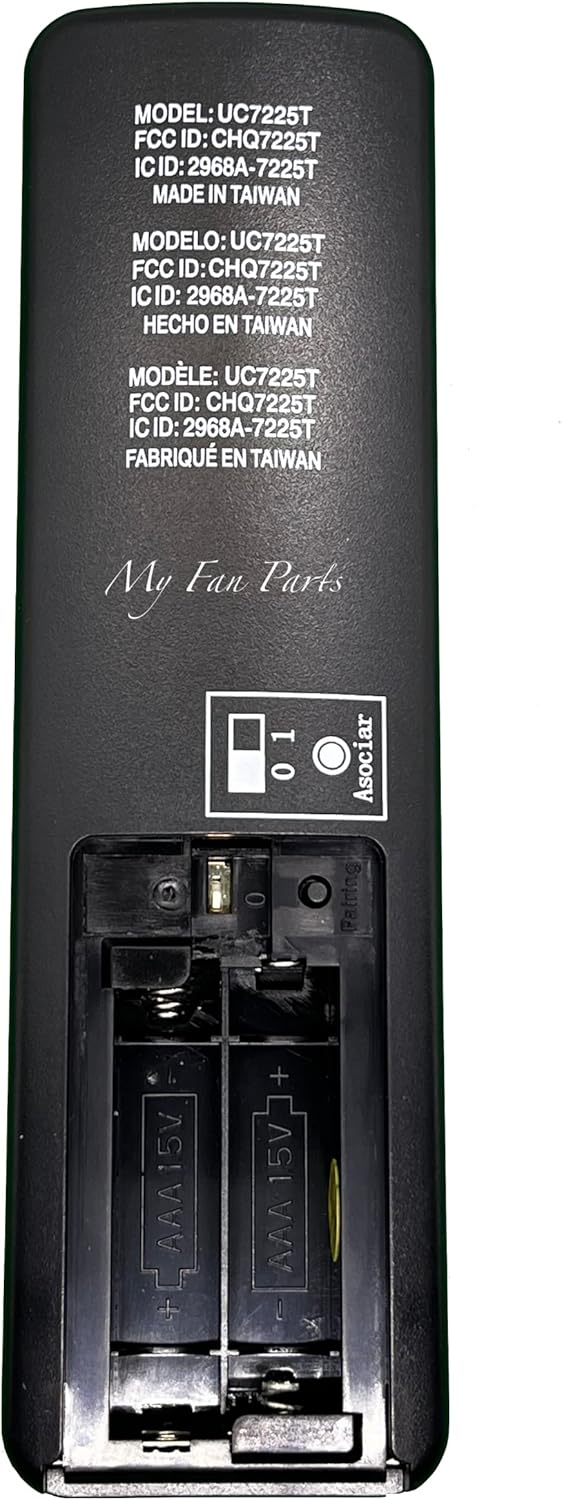
Image 5: Battery compartment of the UC7225T remote control with two AAA batteries inserted.
4.2. Pairing Instructions
The pairing process may vary slightly depending on whether your fan system uses an 'Old Style' DIM/ON remote or a 'New Style' 0/1 remote. Refer to the diagram below for visual guidance.

Image 6: Detailed instruction diagram for pairing and button functions of the UC7225T remote control.
For DIM/ON Remote (Old Style):
- Open the battery compartment of the remote and verify the dipswitch options are set to "DIM" or "ON". Then, insert two AAA batteries.
- Turn off power to the fan at the wall switch or circuit breaker for a few moments, then restore power.
- Within 30 seconds of restoring power, press and hold the Power button on the remote.
- The ceiling fan's light (if installed) will flash on and off. If no light is installed, the fan will turn off and on.
- Tap the Power button on the remote to begin using the fan.
- Note: To unpair all other remotes, repeat step 4 but hold the Power button for at least 30 seconds.
- Note: If installing multiple fans with separate remotes, ensure only the fan being programmed is connected to power during the pairing process.
- Note: If the dimming function does not work, flip the dipswitch to "DIM".
For 0/1 Remote (New Style):
- Open the battery compartment of the remote and verify the dipswitch options are set to "0" or "1". Then, insert two AAA batteries.
- If you have only one DC fan installed, set the dipswitch to "0".
- Tap the Power button on the remote to begin using the fan.
- If the fan does not respond, press the "Pairing" button located on the back of the remote.
- If you have multiple DC fans installed, set the dipswitch to "1".
- Turn off power to the fan at the wall switch or circuit breaker for a few moments, then restore power.
- Press the "Pairing" button on the back of the remote. The fan light will flash.
- Tap the Power button on the remote to begin using the fan.
- Note: To unpair all other remotes, change the dipswitch to "0" and press the "Pairing" button after restoring power to the fan.
5. Operating Instructions
The UC7225T remote control provides intuitive control over your ceiling fan and light. Refer to Image 6 for button locations.
- Power Button (⏻): Turns the fan and light on or off.
- Fan Speed Increase (+): Increases the fan speed.
- Fan Speed Decrease (-): Decreases the fan speed.
- Timer (2H, 4H, 8H): Sets the fan to turn off automatically after 2, 4, or 8 hours.
- Warm Weather (Forward Fan Direction ↻): Sets the fan blades to rotate counter-clockwise, pushing air down to create a cooling effect.
- Cool Weather (Reverse Fan Direction ↺): Sets the fan blades to rotate clockwise, pulling air up to circulate warm air without creating a direct draft.
- Light Dimmer Decrease (⌄): Decreases the brightness of the fan light.
- Light On/Off (💡): Turns the fan light on or off.
- Light Dimmer Increase (⌃): Increases the brightness of the fan light.
6. Maintenance
6.1. Battery Replacement
Replace the AAA batteries when the remote's performance degrades, the indicator light dims, or it stops responding to commands. Always use two new AAA batteries of the same type.
6.2. Cleaning
To clean the remote control, gently wipe its surface with a soft, dry cloth. Avoid using liquid cleaners, abrasive materials, or chemical solvents, as these can damage the remote's finish or internal components.
7. Troubleshooting
7.1. Common Issues and Solutions
- Remote not responding:
- Check battery polarity and ensure batteries are fresh.
- Ensure the fan's power is on at the wall switch or circuit breaker.
- Repeat the pairing process as described in Section 4.2.
- Light dimmer not working:
- For "Old Style" remotes, verify the dipswitch is set to "DIM".
- Ensure your fan's receiver and light kit support dimming functionality.
- Fan not pairing:
- Ensure only the fan being programmed is powered on if you have multiple fans.
- Verify that the remote model (UC7225T or TR198A) is compatible with your existing fan system.
- Ensure the pairing button (if applicable for "New Style" remotes) is pressed correctly during the pairing sequence.
- Battery leakage or corrosion:
- If batteries leak, immediately remove them. Clean the battery compartment thoroughly with rubbing alcohol and cotton swabs.
- Replace with new, fresh batteries. Avoid mixing old and new batteries or different battery types.
8. Specifications
8.1. Product Specifications
- Model Number: UC7225T
- Brand: My Fan Parts
- Manufacturer: MFP
- Item Weight: 3 ounces
- Package Dimensions: 6.4 x 2.4 x 1.5 inches
- Batteries: 2 AAA batteries required (not included)
- Compatible Devices: Fan
- Max Number of Supported Devices: 1
- Color: Black
- Special Feature: Ergonomic
- Date First Available: December 18, 2019
9. Warranty and Support
9.1. Warranty Information
For specific warranty details regarding your My Fan Parts UC7225T remote control, please refer to the product packaging or contact the manufacturer directly. Warranty terms may vary.
9.2. Customer Support
Should you require further assistance, encounter issues not covered in this manual, or need technical support, please contact My Fan Parts customer service or your product retailer. Contact information can typically be found on the product packaging or the manufacturer's official website.