1. Introduction
The Rockville BATTERY PAR 50 is a versatile 18W LED DMX Wash Up-Light designed for various lighting applications. It features a built-in 4400mA lithium battery, providing extended operation without direct power connection. With 18 high-power 1W LEDs (6 red, 6 green, 6 blue), it offers 16.7 million color options for dynamic lighting effects. Control options include an included remote, 7-channel DMX, built-in programs, and sound-activated mode. Its compact and durable design allows for flexible mounting on floors, ceilings, or trusses.
2. What's in the Box
- Rockville Battery PAR 50 LED DMX Wash Up-Light
- Dual Mounting Bracket
- 2 Hand-tightening Knobs
- 2 Washers
- IEC Power Cable
- IR Remote Control
- Owner's Manual

Image: Contents of the Rockville Battery PAR 50 box, including the light, bracket, power cable, and remote control.
3. Setup
3.1 Attaching the Dual Bracket
The dual bracket allows for versatile positioning of the light. To attach it:
- Align the dual bracket with the two screw holes on each side of the light.
- Feed the hand-tightening knobs through the holes on the dual bracket.
- Place a washer on the other side of each knob.
- Tighten the knobs into the light to secure the bracket in place.

Image: The Rockville Battery PAR 50 light with its dual mounting bracket attached, ready for use.
3.2 Charging the Battery
The Battery PAR 50 features a built-in rechargeable lithium battery. To charge:
- Connect the included IEC power cable to the power input on the light.
- Plug the other end of the power cable into a standard wall outlet.
- The battery life LED indicator on the light will show the charging status. A full charge typically takes 5 hours.
The battery provides 8-10 hours of single-color use or 3-5 hours with all colors.
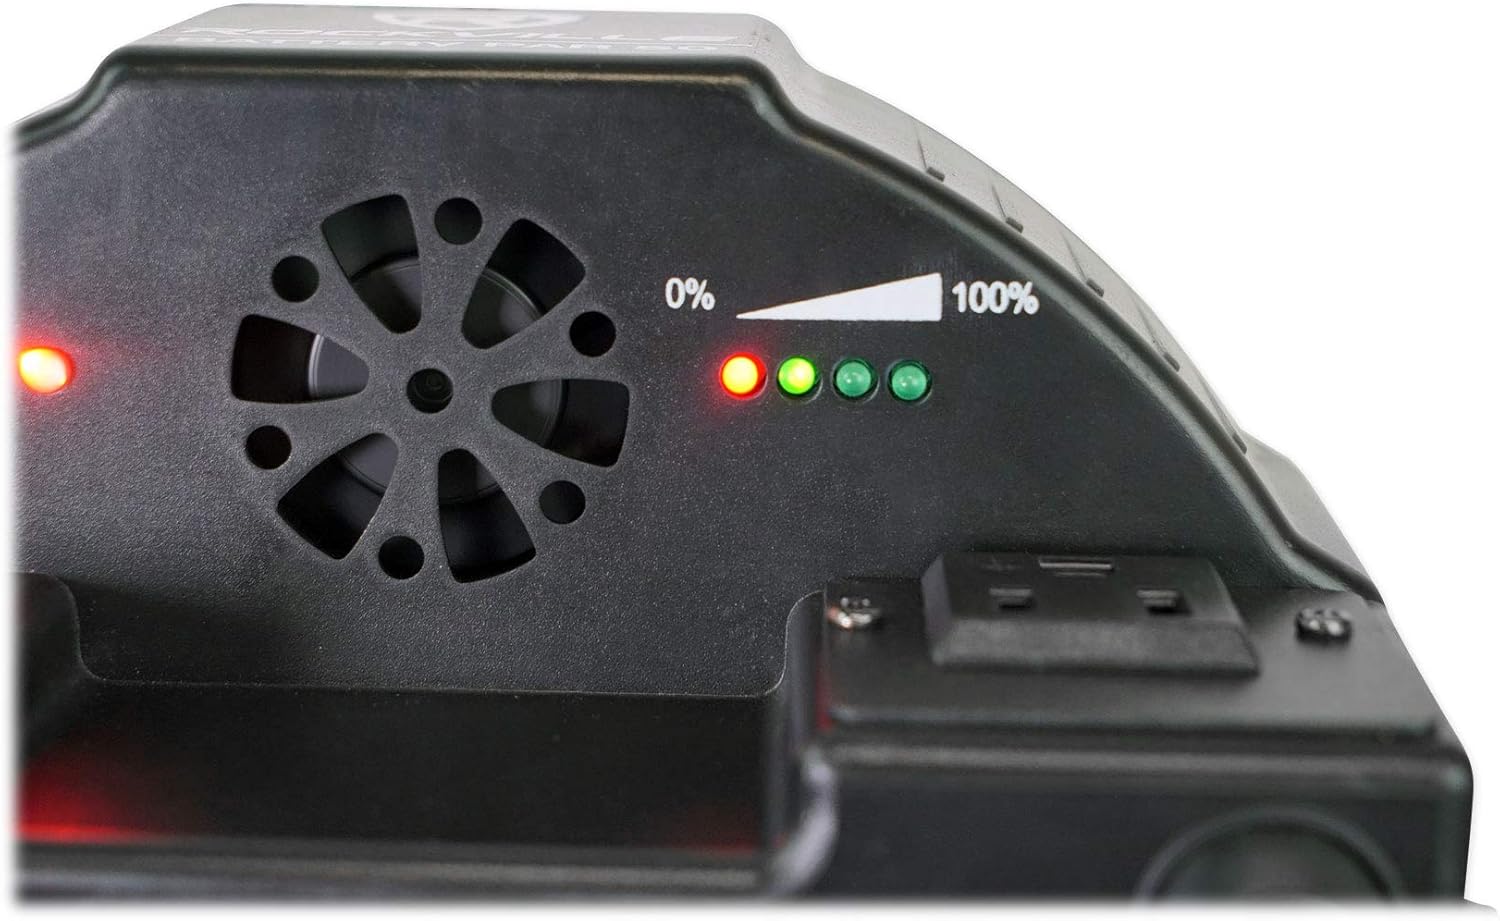
Image: Close-up of the battery indicator lights on the Rockville Battery PAR 50, showing charge level.
3.3 Placement Options
The versatile design of the Battery PAR 50 allows for various placement methods:
Floor Placement (Wall Washing)
For wall washing, you can either place the light flush against a wall or angle it using the dual bracket:
- Flush against wall: Use the rubber feet on the bottom of the light to place it directly against the wall, shining light upwards.
- Angled wall wash: Place the light a few inches away from the wall and use the dual bracket to angle the light beam onto the wall for a desired effect.

Image: Multiple Rockville Battery PAR 50 lights creating a blue wall washing effect in a dark room.
Totem Stand or DJ Facade Illumination
To illuminate a totem stand or DJ facade, place the light at the base:
- Lift the scrim of the totem stand or facade.
- Place the Battery PAR 50 in the center at the base, facing upwards or towards the scrim.
- Lower the scrim. The light will illuminate the stand or facade.

Image: A DJ setup featuring Rockville Battery PAR 50 lights illuminating white totems and a DJ facade with various colors.
Truss Mounting
For overhead lighting, the Battery PAR 50 can be mounted to a truss using a lighting clamp (sold separately):
- Attach a lighting clamp (e.g., Rockville LC70) to the dual bracket of the Battery PAR 50. This typically involves removing a bolt from the clamp, running it through the bracket, and re-securing it.
- Loosen the clamp's attachment screw.
- Hook the clamp onto the truss.
- Tighten the clamp's screw to secure the light to the truss.
Video: Demonstrates how to set up the Rockville Battery PAR 50 for truss, totems, and floor placement, showcasing its versatility in various event setups.
4. Operating the Light
4.1 Control Panel Functions
The control panel on the rear of the light allows for direct mode selection and setting adjustments:
- Mode Button: Cycles through available modes (Sound, Auto, Fade, Strobe, DMX).
- Up/Down Buttons: Adjust parameters (e.g., speed, DMX address) within a selected mode.
- Enter Button: Confirms selections.

Image: Close-up of the control panel on the Rockville Battery PAR 50, showing the LED display and control buttons.
4.2 IR Remote Control
The included IR remote provides convenient wireless control over various functions:
- ON/OFF: Turns the light's LEDs on or off.
- Brightness +/-: Adjusts the overall brightness.
- Color Buttons: Selects static colors (Red, Green, Blue, White, and various mixed colors).
- Mode Buttons: Activates special effects like Flash, Strobe, Fade, and Smooth (color transitions).
- Ensure the IR sensor on the light is enabled via the control panel (IR ON mode) for remote functionality.

Image: The IR remote control for the Rockville Battery PAR 50, showing various color and mode buttons.
Video: Explains how to use the wireless remote control with the Rockville Battery PAR 50, demonstrating various color and mode selections.
4.3 DMX Control (3-channel, 6-channel, Master/Slave)
For advanced lighting control and synchronization, the Battery PAR 50 supports DMX operation:
- DMX Modes: The light offers 3-channel (A mode) and 6-channel (D mode) DMX options. Select the desired mode via the control panel.
- DMX Address: Set the DMX address (e.g., D001) on the light's control panel to match your DMX controller.
- Connection: Connect a DMX cable from your DMX controller's output to the Battery PAR 50's DMX input. For multiple lights, daisy-chain them by connecting the DMX output of one light to the DMX input of the next.
- Master/Slave: To synchronize multiple lights without a DMX controller, set one light as the master (e.g., running an auto program) and connect the DMX output of the master to the DMX input of the slave lights. Set slave lights to DMX mode with the same address as the master.
Video: A detailed guide on how to set up the Rockville Battery PAR 50, covering initial assembly, placement options, and basic operation modes.
Video: Instructions on how to set up a DMX controller with the Rockville Battery PAR 50, explaining channel modes and connections for synchronized lighting.
Video: Guide on how to set up Master/Slave mode with the Rockville Battery PAR 50, allowing multiple lights to operate in sync without a DMX controller.
5. Maintenance
- Clean the exterior of the light with a soft, dry cloth.
- Avoid using harsh chemicals or abrasive materials.
- Ensure the light is unplugged before cleaning.
- Store the light in a cool, dry place when not in use.
6. Troubleshooting
| Problem | Solution |
|---|---|
| Light does not turn on. | Ensure the battery is charged or the unit is plugged into a working power outlet. Check the power switch on the unit. |
| Remote control not working. | Ensure the IR sensor is enabled on the light's control panel (IR ON mode). Point the remote directly at the light's IR sensor. Check remote battery. |
| DMX control not working. | Verify DMX cables are correctly connected (input/output). Ensure the light is set to the correct DMX mode (3-channel or 6-channel) and DMX address. Check DMX controller settings. |
| Lights not synchronizing in Master/Slave. | Ensure DMX cables are correctly daisy-chained. Verify all slave units are set to DMX mode with the same address as the master unit. |
7. Specifications
- Power Source: Battery Powered (Built-in 4400mA lithium battery)
- Battery Life: 8-10 hours (single color), 3-5 hours (all colors)
- Charging Time: 5 hours (max)
- Light Source: 18 x 1W LEDs (6 Red, 6 Green, 6 Blue)
- Color Mixing: RGB (16.7 million colors)
- Beam Angle: 25 degrees
- Luminance: 1,102 Lux @ 2m (All LEDs on)
- DMX Channels: 7 channels
- Control Modes: Remote, DMX, Built-in Programs, Sound-Activated
- Material: Metal (Powder Coated or Black Painted)
- Dimensions (L x W x H): 7.87" x 7.87" x 6.3"
- Weight: 2.2 lbs
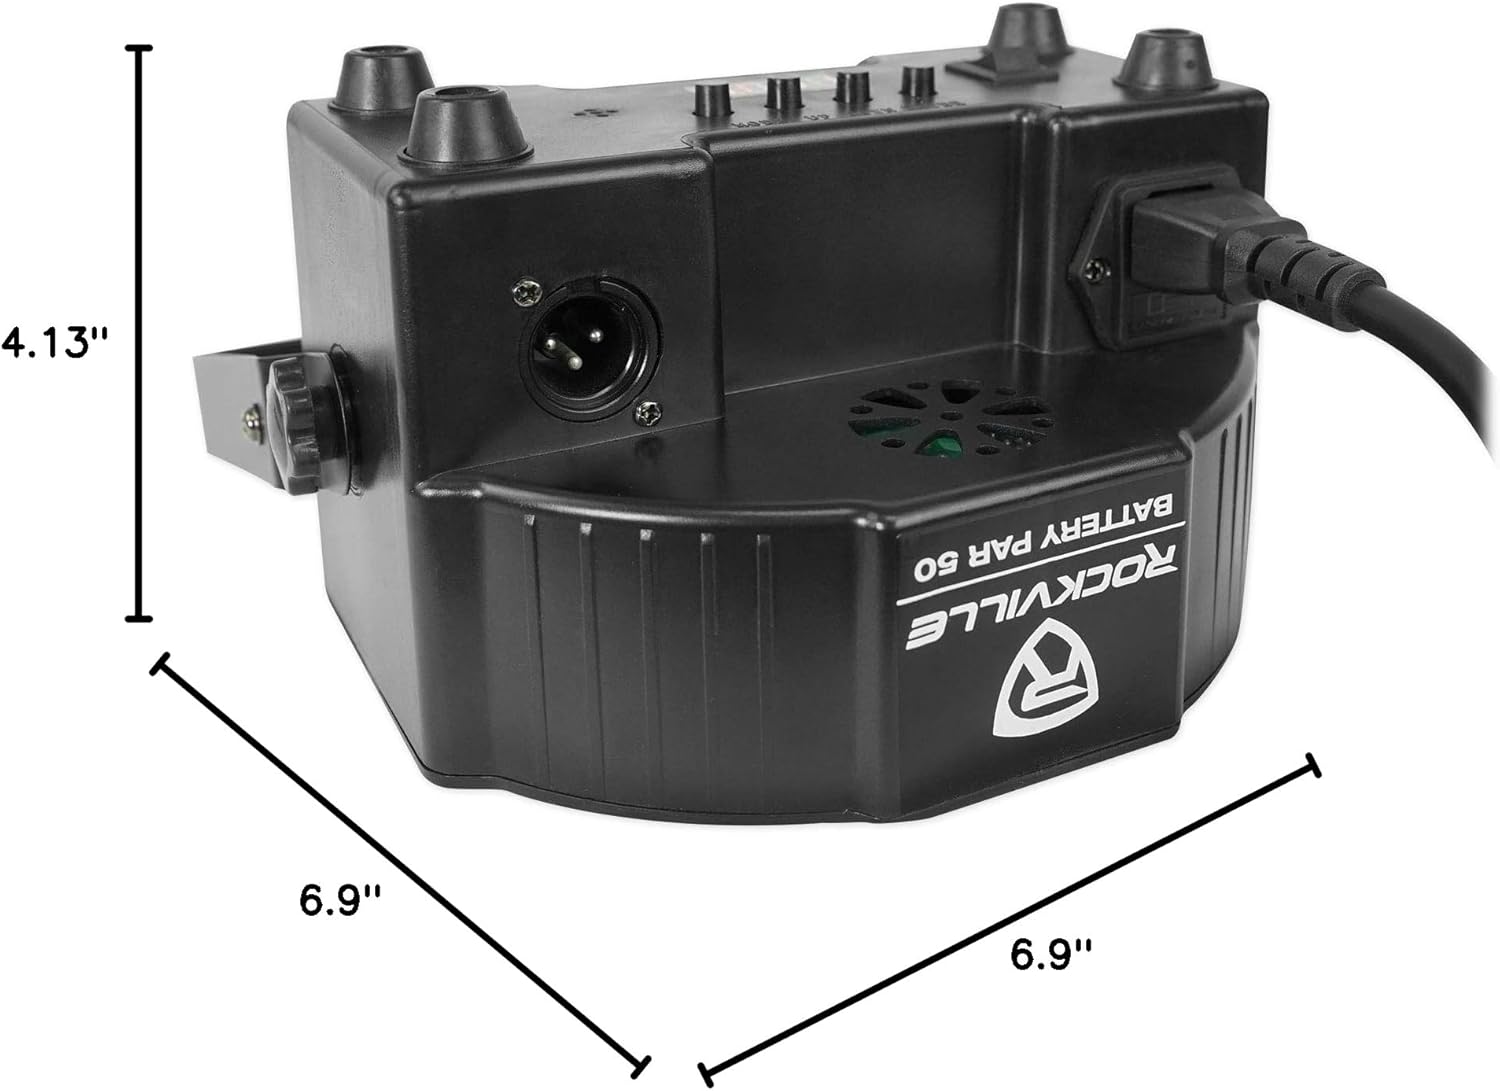
Image: Diagram showing the dimensions of the Rockville Battery PAR 50 light.
8. Warranty & Support
Manufacturer Warranty: This product comes with a 1-year manufacturer warranty.
For any questions, comments, or concerns regarding your Rockville Battery PAR 50, please contact Rockville Customer Support:
- Phone: 1-646-758-0144
- Email: sales@rockvilleaudio.com
- Operating Hours: 9 AM - 5 PM EST, Monday - Friday