1. Introduction
Thank you for purchasing the JURMERRY Metal Daybed Frame Twin Size. This manual provides detailed instructions for the safe assembly, operation, and maintenance of your new daybed. Please read all instructions carefully before beginning assembly and retain this manual for future reference.

Image: The JURMERRY Metal Daybed Frame, fully assembled and ready for use.
2. Safety Information
Please observe the following safety precautions to prevent injury and damage to the product:
- Read all instructions: Ensure you understand all assembly steps before starting.
- Two-person assembly recommended: Some steps may require assistance to prevent injury or damage.
- Keep children and pets away: Small parts can be a choking hazard.
- Use on a level surface: Assemble the daybed on a soft, clean, and level surface to avoid scratching the floor or the product.
- Do not overtighten screws: Tighten all screws only after the entire frame is assembled, then go back and fully tighten. Overtightening initially can strip threads or warp components.
- Maximum weight capacity: The daybed is designed to support approximately 500 lbs. Do not exceed this limit.
- Regularly check connections: Periodically inspect all bolts and screws to ensure they remain tight.
- No jumping: Do not jump on the daybed.
3. Package Contents
Before assembly, verify that all parts are present and undamaged. If any parts are missing or damaged, please contact customer support.
| Part | Description | Quantity |
|---|---|---|
| A | Headboard/Backrest Frame | 1 |
| B | Footboard/Armrest Frame | 2 |
| C | Side Rails | 2 |
| D | Center Support Bar | 1 |
| E | Support Legs | 3 |
| F | Steel Slats | Multiple |
| G | Hardware Pack (Bolts, Washers, Allen Wrench) | 1 |
Note: The exact number of slats and specific hardware may vary slightly. Refer to your packaging for precise details.
4. Assembly Instructions
Follow these steps carefully to assemble your JURMERRY Metal Daybed Frame. It is recommended to have two people for assembly.
- Unpack and Identify Parts: Carefully remove all components from the packaging. Lay them out on a soft, clean surface and compare them against the 'Package Contents' list to ensure everything is present.
- Attach Side Rails to End Frames: Connect the two Side Rails (C) to the Headboard/Backrest Frame (A) and the Footboard/Armrest Frame (B) using the provided bolts and washers from the Hardware Pack (G). Do not fully tighten the bolts at this stage.

Image: Detail of a frame connection point.
- Install Center Support Bar: Attach the Center Support Bar (D) to the designated points on the Side Rails (C). Secure with bolts, but again, do not fully tighten yet.
- Attach Support Legs: Fasten the Support Legs (E) to the underside of the frame, typically to the Center Support Bar and/or Side Rails, as indicated in your specific diagram. Ensure they are oriented correctly for stability.

Image: Detail of a support leg attachment.
- Insert Steel Slats: Place the Steel Slats (F) across the frame, fitting them into the designated slots or attaching them with the provided plastic buckles. Ensure all slats are evenly spaced and securely in place.
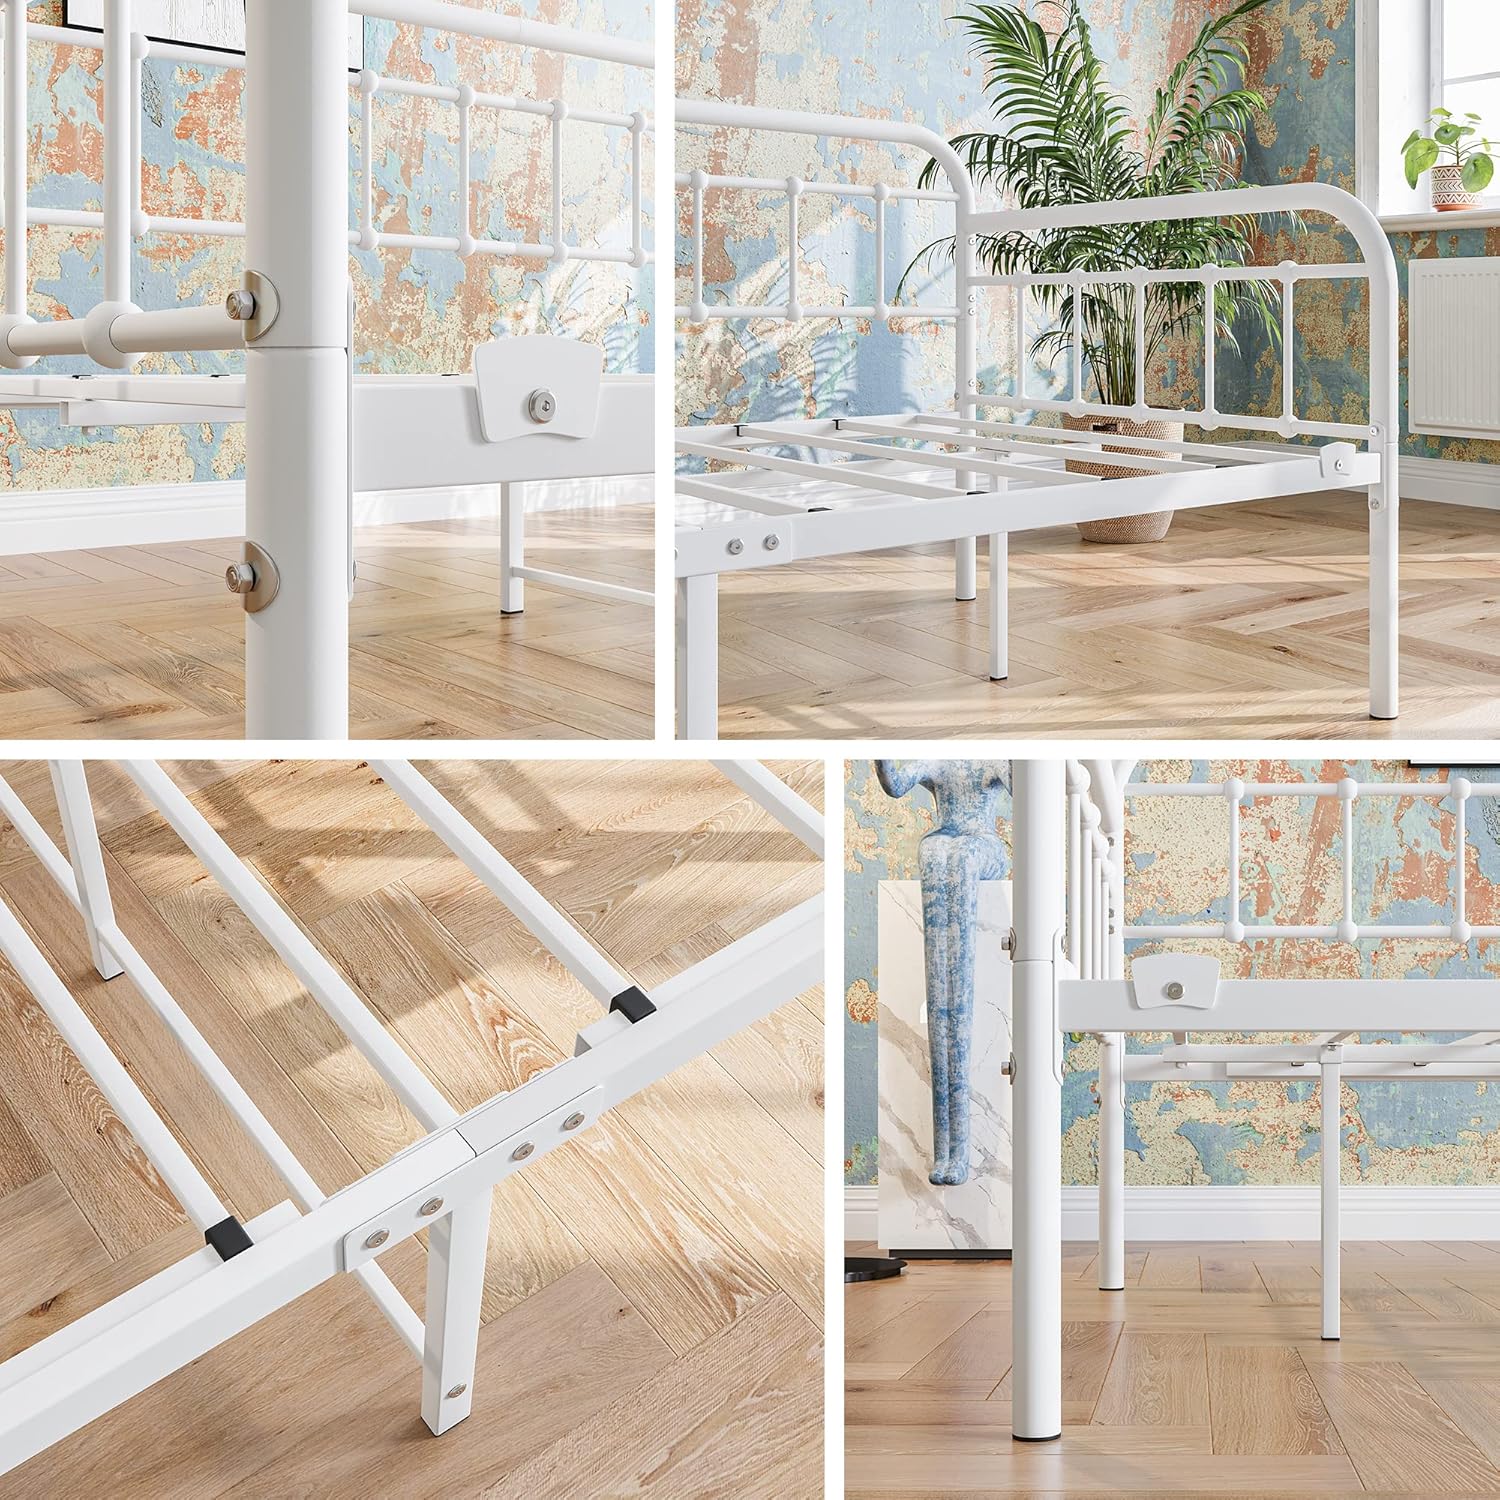
Image: Detail of steel slat installation.
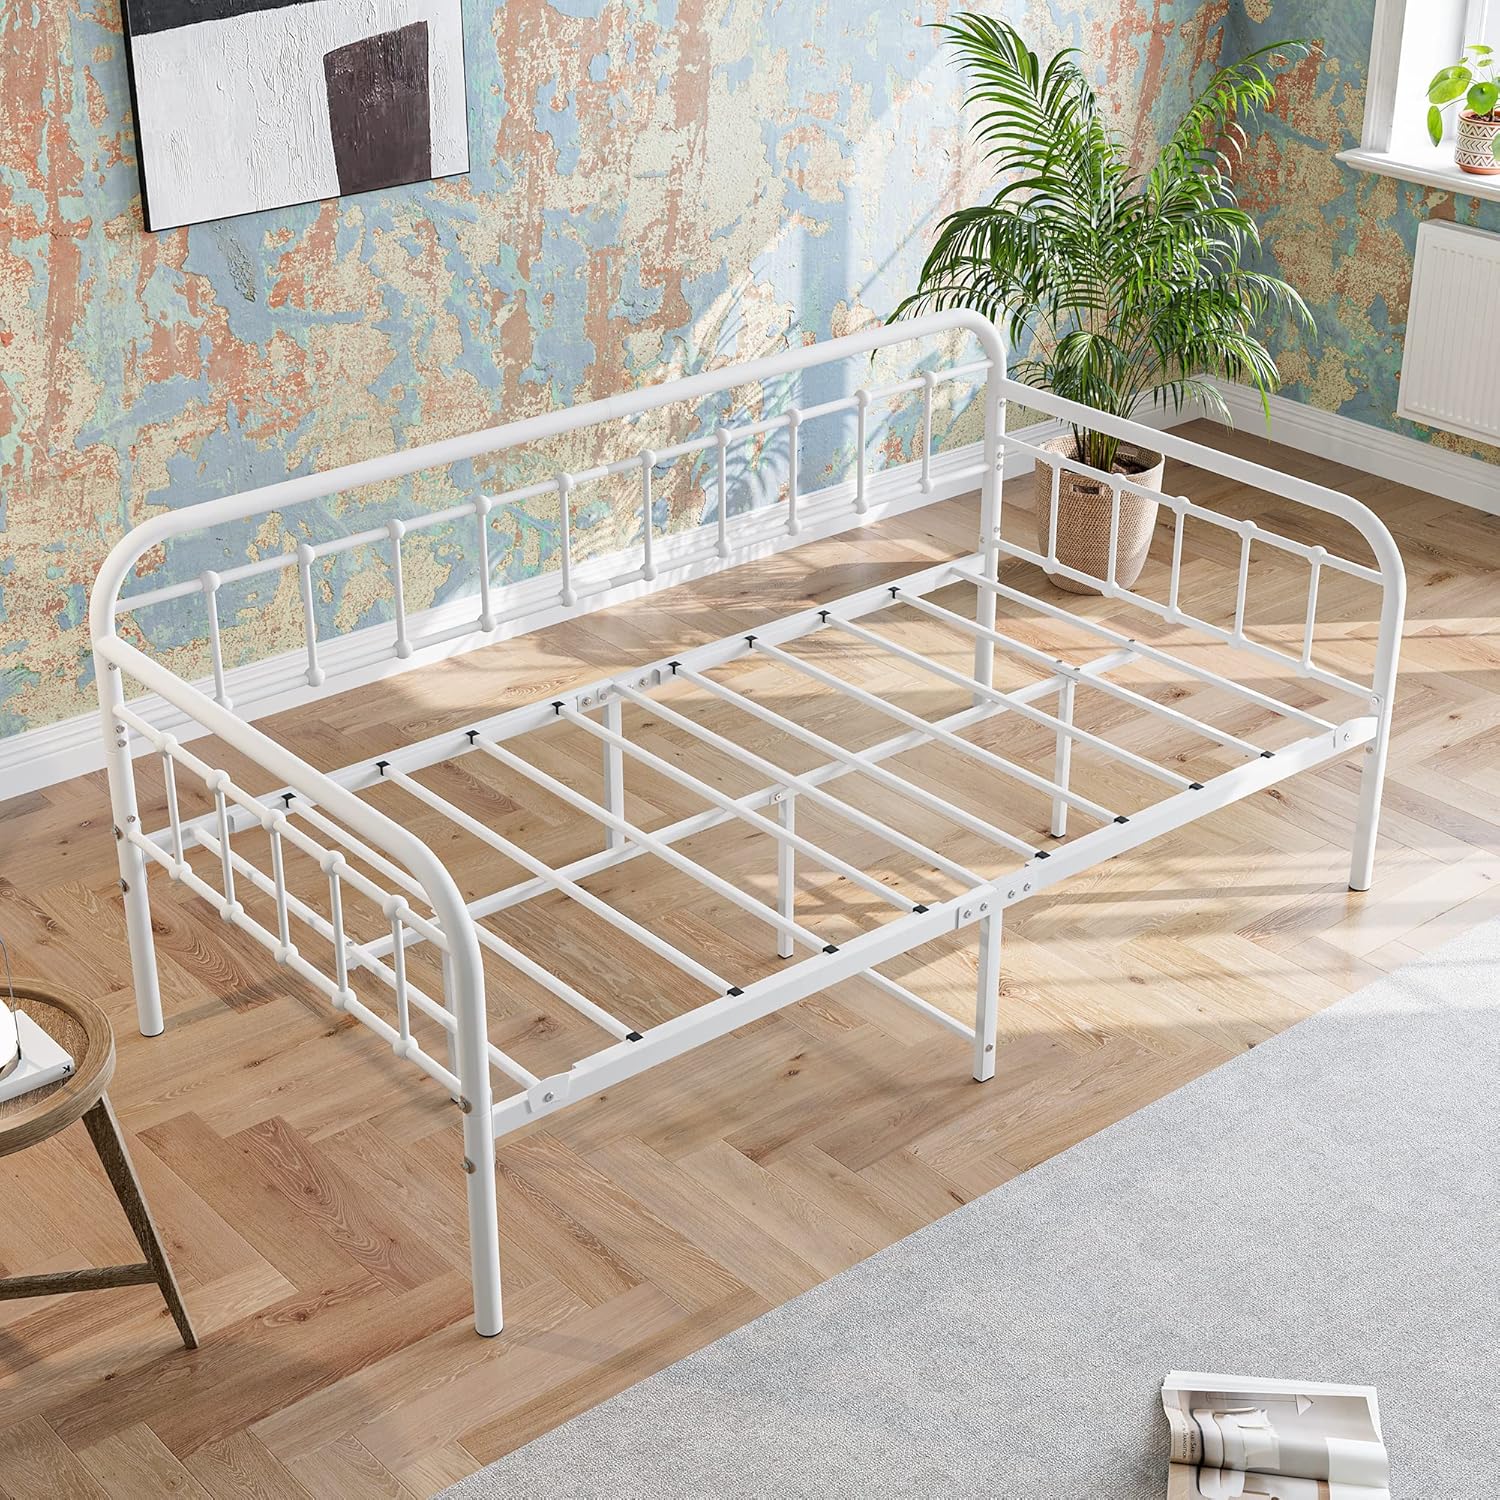
Image: The daybed frame with all slats installed, viewed from above.
- Final Tightening: Once all components are assembled and aligned, go back and progressively tighten all bolts using the provided Allen wrench. Ensure all connections are secure but avoid overtightening.
- Placement: Carefully move the assembled daybed to its desired location.
5. Operating/Usage
The JURMERRY Metal Daybed Frame is designed for versatile use as both a bed and a sofa.
- Mattress Compatibility: This twin-size daybed is compatible with standard twin-size mattresses. A mattress thickness of 8-10 inches is generally recommended for optimal appearance and comfort, though thicker mattresses can also be used. No box spring is required due to the integrated steel slat support system.
- Daybed Functionality: The design allows it to function as a comfortable seating area during the day and a bed at night. Add decorative pillows and throws to enhance its sofa appearance.
- Under-bed Storage: The frame provides approximately 12 inches of clearance from the floor, offering convenient space for under-bed storage bins or boxes.

Image: The daybed configured as a sofa with pillows.
6. Maintenance
Proper care will extend the life and appearance of your daybed frame.
- Cleaning: Wipe the metal frame with a damp cloth. Avoid using harsh chemicals or abrasive cleaners, as these can damage the finish.
- Regular Inspection: Periodically check all bolts and connections to ensure they are tight. Retighten if necessary to maintain stability and prevent squeaking.
- Avoid Excessive Moisture: Keep the daybed in a dry environment to prevent rust or damage to the metal.
7. Troubleshooting
If you encounter issues with your daybed, refer to the following common problems and solutions:
| Problem | Possible Cause | Solution |
|---|---|---|
| Squeaking Noise | Loose bolts or connections. | Check and tighten all bolts and screws on the frame. Ensure slats are properly seated. |
| Frame feels unstable/wobbly | Bolts not fully tightened; uneven floor. | Ensure all bolts are securely tightened. Move the daybed to a level surface or use shims under legs if the floor is uneven. |
| Missing parts during assembly | Packaging error. | Carefully re-check all packaging materials. If still missing, contact JURMERRY customer support with your purchase details. |
| Difficulty aligning holes during assembly | Bolts overtightened prematurely; parts oriented incorrectly. | Loosen all bolts slightly to allow for adjustment. Ensure parts are facing the correct direction. Tighten all bolts only after full assembly. |
8. Specifications
| Feature | Detail |
|---|---|
| Brand | JURMERRY |
| Model | B082SGS9NS |
| Size | Twin |
| Product Dimensions (L x W x H) | 77.32" x 39.96" x 35.43" |
| Color | White |
| Material | Metal |
| Finish Type | Painted |
| Special Feature | No Box Spring Needed |
| Included Components | Slat |
| Ground to Item Distance | 12 Inches |
| Item Weight | 43 pounds |
| Assembly Required | Yes |
| UPC | 630808505799 |

Image: Dimensional diagram of the daybed frame.
9. Warranty & Support
JURMERRY provides a worry-free warranty for this product. For specific warranty details, claims, or technical support, please refer to the warranty information included with your purchase or contact JURMERRY customer service directly. Contact information can typically be found on the product packaging or the manufacturer's official website.
Manufacturer: JURMERRY
Date First Available: February 10, 2020
