1. Introduction
This manual provides essential information for the safe and efficient operation, maintenance, and troubleshooting of your Lavor Ready 32B Professional Floor Scrubber. Please read this manual thoroughly before operating the machine to ensure proper use and to prevent injury or damage. Keep this manual in a safe place for future reference.
The Lavor Ready 32B is a professional floor scrubber designed for cleaning hard floors in commercial and industrial environments. It features a 320 mm working width and is capable of cleaning up to 1500 m² per hour, offering efficient and effective floor cleaning.
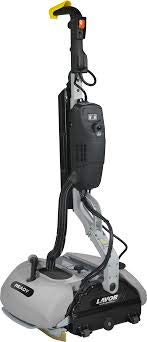
Image 1.1: Lavor Ready 32B Professional Floor Scrubber. This image shows the compact design of the floor scrubber, highlighting its main body and handle.
2. Safety Instructions
Always observe the following safety precautions to reduce the risk of injury or damage:
- Read all instructions before using the appliance.
- Do not operate the machine if it is damaged or not functioning correctly.
- Ensure the power supply matches the machine's specifications before connecting.
- Keep hands, feet, and loose clothing away from moving parts.
- Use only recommended cleaning solutions. Do not use flammable or corrosive liquids.
- Always disconnect the power supply before performing any maintenance or cleaning tasks.
- Do not allow children or untrained personnel to operate the machine.
- Operate the machine on level surfaces. Avoid steep inclines.
- Wear appropriate personal protective equipment (PPE) such as safety glasses and non-slip footwear.
3. Setup
3.1 Unpacking
Carefully remove the floor scrubber and all accessories from the packaging. Inspect for any damage that may have occurred during transit. Retain packaging for future storage or transport.
3.2 Assembly
- Handle Assembly: Attach the handle to the main body of the machine, ensuring all bolts are securely tightened. Refer to the diagrams in the separate assembly guide for detailed steps.
- Brush Installation: Position the scrubbing brush onto the brush deck. Ensure it clicks into place securely.
- Squeegee Assembly: Attach the squeegee assembly to the rear of the machine. Verify that it is properly aligned for effective water collection.
3.3 Filling the Solution Tank
Open the clean water/solution tank cap. Fill the tank with clean water and the recommended floor cleaning solution according to the manufacturer's instructions. Do not overfill. Close the cap securely.
3.4 Power Connection
Connect the power cord to a suitable grounded electrical outlet. Ensure the cord is not damaged and is positioned to avoid tripping hazards.
4. Operating Instructions
4.1 Pre-Operation Checks
- Check that the solution tank is filled and the recovery tank is empty.
- Inspect the brush and squeegee for wear or damage.
- Ensure all connections are secure.
4.2 Starting the Machine
- Turn the main power switch to the 'ON' position.
- Engage the brush motor switch to start scrubbing.
- Activate the vacuum motor switch to engage the squeegee for water collection.
- Adjust the solution flow rate as needed using the control knob.
4.3 Cleaning Procedure
Push the machine forward at a steady pace, allowing the brush to scrub the floor and the squeegee to collect the dirty water. Overlap passes slightly to ensure complete coverage. For heavily soiled areas, a double pass (scrub without vacuum, then scrub with vacuum) may be beneficial.
4.4 Stopping the Machine
- Disengage the brush motor and vacuum motor switches.
- Turn the main power switch to the 'OFF' position.
- Disconnect the power cord from the outlet.
4.5 Emptying the Recovery Tank
After each use, or when the recovery tank is full, empty the dirty water into a suitable drain. Rinse the tank thoroughly with clean water.
5. Maintenance
Regular maintenance ensures optimal performance and extends the life of your Lavor Ready 32B.
5.1 Daily Maintenance
- Empty and rinse both the solution and recovery tanks.
- Clean the scrubbing brush and remove any debris.
- Wipe down the squeegee blades and check for wear.
- Clean the exterior of the machine with a damp cloth.
5.2 Weekly/Monthly Maintenance
- Inspect the power cord for cuts or damage.
- Check all hoses and connections for leaks.
- Examine the brush for excessive wear and replace if necessary.
- Inspect squeegee blades for tears or hardening and replace if needed.
5.3 Storage
Store the machine in a dry, frost-free area. Ensure tanks are empty and clean. Disconnect the power cord and store it neatly.
6. Troubleshooting
This section provides solutions to common operational issues. For problems not listed here, contact Lavor customer support or an authorized service center.
| Problem | Possible Cause | Solution |
|---|---|---|
| Machine does not start | No power supply; Power cord damaged; Main switch off | Check power connection; Inspect power cord; Turn main switch on |
| Poor cleaning performance | Worn brush; Incorrect solution concentration; Insufficient solution flow | Replace brush; Adjust solution concentration; Check solution flow rate and tank level |
| Water not being collected | Worn or damaged squeegee blades; Recovery tank full; Vacuum motor off; Clogged vacuum hose | Replace squeegee blades; Empty recovery tank; Turn vacuum motor on; Clear vacuum hose |
| No solution dispensed | Solution tank empty; Clogged solution filter; Solution pump malfunction | Fill solution tank; Clean solution filter; Contact service for pump issues |
7. Specifications
Technical data for the Lavor Ready 32B Professional Floor Scrubber:
- Brand: Lavor
- Model Number: 0.008.0004
- Working Width: 320 mm
- Theoretical Performance: 1500 m²/h
- ASIN: B082RL18GC
- Global Trade Item Number (GTIN): 08013298192229
8. Warranty and Support
For warranty information, please refer to the separate warranty document included with your purchase or visit the official Lavor website. For technical support, spare parts, or service, please contact your authorized Lavor dealer or Lavor customer service directly. Ensure you have your model number (0.008.0004) and purchase date available when contacting support.
You can visit the Lavor store for more information: Lavor Official Store