
Generico B082GG5K6X
Nintendo Switch Joy-Con Right R Button Replacement Manual
Introduction
This manual provides detailed instructions for the replacement of the R button on the Nintendo Switch Right Joy-Con. This micro switch is designed as a direct replacement for a broken or non-functional R button, restoring full functionality to your controller. Please read all instructions carefully before proceeding with the installation.
Important Note: This replacement requires soldering skills and specialized tools. If you are not comfortable with these procedures, it is recommended to seek professional assistance.
Product Overview
The product is a high-quality replacement micro switch specifically designed for the R button on the Right Nintendo Switch Joy-Con. It is a new component, manufactured to be equivalent to the original part, ensuring reliable performance.
Product Images

This image shows the top view of the replacement R button micro switch. The button features a grey circular actuator on top of a black square housing, with metal mounting tabs visible on the sides. This perspective highlights the primary contact point of the button.
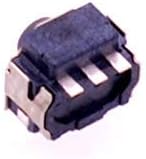
This image displays a side view of the R button micro switch. It clearly shows the black housing and the metal pins extending from the bottom, which are designed for soldering onto the circuit board. This view is crucial for understanding the component's physical dimensions and connection points.
Setup and Installation
Replacing the R button requires specific tools and technical skills, including desoldering and soldering. If you are not comfortable with these procedures, it is recommended to seek professional assistance.
Required Tools
- Small Phillips head screwdriver (e.g., PH00)
- Plastic spudger or opening tool
- Tweezers
- Soldering iron with a fine tip
- Desoldering pump or desoldering braid
- Rosin core solder
- Flux (optional, but recommended)
- Isopropyl alcohol and cotton swabs (for cleaning)
Installation Steps
- Preparation: Power off your Nintendo Switch and disconnect the Right Joy-Con.
- Disassembly: Carefully open the Right Joy-Con casing using a small Phillips head screwdriver. Refer to online guides or videos for specific screw locations and opening techniques to avoid damage.
- Locate the R Button: Identify the existing R button micro switch on the Joy-Con's circuit board.
- Desoldering: Using a soldering iron and desoldering pump/braid, carefully desolder the pins of the old R button from the circuit board. Ensure all solder is removed and the component can be lifted cleanly.
- Remove Old Button: Gently remove the old, broken R button.
- Position New Button: Place the new replacement R button into the correct position on the circuit board, aligning its pins with the solder pads.
- Soldering: Carefully solder each pin of the new R button to its corresponding pad on the circuit board. Ensure strong, clean solder joints without bridging any connections.
- Testing (Pre-assembly): Before fully reassembling, temporarily connect the Joy-Con to the Switch and test the new R button's functionality.
- Reassembly: Once confirmed working, carefully reassemble the Joy-Con casing, ensuring all screws are tightened appropriately.
Operating the Button
Once installed, the R button operates identically to the original. Press the button firmly to activate its function within games or system menus. Ensure a clear, tactile click feedback upon pressing.
Maintenance
The R button micro switch is a sealed unit and requires no internal maintenance. To ensure longevity, keep the Joy-Con clean and free from dust, debris, and liquid spills. Avoid excessive force when pressing the button.
Troubleshooting
Button Not Responding
- Check all solder joints for cold joints or bridges. Re-solder if necessary.
- Ensure the button is correctly aligned and seated on the circuit board.
- Verify that no flex cables were damaged or dislodged during disassembly/reassembly.
Button Sticks or Feels Mushy
- Inspect for any debris or foreign objects lodged around or under the button.
- Ensure the Joy-Con casing is not overtightened, which could put pressure on the button mechanism.
- Confirm the button is correctly positioned and not misaligned.
Specifications
| Feature | Detail |
|---|---|
| Type | Micro Switch |
| Compatibility | Nintendo Switch Right Joy-Con R Button |
| Approximate Dimensions (Package) | 8 x 6 x 0.4 cm |
| Approximate Weight (Package) | 10 grams |
Warranty and Support
This product is a replacement part. For information regarding returns or defective/damaged products, please refer to the Amazon help pages where the product was purchased. Specific return policies may vary based on the seller and marketplace.
Ask a question about this manual
Ask about setup, troubleshooting, compatibility, parts, safety, or missing instructions. Manuals+ will review the question and use this page’s manual context to help answer it.