Introduction
This manual provides detailed instructions for the safe and effective operation of your Neewer NW635 TTL GN58 Flash Speedlite. Please read this manual thoroughly before using the product to ensure proper function and to prevent damage. Keep this manual for future reference.
Safety Information
- Do not disassemble or modify the flash unit. Repairs should only be performed by authorized service personnel.
- Keep the flash unit dry. Do not expose it to rain, moisture, or high humidity.
- Do not touch the flash tube immediately after firing, as it can be hot.
- Use only specified batteries (4x AA batteries). Incorrect battery types may cause leakage or explosion.
- Keep out of reach of children.
- Avoid direct eye exposure to the flash, especially at close range, as it can impair vision.
Package Contents
- Neewer NW635 TTL Flash Speedlite
- Hot Shoe Stand
- Diffuser
- Protective Carrying Bag
- Instruction Manual
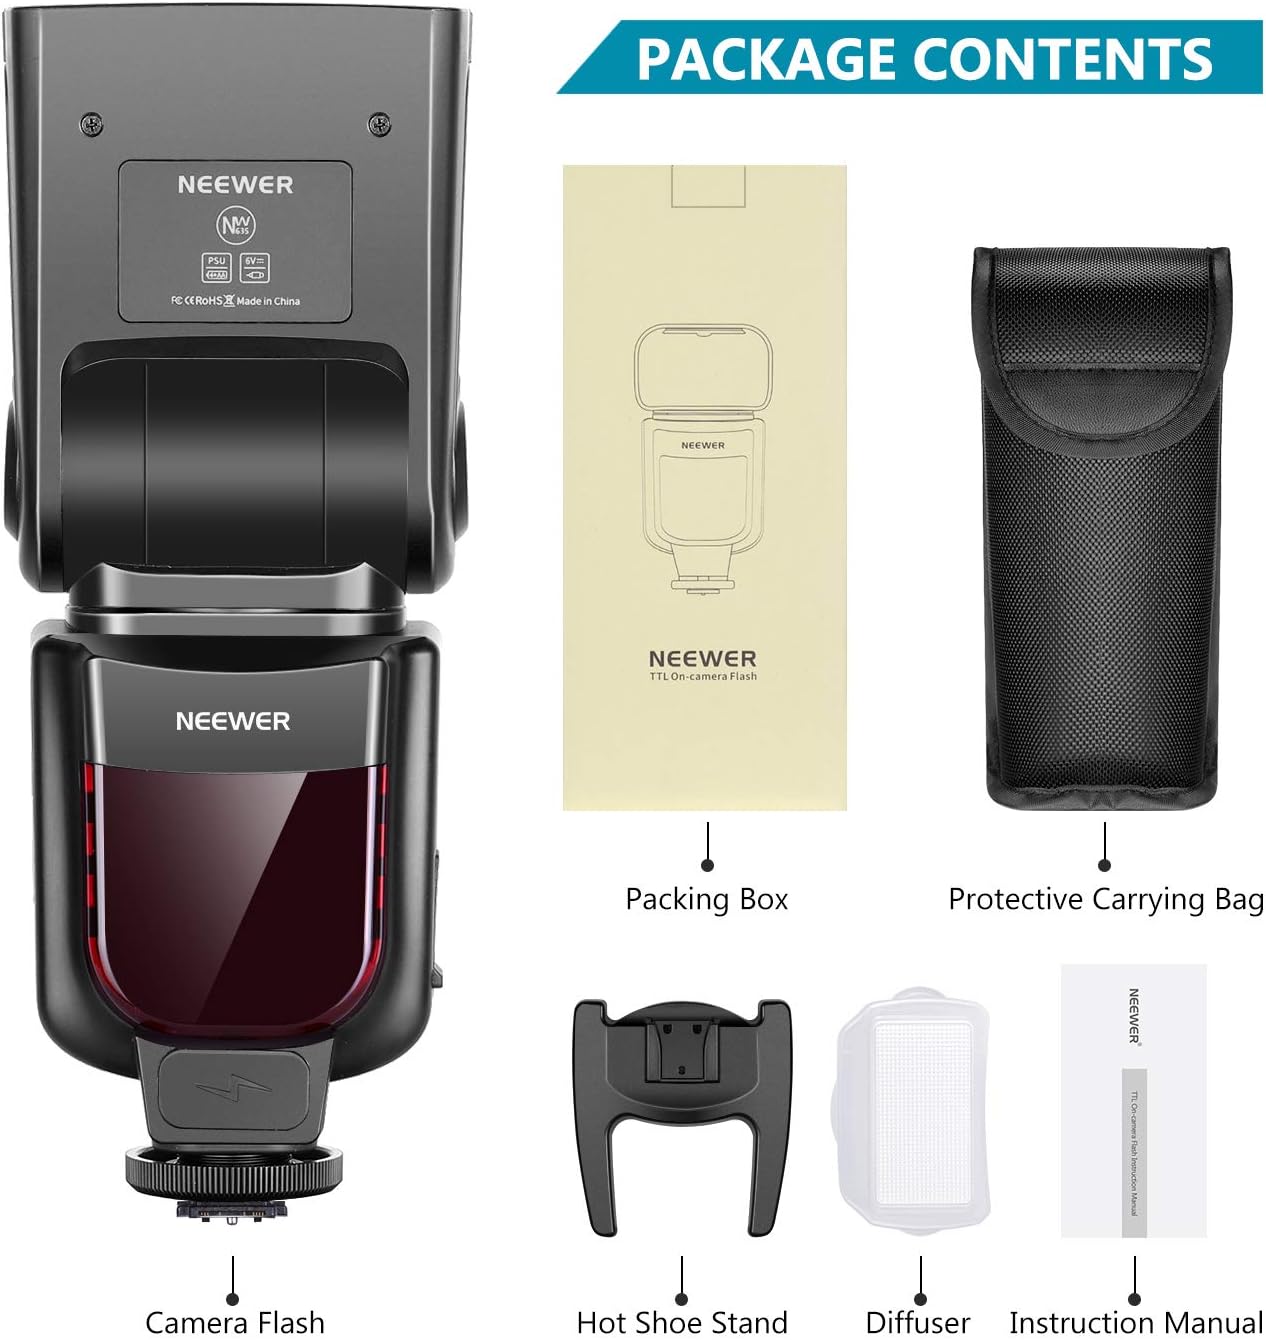
Image: The Neewer NW635 Flash Speedlite with its packing box, hot shoe stand, diffuser, and protective carrying bag.
Product Overview
Familiarize yourself with the components of your NW635 Flash Speedlite.

Image: Detailed view of the flash unit highlighting key components such as the catch-light panel, diffusing panel, flash head, flash sensor, battery compartment, external power jack, locking pin, and hot shoe stand.
- Catch-light Panel: Used to create a catch-light in the subject's eyes.
- Built-in Wide Angle Diffusing Panel: Spreads the flash light for wider coverage.
- Flash Head: The main light-emitting component.
- Flash Sensor: Detects ambient light for automatic flash control in certain modes.
- Battery Compartment: Holds 4x AA batteries (not included).
- External Power Jack: For connecting an external power source (optional).
- Locking Pin: Secures the flash to the camera's hot shoe.
- Hot Shoe Stand: The base for mounting the flash onto a camera or stand.

Image: Diagram illustrating the LCD display and control buttons, including the tilting-angle scale, LCD display, On/Off switch/Backlight button, SET button, M (Mode) button, Sync Jack, Function/Direction buttons, and Recycle indicator/test button.
Setup
1. Battery Installation
- Open the battery compartment cover located on the side of the flash unit.
- Insert four (4) AA batteries, ensuring correct polarity (+/-) as indicated inside the compartment.
- Close the battery compartment cover securely.
2. Mounting on Camera
- Slide the flash's hot shoe onto your camera's hot shoe mount.
- Ensure the flash is fully seated.
- Rotate the locking pin (or locking ring) clockwise to secure the flash firmly to the camera. Do not overtighten.

Image: The Neewer NW635 Flash Speedlite securely mounted on a Sony MI Hot Shoe mirrorless camera, ready for use.
Operating Modes
The NW635 offers several flash modes to suit various photographic needs.

Image: The flash's LCD display showing different operational modes: TTL, Multi (stroboscopic), and Slave S1, along with power settings and zoom.
1. TTL (Through-The-Lens) Mode
In TTL mode, the flash output is automatically controlled by the camera's light metering system. This provides balanced and accurate exposure by detecting the light bounced back from the subject. This mode is ideal for quick shooting and changing light conditions.
2. Manual (M) Mode
Manual mode allows you to set the flash output power manually, from 1/1 (full power) to 1/128 in 1/3 stop increments. This mode offers precise control over lighting and is suitable for consistent lighting setups or creative effects.

Image: A visual representation of how different manual power settings (1/8, 1/16, 1/32, 1/64) affect the brightness of the subject, illustrating the 8 levels of output control available.
3. Multi (Stroboscopic) Mode
Multi mode allows the flash to fire a series of rapid flashes during a single exposure. This can be used to capture multiple images of a moving subject in one frame, creating a stroboscopic effect. You can adjust the flash frequency and number of flashes.
4. S1/S2 Slave Modes
These modes allow the NW635 to act as an optical slave flash, triggered by another flash unit. This is useful for off-camera lighting setups without the need for radio triggers.
- S1 Mode: The flash will fire in response to the first flash from a master flash. Suitable for manual flash setups.
- S2 Mode: The flash will ignore the pre-flash of a TTL master flash and fire on the main flash. Suitable for TTL flash setups where the master flash uses a pre-flash.

Image: A diagram showing the flash unit in S1 and S2 slave modes, demonstrating how it can be used off-camera to create various lighting effects.
Flash Head Rotation
The flash head can be rotated and tilted to bounce light off ceilings or walls, creating softer, more natural illumination.
- Vertical Rotation: The flash head can tilt from -7 degrees to 90 degrees.
- Horizontal Rotation: The flash head can rotate from 90 degrees to 180 degrees.

Image: Illustrations demonstrating the vertical rotation angle (-7 to 90 degrees) and horizontal rotation angle (90 to 180 degrees) of the flash head for flexible lighting control.
LCD Display Functions
The LCD display provides essential information and allows for easy adjustment of settings.
- M/Multi Mode Indicator: Shows the current flash mode (Manual, Multi, or Stroboscopic).
- TTL Mode Indicator: Displays when TTL mode is active.
- Power Adjustment: Indicates the flash output level (e.g., 1/1 to 1/128).
- Slave Mode (S1/S2): Shows if the flash is operating as an optical slave.
- Sound Indicator Switch: Toggles the sound prompts.
- Flash Frequency Setting: Adjustable in Multi mode.
- Zoom Focal Length: Displays the current zoom setting (e.g., M 180mm).
- Overheating Protection: Icon indicates when the flash is overheating.
Advanced Features
1. Exposure Compensation
Adjust the flash exposure compensation from -3 to +3 in 1/3 stop increments to fine-tune the brightness of your subject relative to the background.
2. Zoom Function
The flash features an automatic or manual zoom function to match the focal length of your lens, ensuring optimal light coverage. The zoom range is typically from 24mm to 180mm.
Maintenance
- Cleaning: Use a soft, dry cloth to clean the flash unit. For stubborn dirt, a slightly damp cloth can be used, followed by a dry cloth. Do not use solvents or abrasive cleaners.
- Storage: When not in use for extended periods, remove the batteries to prevent leakage. Store the flash in a cool, dry place, away from direct sunlight and extreme temperatures.
- Flash Tube: Avoid touching the flash tube directly with bare hands, as oils can reduce its lifespan.
Troubleshooting
| Problem | Possible Cause | Solution |
|---|---|---|
| Flash does not fire. | Low or dead batteries; incorrect camera/flash settings; flash not securely mounted. | Replace batteries; check camera and flash settings (e.g., ensure flash is enabled); re-mount flash securely. |
| Flash exposure is inconsistent. | TTL metering issues with specific apertures; subject distance changes; flash head position. | Adjust flash exposure compensation; use manual mode for consistent output; ensure flash head is aimed correctly. |
| Flash gets stuck on camera hot shoe. | Overtightened locking mechanism; debris in hot shoe. | Do not overtighten the locking pin. Gently wiggle the flash while pulling it off. Clean the hot shoe contacts. |
| Flash overheats. | Frequent full-power flashes. | Allow the flash to cool down. Reduce flash power or frequency of firing. |
Specifications
| Feature | Detail |
|---|---|
| Guide Number | GN58 (ISO 100, 180mm) |
| Flash Modes | TTL, Manual, Multi, S1, S2 |
| Zoom Range | 24-180mm (Auto/Manual) |
| Vertical Rotation Angle | -7 to 90 degrees |
| Horizontal Rotation Angle | 0 to 180 degrees |
| Flash Duration | 1/200s - 1/5600s |
| Recycle Time | Approx. 3.5 seconds |
| Exposure Control Type | TTL, Manual |
| Power Source | 4x AA batteries |
| Weight | 18 Ounces (approx. 510g) |
| Compatible Mountings | Sony MI Hot Shoe |
Official Product Video
Video: An official product video demonstrating the features and usage of the Neewer NW635 TTL Flash Speedlite, including its various modes, rotation capabilities, and application in different photography scenarios.
Warranty and Support
Neewer products are designed for reliability and performance. This product comes with a standard manufacturer's warranty. For specific warranty terms, please refer to the warranty card included in your package or visit the official Neewer website.
For technical support, troubleshooting assistance, or service inquiries, please contact Neewer customer support through their official channels. Keep your purchase receipt as proof of purchase for warranty claims.
Online Support: Visit www.neewer.com/support