X-Sense CO03B
X-Sense CO Detector User Manual
Model: CO03B
Introduction
This user manual provides important information on the installation, operation, and maintenance of your X-Sense CO03B Carbon Monoxide Detector. Please read this manual thoroughly before installation and keep it for future reference. This detector is designed to detect carbon monoxide gas and alert you to dangerous levels, helping to protect your home and family.
Safety Information
Important: This carbon monoxide alarm is designed to detect carbon monoxide gas from any combustion source. It is NOT designed to detect smoke, fire, or other gases. It is not a substitute for a smoke alarm.
- Never ignore any alarm. Ignoring the alarm may result in injury or death.
- Test the alarm weekly to ensure proper operation.
- Do not paint the alarm. Paint can clog the openings and interfere with the sensor's ability to detect CO.
- Do not install in areas with extreme temperatures, high humidity, or excessive dust.
- Keep the alarm clean. Dust and debris can affect performance.
Product Overview
The X-Sense CO03B Carbon Monoxide Detector features a clear LCD display, a test/silence button, and LED indicators for alarm, power, and fault status.

Figure 1: Components of the X-Sense CO03B Carbon Monoxide Detector. This image shows the front of the detector with callouts pointing to the LCD display, the red (Alarm), green (Power), and yellow (Fault) LED indicators, the central test/silence button, and the horn grille.
Key Features:
- LCD Display: Provides real-time CO concentration readings in PPM (Parts Per Million).
- LED Indicators:
- Red LED: Alarm status.
- Green LED: Power status.
- Yellow LED: Fault or low battery status.
- Test/Silence Button: Used to test the alarm's functionality and silence false alarms.
- 85 dB Alarm: Loud audible alarm to alert occupants.
- Replaceable 9V Battery: Provides 3-5 years of power.
Setup and Installation
What's in the Box:
- 1 x CO Detector
- 1 x Mounting Bracket
- 1 x 9-Volt Battery
- 2 x Screws
- 2 x Wall Plugs
- 1 x User Manual

Figure 2: Package contents of the X-Sense CO03B Carbon Monoxide Detector.
Choosing a Location:
Carbon monoxide is slightly lighter than air and mixes readily with air. For optimal detection, install the CO detector:
- On a wall, at least 1.5 meters (5 feet) from the floor, but below the ceiling.
- In or near sleeping areas and living areas.
- Within 6 meters (20 feet) of any fuel-burning appliance.
- Avoid dead air spaces, such as at the peak of a vaulted ceiling or in corners.
- Do not install in garages, kitchens, or bathrooms due to high humidity, dust, or exhaust fumes.
Mounting Instructions:
- Using the mounting bracket as a template, mark two drill holes on the wall.
- Drill holes and insert the wall plugs.
- Secure the mounting bracket to the wall with the provided screws.
- Insert the 9V battery into the battery compartment of the detector. Ensure correct polarity.
- Align the detector with the mounting bracket and twist clockwise until it locks into place.
- Test the alarm immediately after installation.

Figure 3: Attaching the CO detector to its mounting bracket.
Operating the Detector
Initial Power-On:
Once the battery is installed, the detector will perform a self-test. The LCD display will show "0 PPM" and the green LED will flash every 60 seconds, indicating normal operation.
Testing the Alarm:
Press and hold the Test/Silence button. The alarm will sound three loud beeps, and the red LED will flash. The LCD display will show a test value. Release the button to stop the test. Test the alarm weekly.
Figure 4: Performing a weekly test by pressing the test button.
Understanding the Display and Indicators:
| Indicator/Display | Meaning |
|---|---|
| LCD Display (PPM) | Current Carbon Monoxide concentration. |
| Green LED (flashing every 60s) | Normal operation. |
| Red LED (flashing rapidly) + Alarm | CO detected at dangerous levels. |
| Yellow LED (flashing) + Chirp | Low battery warning. Replace battery immediately. |
| Yellow LED (solid) + "Err" on LCD | Malfunction. The unit needs to be replaced. |
| "End" on LCD | End of product life. Replace the unit. |

Figure 5: The detector continuously monitors CO levels. Alarm thresholds are shown for 30 ppm, 50 ppm, 100 ppm, and 300 ppm with corresponding exposure times.
Alarm Response:
If the alarm sounds:
- Immediately move to fresh air outdoors or open all doors and windows to ventilate the area.
- Do a head count to check that all persons are accounted for.
- Do not re-enter the premises until the alarm has stopped and the CO concentration has returned to 0 PPM.
- Call the fire department or a qualified technician to investigate the source of the CO.
Maintenance
Battery Replacement:
The detector uses a 9V alkaline battery. When the battery is low, the yellow LED will flash and the unit will chirp every 60 seconds. Replace the battery immediately.
- Twist the detector counter-clockwise to remove it from the mounting bracket.
- Open the battery compartment cover.
- Remove the old 9V battery and dispose of it properly.
- Insert a new 9V alkaline battery, ensuring correct polarity.
- Close the battery compartment and reattach the detector to the mounting bracket.
- Test the alarm after replacing the battery.

Figure 6: Replacing the 9V battery in the CO detector.
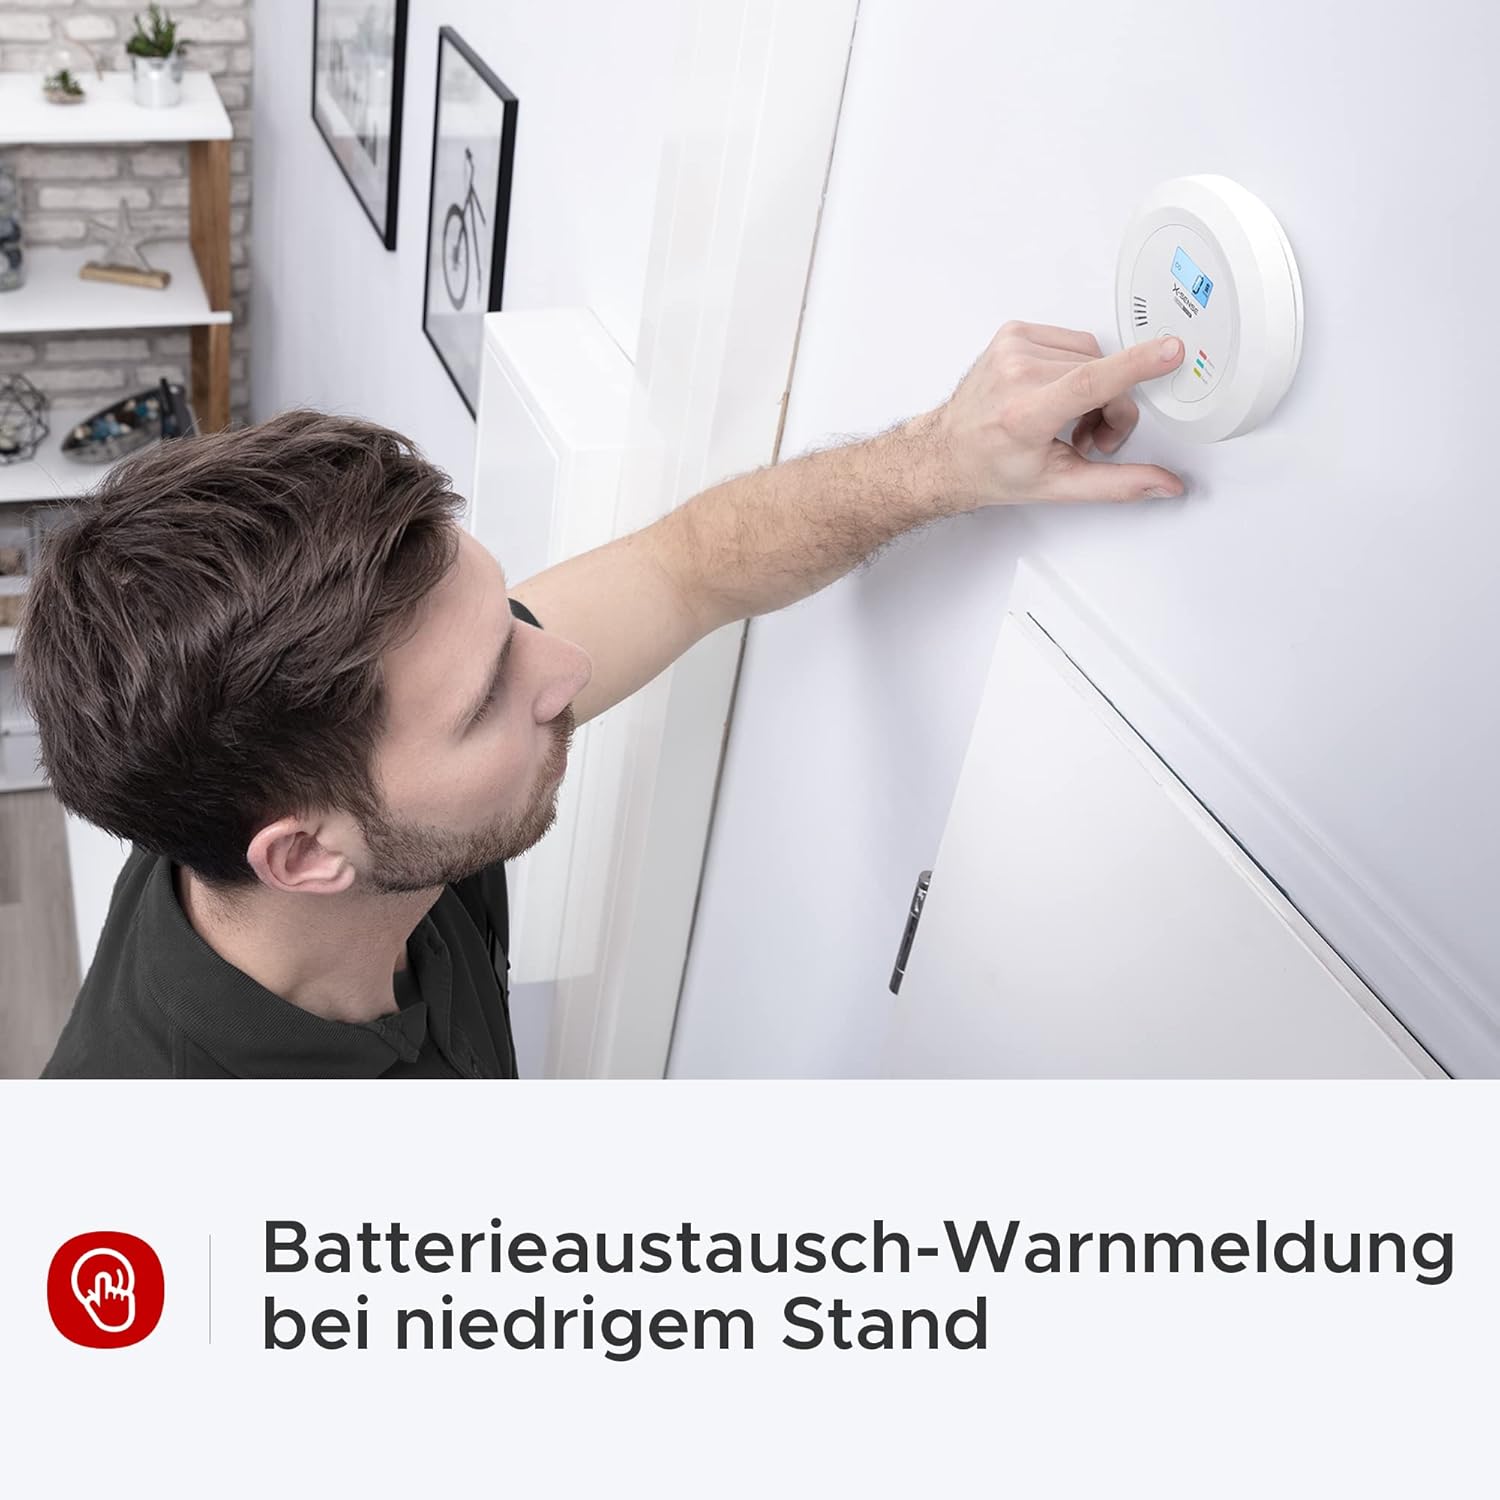
Figure 7: Low battery warning ('Lb') displayed on the LCD screen.
Cleaning Your Detector:
Clean the detector at least once a month to remove dust and debris. Use a soft, damp cloth to wipe the exterior. Do not use cleaning agents or solvents. Do not spray air fresheners or other aerosols near the detector.
Troubleshooting
| Problem | Possible Cause | Solution |
|---|---|---|
| Alarm sounds intermittently or chirps every 60 seconds. | Low battery. | Replace the 9V battery. |
| Yellow LED is solid or "Err" on LCD. | Detector malfunction. | The unit needs to be replaced. Contact customer support. |
| "End" displayed on LCD. | End of product life. | Replace the detector immediately. |
| Alarm sounds but no visible CO source. | False alarm or low-level CO presence. | Ventilate the area. If alarm persists, evacuate and call emergency services. |
| Detector does not respond to test button. | Dead battery or unit malfunction. | Replace battery. If still unresponsive, replace the unit. |
Specifications
| Feature | Detail |
|---|---|
| Model Number | CO03B |
| Sensor Type | Electrochemical |
| Power Source | 9V Alkaline Battery (included) |
| Battery Life | 3-5 years |
| Alarm Loudness | 85 dB at 3 meters (10 feet) |
| CO Concentration Range | 30 - 999 PPM |
| Operating Temperature | 5°C to 40°C (41°F to 104°F) |
| Operating Humidity | 30% - 90% RH (non-condensing) |
| Dimensions (D x H) | 125 mm x 38 mm (4.92 in x 1.5 in) |
| Weight | 196 g (0.43 lbs) |
| Material | Improved ABS Material (High temperature resistance, corrosion resistance, no discoloration) |
| Installation Method | Screw mounting |

Figure 8: Dimensions of the X-Sense CO03B Carbon Monoxide Detector.
Warranty and Support
X-Sense provides lifetime customer support and a 24-hour response time for inquiries. For any questions or assistance with your X-Sense CO03B Carbon Monoxide Detector, please contact X-Sense customer service.
Refer to the official X-Sense website or the contact information provided in your product packaging for the most up-to-date support details.