Introduction
This Easytry123 Universal Remote Control serves as a direct replacement for various JVC LCD LED HDTV TV models. It is designed to provide essential control functions for your television. This remote operates using infrared (IR) technology and requires two AAA batteries for operation, which are not included with the product.
Compatible JVC TV Models: RM-C380, RM-C3801A, RM-C381, RM-C3812A, RM-C382, RM-C3822A, RM-C383, RM-C3832A, RM-C384.

Image: Front view of the Easytry123 Universal Remote Control. This image displays the layout of the buttons, including power, input selection, channel and volume controls, number pad, and navigation keys.
Setup
The Easytry123 Universal Remote Control is designed to work with the specified JVC TV models without requiring complex programming. Simply install the batteries, and the remote should be ready for use.
Battery Installation
- Locate the Battery Compartment: Turn the remote control over. The battery compartment is located on the back of the remote.
- Open the Battery Cover: Gently slide the battery compartment cover downwards or press the latch (if present) and lift the cover off.
- Insert Batteries: Insert two (2) AAA batteries into the compartment. Ensure that the positive (+) and negative (-) terminals of the batteries match the polarity indicators inside the compartment. Incorrect insertion can prevent the remote from functioning.
- Close the Battery Cover: Replace the battery compartment cover by sliding it back into place until it clicks securely.
After installing the batteries, the remote control is ready to operate your compatible JVC television.
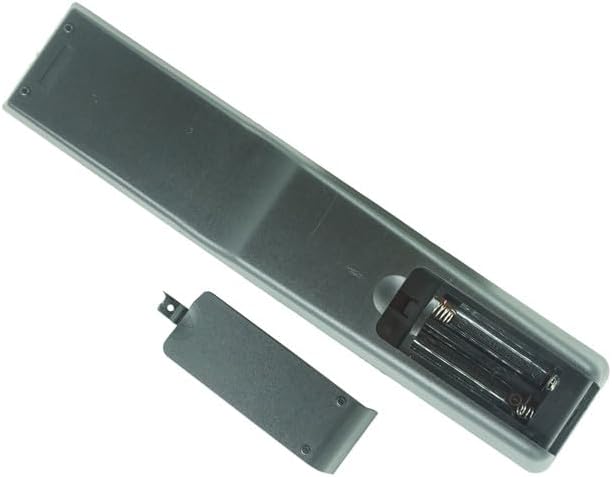
Image: Back view of the remote control with the battery cover removed. This shows the empty battery compartment where two AAA batteries should be inserted according to the polarity markings.
Operating Instructions
Point the remote control directly at the infrared sensor on your JVC television. Ensure there are no obstructions between the remote and the TV.
- Power On/Off: Press the POWER button (usually red, located at the top right) to turn your TV on or off.
- Volume Control: Use the VOL + and VOL - buttons to adjust the volume level.
- Channel Selection: Use the CH + and CH - buttons to change channels sequentially. You can also use the number pad (0-9) to directly enter channel numbers.
- Mute: Press the MUTE button to temporarily silence the TV audio. Press it again to restore sound.
- Input/Source: Press the INPUT or SOURCE button to cycle through available input sources (e.g., HDMI, AV, USB).
- Navigation and OK: Use the directional arrow buttons (UP, DOWN, LEFT, RIGHT) to navigate menus and select options. Press the OK button to confirm a selection.
- Menu: Press the MENU button to access the TV's main menu.
- Exit/Back: Use the EXIT or BACK button to exit menus or return to the previous screen.
- Special Functions: Buttons labeled CC (Closed Caption), ZOOM, MEDIA, USB, COMP, HDMI, PC, NETFLIX (if present) provide direct access to specific features or inputs.
Note: Not all buttons or functions on this replacement remote may be fully identical to your original remote or supported by all JVC TV models.
Maintenance
Proper care and maintenance will ensure the longevity and optimal performance of your remote control.
- Cleaning: Wipe the remote control with a soft, dry cloth. For stubborn dirt, slightly dampen the cloth with water or a mild, non-abrasive cleaner. Avoid using harsh chemicals or excessive moisture, as these can damage the remote's electronics.
- Battery Replacement: Replace batteries when the remote's response becomes sluggish or it stops working. Always replace both batteries at the same time with new AAA batteries. Do not mix old and new batteries, or different types of batteries.
- Storage: If the remote control will not be used for an extended period, remove the batteries to prevent leakage, which can cause damage to the remote. Store the remote in a cool, dry place away from direct sunlight and extreme temperatures.
- Avoid Drops and Impacts: Protect the remote from physical shocks, as internal components can be damaged.
Troubleshooting
If you encounter issues with your remote control, please refer to the following troubleshooting steps:
- Remote Not Responding:
- Check Batteries: Ensure batteries are inserted correctly with the correct polarity (+/-). Replace old batteries with fresh AAA batteries.
- Line of Sight: Make sure there are no objects blocking the path between the remote's IR emitter and the TV's IR receiver.
- Distance: Ensure you are within the effective range of the remote control (typically 15-20 feet).
- TV Sensor: Verify that the TV's infrared sensor is not obstructed or dirty.
- Some Functions Not Working:
- This remote is a replacement and may not offer every single function or button layout identical to your original JVC remote. Some advanced or specific features of your TV might not be accessible via this remote.
- Refer to your JVC TV's original manual for specific functions if you suspect a compatibility issue with a particular button.
- Remote Buttons Stuck or Unresponsive:
- Clean the remote control, especially around the buttons, to remove any dirt or debris that might be causing them to stick.
- If a button remains unresponsive after cleaning and battery replacement, the remote may be damaged and require replacement.
Specifications
| Brand | Easytry123 |
| Model Compatibility | JVC RM-C380, RM-C3801A, RM-C381, RM-C3812A, RM-C382, RM-C3822A, RM-C383, RM-C3832A, RM-C384 LCD LED HDTV TVs |
| Power Source | 2 x AAA Batteries (not included) |
| Connectivity Technology | Infrared (IR) |
| Material | New ABS Plastic |
| Controller Type | Button Control |
Warranty and Support
Specific warranty information for this Easytry123 Universal Remote Control is not provided in the product details. For any warranty-related inquiries, product support, or further assistance, please contact the seller directly through the platform where the purchase was made.
Seller: Easytry123
For the most up-to-date support information, please refer to your purchase documentation or the seller's contact details on the product listing page.