
COSTWAY 23047-EPCY
COSTWAY Portable Electric Laundry Dryer
Model: 23047-EPCY
User Manual
1. Introduction
Thank you for purchasing the COSTWAY Portable Electric Laundry Dryer. This manual provides essential information for the safe and efficient use of your appliance. Please read all instructions carefully before operation and retain this manual for future reference.

Figure 1.1: Front view of the COSTWAY Portable Electric Laundry Dryer.
2. Important Safety Instructions
To reduce the risk of fire, electric shock, or injury, follow these basic precautions:
- Read all instructions before using the appliance.
- Do not dry articles that have been previously cleaned in, washed in, soaked in, or spotted with gasoline, dry-cleaning solvents, or other flammable or explosive substances.
- Do not allow children to play on or in the appliance. Close supervision is necessary when the appliance is used near children.
- Before the appliance is removed from service or discarded, remove the door to the drying compartment.
- Do not reach into the appliance if the drum is moving.
- Do not install or store this appliance where it will be exposed to the weather.
- Do not tamper with controls.
- Do not repair or replace any part of the appliance or attempt any servicing unless specifically recommended in this manual.
- Always disconnect the appliance from the power supply before cleaning or performing any maintenance.
- Ensure proper ventilation. The dryer must be vented externally.
- Do not overload the dryer. Refer to the capacity specifications.
- Clean the lint filter before or after each load.
3. Product Overview and Components
Familiarize yourself with the main parts of your dryer for optimal use.

Figure 3.1: Key components of the dryer. This includes the stainless steel tub, integrated viewing window, control panel, and air intake filter.
- Stainless Steel Tub: Durable and resistant to scratches.
- Integrated Viewing Window: Allows monitoring of the drying process.
- Control Panel: For selecting drying programs and settings.
- Air Intake Filter: Essential for efficient operation and air quality.
- Minimal Noise Design: Engineered for quiet operation.
4. Installation and Setup
The COSTWAY Portable Electric Laundry Dryer is designed for flexible placement. It can be mounted on a wall, placed on a firm horizontal floor, or installed on a rack to save space.
- Location: Choose a dry, well-ventilated area. Ensure adequate space around the dryer for air circulation.
- Power Connection: Connect the dryer to a standard 110V, 60Hz electrical outlet. The dryer operates at 1500W.
- Venting: The dryer requires external venting. Ensure the exhaust hose is properly connected and directs moist air outside. A 4-inch dryer hose is typically required (not always included).
- Leveling: If placed on a floor, ensure the dryer is level to prevent vibrations and ensure proper operation. Adjust the leveling feet as needed.
- Wall Mounting (Optional): If wall mounting, ensure the wall structure can support the dryer's weight and follow specific wall-mounting kit instructions (kit sold separately).

Figure 4.1: The compact design allows for flexible placement in various home environments.
5. Operating Instructions
Operating your dryer is straightforward. Follow these steps for effective drying.
5.1 Loading the Dryer
- Sort laundry by fabric type and desired drying time.
- Do not overload the dryer. The maximum capacity is approximately 12-13 pounds (5.9 kg) of wet laundry. Overloading can reduce drying efficiency and cause wrinkles.
- Place items loosely into the drum.
- Close the door securely.
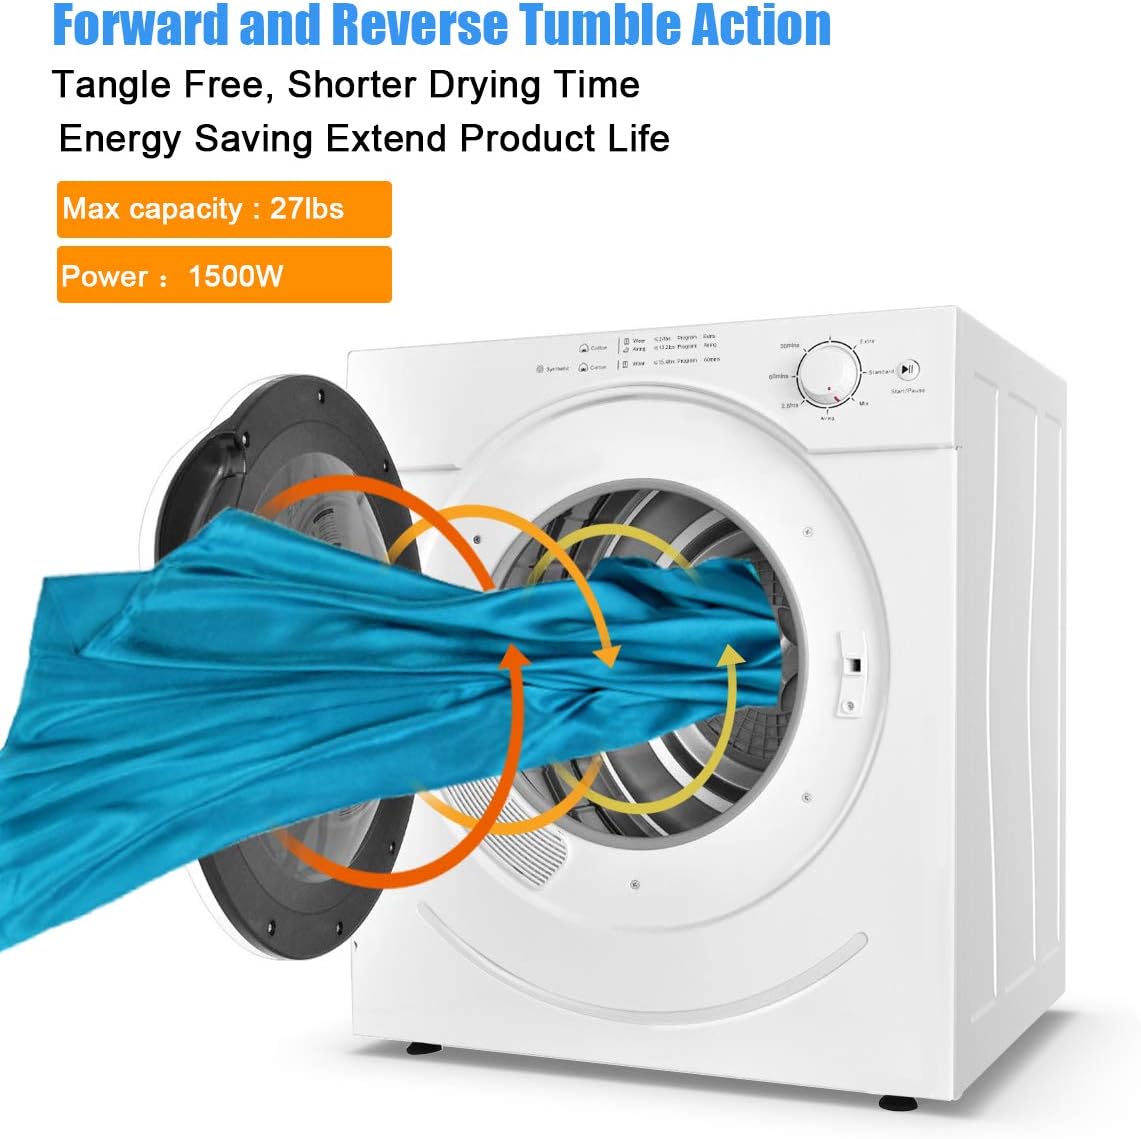
Figure 5.1: The dryer features forward and reverse tumble action for tangle-free drying and improved efficiency.
5.2 Control Panel and Drying Programs
The control panel allows you to select the appropriate drying program for your laundry.

Figure 5.2: Control dial with drying program selections.
- Extra (170 mins): Recommended for cotton weaving clothes, jeans, and bed sheets.
- Standard (140 mins): Suitable for general cotton clothes and jeans.
- Mix (110 mins): For mixed loads of cotton and synthetic fabrics.
- Airing (90 mins): Ideal for silk clothing, polyester, and delicate fibers.
- 2.5 hrs (150 mins): For larger loads of cotton clothes.
- 60 mins: For quick-drying clothes.
- 30 mins: For warming clothes or very small, lightly damp items.
Turn the dial to select your desired program, then press the Start/Pause button to begin or pause the cycle.

Figure 5.3: The dryer can reach temperatures up to 172°F (77.7°C) and is suitable for various fabric types.
6. Maintenance
Regular maintenance ensures the longevity and efficient operation of your dryer.
6.1 Cleaning the Lint Filter
The dryer is equipped with a double filtration system to capture lint and prevent air pollution. Clean the lint filter before or after every load to maintain drying efficiency and prevent fire hazards.
Figure 6.1: The double filtration system includes an air inlet filter and an air outlet filter.
- Open the dryer door.
- Locate the lint filter inside the drum.
- Remove the filter by pulling it out.
- Remove any accumulated lint by hand or with a soft brush.
- Reinsert the filter firmly into its position.
6.2 Cleaning the Exterior
Wipe the exterior surfaces with a soft, damp cloth. Do not use abrasive cleaners or solvents.
6.3 Cleaning the Interior Drum
Occasionally, wipe the interior drum with a damp cloth. For stubborn stains, use a mild soap solution and then wipe clean with a damp cloth.
7. Troubleshooting
Before contacting customer support, review these common issues and solutions.
| Problem | Possible Cause | Solution |
|---|---|---|
| Dryer does not start | No power; Door not closed; Program not selected. | Check power cord connection and circuit breaker; Ensure door is fully latched; Select a drying program. |
| Clothes not drying properly | Overloaded; Lint filter clogged; Improper program selected; Poor ventilation. | Reduce load size; Clean lint filter; Select appropriate program; Check exhaust vent for obstructions. |
| Excessive noise or vibration | Dryer not level; Foreign object in drum; Overloaded. | Adjust leveling feet; Check drum for loose items; Reduce load size. |
| Dryer stops mid-cycle | Overheating; Power interruption. | Clean lint filter and check ventilation; Check power supply. |
8. Specifications
| Feature | Detail |
|---|---|
| Brand | COSTWAY |
| Model Number | 23047-EPCY |
| Dimensions (L x W x H) | 66.04 x 48.26 x 58.42 cm (26 x 19 x 23 inches approx.) |
| Weight | 25.85 kg (57 lbs approx.) |
| Capacity | 5.9 Kilograms (approx. 12-13 lbs) |
| Power | 1500 W |
| Voltage | 110 V |
| Frequency | 60 Hz |
| Drying Temperature | Up to 172°F (77.7°C) |
| Form Factor | Front Load |
| Color | White |
9. Warranty and Customer Support
For warranty information or technical assistance, please refer to the documentation provided at the time of purchase or contact COSTWAY customer support. Keep your purchase receipt as proof of purchase.
Return Policy: This product may be eligible for returns up to January 31, 2026, as per the seller's policy at the time of purchase.
For further inquiries, please visit the official COSTWAY website or contact your retailer.
Ask a question about this manual
Ask about setup, troubleshooting, compatibility, parts, safety, or missing instructions. Manuals+ will review the question and use this page’s manual context to help answer it.