1. Introduction
This manual provides detailed instructions for the installation, operation, and maintenance of your SolaMr 50A Solar Charge Controller. This device is designed to manage the power flow from your solar panels to your battery bank, ensuring efficient charging and protecting your batteries from overcharge and over-discharge. It features automatic 12V/24V voltage recognition, smart PWM charging, a clear LCD display, and dual USB outputs for convenient device charging.
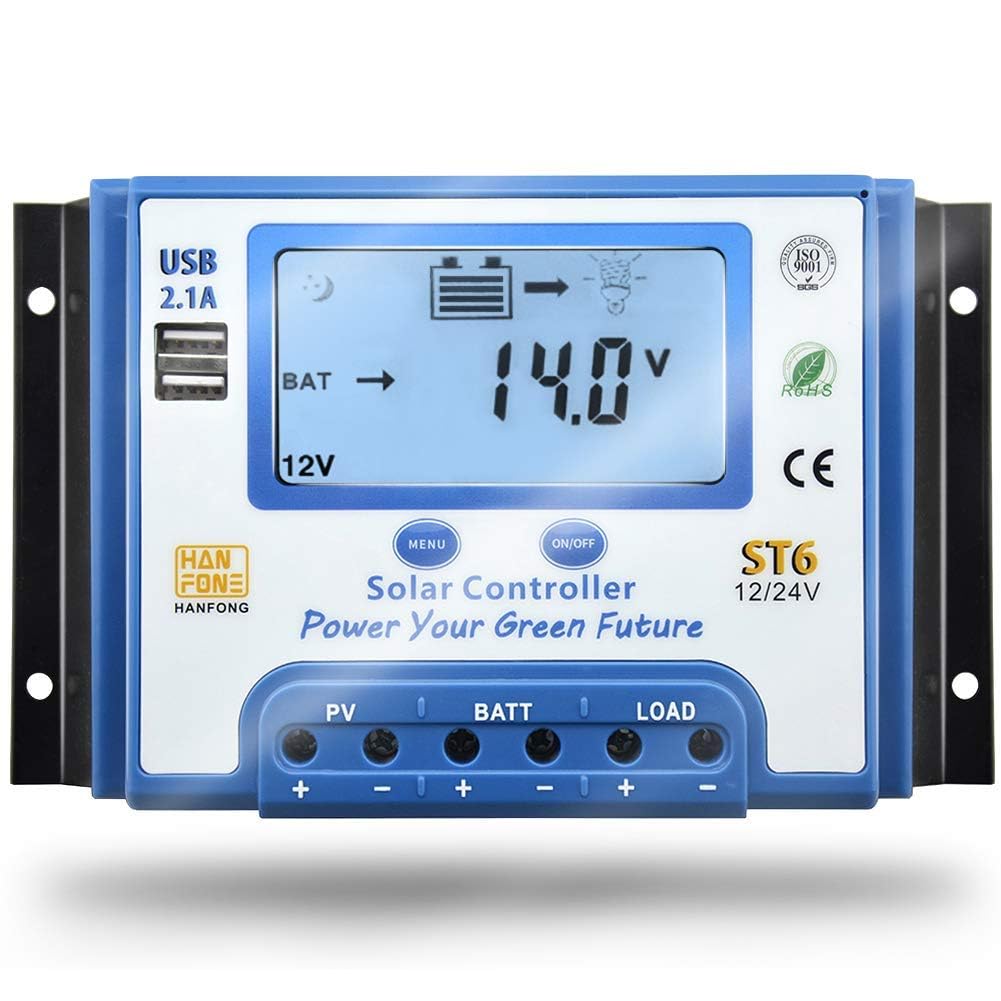
Figure 1: SolaMr 50A Solar Charge Controller
2. Safety Precautions
- Ensure all connections are correct before powering on the system. Incorrect wiring can damage the controller and connected devices.
- The voltage of solar panels can be high under sunlight. Always exercise caution to prevent injury or damage to the controller.
- For 48V systems, reverse connection of the solar panel will destroy the solar charge controller. Verify polarity carefully.
- To avoid injury from load voltage, always disconnect the load from the controller output using the button before connecting or disconnecting the load wires.
- The controller does not offer reverse connection protection for the load. Incorrect load connection can damage the load.
- Install the controller in a well-ventilated area, away from flammable materials and direct sunlight.
- This device is designed for indoor use. Protect it from moisture and dust.
3. Product Features
The SolaMr 50A Solar Charge Controller is equipped with several features to optimize your solar power system:
- Automatic 12V/24V Voltage Recognition: Automatically detects and adapts to your system's battery voltage.
- Comprehensive Protection Circuit: Guards against over-voltage, over-current, short circuits, and reverse connections.
- Smart PWM Charging: Utilizes multi-stage charging and automatic temperature compensation for extended battery life.
- Clear LCD Display: Provides real-time monitoring of solar input, battery level, load status, and accumulated charging/discharging data.
- Dual 5V/2.1A USB Ports: Conveniently charge mobile phones and other USB-powered devices.
- Versatile Load Control Modes: Offers 24-hour mode, timer mode (light + time control), and power rationing mode.
- Durable Construction: Features an aluminum alloy casing for enhanced heat dissipation and longevity.

Figure 2: Labeled features of the SolaMr Solar Charge Controller, showing USB ports, LCD display, menu and power buttons, and connection terminals.

Figure 3: Close-up view of the dual USB ports and LCD display on the SolaMr Solar Charge Controller.
4. Installation Guide
Follow these steps for proper installation of your solar charge controller. Ensure all power sources are disconnected before making any connections.
- Mounting: Choose a dry, well-ventilated location, protected from direct sunlight and moisture. Mount the controller vertically on a wall or panel, ensuring adequate airflow around the unit for heat dissipation.
- Connect Battery: Connect the battery to the controller's battery terminals (+ and -). Ensure correct polarity. The controller will automatically detect the system voltage (12V or 24V).
- Connect Solar Panel: Connect the solar panel to the controller's PV terminals (+ and -). Ensure correct polarity. The LCD display should show charging status.
- Connect Load: Connect the DC load to the controller's LOAD terminals (+ and -). Ensure correct polarity. Important: Always connect the load after the battery and solar panel. Disconnect the load before disconnecting the battery or solar panel.
Wiring Order: Always connect the battery first, then the solar panel, and finally the load. Disconnect in the reverse order: load, then solar panel, then battery.

Figure 4: Wiring diagram illustrating connections for solar panel, battery, and load to the SolaMr Solar Charge Controller, including an optional inverter.
5. Operating Instructions
5.1 LCD Display and Buttons
The controller features an intuitive LCD display and two buttons for easy operation:
- MENU Button: Press to cycle through display screens (voltage, current, temperature, etc.) and enter/exit parameter settings.
- ON/OFF Button: Controls the load output (turns load on/off). In parameter setting mode, it adjusts values.
5.2 Load Control Modes
The controller offers flexible load management options:
- 24-Hour Mode: Load output is continuously on.
- Timer Mode (Light + Time Control): Load output turns on at dusk and stays on for a set number of hours.
- Power Rationing Mode: Specific settings for power distribution.
Refer to the detailed parameter settings in the full manual for configuring these modes.
5.3 USB Output
The dual 5V/2.1A USB ports can be used to charge compatible electronic devices. The USB output is active when the controller is powered.
6. Maintenance
Regular maintenance ensures optimal performance and longevity of your solar charge controller:
- Check Connections: Periodically inspect all wiring connections for tightness and corrosion.
- Clean Controller: Keep the controller clean and free from dust and debris. Use a dry cloth for cleaning.
- Ventilation: Ensure the installation area remains well-ventilated to prevent overheating.
- Battery Inspection: Regularly check your battery bank for signs of damage, corrosion, or low electrolyte levels (for flooded batteries).
7. Troubleshooting
If you encounter issues with your SolaMr 50A Solar Charge Controller, refer to the following common problems and solutions:
| Problem | Possible Cause | Solution |
|---|---|---|
| No display on LCD | Battery not connected or reverse polarity; battery voltage too low. | Check battery connections and polarity. Ensure battery voltage is above minimum operating threshold. |
| Battery not charging | Solar panel not connected or reverse polarity; insufficient sunlight; damaged solar panel or wiring. | Verify solar panel connections and polarity. Check for adequate sunlight. Inspect solar panel and wiring for damage. |
| Load not working | Load output turned off; load connected incorrectly; battery voltage too low (low voltage disconnect). | Press the ON/OFF button to activate load. Check load connections and polarity. Charge battery. |
| Overcharge/Over-discharge warning | Battery parameters set incorrectly; battery fault. | Verify battery type and parameters. Test battery health. |
For further assistance, please contact customer support.
8. Technical Specifications
| Parameter | Value |
|---|---|
| Brand | SolaMr |
| Model | ST6-50A |
| Rated Current | 50A |
| System Voltage | 12V/24V Automatic Recognition |
| Display Type | LCD |
| USB Output | Dual 5V/2.1A |
| Protection Features | Over-voltage, Over-current, Short Circuit, Reverse Connection |
| Charging Type | PWM (Pulse Width Modulation) |
| Dimensions (Approx.) | L 194mm x W 133mm x H 60mm |
| UPC | 732376585057 |

Figure 5: Approximate dimensions of the SolaMr Solar Charge Controller.
9. Warranty and Customer Support
SolaMr is committed to providing reliable products and excellent customer service. This product is backed by a clear warranty. For any questions, technical assistance, or warranty claims, please contact SolaMr customer support through the retailer where the product was purchased or visit the official SolaMr store online.
Online Store: SolaMr Amazon Store


