
1. Product Overview
The Evertech 8-Channel 1080P Security Digital Video Recorder (DVR) is designed for comprehensive surveillance systems. This DVR supports up to eight high-resolution security cameras simultaneously, offering real-time viewing and recording capabilities. It comes equipped with a pre-installed 4TB hard drive for extensive video storage.
Key Features:
- 8-Channel HD Recording: Supports up to 8 cameras for simultaneous video viewing and recording.
- Wide Camera Compatibility: Compatible with 1080P, 960P, 720P, TVI, AHD, CVI, and traditional analog cameras. Note: Not compatible with SDI or cameras exceeding 2.4MP resolution.
- 4TB Hard Drive: Pre-installed 4TB memory storage for extensive video archives.
- Flexible Recording Modes: Offers Manual, Scheduled, and Motion Detection recording options.
- Motion Detection Alerts: Configurable motion detection with email notification capabilities.
- Remote Access: Easy remote viewing via a free mobile application for iPhone, iPad, and Android devices using QR code setup.
- USB Backup: Supports video backup via USB port.


2. Package Contents
Before beginning installation, please verify that all items listed below are present in your package.
- Evertech 8-Channel DVR with 4TB HDD Installed
- Power Supply Adapter
- Wireless Mouse
- CD for PC Software and Video Instructions (if included)

3. Setup and Installation
Follow these steps to set up your Evertech DVR system.
3.1 Physical Connections
- Connect Cameras: Attach your security cameras to the BNC video input ports on the rear of the DVR. Each port is labeled "VIDEO IN".
- Connect Monitor: Connect a monitor to the DVR using either the HDMI or VGA output port.
- Connect Audio (Optional): If using an external microphone, connect it to the "AUDIO IN" port. Connect speakers to the "AUDIO OUT" port for audio playback.
- Connect Network: For remote access and network features, connect an Ethernet cable from the DVR's LAN port to your router.
- Connect USB Devices: Plug the included wireless mouse into a USB port. Additional USB devices, such as a USB flash drive for backup, can also be connected.
- Connect Power: Connect the power adapter to the DVR's DC 12V power input and then plug it into a power outlet.

3.2 Initial Power-On and Configuration
Once all connections are made, power on the DVR. The system will boot up, and you will be guided through an initial setup wizard on the connected monitor. This wizard typically includes setting the date/time, creating an administrator password, and configuring network settings.
4. Operating the DVR
4.1 Recording Modes
- Manual Recording: Start and stop recording manually as needed.
- Scheduled Recording: Set specific times and days for continuous recording.
- Motion Detection Recording: The DVR will record only when motion is detected by the cameras. Configure sensitivity and detection areas in the system settings.
4.2 Playback and Backup
Access recorded footage through the DVR's menu interface. You can search by date, time, and event type (e.g., motion detection). Use the USB port to back up important video segments to a USB flash drive.
4.3 Remote Monitoring
To access your DVR remotely via a smartphone or tablet:
- Download the free mobile application (compatible with iPhone, iPad, and Android devices) from your device's app store.
- Open the application and follow the instructions to add your DVR. This typically involves scanning a QR code displayed on the DVR's monitor or manually entering its network details.
- Once connected, you can view live camera feeds, play back recorded video, and receive motion detection alerts from anywhere with an internet connection.

5. Maintenance
Regular maintenance ensures optimal performance and longevity of your DVR system.
- Hard Drive Management: The 4TB hard drive will automatically overwrite the oldest footage when full. Periodically review and back up important recordings to external storage.
- Cleaning: Keep the DVR unit clean and free from dust. Use a soft, dry cloth for cleaning. Ensure ventilation openings are not obstructed.
- Firmware Updates: Check the manufacturer's website periodically for firmware updates. Updating firmware can improve system stability and add new features.
6. Troubleshooting
This section addresses common issues you might encounter with your DVR system.
| Problem | Possible Cause | Solution |
|---|---|---|
| No video display on monitor. | Loose video cable, incorrect input selected on monitor, DVR not powered on. | Check HDMI/VGA cable connections. Ensure monitor is set to the correct input source. Verify DVR power. |
| Cameras not showing video. | Loose camera connection, camera power issue, incompatible camera type. | Check BNC connections. Ensure cameras are powered. Confirm camera compatibility (AHD/TVI/CVI/Analog, up to 2.4MP). |
| Cannot access DVR remotely. | No internet connection, incorrect network settings, firewall blocking access, app configuration error. | Verify DVR's internet connection. Check network settings (DHCP/Static IP). Ensure router firewall allows necessary ports. Reconfigure DVR in the mobile app. |
| Motion detection not working. | Motion detection not enabled, sensitivity too low, detection area not configured. | Enable motion detection in DVR settings. Adjust sensitivity. Define detection zones for each camera. |
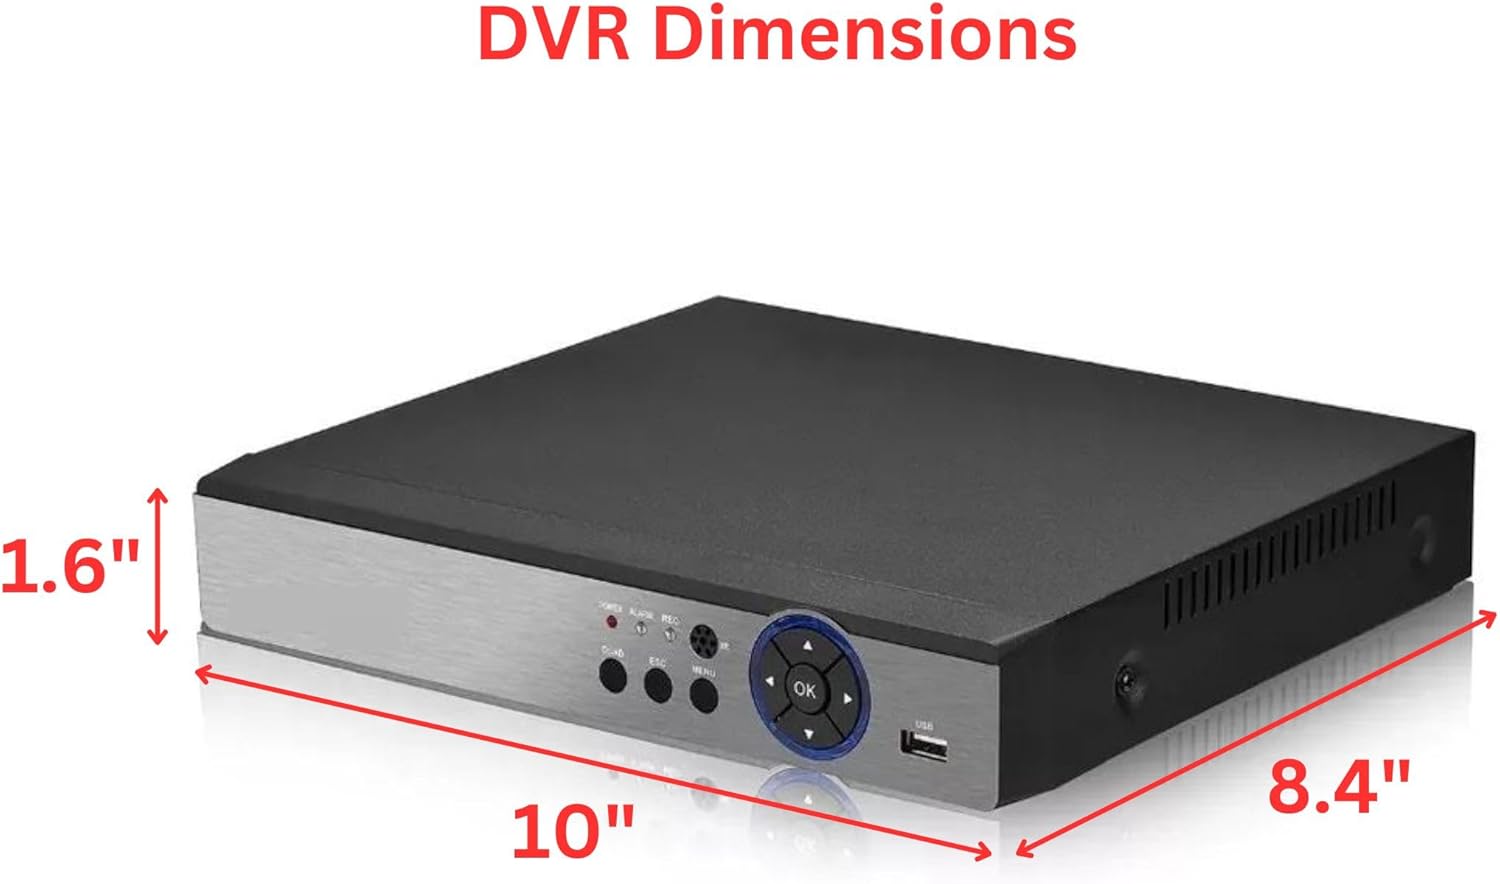
7. Specifications
| Feature | Detail |
|---|---|
| Model Number | S081XVR01HWMS4 |
| Brand | Evertech |
| Number of Channels | 8 |
| Video Resolution Support | 1080P, 960P, 720P |
| Camera Compatibility | TVI, AHD, CVI, Analog (up to 2.4MP) |
| Hard Disk Size | 4 TB (4000 GB) |
| Connectivity Technology | Ethernet, HDMI, USB, VGA |
| Manufacturer | Evertech |
8. Warranty and Support
Your Evertech DVR comes with a One Year Warranty. Additionally, free technical support is available to assist you with any questions or issues regarding the product.
For technical assistance or warranty claims, please contact Evertech customer support. Refer to the contact information provided with your product or visit the official Evertech website for support details.