
1. Introduction
The LEMEGA MSY1P is a versatile all-in-one music system designed to provide a comprehensive audio experience. It integrates a CD player, DAB/DAB+ and FM digital radio, Bluetooth speaker functionality, USB MP3 playback, and an Aux-in port. This manual provides detailed instructions for setting up, operating, and maintaining your MSY1P music system.
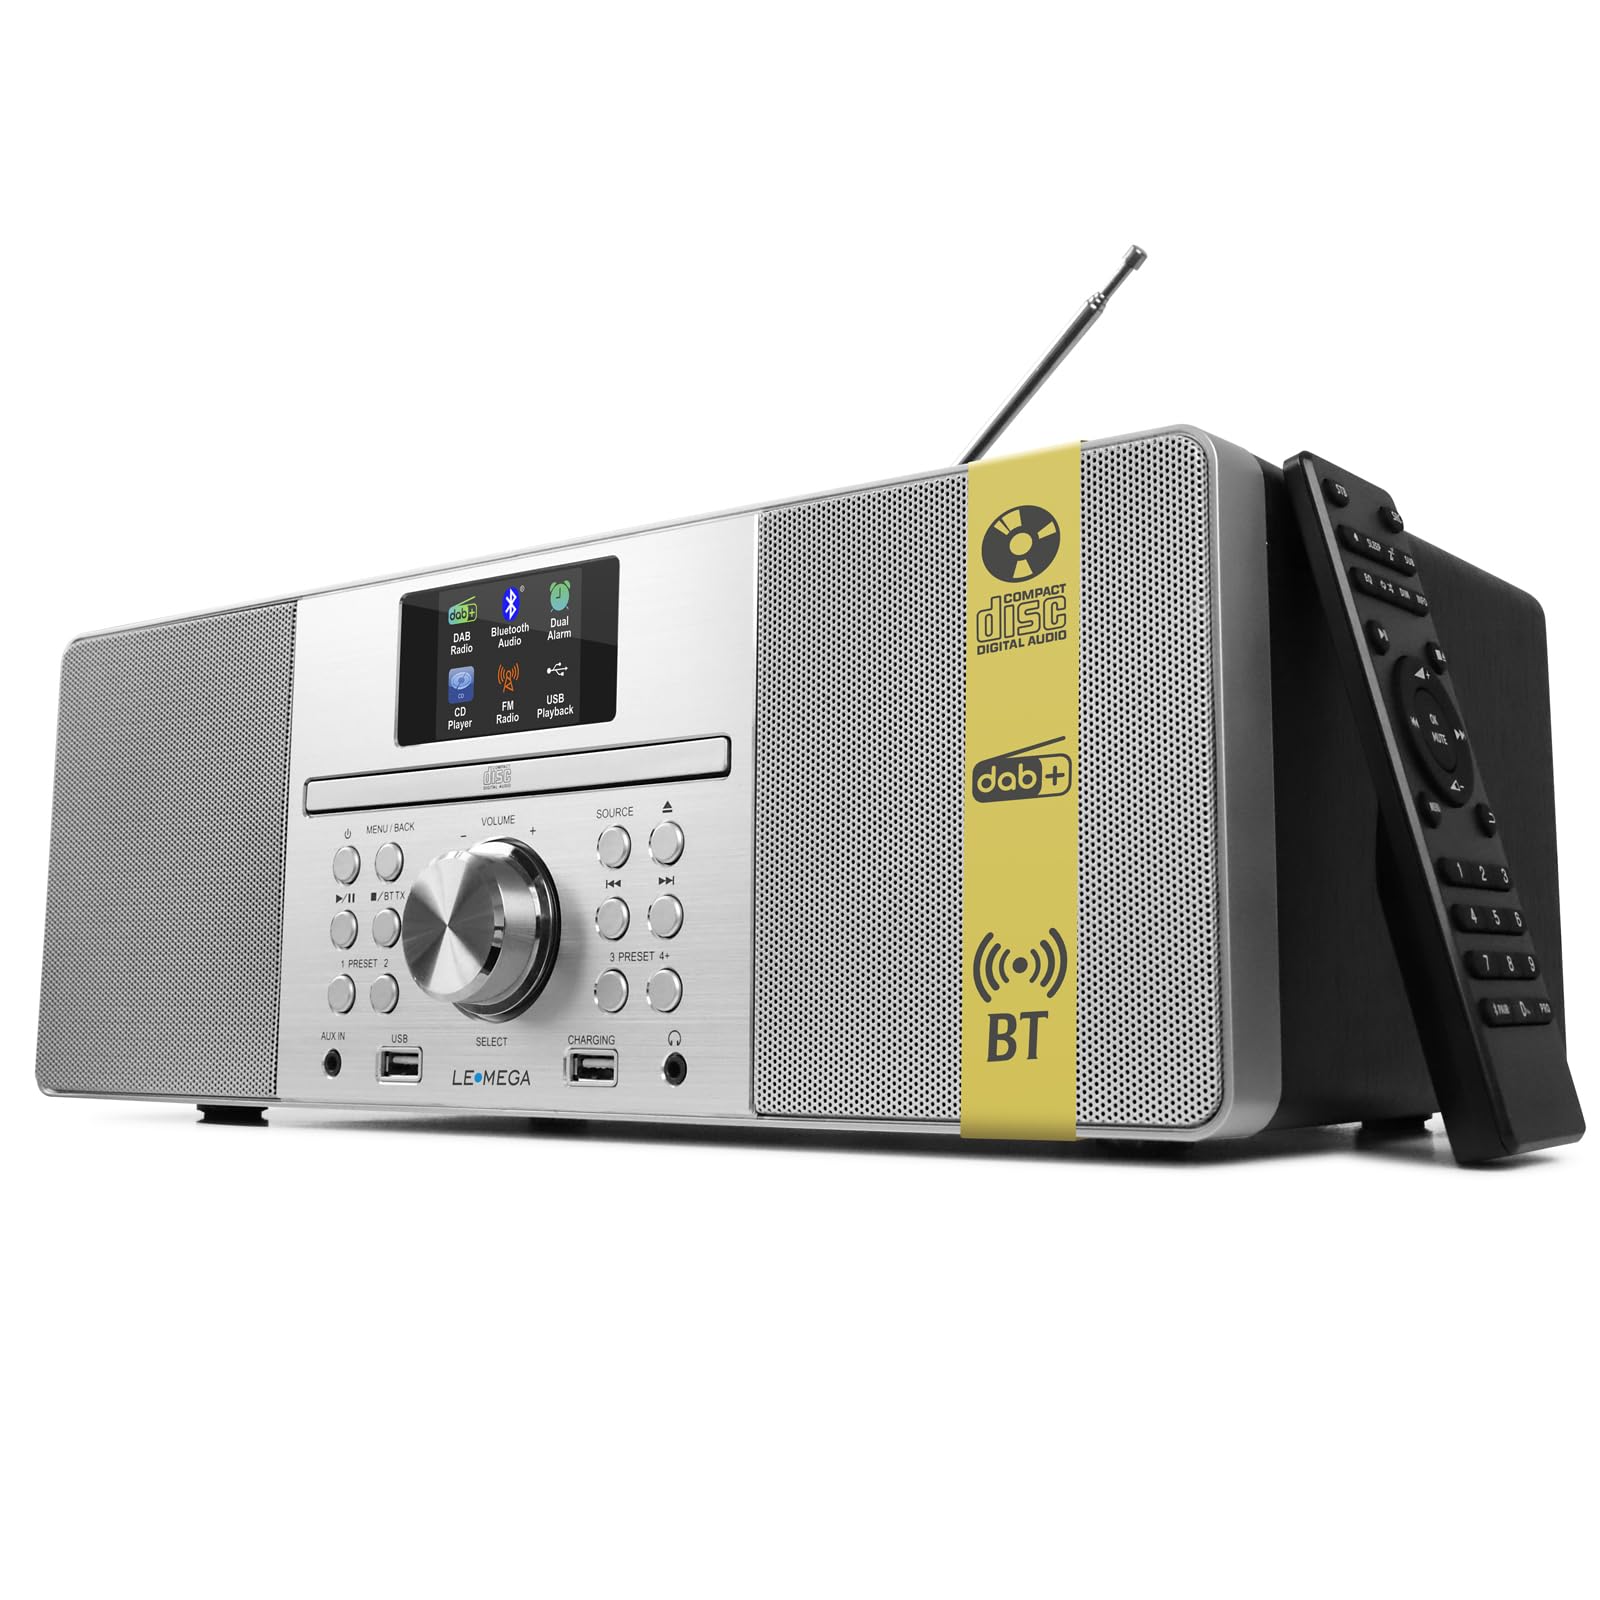
Image 1.1: The LEMEGA MSY1P All-in-One Music System, showcasing its multiple audio sources.
2. Safety Information
Before operating this device, please read all safety instructions carefully. A detailed safety information document is available in PDF format. It is crucial to follow these guidelines to ensure safe operation and prevent damage to the unit or personal injury.
For comprehensive safety guidelines, please refer to the official safety information document: Safety Information (PDF).
3. Package Contents
Please check the package contents upon unboxing. The following items should be included:
- 1 x LEMEGA MSY1P Digital CD Radio
- 1 x Power Supply Unit
- 1 x Remote Control
- 1 x 3.5mm Jack Cable (Aux-in cable)
- 1 x User Manual (this document)
4. Product Overview
4.1 Front Panel Controls and Connections
The front panel of the MSY1P features all primary controls and essential connection ports for easy access and operation.

Image 4.1: Detailed view of the MSY1P front panel controls and ports.
- Display Screen: Shows current mode, track information, radio station, time, etc.
- CD Slot: For inserting audio CDs.
- Control Buttons: Power, Mode, Play/Pause, Skip, Preset, Alarm.
- Rotary Knob: For volume control and menu navigation/selection.
- USB Ports: One for MP3 playback, one for smartphone charging.
- AUX IN: 3.5mm jack for connecting external audio devices.
- Headphone Out: 3.5mm jack for private listening.
4.2 Rear Panel Connections
The rear panel typically houses the power input and the telescopic antenna for radio reception.
- Power Input: Connects to the provided power adapter.
- Telescopic Antenna: Extend for optimal DAB/DAB+ and FM radio reception.
5. Setup
5.1 Power Connection
- Ensure the MSY1P is placed on a stable, flat surface.
- Connect the provided power adapter to the DC IN port on the rear of the unit.
- Plug the power adapter into a wall outlet.
5.2 Antenna Setup
- For optimal radio reception, fully extend the telescopic antenna located on the rear of the unit.
- Adjust the antenna direction to improve signal strength if reception is poor.
5.3 Initial Power On
- Press the Power button on the front panel or remote control to turn on the unit.
- The display will light up, and the system will typically start in the last used mode or default to DAB radio.
- If prompted, follow the on-screen instructions for initial setup, such as language selection and time synchronization.
6. Operating Instructions
6.1 General Operation
- Power On/Off: Press the Power button.
- Volume Control: Rotate the large central knob or use the Volume +/- buttons on the remote.
- Source Selection: Press the Mode button repeatedly to cycle through available sources (CD, DAB, FM, Bluetooth, USB, AUX).
6.2 CD Player Operation
The MSY1P features a slot-in CD player compatible with CD, CD-R, and CD-RW discs.
- Select CD mode using the Mode button.
- Gently insert a CD into the CD slot with the label side facing up. The disc will be drawn in automatically.
- Playback should begin automatically. Use the Play/Pause, Skip Forward, and Skip Backward buttons to control playback.
- To eject the CD, press the Eject button (usually indicated by an arrow or eject symbol).

Image 6.1: Operating the integrated CD player with the remote control.
6.3 DAB/DAB+ Radio Operation
- Select DAB mode using the Mode button.
- The system will perform an automatic scan for available DAB/DAB+ stations upon first use or if no stations are found.
- Use the Skip Forward/Backward buttons or the rotary knob to navigate through the list of available stations.
- Press the Select button (central knob) to tune into a station.
- To save a preset, press and hold a Preset button (1-5 or 1-10 depending on model) until the display confirms. To recall, short press the preset button.
6.4 FM Radio Operation
- Select FM mode using the Mode button.
- To auto-scan for stations, press and hold the Scan button (if available) or the Play/Pause button.
- To manually tune, rotate the central knob. For fine-tuning, short press the Skip buttons.
- Save and recall presets as described for DAB radio.
6.5 Bluetooth Operation
Connect your smartphone or other Bluetooth-enabled devices to stream audio wirelessly.
- Select Bluetooth mode using the Mode button. The display will show "Pairing" or "Waiting for connection".
- On your Bluetooth device, enable Bluetooth and search for "LEMEGA MSY1P" in the list of available devices.
- Select the MSY1P to pair. Once connected, the display will show "Connected".
- You can now play music from your device, controlling playback via your device or the MSY1P's controls.

Image 6.2: The MSY1P connected to a smartphone via Bluetooth for wireless audio streaming.
6.6 USB MP3 Playback
Play MP3 audio files directly from a USB flash drive.
- Insert a USB flash drive containing MP3 files into the USB MP3 port on the front panel.
- Select USB mode using the Mode button.
- The system will automatically detect and begin playing MP3 files. Use the playback controls to navigate tracks.
6.7 AUX-in Connection
Connect external audio devices (e.g., older MP3 players, non-Bluetooth devices) using the 3.5mm jack cable.
- Connect one end of the 3.5mm jack cable to the AUX IN port on the MSY1P.
- Connect the other end to the headphone output or line-out of your external audio device.
- Select AUX mode using the Mode button.
- Control playback and volume from your external device.
6.8 Headphone Use
For private listening, connect standard 3.5mm headphones to the dedicated headphone jack.
- Plug your headphones into the Headphone Out jack on the front panel.
- The main speakers will automatically mute.
- Adjust the volume using the main volume control.

Image 6.3: The MSY1P used with headphones for private listening, also showing the alarm function.
6.9 USB Charging
The dedicated USB charging port allows you to charge your smartphone or other USB-powered devices.
- Connect your device's USB charging cable to the USB Charging port on the front panel.
- Ensure your device is compatible with USB charging via this port.
6.10 Alarm Function
The MSY1P includes an alarm clock function.
- Press the Alarm button to enter alarm setup.
- Use the rotary knob to set the alarm time, source (e.g., buzzer, DAB, FM), and volume.
- Press Select to confirm each setting.
- To activate/deactivate the alarm, short press the Alarm button.
6.11 Display Brightness Control
Adjust the brightness of the LCD color screen for comfortable viewing in different lighting conditions.
- Access the display settings through the system menu (refer to the on-screen menu for navigation).
- Adjust the brightness level as desired.
6.12 Remote Control Usage
The included remote control provides full functionality for operating the MSY1P from a distance.
- Ensure batteries are correctly inserted into the remote control.
- Point the remote control towards the front panel of the MSY1P.
- All major functions, including power, mode selection, volume, playback controls, and presets, are accessible via the remote.
7. Maintenance
- Cleaning: Use a soft, dry cloth to clean the unit's exterior. Do not use abrasive cleaners, waxes, or solvents.
- CD Player Care: Handle CDs by their edges to avoid fingerprints and scratches. Clean discs with a soft, lint-free cloth, wiping from the center outwards.
- Ventilation: Ensure the unit has adequate ventilation. Do not block any ventilation openings.
- Storage: If storing the unit for an extended period, disconnect it from the power supply and store it in a cool, dry place.
8. Troubleshooting
| Problem | Possible Cause | Solution |
|---|---|---|
| No power | Power cable not connected; Power outlet faulty. | Check power cable connection; Try a different power outlet. |
| No sound | Volume too low; Mute activated; Incorrect source selected; Headphones connected. | Increase volume; Deactivate mute; Select correct source; Disconnect headphones. |
| Poor radio reception | Antenna not extended/positioned correctly; Weak signal area. | Fully extend and adjust the antenna; Try moving the unit to a different location. |
| CD not playing | CD inserted incorrectly; Disc scratched/dirty; Disc format not supported. | Re-insert CD correctly; Clean or replace disc; Ensure it's an audio CD (CD, CD-R, CD-RW). |
| Bluetooth pairing fails | Bluetooth not enabled on device; Device too far; MSY1P not in pairing mode. | Enable Bluetooth on your device; Move device closer; Ensure MSY1P is in Bluetooth mode and searching. |
| Remote control not working | Batteries depleted/incorrectly inserted; Obstruction between remote and unit. | Replace batteries; Check battery polarity; Remove obstructions. |
9. Specifications
| Feature | Detail |
|---|---|
| Model Number | MSY1 |
| Dimensions (L x W x H) | 38 x 21.2 x 13.9 cm |
| Weight | 3.3 kg |
| Audio Output | 20W Stereo Sound (2 x 3" full-range speakers) |
| CD Player Compatibility | CD, CD-R, CD-RW |
| Radio Tuner | DAB/DAB+, FM Digital Radio |
| Bluetooth Version | Bluetooth (for wireless streaming) |
| Connectivity | Bluetooth, 3.5mm Audio (AUX In), USB (MP3 playback, charging), 3.5mm Headphone Out |
| Power Source | Electric Wired |
| Special Features | Alarm Clock, LCD Color Screen with brightness control, Remote Control |
| Manufacturer | LEMEGA |
| Country of Origin | China |
10. Warranty and Support
LEMEGA products are manufactured to high-quality standards. For warranty information and customer support, please refer to the warranty card included with your product or visit the official LEMEGA website. Keep your proof of purchase for any warranty claims.
For further assistance, please contact LEMEGA customer support through their official channels.


