1. Product Overview
The Flever Miniature DIY Dollhouse Kit QT-027, also known as 'Taste of Life', is a creative craft project designed for assembly. This kit allows you to construct a detailed miniature kitchen scene with various furniture and accessories. The finished product features LED lighting to enhance its display.

Image: The completed 'Taste of Life' miniature kitchen, showcasing the pink refrigerator, sink, stove, dining table with stools, and illuminated details.
2. Safety Information
This product is recommended for individuals 14 years old and up. It requires patience and careful handling during assembly. Please be aware that the kit contains sharp tools and small parts, which could pose a choking hazard for young children. Adult supervision is recommended for younger users within the recommended age range.
3. What's Included in the Kit
The Flever Miniature DIY Dollhouse Kit QT-027 includes the following components:
- Pre-cut MDF wooden pieces for the house structure and furniture.
- Fabric and printed paper for decorations and accessories.
- Plexiglass pieces for the dust cover.
- LED light wires and other miniature decorations & accessories.
- English manual (paper copy usually included; PDF available from seller if not).
- Toolkit: Includes a scissor, knife, tweezer, ruler, and screwdriver.

Image: Various components of the kit, including wooden parts, fabric, paper cutouts, and the instruction manual.
4. Items Not Included (Required for Assembly)
The following items are necessary for assembly but are not included in the kit:
- Batteries: 3 pieces of LR44 button cells are required for the LED lights.
- Glue: Quick-dry tacky glue is recommended for assembly.
5. Assembly Instructions
Assembly time typically ranges from 6 to 12 hours, depending on the crafter's experience. Follow the steps below and refer to the included manual for detailed diagrams and specific part identification.
5.1 Preparation
- Unpack the kit and carefully remove all components.
- Gather all provided tools (scissor, knife, tweezer, ruler, screwdriver) and the required external items (LR44 batteries, quick-dry tacky glue).
- Familiarize yourself with the English manual. If a paper manual is not included, contact the seller for a PDF version.
5.2 Step-by-Step Assembly
- Begin by assembling the main wooden structure of the dollhouse. Follow the manual's diagrams for correct placement and gluing.
- Proceed to assemble each piece of miniature furniture using the pre-cut wooden pieces, fabric, and printed paper as instructed.
- Cut out and apply all decorative accessories as indicated in the manual.
- Install the LED light wires according to the manual's wiring diagrams. Ensure correct polarity when connecting to the battery holder.
- Once all interior elements are assembled and secured, carefully attach the plexiglass dust cover.

Image: An example page from the full-color instruction manual, providing visual guidance and tips for assembly.
5.3 Assembly Video
For additional visual guidance, an assembly process video is available. This video demonstrates various steps and techniques that may be helpful during construction.
Video: An official Flever Dollhouse video showcasing the assembly process and features of the miniature kit.
6. Operating Instructions
The kit includes LED lights to illuminate your miniature scene. To operate the lights:
- Ensure 3 LR44 button cell batteries are correctly installed in the designated battery holder (not included).
- Connect the LED light wires to the battery holder as shown in the manual.
- The lights should illuminate once connected. If they do not, check battery orientation and wire connections.
7. Maintenance
To maintain the appearance and longevity of your miniature dollhouse:
- Keep the dollhouse in a dry environment to prevent damage to wooden and paper components.
- Dust regularly with a soft, dry brush or cloth.
- Avoid direct sunlight exposure to prevent fading of colors.
- If the LED lights dim, replace the LR44 batteries.
8. Troubleshooting
| Problem | Possible Cause | Solution |
|---|---|---|
| LED lights do not turn on. | Batteries are dead or incorrectly installed. Wires are not connected properly. | Check battery orientation and replace if necessary. Ensure all wire connections are secure. |
| Pieces do not fit together. | Incorrect piece selection. Excess glue. | Refer to the manual to confirm correct parts. Remove any excess glue that may be obstructing fit. |
| Finished product is unstable. | Insufficient glue or improper alignment during assembly. | Ensure all joints are securely glued and allowed to dry completely. Re-align and re-glue unstable sections. |
9. Specifications
| Feature | Detail |
|---|---|
| Product Dimensions (Finished) | 3.5 x 3.5 x 4.5 inches (measured with dust cover) |
| Scale | 1:32 |
| Item Weight | 9.6 ounces |
| Model Number | QT-027 |
| Recommended Age | 14 years and up |
| Batteries Required | 3 x LR44 button cells (not included) |
| Manufacturer | Flever |
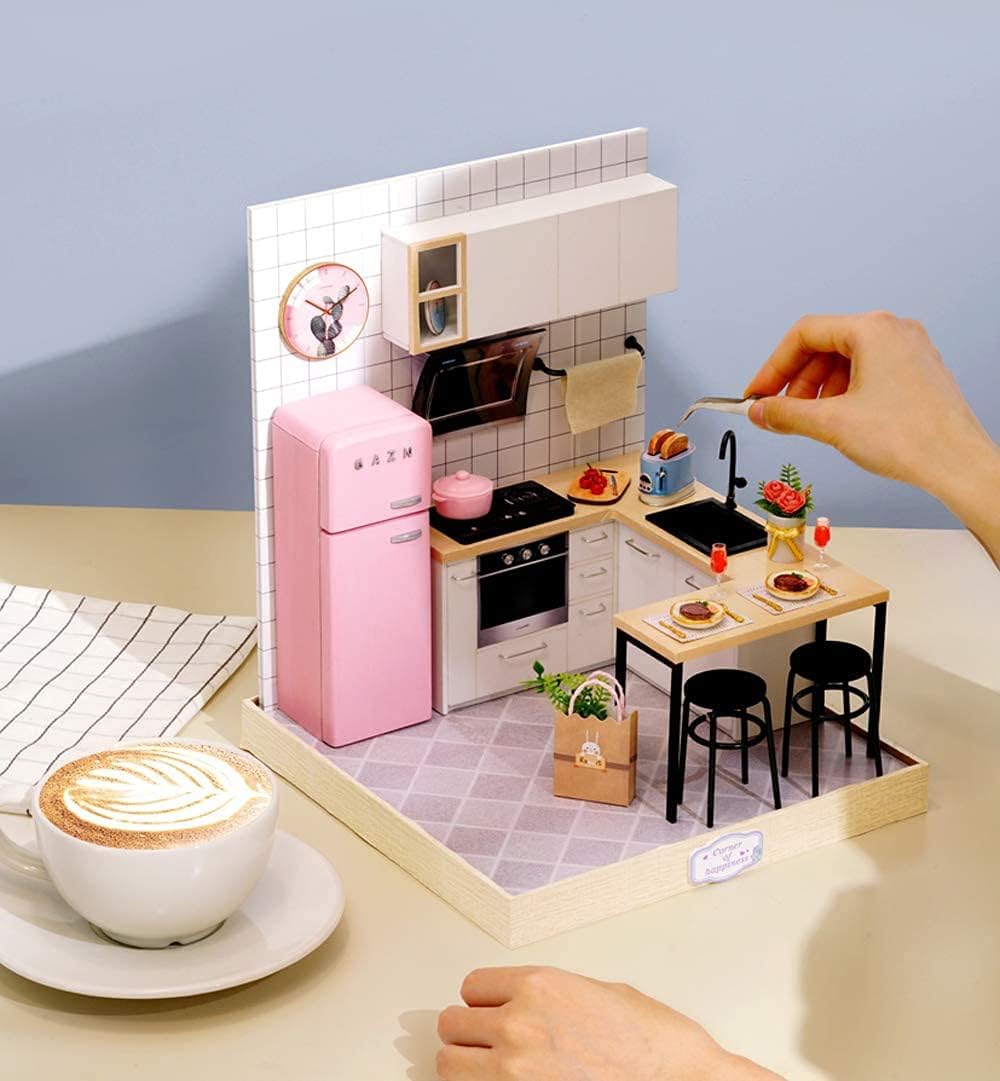
Image: Diagram illustrating the dimensions of the assembled miniature dollhouse kit.
10. Warranty and Support
For any missing parts, damaged components, or questions regarding assembly, please contact Flever customer support directly. Refer to the contact information provided with your purchase or on the official Flever website. Please retain your proof of purchase for warranty claims.