1. Introduction and Overview
This manual provides essential information for the proper installation and use of your Waverspeed 3.5-inch front and 3-inch rear suspension leveling kit. This kit is designed to increase vehicle clearance, allow for larger tire fitment (up to 32 inches), and reduce the factory rake, enhancing the vehicle's stance and off-road capability. The components are constructed from solid steel with a protective powder coating to resist corrosion and rust.
The following video provides a general overview of maXpeedingrods lift kits and their benefits, including some visual demonstrations of installation concepts and product features.
Video: General overview of maXpeedingrods lift kits, showcasing product features and installation concepts. This video is for informational purposes and may not depict the exact installation process for your specific vehicle model.
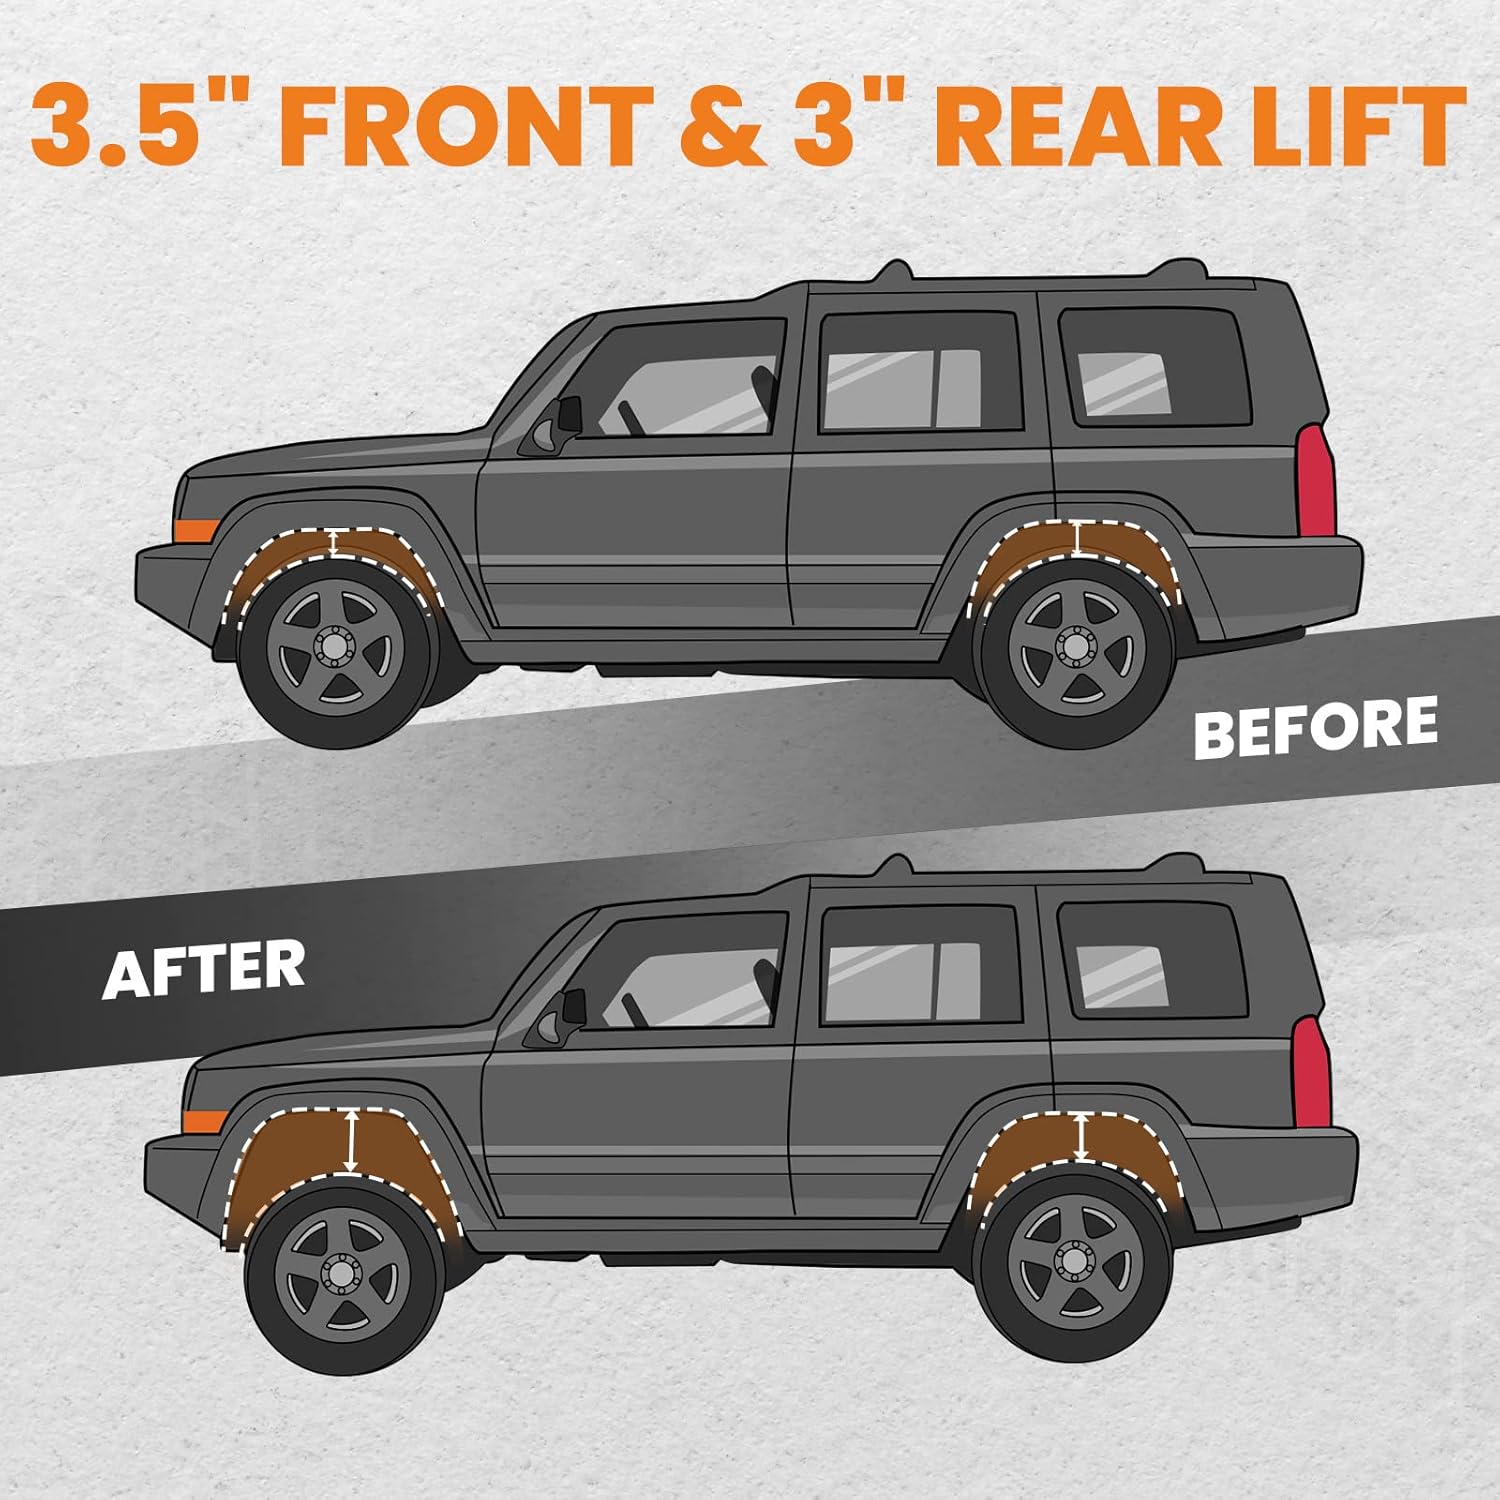
Image: Visual comparison of a Jeep Grand Cherokee before and after the installation of the 3.5" front and 3" rear leveling kit, illustrating the increased ride height.
2. Vehicle Compatibility
This leveling kit is specifically designed for the following vehicle models:
| Make | Year | Model |
|---|---|---|
| Jeep | 2005-2010 | Grand Cherokee WK 2WD/4WD |
| Jeep | 2006-2010 | Commander XK 2WD/4WD |

Image: Compatibility table for the leveling kit, listing applicable Jeep models and manufacturing years.
3. Package Contents
Verify that all components are present and undamaged before beginning installation. The package should include:
- 2 x Front Strut Forks
- 2 x Rear Coil Spring Spacers
- Necessary Installation Hardware (bolts, nuts, washers)
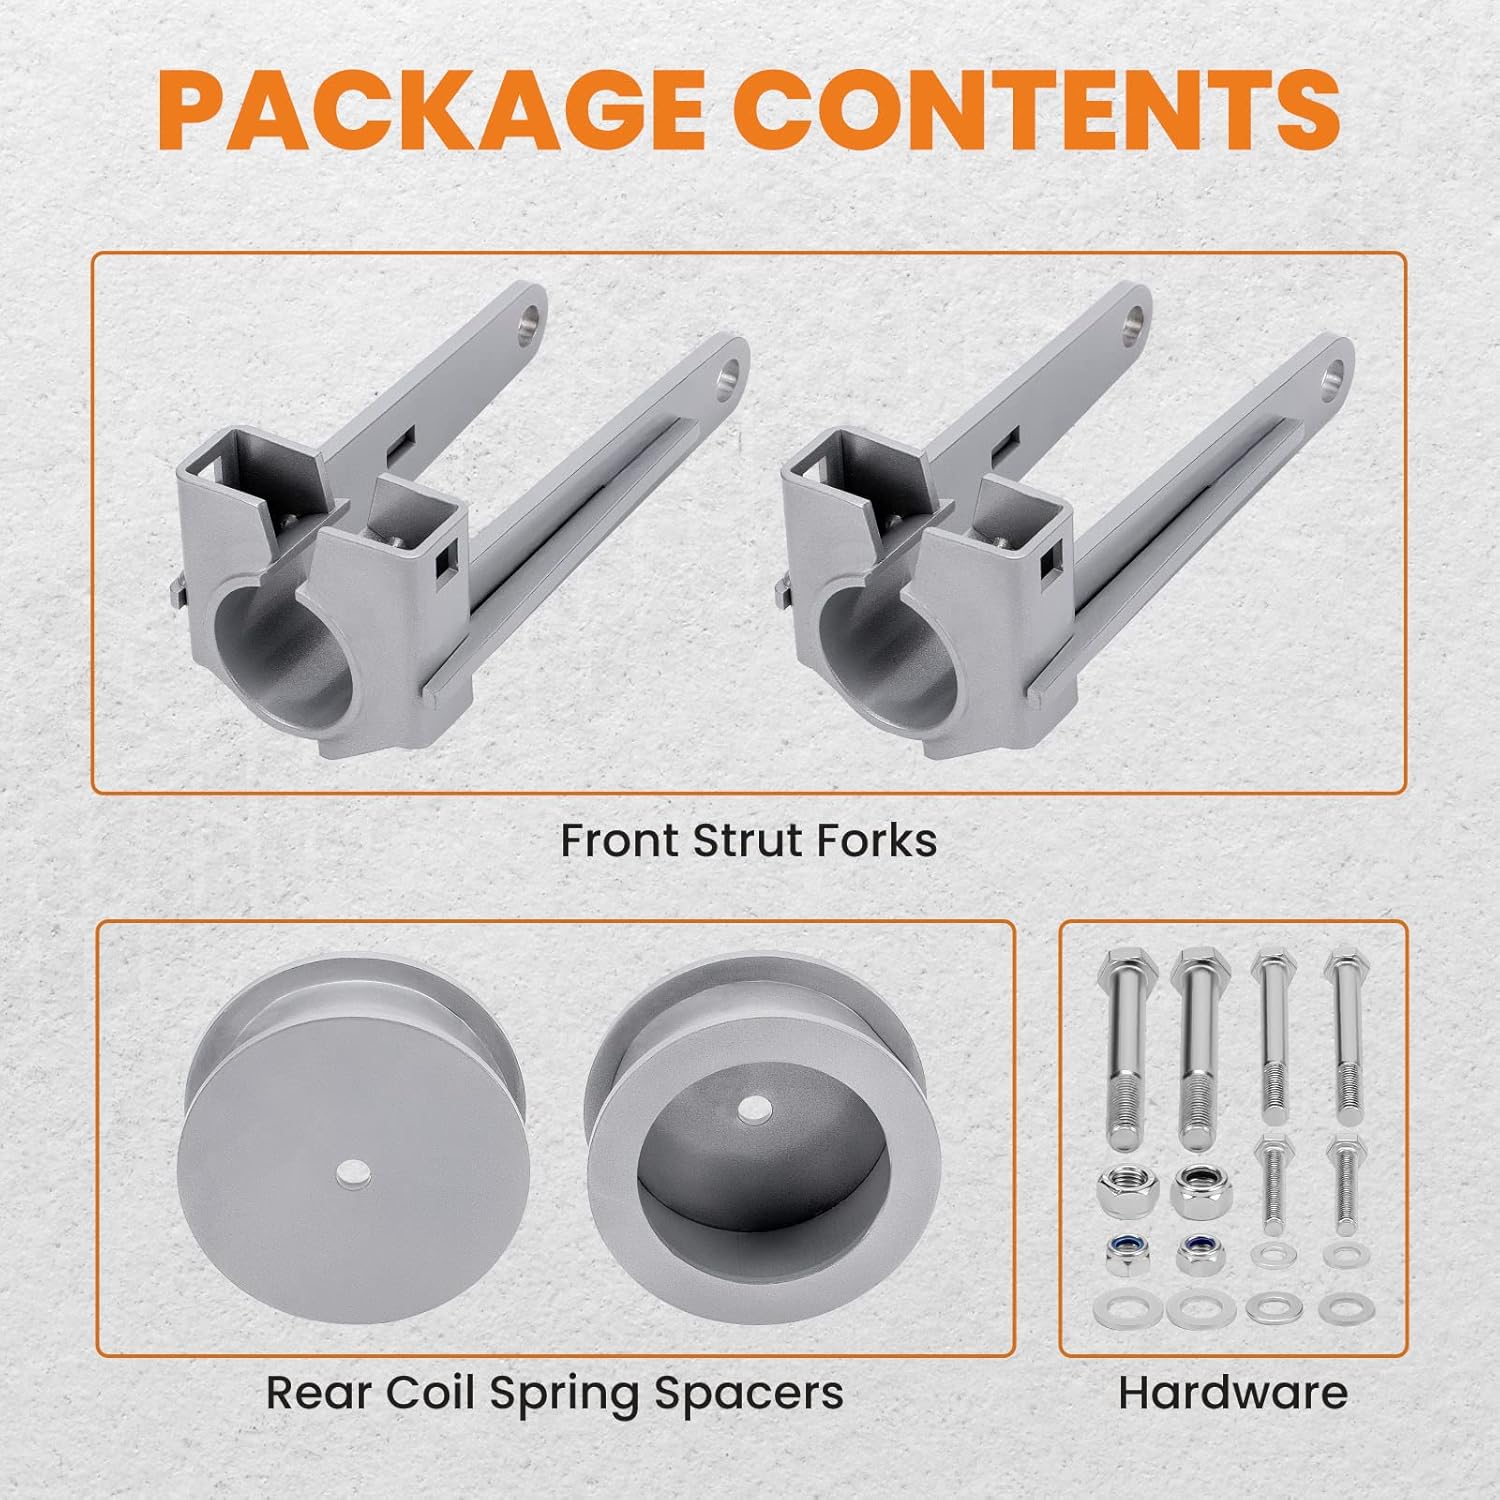
Image: Detailed view of the leveling kit components, including front strut forks, rear coil spring spacers, and all necessary hardware.

Image: Close-up of the front strut forks, emphasizing their CNC machined finish, rust-resistant properties, and robust construction.
4. Safety Information and Professional Installation
Warning: Installation of this product modifies your vehicle's suspension. It is crucial that installation and commissioning are performed by qualified technicians in accordance with applicable safety standards. Users must ensure the vehicle remains compliant with relevant national and local laws and regulations after installation. The use of this product should be restricted to scenarios specifically permitted by law.
Always wear appropriate personal protective equipment (PPE) during installation, including safety glasses and gloves. Ensure the vehicle is securely supported on jack stands or a lift before working underneath it. Never rely solely on a jack for support.
5. Installation Instructions
While this kit is designed for straightforward installation without the need for a spring compressor or special tools, professional installation is highly recommended due to the critical nature of suspension components.
Important Note on Lift Height:
The advertised lift height (3.5" front, 3" rear) is the final height achieved after installation. This is not the physical thickness of the spacer itself. Due to suspension geometry, a strut spacer will alter the angle of the lower control arm, providing an additional lift beyond the spacer's actual thickness. Therefore, the spacer thickness to lift height is not a 1:1 ratio.

Image: Diagram explaining the relationship between spacer thickness and the actual vehicle lift height, highlighting the effect of suspension geometry.
General Installation Steps (Consult a professional or detailed service manual for your vehicle):
- Prepare the Vehicle: Park the vehicle on a level surface. Engage the parking brake. Loosen the lug nuts on the wheels.
- Lift and Secure: Safely lift the front of the vehicle using a hydraulic jack and support it with jack stands under the frame. Remove the front wheels. Repeat for the rear of the vehicle.
- Disassemble Front Suspension: Carefully disconnect necessary components to allow for strut removal. This typically includes the sway bar end links, brake line brackets, and the lower strut bolts.
- Install Front Strut Forks: Install the new front strut forks onto the lower part of the existing struts. Ensure proper alignment and secure with the provided hardware.
- Reassemble Front Suspension: Reinstall the strut assembly into the vehicle, connecting all previously removed components. Torque all bolts to manufacturer specifications.
- Disassemble Rear Suspension: Disconnect the lower shock bolts and carefully lower the axle to allow the coil springs to be removed.
- Install Rear Coil Spring Spacers: Place the rear coil spring spacers on top of the rear coil springs or in their designated position, depending on the design.
- Reassemble Rear Suspension: Reinstall the coil springs with spacers and reconnect the lower shock bolts. Torque all bolts to manufacturer specifications.
- Final Steps: Reinstall all wheels and torque lug nuts to factory specifications. Lower the vehicle. It is highly recommended to get a professional wheel alignment after installation to ensure proper handling and tire wear.
6. Operation and Performance
After installation, your vehicle will exhibit a more aggressive stance with increased ground clearance. This allows for the fitment of larger tires, up to 32 inches, enhancing both the aesthetic appeal and off-road capabilities. The leveling kit is designed to reduce the factory rake, providing a more level appearance. Expect improved performance on various terrains due to the elevated chassis.

Image: Before and after comparison highlighting increased tire clearance and a leveled vehicle stance achieved with the lift kit.

Image: A Jeep Commander navigating a challenging dirt road, illustrating the improved off-road performance and ground clearance provided by the leveling kit.
7. Maintenance
Regularly inspect all components of the leveling kit, including bolts, nuts, and spacers, for any signs of wear, damage, or loosening. Check for corrosion, especially if driving in harsh conditions. Ensure all suspension components are clean and free from excessive dirt or debris. Adhere to your vehicle's manufacturer-recommended maintenance schedule for all other suspension and steering components.
8. Troubleshooting
If you experience any unusual noises, vibrations, or changes in handling after installation, immediately pull over to a safe location and inspect the suspension components. Common issues can include:
- Misalignment: An immediate professional wheel alignment is crucial after installation. Incorrect alignment can cause uneven tire wear, poor handling, and steering issues.
- Loose Hardware: Re-check all bolts and nuts for proper torque after the first 50-100 miles of driving and periodically thereafter.
- Component Interference: Ensure no suspension or steering components are rubbing or making contact with other parts of the vehicle, especially when turning or during suspension travel.
If you are unable to identify or resolve an issue, consult a certified automotive technician or contact Waverspeed customer support.
9. Specifications
| Specification | Detail |
|---|---|
| Brand | Waverspeed |
| Model Number | KY60@LK-JEEP-0510-K-LC |
| Auto Part Position | Front & Rear |
| Material | Alloy Steel |
| Maximum Front Lifting Height | 3.5 Inches |
| Maximum Rear Lifting Height | 3 Inches |
| Included Components | 2 Front Strut Forks, 2 Rear Coil Spring Spacers, Hardware |
| Item Weight | 17.75 pounds |
| Product Dimensions | 12.6 x 9.06 x 5.51 inches |
10. Warranty and Support
Waverspeed offers lifetime technical support for this product. Additionally, a 1-year limited warranty is provided for quality-related issues from the date of purchase. For technical assistance or warranty claims, please refer to the contact information provided with your purchase or visit the official Waverspeed website.