
Sainlogic WS3500
Sainlogic Professional WLAN Weather Station User Manual
Model: WS3500
Introduction
Thank you for choosing the Sainlogic Professional WLAN Weather Station. This device provides comprehensive weather data, including wind speed, wind direction, humidity, temperature, and rainfall, directly to your color display console and allows for data transmission to online weather services like Wunderground. This manual will guide you through the setup, operation, and maintenance of your weather station to ensure accurate and reliable performance.
Product Overview and Components
The Sainlogic Professional WLAN Weather Station consists of two main parts: the indoor display console and the 7-in-1 outdoor sensor array.

Figure 1: Sainlogic Professional WLAN Weather Station showing the main display console, the 7-in-1 outdoor sensor, and a smartphone indicating remote data access.
Outdoor Sensor Components:
- Wind Vane: Measures wind direction.
- Anemometer: Measures wind speed.
- Rain Collector: Measures rainfall.
- Thermo-hygrometer Sensor: Measures outdoor temperature and humidity.
- Solar Panel: Provides primary power to the outdoor sensor.
- UV Sensor: Measures ultraviolet radiation.
- Light Sensor: Measures ambient light.

Figure 2: Detailed diagram illustrating the various components of the 7-in-1 outdoor sensor, including the wind vane, anemometer, rain collector, and optical sensor for wind direction.
Display Console Features:
- Large color display for easy readability.
- Displays indoor/outdoor temperature and humidity.
- Shows wind speed, wind direction, and rainfall data.
- Barometric pressure readings.
- UV index and light intensity.
- Time, date, and weather forecast icons.
- Wi-Fi connectivity for online data sharing (e.g., Wunderground).
- Alarm functions for various weather parameters.

Figure 3: A close-up view of the weather station's large color display, highlighting its clear presentation of time, date, indoor/outdoor temperature, humidity, pressure, wind, and rain data.
Setup Guide
1. Unpacking and Initial Inspection
Carefully remove all components from the packaging. Verify that all parts are present and undamaged. Keep the packaging for future storage or transport.
2. Battery Installation
- Outdoor Sensor: Install 2 x AA batteries (not included) into the battery compartment of the outdoor sensor. These batteries serve as backup power when solar power is insufficient. Ensure correct polarity.
- Display Console: Install 3 x AAA batteries (not included) into the battery compartment on the back of the display console. Connect the included power adapter to the console and a power outlet. The console can operate on battery power alone, but the adapter ensures continuous display illumination and Wi-Fi functionality.
3. Outdoor Sensor Assembly
Assemble the wind vane, anemometer cups, and rain collector onto the main sensor body according to the diagrams in the quick start guide. Ensure all parts click securely into place.
4. Mounting the Outdoor Sensor
Choose an open location for the outdoor sensor, free from obstructions that could block wind or rain. Ideal locations include a pole in your garden or on a roof. The sensor should be mounted at least 1.5 meters (5 feet) above the ground for accurate readings. Use a spirit level to ensure the sensor is perfectly horizontal, especially for accurate rain collection and wind direction. The sensor has a built-in bubble level for assistance.
5. Console Placement
Place the display console indoors, away from direct sunlight and heat sources, which could affect indoor temperature readings. Ensure it is within the wireless range of the outdoor sensor (typically up to 100 meters / 330 feet in open air).
6. Initial Power-On and Sensor Connection
Once batteries are installed and the console is powered, it will automatically begin searching for the outdoor sensor. This process may take a few minutes. Ensure both units are relatively close during the initial pairing. A signal icon on the console will indicate successful connection.
Operating Instructions
1. Display Overview
The color display console presents various weather parameters. Familiarize yourself with the layout:
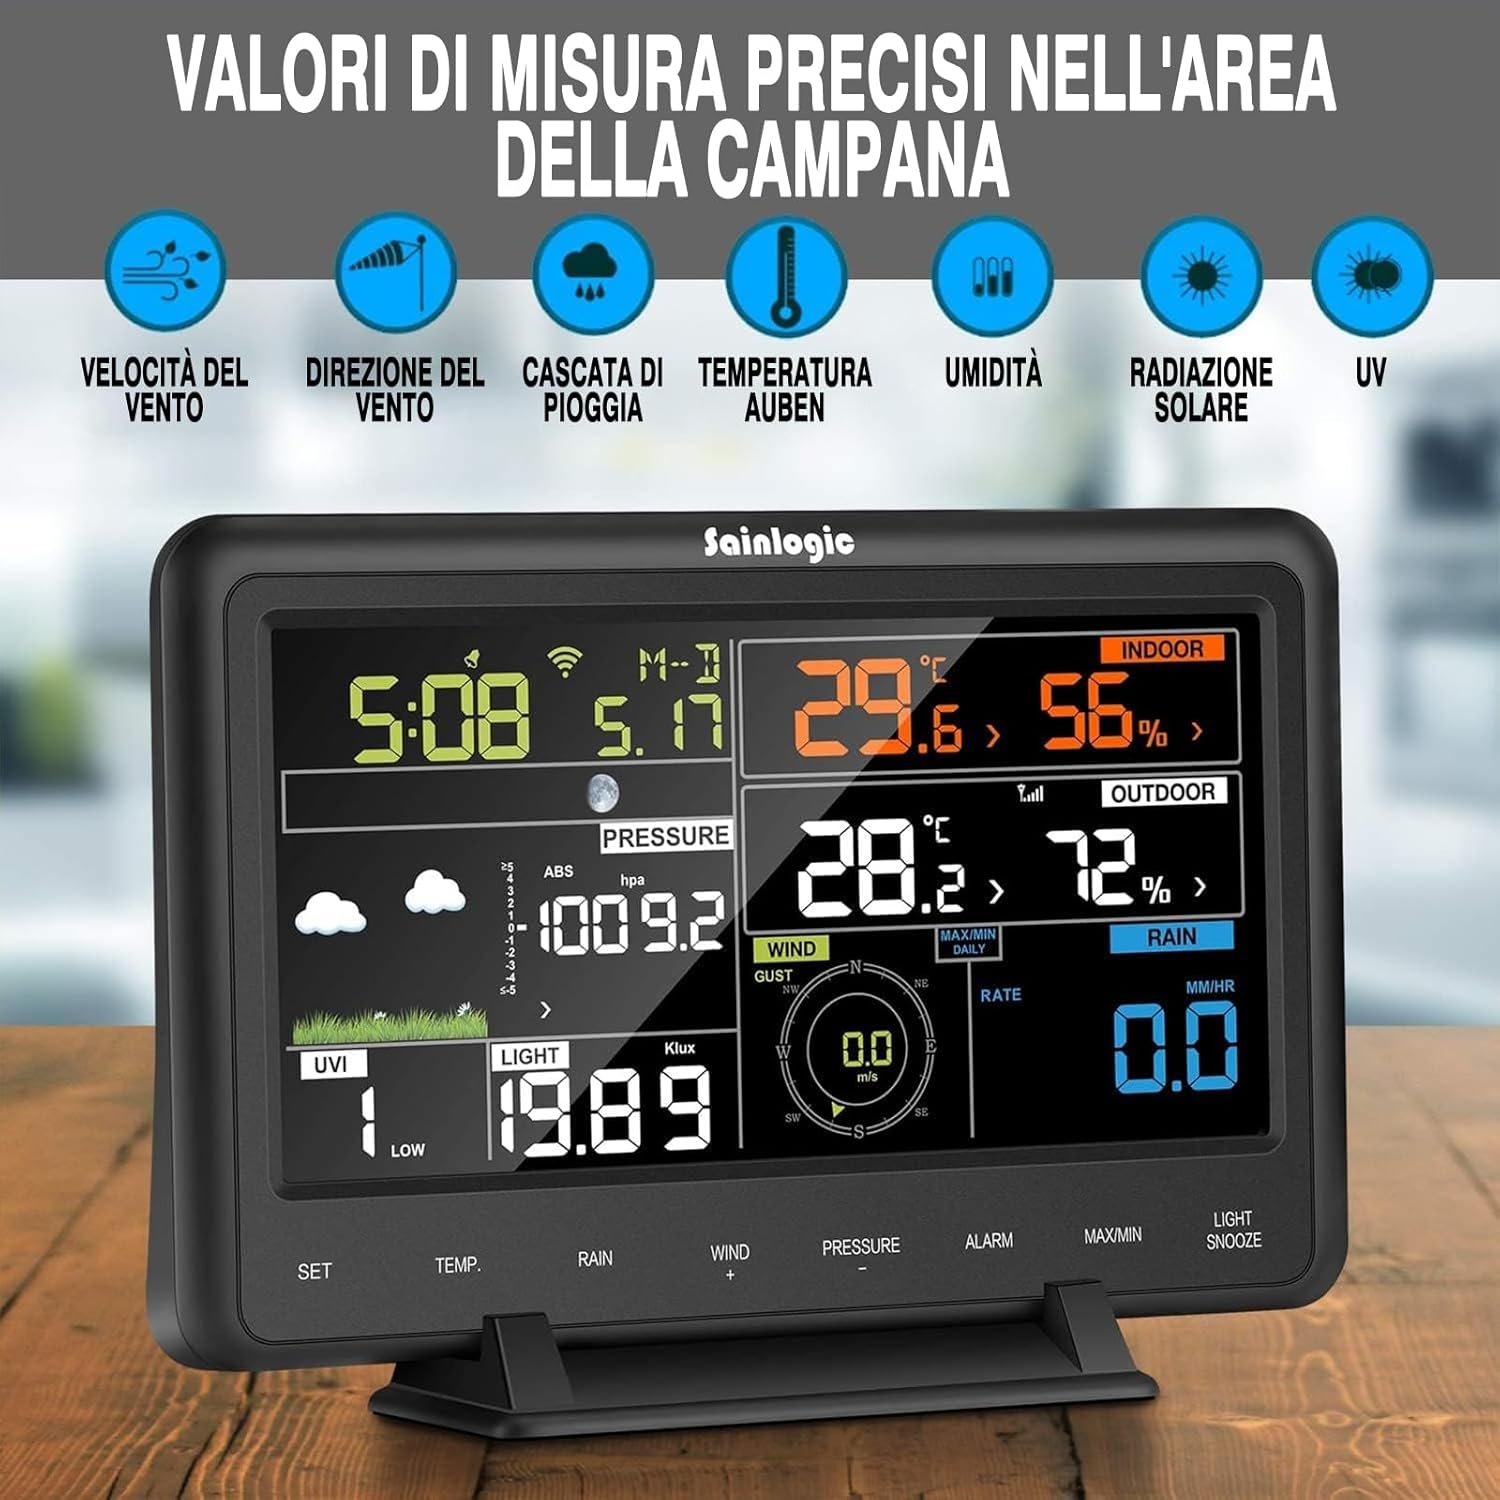
Figure 4: The display console showing real-time data for indoor and outdoor temperature, humidity, barometric pressure, wind speed, wind gust, wind direction, rainfall, UV index, and light intensity.
- Time & Date: Top left.
- Indoor Temperature & Humidity: Top right.
- Outdoor Temperature & Humidity: Middle right.
- Barometric Pressure: Middle left.
- Wind Speed & Direction: Center.
- Rainfall: Bottom right.
- UV Index & Light: Bottom left.
2. Setting Time and Date
Refer to the specific button functions on your console (e.g., "SET" button). Typically, you press and hold the "SET" button to enter setup mode, then use arrow keys (if available) or other function buttons to adjust values. Press "SET" again to confirm and move to the next setting.
3. Unit Settings
You can customize the units for various measurements:
- Temperature: Celsius (°C) or Fahrenheit (°F).
- Barometric Pressure: hPa, inHg, or mmHg.
- Wind Speed: km/h, mph, m/s, knots, or Beaufort.
- Rainfall: mm or inches.
Use the dedicated buttons (e.g., "TEMP", "PRESSURE", "WIND", "RAIN") to cycle through available units.
4. Alarm Functions
The weather station features customizable alarms for various parameters (e.g., high/low temperature, high wind speed, heavy rainfall). To set an alarm:
- Press the "ALARM" button to cycle through alarm settings.
- When the desired parameter is displayed, press and hold "ALARM" to enter adjustment mode.
- Use adjustment buttons to set the alarm threshold.
- Press "ALARM" again to confirm and activate the alarm.

Figure 5: The display console highlighting the integrated alarm function, which can be set for various weather conditions.
5. Wi-Fi Connectivity and Data Upload
Your weather station can connect to your home Wi-Fi network to upload data to online weather services like Wunderground. This allows you to access your personal weather information from anywhere via a computer, tablet, or mobile phone.

Figure 6: Illustration of the weather station's Wi-Fi data transmission capability, showing data being sent to the Weather Underground platform, accessible on mobile phones, tablets, and laptops.
- Ensure your console is powered by the AC adapter for stable Wi-Fi operation.
- Access the Wi-Fi setup mode on your console (refer to your specific model's instructions, often involves holding a "Wi-Fi" or "SET" button).
- Use your smartphone or computer to connect to the console's temporary Wi-Fi hotspot (usually named "WeatherStation_XXXX").
- Open a web browser and navigate to the IP address provided in the console's display or manual (e.g., 192.168.1.1).
- Follow the on-screen instructions to select your home Wi-Fi network and enter the password.
- Once connected, you can configure settings for services like Wunderground, including your Station ID and Key.
6. Viewing Historical Data
The console stores daily minimum and maximum values for various parameters. Use the "MAX/MIN" button to cycle through these records. For more extensive historical data and graphing, access your station's page on Wunderground or other connected online services.
Maintenance
Regular maintenance ensures the longevity and accuracy of your weather station.
1. Cleaning the Rain Collector
Periodically check the rain collector funnel for debris (leaves, insects, dirt) that could obstruct the tipping bucket mechanism. Clean with a soft cloth and water. Do not use abrasive cleaners.
2. Sensor Calibration
While the sensors are factory calibrated, minor adjustments for pressure or temperature offset may be possible through the console's advanced settings or the connected online platform. Refer to the detailed manual for specific calibration procedures if needed.
3. Battery Replacement
Replace batteries in both the outdoor sensor and display console when the low battery indicator appears on the display. For the outdoor sensor, the solar panel charges a capacitor, but the AA batteries provide backup power during prolonged periods of low light. Always use fresh, high-quality batteries.
4. Solar Panel Maintenance
Keep the solar panel on the outdoor sensor clean and free of dust, dirt, or snow to ensure optimal charging efficiency. Wipe gently with a damp cloth.
Troubleshooting
| Problem | Possible Cause | Solution |
|---|---|---|
| No outdoor sensor data on console. |
|
|
| Wi-Fi connection fails. |
|
|
| Inaccurate rainfall readings. |
|
|
| Inaccurate wind readings. |
|
|
Specifications
| Feature | Detail |
|---|---|
| Model Number | WS3500 |
| Product Dimensions | 37 x 17.5 x 41.4 cm; 2.24 kg |
| Power Source | Solar Powered (Outdoor Sensor), AC Adapter / Batteries (Console) |
| Battery Type (Outdoor Sensor) | 2 x AA batteries (backup) |
| Battery Type (Console) | 3 x AAA batteries |
| Connectivity Technology | Wi-Fi |
| Material | Acrylonitrile Butadiene Styrene (ABS) |
| Color | Black |
| Special Features | Lightweight, Alarm, Color Display, Wunderground Integration |
Warranty and Support
For warranty information and technical support, please refer to the documentation included with your product or visit the official Sainlogic website. If you encounter any issues not covered in this manual, please contact Sainlogic customer service for assistance.
For further information and to register your product, please visit: www.sainlogic.com
Related Documents - WS3500
 |
FT0835-plus Weather Station Quick Setup Guide A quick setup guide for the FT0835-plus Weather Station, covering battery installation, console setup, sensor verification, and outdoor installation. Includes instructions for connecting to WiFi and uploading data to Wunderground and Weathercloud. |
 |
Sainlogic FT0310 Weather Station Quick Setup Guide Comprehensive quick setup guide for the Sainlogic FT0310 WiFi Weather Station. Learn how to install batteries, connect the indoor console, verify sensors, mount the outdoor array, and configure WiFi for data uploading to Wunderground and Weathercloud. |
 |
SC088 Professional Wireless Weather Station User Manual User manual for the SC088 Professional Wireless Weather Station, providing instructions on setup, operation, installation, troubleshooting, and specifications. |
 |
Sainlogic APP WiFi Setup Guide: Connect Your Weather Station This guide provides step-by-step instructions for setting up your Sainlogic WiFi weather station using the mobile app and web interface, including console configuration, weather server registration, and troubleshooting. |
 |
Sainlogic APP WiFi Setup Guide - Connect Your Weather Station Comprehensive guide to setting up your Sainlogic WiFi weather station using the mobile app or web interface. Learn how to connect, register, and troubleshoot your device. |
 |
SC088 Professional Wireless Weather Station User Manual Comprehensive user manual for the SC088 Professional Wireless Weather Station, covering installation, operation, calibration, troubleshooting, and specifications. |
Ask a question about this manual
Ask about setup, troubleshooting, compatibility, parts, safety, or missing instructions. Manuals+ will review the question and use this page’s manual context to help answer it.