Introduction
This manual provides comprehensive instructions for the setup, operation, and maintenance of your Oneconcept Beaufort Silver Edition Weather Station. Please read this manual thoroughly before using the device to ensure correct installation and optimal performance. This weather station is designed to provide accurate measurements of temperature, humidity, wind direction, wind speed, and rainfall.
Product Components
The Oneconcept Beaufort Silver Edition Weather Station includes the following main components:
- Outdoor Sensor Array: Measures wind speed, wind direction, rainfall, temperature, and humidity.
- Indoor Display Unit: Receives and displays data from the outdoor sensor, provides alarm functions, and stores historical data.
- Mounting Hardware: For securing the outdoor sensor array.
- Instruction Manual: This document.
- Batteries: 5 AA batteries are included for operation.

Image Description: A clear view of the Oneconcept Beaufort Silver Edition Weather Station, showing the white outdoor sensor array with wind cups, wind vane, rain collector, and temperature/humidity sensor, alongside the silver-framed indoor display unit with a green backlit screen showing various weather readings.
Setup
1. Unpacking and Battery Installation
- Carefully remove all components from the packaging.
- For the Outdoor Sensor Array: Locate the battery compartment. Insert the required AA batteries, ensuring correct polarity. Close the compartment securely.
- For the Indoor Display Unit: Locate the battery compartment. Insert the required AA batteries, ensuring correct polarity. Alternatively, connect the display unit to a USB power source using the provided cable. Close the compartment securely.
2. Outdoor Sensor Array Placement
Proper placement of the outdoor sensor array is crucial for accurate readings.
- Choose an open location, free from obstructions like buildings, trees, or other structures that could interfere with wind, rain, or sunlight.
- Mount the sensor array securely using the provided hardware. Ensure it is level to guarantee accurate rain collection and wind direction.
- The recommended height for wind measurement is at least 2 meters (6.5 feet) above ground level.
- Ensure the wind vane is oriented correctly (e.g., pointing North) if calibration is required by the device. Refer to the display unit's initial setup for specific calibration steps.

Image Description: The outdoor sensor array is shown mounted on a pole extending from a rooftop, with the indoor display unit visible in the foreground. This illustrates a typical installation scenario for accurate weather data collection.
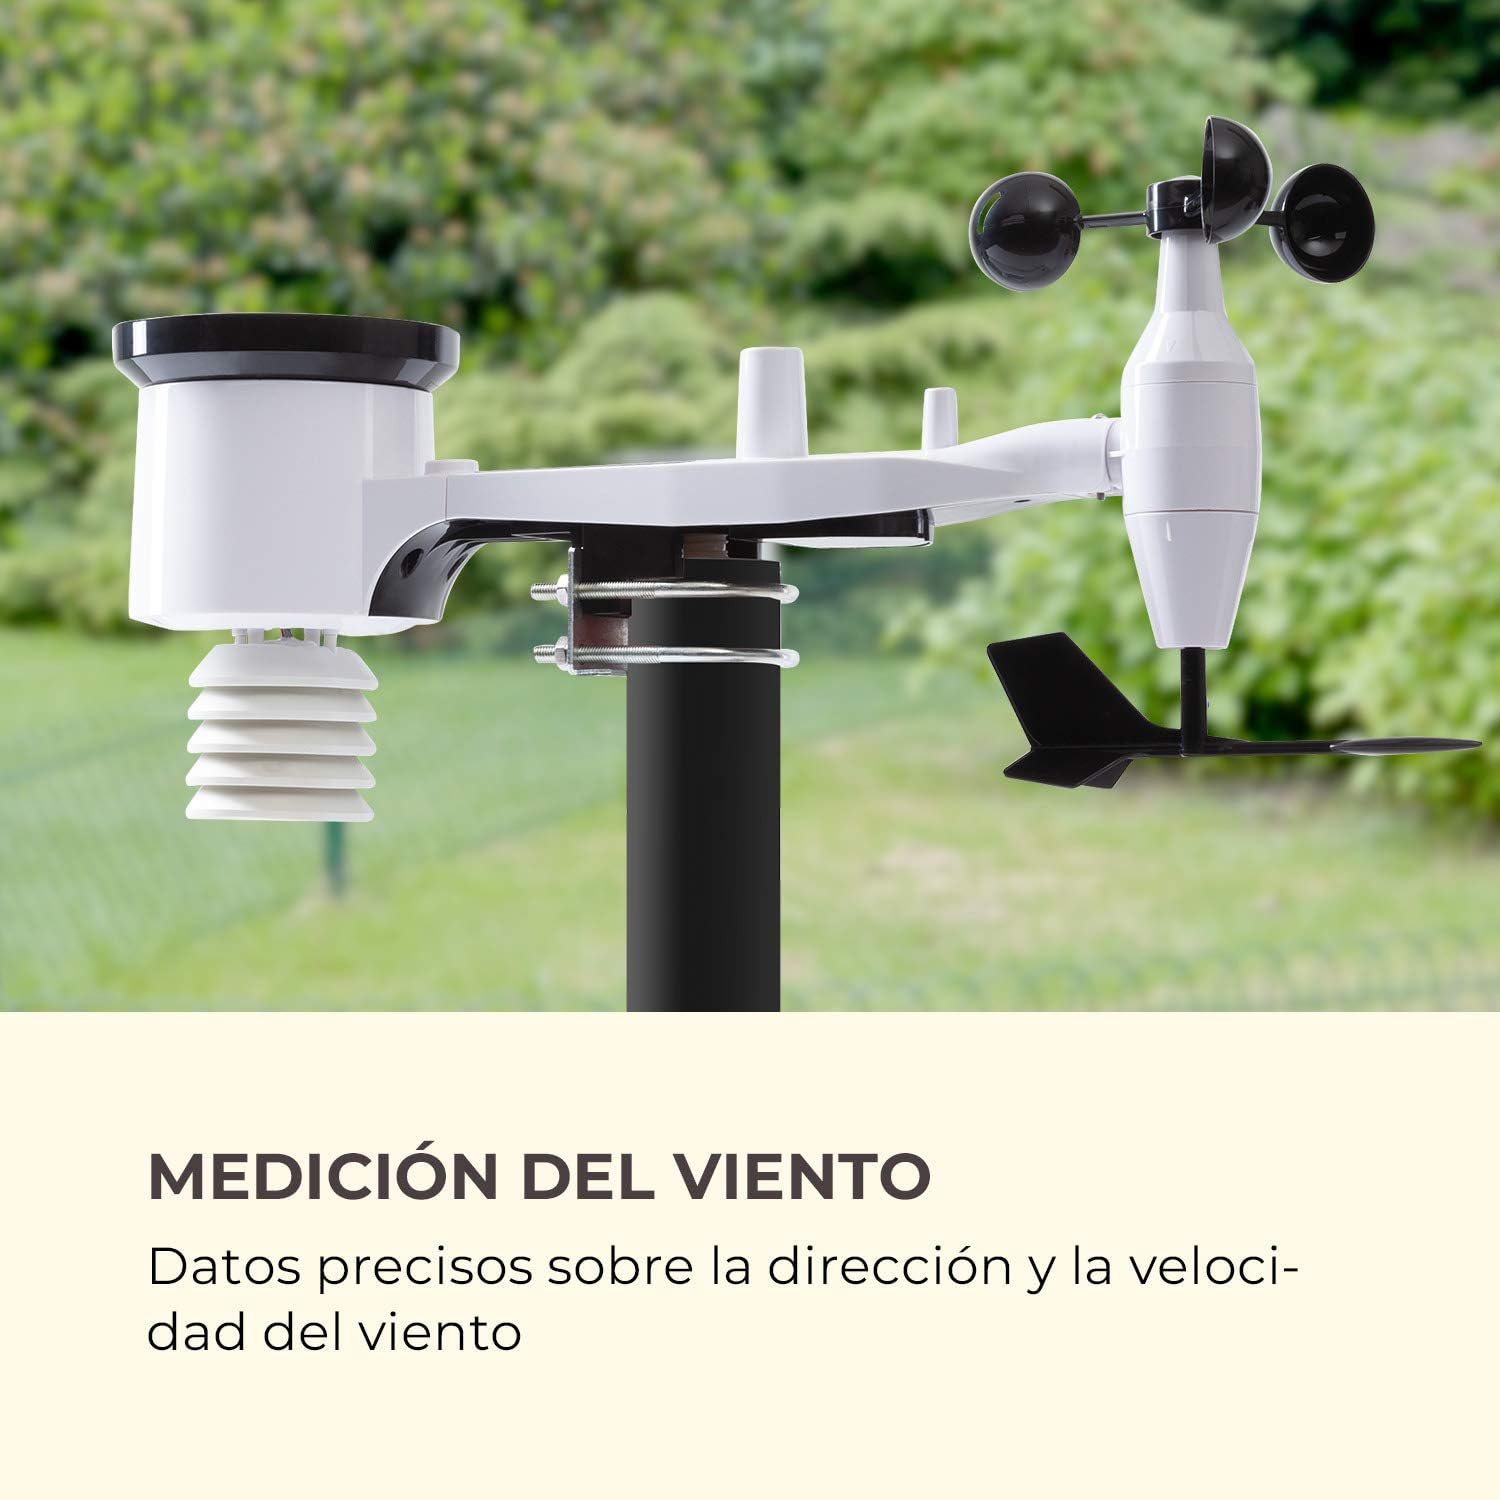
Image Description: A detailed view of the outdoor sensor array, highlighting the wind cups for speed measurement and the wind vane for direction, against a blurred green background of trees, emphasizing its function for wind data collection.
3. Indoor Display Unit Setup
- Place the indoor display unit in a convenient location within the wireless range (up to 100m) of the outdoor sensor array.
- Avoid placing the unit near large metal objects or electronic devices that could cause interference.
- Once powered on, the display unit will automatically attempt to connect with the outdoor sensor. This may take a few minutes.
- Set the time, date, and preferred units of measurement (e.g., °C/°F, km/h/mph, hPa/inHg) using the buttons on the display unit. Refer to the specific button functions outlined in the Operating Instructions section.

Image Description: The indoor display unit is positioned on a modern coffee table in a living room setting, next to a cup of coffee and a smartphone, illustrating its wireless and practical nature for indoor use.
Operating Instructions
The indoor display unit provides various functions and displays for monitoring weather conditions.
Display Overview

Image Description: A detailed close-up of the indoor display unit's screen, showing indoor and outdoor temperature and humidity, wind speed and direction, rainfall, atmospheric pressure, time, and date, highlighting its versatile data display capabilities.
- IN TEMP / OUT TEMP: Displays indoor and outdoor temperature.
- HUMIDITY: Shows indoor and outdoor humidity levels.
- WIND: Indicates wind speed and direction.
- RAIN: Displays rainfall data (e.g., hourly, daily, weekly).
- PRESSURE: Shows atmospheric pressure and historical trends.
- TENDENCY: Provides a weather forecast icon (e.g., sunny, cloudy, rainy).
- TIME / DATE: Current time and date.
Button Functions
Specific button functions may vary slightly. Refer to the icons on your device for precise controls.
- MODE: Toggles between different display modes or settings.
- SET: Enters settings mode or confirms selections.
- UP/DOWN (or +/-): Adjusts values in settings or cycles through historical data.
- ALARM: Activates or deactivates the alarm function, or sets alarm parameters.
- MAX/MIN: Displays maximum and minimum recorded values for various parameters.
Setting Alarms
The weather station features an alarm function. To set an alarm:
- Press the ALARM button to enter alarm setting mode.
- Use the UP/DOWN buttons to adjust the desired alarm time or weather threshold (e.g., temperature, wind speed).
- Press SET to confirm each setting.
- Ensure the alarm is activated (an alarm icon should appear on the display).
Maintenance
Regular maintenance ensures the longevity and accuracy of your weather station.
- Cleaning: Periodically clean the outdoor sensor array, especially the rain collector and wind sensors, to remove dirt, leaves, or debris that could affect readings. Use a soft, damp cloth. Do not use abrasive cleaners.
- Battery Replacement: Replace batteries in both the outdoor sensor and indoor display unit when the low battery indicator appears on the display. Use high-quality AA batteries.
- Sensor Check: Occasionally check the outdoor sensor array for any physical damage or loose connections. Ensure the mounting is still secure.
- Winter Care: In areas with heavy snowfall or freezing rain, ensure the rain collector and wind sensors are clear of ice and snow to prevent damage and ensure accurate readings.
Troubleshooting
| Problem | Possible Cause | Solution |
|---|---|---|
| No outdoor data displayed. |
|
|
| Inaccurate temperature/humidity readings. |
|
|
| Inaccurate wind speed/direction. |
|
|
| Rainfall readings are incorrect or zero. |
|
|
Specifications
| Feature | Detail |
|---|---|
| Model Number | WTH3-3400-eauf |
| Brand | Oneconcept |
| Wireless Range | Up to 100 meters (328 feet) in open air |
| Power Source (Outdoor Sensor) | 5 AA Batteries (included) |
| Power Source (Indoor Display) | Batteries, USB |
| Special Feature | Alarm Function |
| Material | Metal (housing) |
| Connectivity Technology | USB (for display unit power/data) |
| Included Components | Temperature and Humidity Sensor, Wind Sensor, Instruction Manual |
| Sensor Technology | Ultrasonic, Motion |
| Package Dimensions | 46.4 x 29.8 x 19.4 cm |
| Package Weight | 2.38 kg |
Warranty and Support
For warranty information and technical support, please refer to the documentation provided with your purchase or visit the official Oneconcept website. Keep your proof of purchase for warranty claims.
Contact Information: Please consult the manufacturer's website or your retailer for the most up-to-date contact details for customer service and technical support.