
Introduction
Thank you for choosing the NanoRS RS110 Monitor Stand. This manual provides essential information for the safe and efficient installation, operation, and maintenance of your new monitor stand. Please read these instructions carefully before assembly and retain them for future reference.

Image: The NanoRS RS110 monitor stand supporting a monitor, positioned on a desk with peripherals. This illustrates the product in a typical use environment.
Safety Information
Please observe the following safety precautions to prevent injury or damage to the product:
- Ensure the monitor stand is placed on a stable, level surface capable of supporting the combined weight of the stand and your monitor.
- Do not exceed the maximum weight capacity of 8 kg (17.6 lbs).
- This stand is designed for monitors between 17 and 32 inches. Using monitors outside this range may compromise stability.
- Always follow the assembly instructions carefully. Incorrect assembly can lead to product failure.
- Keep small parts away from children to prevent choking hazards.
- Periodically check all screws and connections to ensure they remain secure.
Package Contents
Verify that all components are present before beginning assembly. If any parts are missing or damaged, please contact customer support.
- Monitor Stand Base
- Monitor Arm/Column
- VESA Plate
- Assembly Hardware (screws, washers, Allen keys)
- Instruction Manual (this document)
Specifications
| Model Number | RS110 |
| Brand | NanoRS |
| Screen Size Compatibility | 17 - 32 inches |
| Maximum Load Capacity | 8 kg (17.6 lbs) |
| VESA Compatibility | 75x75 mm, 100x100 mm |
| Height Adjustment Range | 32 - 45 cm (12.6 - 17.7 inches) |
| Tilt Angle | ± 10° |
| Swivel Angle | ± 10° |
| Rotation (Pivot) | ± 180° |
| Connectivity | 2 x USB 3.0 ports, Headphone port, Microphone port |
| Cable Management | Integrated |
| Mounting Type | Freestanding (with counterweight) |
| Color | Black |
| Product Dimensions (L x W x H) | 62 x 15 x 25 cm (24.4 x 5.9 x 9.8 inches) |
| Item Weight | 8 kg (17.6 lbs) |

Image: A technical diagram illustrating the dimensions and various adjustment angles (tilt, swivel, rotation) of the NanoRS RS110 monitor stand, including VESA mounting points.
Setup and Installation
Follow these steps to assemble and install your NanoRS RS110 monitor stand:
- Attach the Base: Securely attach the stand column to the base using the provided screws and tools. Ensure the base is stable and on a flat surface.
- Prepare the VESA Plate: Attach the VESA plate to the back of your monitor using the appropriate screws for your monitor's VESA pattern (75x75mm or 100x100mm). Do not overtighten.
- Mount the Monitor: Carefully slide the monitor (with the attached VESA plate) onto the stand's mounting arm. Ensure it clicks securely into place.
- Connect Cables: Route your monitor's power and display cables through the integrated cable management system for a tidy setup.
- Connect USB/Audio: Connect the stand's integrated USB 3.0, headphone, and microphone cables to your computer's corresponding ports.
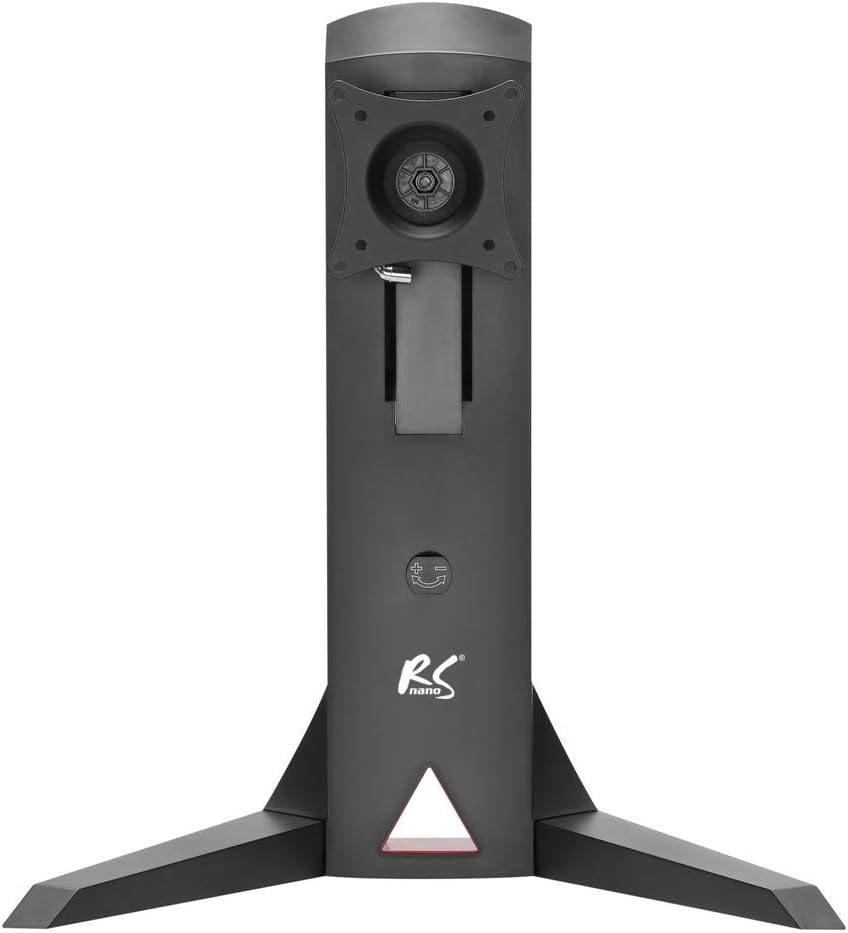
Image: Front view of the NanoRS RS110 stand, highlighting its stable base and the VESA mounting interface at the top of the column, ready for monitor attachment.

Image: Rear view of the NanoRS RS110 monitor stand, demonstrating the integrated cable management system with cables neatly routed through the stand's column.
Operating Instructions
The NanoRS RS110 monitor stand offers various adjustments for optimal viewing comfort:
- Height Adjustment: Gently push or pull the monitor up or down to adjust its height within the 32-45 cm range. The adjustable spring tension allows for smooth movement.
- Tilt Adjustment: Tilt the monitor screen forward or backward by ±10° to reduce glare and find your preferred viewing angle.
- Swivel Adjustment: Rotate the monitor horizontally by ±10° to share your screen or adjust your viewing position.
- Rotation (Pivot): Rotate the monitor 180° (from landscape to portrait mode) for different applications.
- USB and Audio Ports: Utilize the two integrated USB 3.0 ports, headphone jack, and microphone jack located on the front of the stand for convenient access to peripherals.

Image: Detail of the NanoRS RS110 stand's front-facing ports, including two USB 3.0 ports, a headphone jack, and a microphone jack for easy peripheral connection.

Image: Side profile of the NanoRS RS110 monitor stand with a monitor attached, showcasing its ability to tilt and adjust vertically for ergonomic positioning.
Maintenance
To ensure the longevity and proper function of your monitor stand:
- Cleaning: Wipe the stand with a soft, damp cloth. Avoid abrasive cleaners or solvents that could damage the finish.
- Inspections: Periodically check all screws and connections for tightness. Retighten if necessary.
- Spring Tension: If the monitor feels too loose or too stiff when adjusting height, refer to the stand's adjustment mechanism (usually a screw) to fine-tune the spring tension.
Troubleshooting
| Problem | Possible Cause | Solution |
|---|---|---|
| Monitor is unstable or wobbles. | Loose connections; uneven surface; monitor too heavy. | Ensure all screws are tightened. Place stand on a level surface. Verify monitor weight is within 8 kg limit. |
| Monitor slides down or is difficult to adjust height. | Spring tension needs adjustment. | Locate the spring tension adjustment screw (refer to assembly diagram if available) and adjust it to increase or decrease tension as needed. |
| USB ports or audio jacks are not working. | Cables not properly connected to computer. | Ensure the USB and audio cables from the stand are securely plugged into the corresponding ports on your computer. |
Warranty and Support
For warranty information or technical support, please refer to the documentation included with your purchase or visit the official NanoRS website. Keep your proof of purchase for warranty claims.
NanoRS Official Store: Visit NanoRS Store on Amazon