Introduction
This instruction manual provides essential information for the proper installation, operation, and maintenance of your Anlapus 1080P TVI Outdoor Surveillance Camera. Please read this manual thoroughly before using the product to ensure optimal performance and safety. This camera is designed for use with HD-TVI DVR systems.
Package Contents
Verify that all items listed below are included in your package. If any items are missing or damaged, please contact customer support.
- 4 x Anlapus 1080P TVI Surveillance Cameras
- 4 x BNC Video Cables (60ft each)
- 1 x Power Supply
- 1 x 1-to-4 Power Splitter Cable
- 4 x Mounting Screw Bags
- 4 x Mounting Hole Templates
- 4 x Warning Stickers
- 1 x Quick Start Guide (this manual)

Product Overview
The Anlapus 1080P TVI Outdoor Surveillance Camera is designed to provide reliable security monitoring with high-definition video quality and robust construction.
Key Features:
- 1080P HD Resolution: Captures clear and detailed video footage (1920x1080 pixels).
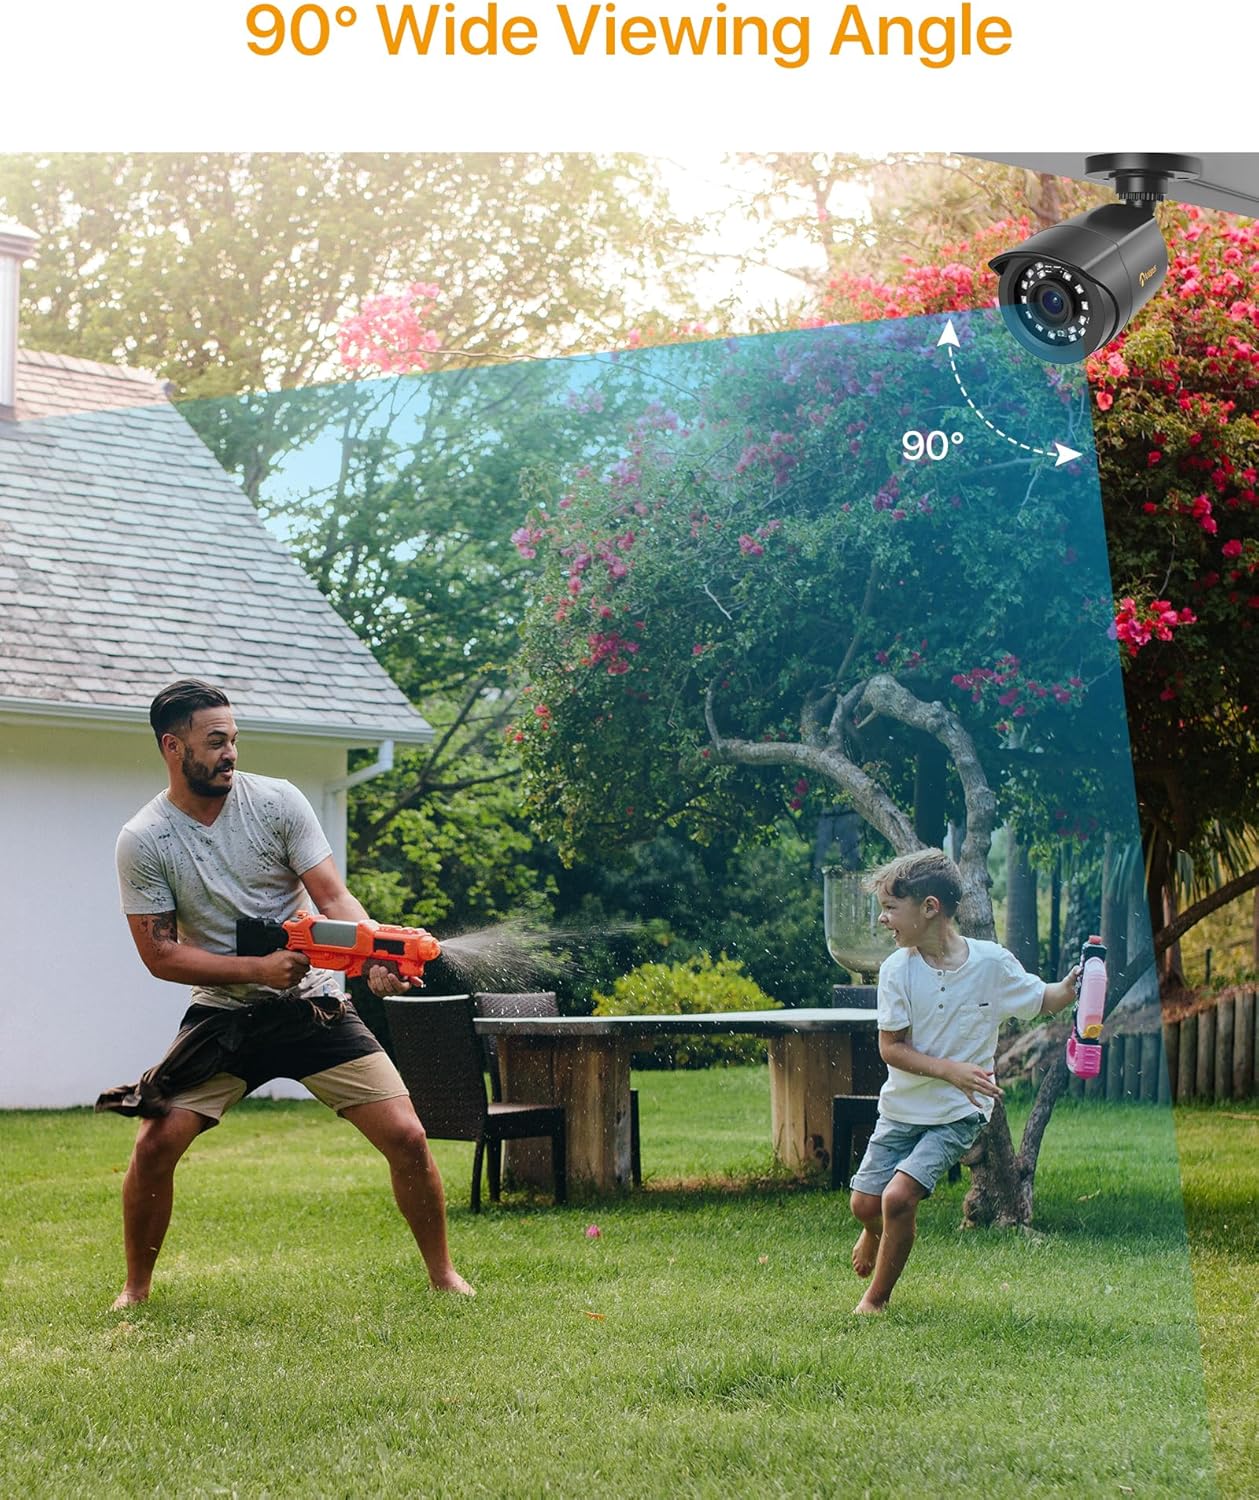
- 90-Degree Wide Viewing Angle: Provides extensive coverage with a 3.6mm lens.
- 24-Meter Night Vision: Equipped with 24 IR-Cut LEDs for clear black and white images in low-light conditions.
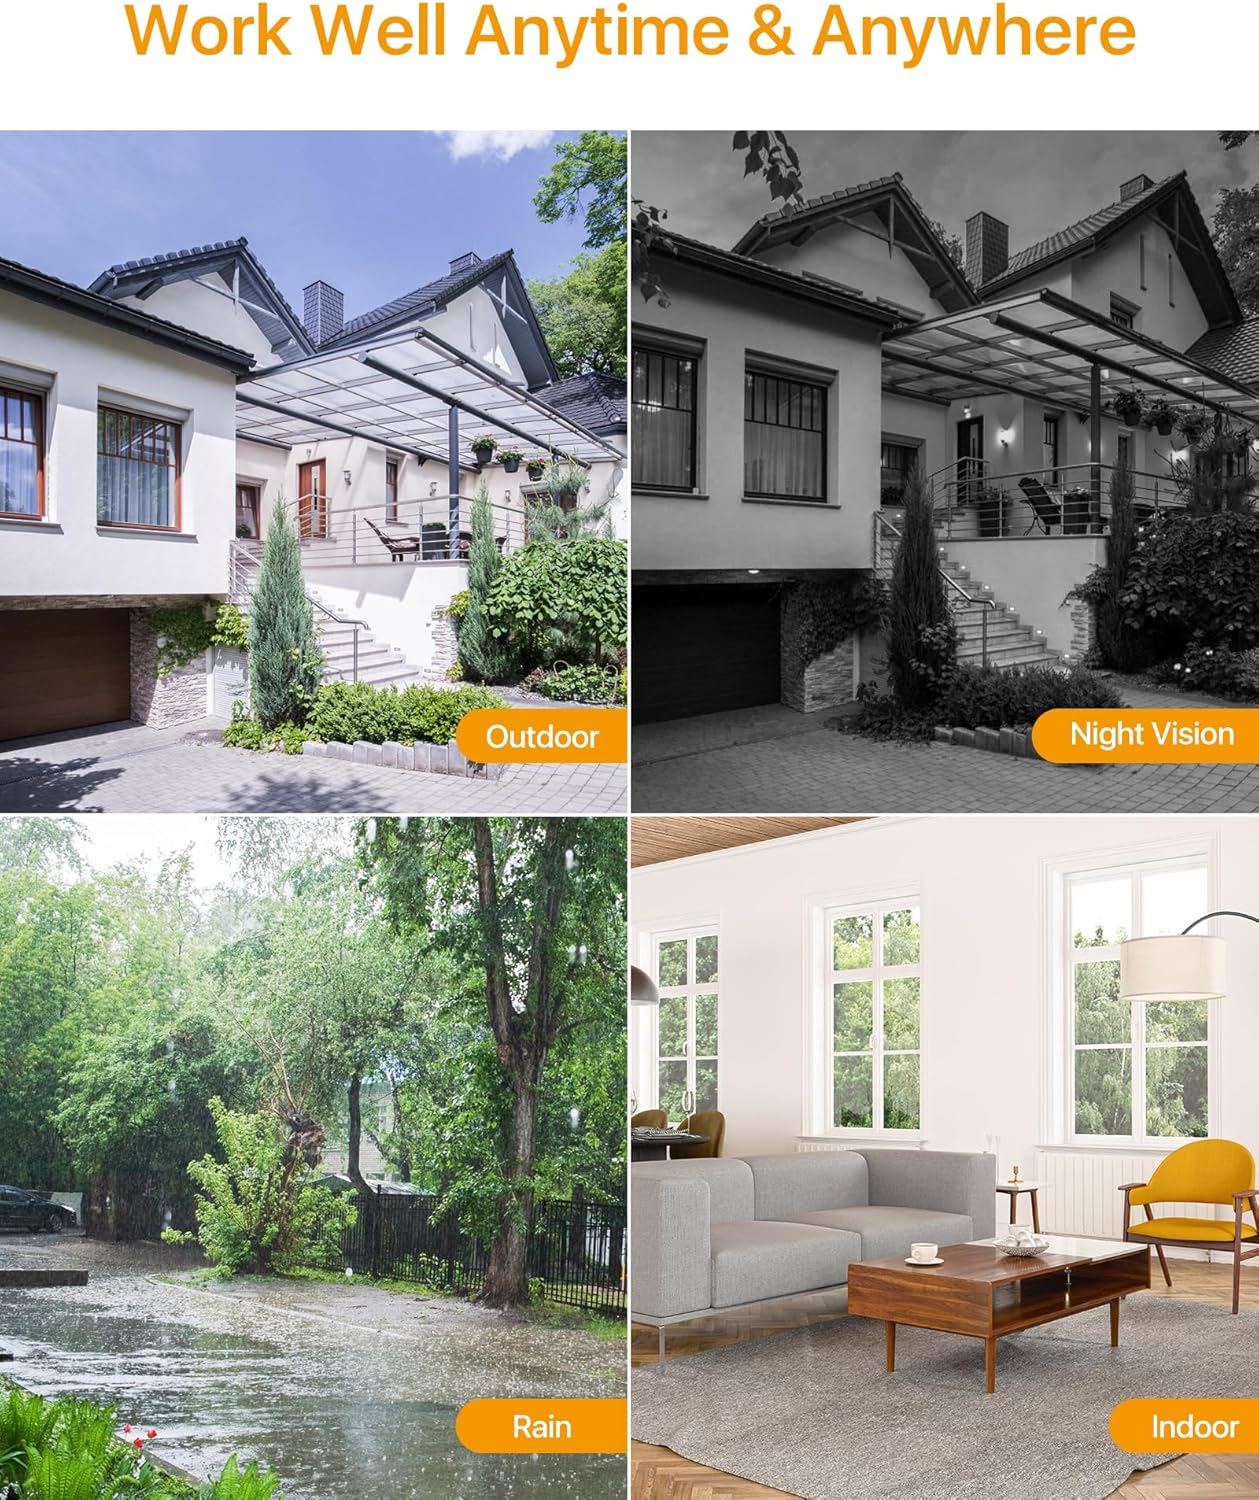
- IP66 Weatherproof Housing: Durable metal casing protects against dust, rain, and extreme weather, suitable for both indoor and outdoor use.
- HD-TVI Compatibility: Specifically designed to work with HD-TVI DVR systems.

Setup and Installation
Compatibility Check:
Before installation, ensure your Digital Video Recorder (DVR) is compatible with HD-TVI cameras. This camera is designed exclusively for HD-TVI DVR systems.
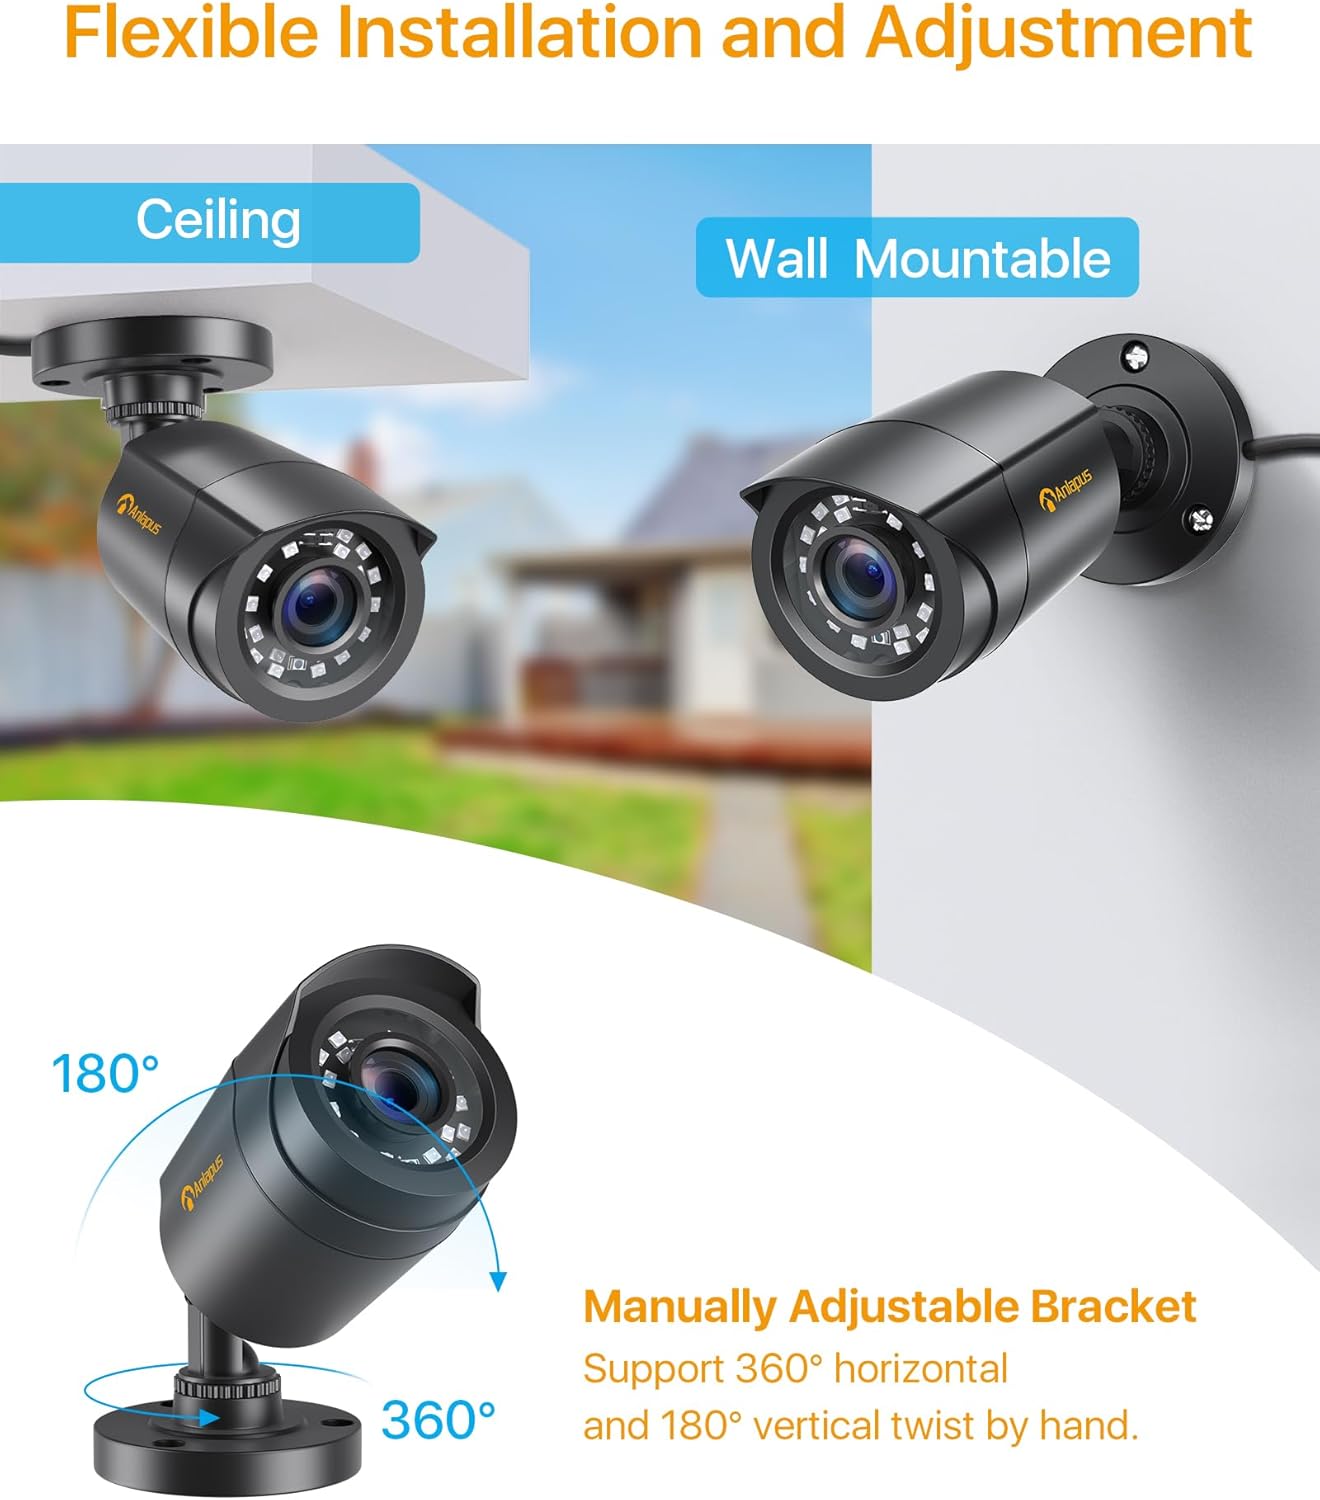
Mounting Options:
The camera features a flexible bracket that supports both ceiling and wall mounting. The bracket allows for 360-degree horizontal and 180-degree vertical adjustment to achieve the desired viewing angle.
Connection Diagram:
Follow the diagram below to connect the camera to your HD-TVI DVR system. Ensure all connections are secure before powering on the system.

Operating Instructions
Once the camera is properly installed and connected to a compatible HD-TVI DVR, the system will begin recording based on your DVR's settings. Refer to your DVR's manual for specific recording, playback, and remote viewing instructions.
Motion Detection:
Many HD-TVI DVRs support motion detection features. Configure these settings within your DVR's interface to receive alerts or trigger recordings when motion is detected in the camera's field of view.


Maintenance
Regular maintenance ensures the longevity and optimal performance of your surveillance camera.
- Cleaning: Periodically clean the camera lens and housing with a soft, damp cloth. Avoid abrasive cleaners that could scratch the lens.
- Cable Inspection: Regularly check all cables for signs of wear, damage, or loose connections.
- Environmental Protection: While the camera is IP66 weatherproof, ensure it is not submerged in water or exposed to extreme physical impact.
Troubleshooting
If you encounter issues with your camera, refer to the following common troubleshooting steps:
| Problem | Possible Cause | Solution |
|---|---|---|
| No image on monitor | Loose cable connection, no power, incompatible DVR. | Check BNC and power connections. Ensure power supply is working. Verify DVR is HD-TVI compatible. |
| Poor image quality | Dirty lens, improper focus (if adjustable), cable interference, low light. | Clean the lens. Ensure cables are not near strong electrical interference. Check night vision functionality in low light. |
| Night vision not working | Insufficient power, IR LEDs malfunction, ambient light interference. | Ensure adequate power supply. Check for strong light sources near the camera that might prevent IR activation. |
| Camera not recording | DVR settings, hard drive issues, motion detection not configured. | Refer to your DVR's manual to check recording schedules, motion detection settings, and hard drive status. |
Specifications
Detailed technical specifications for the Anlapus 1080P TVI Outdoor Surveillance Camera.
- Model Name: C1062B Surveillance Camera
- Model Number: 6972804072672
- Resolution: 1080P (1920x1080)
- Lens: 3.6mm
- Viewing Angle: 90 Degrees
- Night Vision Range: 24 Meters (80 feet)
- IR LEDs: 24 pcs IR-Cut LEDs
- Weatherproof Rating: IP66
- Connectivity: Wired (BNC)
- Compatible Devices: HD-TVI DVRs
- Power Source: Electric Cable (12V DC)
- Power Consumption: 6 Watts
- Material: Metal Housing
- Operating Temperature: (Not specified, but implied by outdoor use)
- Dimensions: 42.9 x 27 x 8.7 cm (Product dimensions for the kit)
- Weight: 2.66 Kilograms (Product weight for the kit)
- Control Method: Remote control (via DVR)
- Alert Type: Motion only (configurable via DVR)
- Frame Rate: 25 fps
- Optical Sensor Technology: CMOS
Warranty and Support
Anlapus is committed to providing high-quality products and customer satisfaction. For any technical assistance, warranty claims, or product-related inquiries, please contact Anlapus customer support.
Please retain your proof of purchase for warranty purposes. Specific warranty terms and conditions may vary by region and retailer.
