Nisorpa UKB2-C2-0008
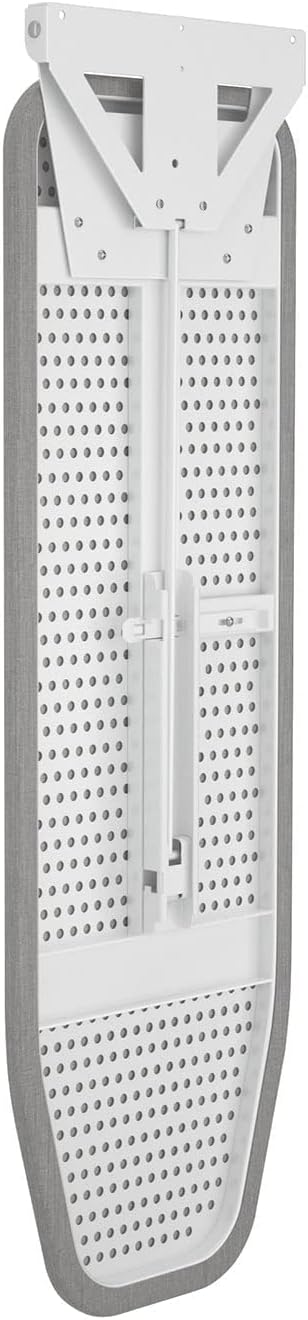
Nisorpa UKB2-C2-0008 Wall-Mounted Foldable Ironing Board
User Manual
1. Introduction
Thank you for choosing the Nisorpa UKB2-C2-0008 Wall-Mounted Foldable Ironing Board. This product is designed to provide a convenient and space-saving solution for your ironing needs. Please read this manual carefully before installation and use to ensure proper function and safety. Keep this manual for future reference.
2. Safety Instructions
- Always ensure the ironing board is securely mounted to a sturdy wall structure before use.
- Do not overload the ironing board. It is designed for ironing garments, not for supporting heavy objects.
- Keep children and pets away from the ironing board during use and when folding/unfolding.
- Use caution when handling hot irons. Always place the iron on a heat-resistant surface or iron rest when not in use.
- Ensure the board is fully locked in its open position before applying pressure during ironing.
- When folding the board, ensure fingers and hands are clear of moving parts to prevent pinching.
- Regularly inspect the mounting hardware and board for any signs of wear or damage. Do not use if damaged.
3. Package Contents
Please check the package to ensure all components are present:
- Nisorpa Wall-Mounted Foldable Ironing Board
- Heat-Resistant Ironing Board Cover (pre-installed)
- Mounting Bracket
- Mounting Hardware (screws, wall anchors)
- Instruction Manual
4. Setup and Installation
Tools Required: Drill, drill bits, level, measuring tape, screwdriver, pencil.
- Choose a Location: Select a sturdy wall in a convenient location, ensuring sufficient space for the board to unfold (100 cm length). Consider the desired ironing height.
- Mark Mounting Points: Hold the mounting bracket against the wall at the desired height. Use a level to ensure it is straight. Mark the positions for the drill holes with a pencil. Refer to the dimensions diagram for precise measurements.
- Drill Holes: Drill pilot holes at the marked positions. Use appropriate drill bits for your wall type (e.g., masonry bit for brick, wood bit for studs). Insert wall anchors if necessary.
- Attach Mounting Bracket: Secure the mounting bracket to the wall using the provided screws. Ensure it is firmly attached and stable.
- Attach Ironing Board: Align the ironing board's hinge mechanism with the mounted bracket. Secure the board to the bracket using the remaining screws. Ensure all connections are tight and the board can pivot smoothly.
- Test Stability: Gently pull the board down to its open position and push it back up to its folded position several times to ensure smooth operation and secure mounting.


5. Operating Instructions
- Unfolding the Board: Gently pull the bottom edge of the folded ironing board downwards. The board will pivot on its hinge until it reaches a horizontal position. Ensure the support mechanism locks into place, providing a stable ironing surface.
- Using the Board: Place your garments on the heat-resistant cover. Use your iron as usual. Always ensure the iron is placed on a heat-resistant surface when not actively ironing.
- Folding the Board: After use, ensure the iron is safely stored away and the board has cooled if it absorbed heat. Release the locking mechanism (if applicable, typically a lever or button near the hinge) and gently push the board upwards until it is vertical and flush against the wall. Ensure it locks securely in the folded position.


6. Maintenance
- Cleaning: Wipe the metal parts of the board with a damp cloth. Do not use abrasive cleaners.
- Cover Care: The heat-resistant cover can be removed for cleaning if necessary. Follow the care instructions on the cover's label. Ensure the cover is dry before reattaching.
- Hardware Check: Periodically check all screws and mounting hardware to ensure they remain tight. Tighten if loose.
- Hinge Lubrication: If the folding mechanism becomes stiff, apply a small amount of silicone-based lubricant to the hinge points.
7. Troubleshooting
- Board feels unstable: Ensure all mounting screws are securely tightened. Verify that the wall structure is solid and capable of supporting the board's weight and applied pressure during ironing.
- Difficulty folding/unfolding: Check for any obstructions in the hinge mechanism. Ensure the locking mechanism is fully disengaged when folding and fully engaged when unfolding. Lubricate hinges if necessary.
- Board not level: Re-check the mounting bracket installation with a level. Adjust if needed.
8. Specifications
| Feature | Specification |
|---|---|
| Brand | Nisorpa |
| Model Number | UKB2-C2-0008 |
| Dimensions (L x W x H) | 100 x 30 x 17 cm (folded) |
| Weight | 4.8 Kilograms |
| Material | Alloy Steel (Frame: Iron, Metal) |
| Mounting Type | Wall Mount |
| Foldable | Yes |
9. Warranty and Support
Information regarding specific warranty terms and customer support for the Nisorpa UKB2-C2-0008 Wall-Mounted Foldable Ironing Board is not available in this manual. Please refer to your purchase documentation or contact the retailer/manufacturer directly for warranty claims and technical assistance.
Related Documents - UKB2-C2-0008
 |
Nisorpa Pull Out Ironing Board Installation Guide | 95.6 x 30cm Step-by-step installation guide for the Nisorpa pull-out ironing board (95.6 x 30cm). Learn how to properly mount and use this 180-degree rotatable, built-in, fold-away ironing solution with a heat-resistant cover. |
 |
Utopia Alley Folding Wall Desk Installation and Assembly Instructions Comprehensive installation and assembly guide for the Utopia Alley Folding Wall Desk (Model SH0002WW101/SH0002CH201), featuring space-saving design and storage. |
 |
Starax Foldable Ironing Board Mounting Instructions Step-by-step guide for mounting the Starax foldable ironing board, including all necessary parts and dimensions for installation. |
 |
Ebern Designs Foldable Ironing Board Cabinet Assembly Instructions Detailed assembly instructions for the Ebern Designs Foldable Ironing Board Cabinet with Storage. Includes parts list, hardware list, and step-by-step guidance for building your ironing station. |
 |
Honey-Can-Do Collapsible Tabletop Ironing Board Assembly and Folding Guide Step-by-step instructions for setting up and folding the Honey-Can-Do collapsible tabletop ironing board (models BRD-01292, BRD-09222). |
 |
Assembly Instructions for Space-Saving Wall Bed with Wardrobe Detailed assembly instructions for a space-saving wall bed, including safety warnings, parts list, hardware guide, and step-by-step instructions for installation. This guide helps users assemble their metal foldable Murphy bed with integrated wardrobe and shelves. |
Ask a question about this manual
Ask about setup, troubleshooting, compatibility, parts, safety, or missing instructions. Manuals+ will review the question and use this page’s manual context to help answer it.