1. Product Overview
The AZUTTA Digital Alarm Clock Radio is designed to provide reliable timekeeping, alarm functions, and FM radio entertainment. It features a clear VA screen with adjustable display colors and brightness levels, dual alarms, a sleep timer, and battery backup for convenience.
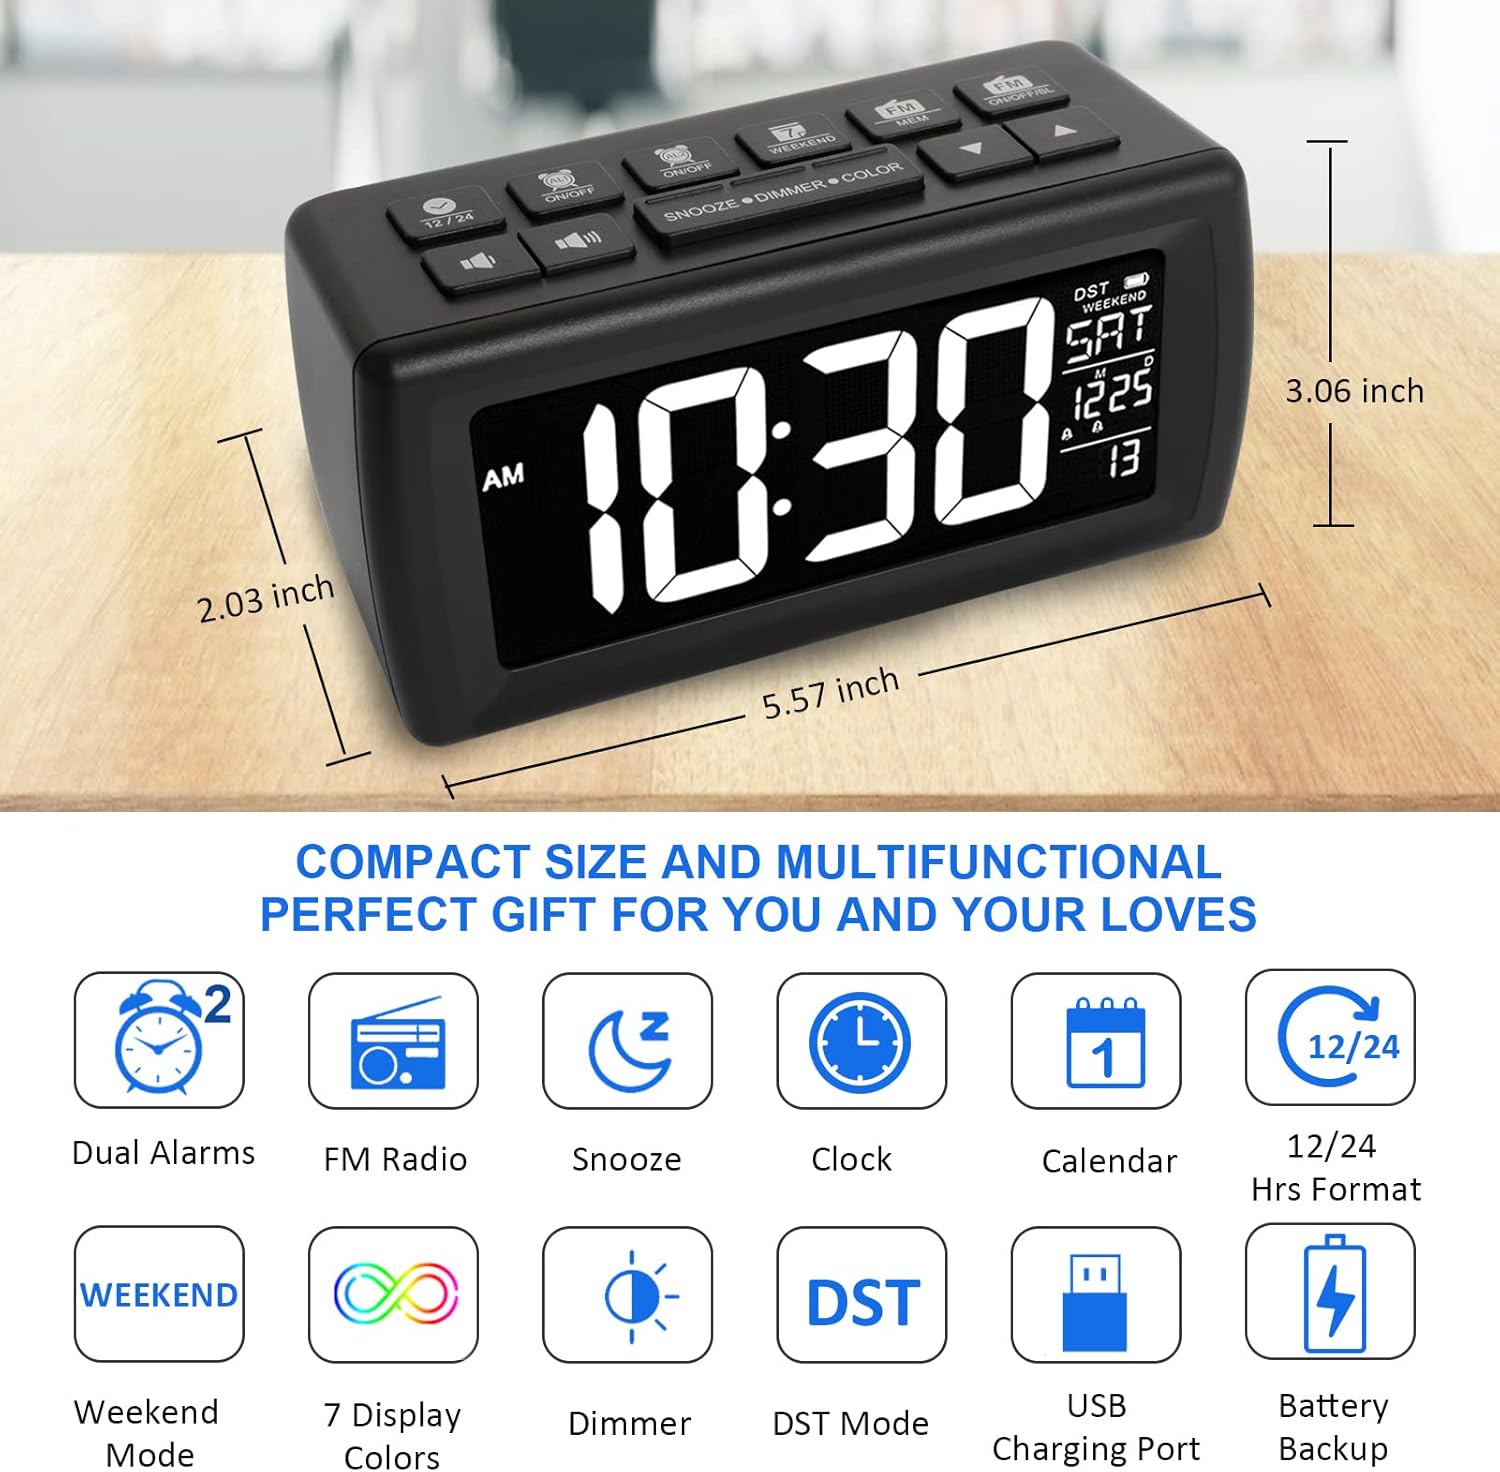
Image 1.1: Overview of the AZUTTA Digital Alarm Clock Radio, highlighting its compact dimensions and key functionalities such as dual alarms, FM radio, snooze, clock, calendar, 12/24 hour format, weekend mode, 7 display colors, dimmer, DST mode, USB charging port, and battery backup.
2. Setup
2.1 Power Connection
Connect the provided DC adapter to the clock's power input port and plug it into a standard AC100-240V power outlet. The clock will power on and the display will illuminate.
2.2 Battery Backup Installation
For backup functionality during power outages or for outdoor use, install 3 x AAA batteries (not included) into the battery compartment located on the bottom of the unit. Ensure correct polarity. Batteries are for backup only and not intended for daily operation due to rapid drainage.
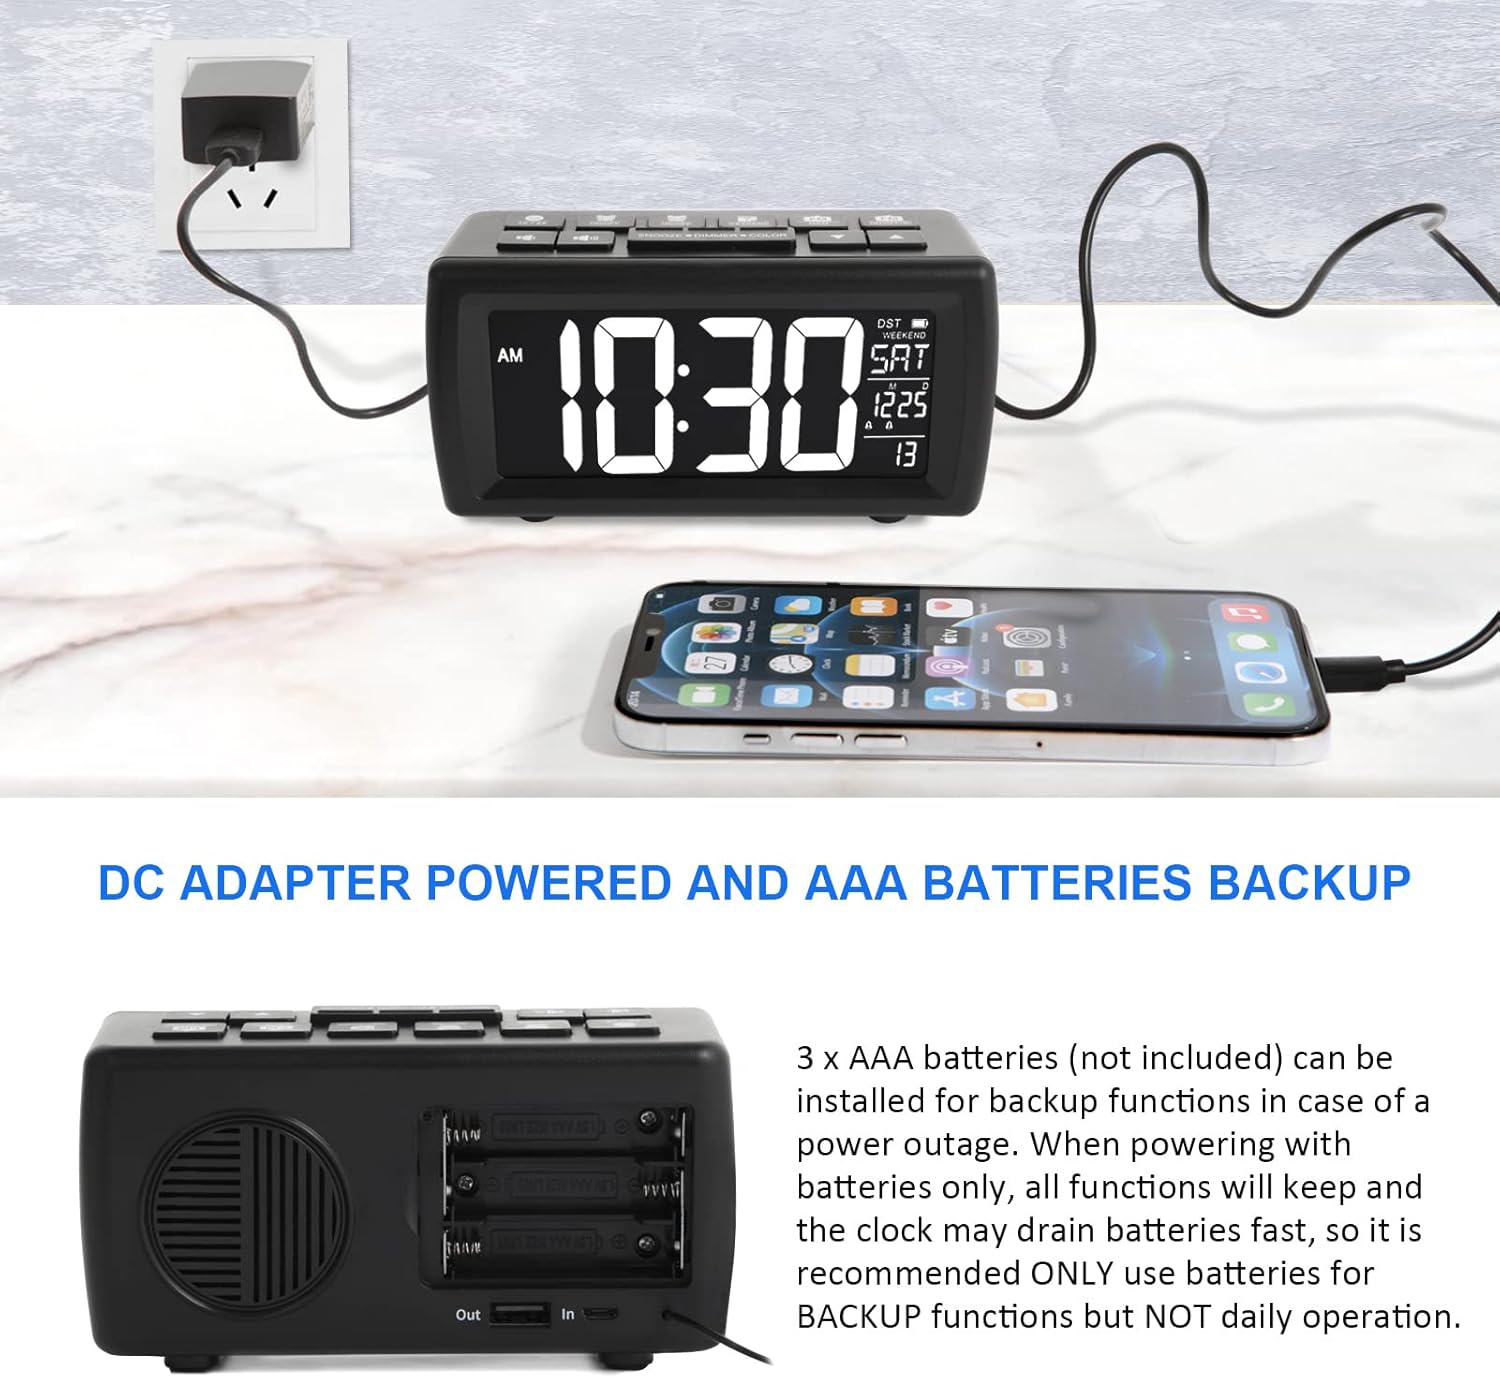
Image 2.1: The alarm clock powered by a DC adapter, with a view of the battery compartment requiring 3 AAA batteries for backup functions.
3. Operating Instructions
3.1 Time and Date Setting
Refer to the included quick start guide for specific button presses to set the current time and date. Typically, a 'SET' or 'TIME SET' button is used in conjunction with 'UP'/'DOWN' arrows.
3.2 Display Settings: Colors and Brightness
The clock features 7 display colors (White, Green, Azure, Red, Purple, Blue, Yellow) and 5 brightness levels. Long-press the 'SNOOZE/DIMMER/COLOR' button to cycle through the 7 display colors. Press the 'SNOOZE/DIMMER/COLOR' button briefly to adjust the 5 brightness levels.

Image 3.1: The clock display showing various color options for the time, date, and day of the week.

Image 3.2: The clock display demonstrating the five adjustable brightness levels, from dimmest to brightest.
3.3 Dual Alarms
The clock supports two independent alarms. To set an alarm, press the 'ALARM 1' or 'ALARM 2' button and use the 'UP'/'DOWN' arrows to set the desired time. Press the 'Down' arrow button to select a beep as the alarm ringtone, or press the 'Up' arrow button to select the last-listened FM radio station as the ringtone. The two alarms share the same ringtone setting. Adjust alarm volume using the volume buttons.
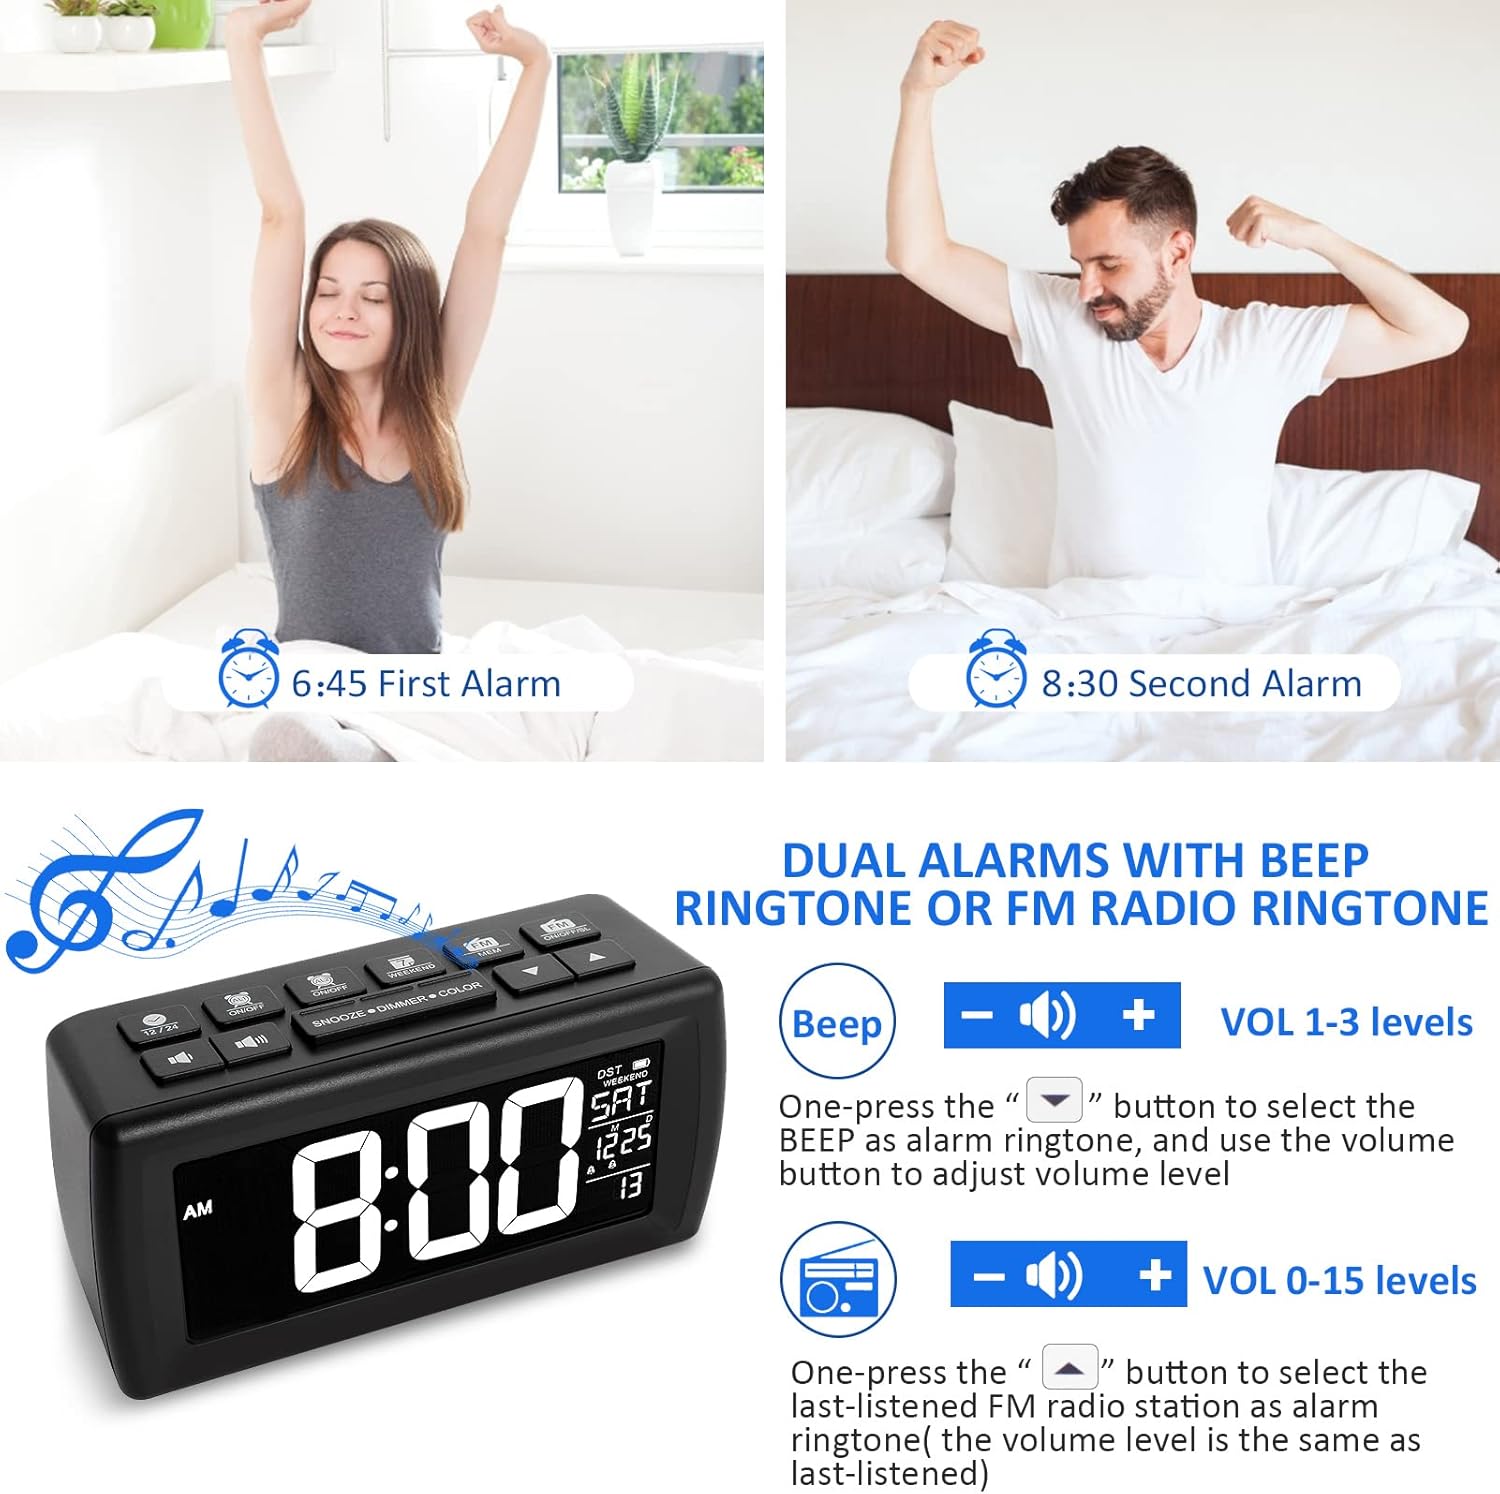
Image 3.3: Illustration of setting dual alarms, with options to choose between a beep sound or an FM radio station as the alarm tone, and adjusting volume levels.
3.4 FM Radio with Sleep Timer
To activate the FM radio, press the 'FM' button. The radio operates within the frequency range of 87.5-108.0MHz. One-press to automatically search and save up to 40 FM radio stations. Use the 'UP'/'DOWN' arrows to navigate saved stations. The clock also features a radio sleep timer mode (5-90 minutes countdown) for falling asleep to the radio. A 39-inch antenna is attached for improved signal reception.

Image 3.4: The alarm clock displaying FM radio frequencies and indicating the sleep timer function, allowing users to fall asleep to their favorite radio station.
3.5 Snooze, Weekend, and DST Mode
- Snooze Mode: When an alarm sounds, press the 'SNOOZE' button to temporarily silence the alarm for 9 minutes. The alarm will sound again after this period.
- Weekend Mode: Activate Weekend Mode to prevent alarms from sounding on Saturdays and Sundays. Refer to the manual for specific button combinations to enable/disable this feature.
- DST Mode (Daylight Saving Time): Manually long-press the 'UP' arrow button to turn on or off DST mode, which adjusts the time by one hour.
3.6 USB Charging Port
An output USB port is located at the back of the unit, allowing you to charge mobile phones or other USB-powered devices. This port is active when the clock is powered via the DC adapter.
4. Maintenance
4.1 Cleaning
To clean the clock, gently wipe the surface with a soft, dry cloth. Do not use abrasive cleaners, waxes, or solvents as they may damage the finish. Ensure the device is unplugged before cleaning.
4.2 Battery Replacement
If using battery backup, replace the 3 x AAA batteries when the backup function is no longer reliable. Always use new batteries and dispose of old batteries responsibly.
5. Troubleshooting
- Display is blank or dim: Ensure the DC adapter is securely plugged in. Adjust the brightness level using the 'SNOOZE/DIMMER/COLOR' button. Check if batteries are installed correctly for backup.
- Alarm does not sound: Verify that the alarm is enabled and set to the correct time. Check the alarm volume level. Ensure Weekend Mode is not active if the alarm is set for a weekend day.
- Poor FM radio reception: Extend the antenna fully. Try repositioning the clock to improve signal. Perform an automatic station search again.
- Buttons are unresponsive: Unplug the power adapter and remove backup batteries for a few minutes, then reconnect to perform a soft reset.
- Time is incorrect: Re-set the time and date. Check DST mode setting.
6. Specifications
- Brand: AZUTTA
- Model: AZUTTA Digital Alarm Clock Radio
- Display Type: LCD (VA screen)
- Display Colors: 7 (White, Green, Azure, Red, Purple, Blue, Yellow)
- Brightness Levels: 5
- Power Source: Corded Electric (DC adapter)
- Battery Backup: 3 x AAA batteries (not included)
- FM Radio Frequency: 87.5-108.0MHz
- Special Features: Dual Alarms, Snooze, Weekend Mode, DST Mode, Sleep Timer, USB Charging Port
- Mounting Type: Tabletop
- Dimensions: Approximately 19.2 x 9.09 x 6.91 cm
- Weight: Approximately 385.55 g
7. Warranty and Support
7.1 Warranty Information
This product comes with an 18-month worry-free warranty from the date of purchase. Please retain your proof of purchase for warranty claims.
7.2 Customer Support
For any questions, technical assistance, or warranty claims, please contact AZUTTA customer support through the retailer's platform or the contact information provided with your purchase.


