Introduction
Thank you for choosing the PEAKPULSE Golf Rangefinder LC600AG. This device is designed to provide accurate distance measurements for an enhanced golfing experience, featuring advanced technologies such as slope compensation, flag acquisition with pulse vibration, and a fast focus system. Please read this manual carefully to ensure proper use and optimal performance.
Package Contents
- PEAKPULSE Golf Rangefinder LC600AG
- Carrying Case
- Lanyard
- Microfiber Cleaning Cloth
- AAA Batteries (2x)
- User Manual
Setup
1. Battery Installation
The PEAKPULSE Golf Rangefinder LC600AG uses two AAA batteries. To install:
- Locate the battery compartment on the device.
- Open the battery cover.
- Insert two AAA batteries, ensuring correct polarity (+/-).
- Close the battery cover securely.
Video: Unboxing and battery installation of the PEAKPULSE Golf Rangefinder. This video demonstrates the initial setup, including how to open the packaging and insert the batteries into the device.
2. Attaching the Lanyard
Attach the provided lanyard to the designated loop on the rangefinder to prevent accidental drops and ensure easy access during use.
3. Adjusting the Eyepiece
Rotate the eyepiece to adjust the focus until the display and target appear clear and sharp.
Operating Instructions
1. Power On/Off and Basic Ranging
Press the RANGE button once to power on the device. Aim the crosshairs at your target and press the RANGE button again to get a distance measurement. The device will automatically power off after a period of inactivity to conserve battery.
2. Mode Selection
Press the MODE button to cycle through the available measurement modes:
- M1: Angle Mode - Measures horizontal distance and angle.
- M2: Non-Slope Mode - Provides direct line-of-sight distance without slope compensation. This mode is legal for tournament play.
- M3: Slope Mode - Calculates the slope-adjusted distance, taking into account elevation changes. This mode is typically not permitted in official tournament play.

Image: Illustration of the three distinct operating modes: Angle Mode (M1), Non-Slope Mode (M2), and Slope Mode (M3), demonstrating how each mode calculates distance based on terrain.
3. Flag Acquisition with Pulse Vibration
In Flag Acquisition mode, the rangefinder will prioritize the closest target, such as a flagstick, and confirm the lock with a short vibration. This ensures you get an accurate reading to the pin, even with background objects.
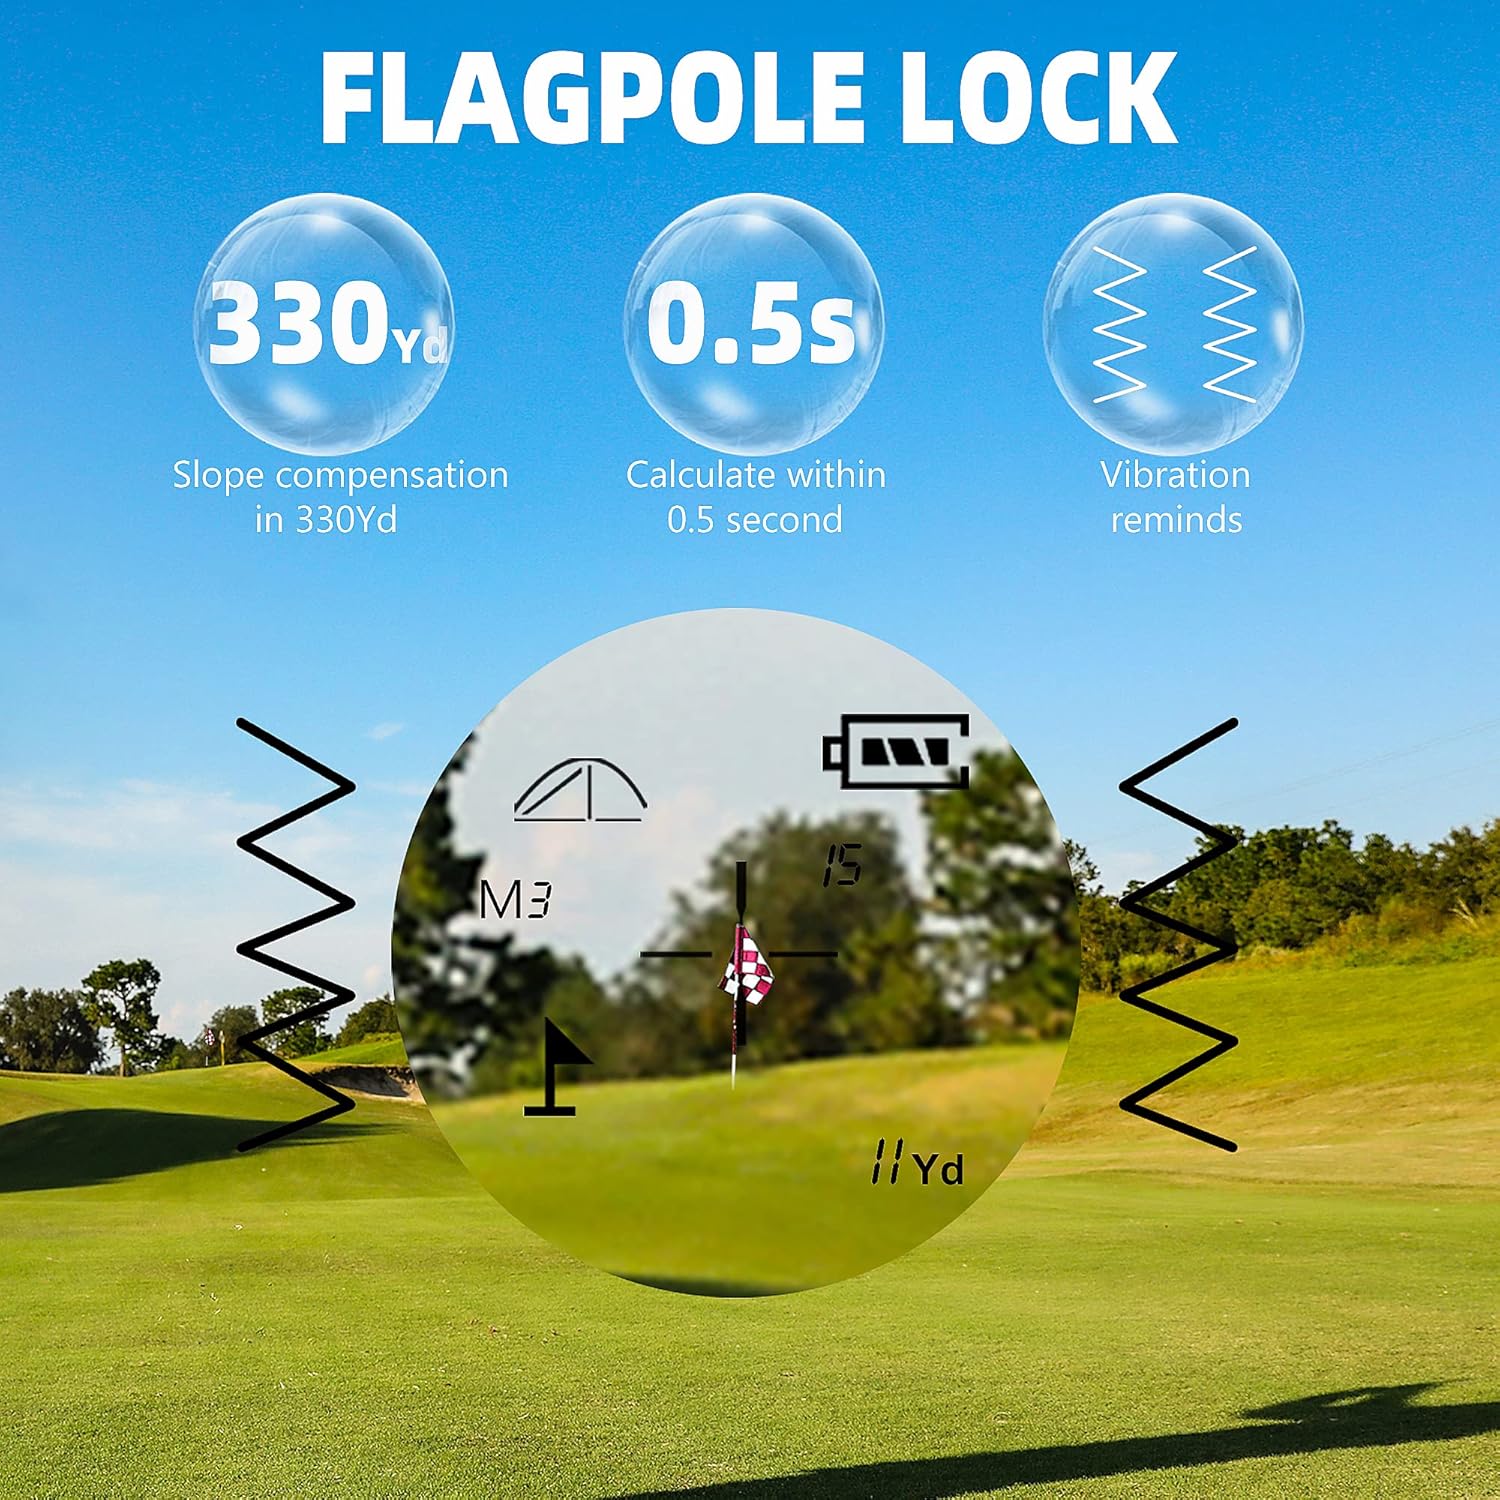
Image: The rangefinder's display indicating successful flag acquisition, showing the distance and a vibration icon, confirming the target lock.
4. Slope Compensation Technology
When Slope Mode (M3) is active, the rangefinder automatically calculates and displays the slope-adjusted distance, providing a more accurate "play as" distance for uphill or downhill shots. This feature can be toggled off for tournament compliance.

Image: A golfer on a course, with an overlay illustrating how slope compensation technology adjusts the measured distance based on the terrain's incline or decline.
5. Unit Switching (Yards/Meters)
To switch between Yards (Y) and Meters (M), press and hold the MODE button for approximately 3 seconds while the device is powered on. The unit displayed on the screen will change.

Image: A visual representation of the rangefinder's rich functions, including 6X magnification, 0.5-yard accuracy, 7-degree field of view, 650-meter range, vibration confirmation, and the ability to switch between Yards and Meters.
Maintenance
1. Cleaning the Lenses
Use the provided microfiber cleaning cloth to gently wipe the lenses. Avoid using abrasive materials or harsh chemicals that could damage the optical coatings.
2. Battery Care
Replace batteries when the low battery indicator appears on the display. If the device will not be used for an extended period, remove the batteries to prevent leakage and potential damage.
3. Storage
Store the rangefinder in its protective carrying case in a cool, dry place away from direct sunlight and extreme temperatures.
Troubleshooting
| Problem | Possible Cause | Solution |
|---|---|---|
| Device does not power on. | Dead or incorrectly installed batteries. | Check battery polarity or replace with new AAA batteries. |
| Inaccurate distance readings. | Unstable aiming, dirty lenses, or target too far/small. | Ensure steady aim, clean lenses, or try a larger/closer target. |
| Flag acquisition not working. | Background objects interfering, or flag too far. | Ensure clear line of sight to the flag, or try multiple measurements. |
If you encounter issues not listed here, please contact PEAKPULSE customer support for assistance.
Specifications
- Brand: PEAKPULSE
- Model Number: LC600AG
- Magnification: 6x
- Max Range: 650 Yards (approx. 600 meters)
- Accuracy: ±0.5 Yard
- Sport Type: Golf
- Battery Type: AAA Alkaline (2x)
- International Protection Rating: IP54
- Color: Grey/Silver (as shown in product images)

Image: The ergonomic design of the rangefinder, highlighting its compact dimensions (4.6 inches long, 3 inches high) for comfortable handling.

Image: A golf ball with "6X" printed on it, symbolizing the 6x magnification capability of the rangefinder for clear target viewing.
Warranty and Support
Your PEAKPULSE Golf Rangefinder LC600AG comes with a manufacturer's warranty. Please refer to the warranty card included in your package for specific terms and conditions. For technical support, troubleshooting assistance, or warranty claims, please contact PEAKPULSE customer service through their official website or the contact information provided on your warranty card.