DALLUX RCS7001
DALLUX Heavy Duty Vehicle Backup Camera System DL002 User Manual
Model: RCS7001
Introduction
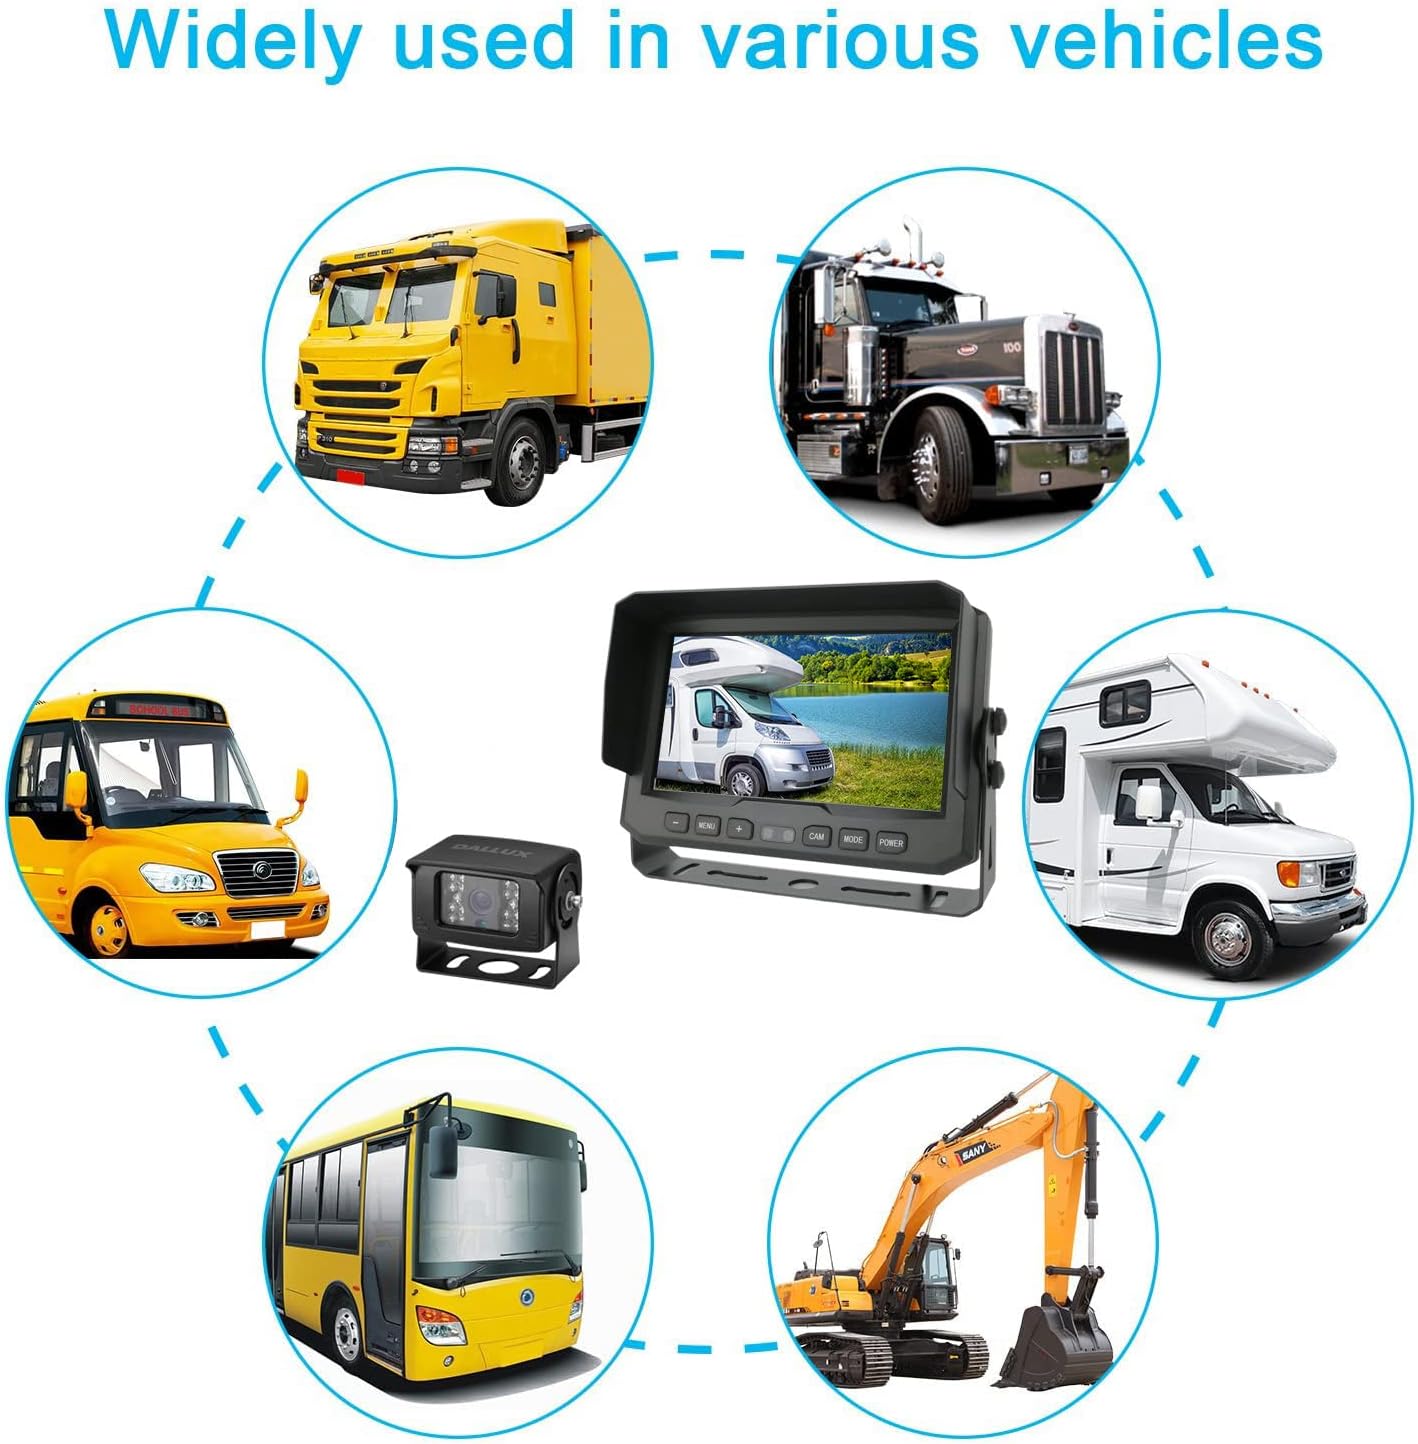
This manual provides comprehensive instructions for the installation, operation, and maintenance of your DALLUX Heavy Duty Vehicle Backup Camera System, model DL002 (RCS7001). This system is designed to enhance rear visibility for various heavy-duty vehicles, including trucks, buses, vans, trailers, RVs, and motor homes, operating on 12V or 24V power systems. Please read this manual thoroughly before installation and use to ensure proper function and safety.
Safety Information
- Always ensure the vehicle's power is disconnected before performing any installation or wiring.
- Improper installation can lead to electrical shock, fire, or damage to the product and vehicle. Consult a qualified technician if you are unsure about any steps.
- This system is an aid for safe driving and parking. It does not replace the driver's responsibility to check surroundings and use mirrors.
- Keep the monitor and camera lenses clean for optimal performance.
- Do not attempt to disassemble or modify the product. This will void the warranty and may cause damage.
Package Contents
Verify that all items listed below are included in your package:
- 7-inch HD LCD Color Monitor
- Heavy Duty Backup Camera
- 66ft 4-PIN Extension Cable
- Remote Control
- Monitor Mounting Brackets (3 types: U-shaped, Suction Cup, Butterfly-shaped)
- Power Cord with Fuse
- Installation Accessories (screws, nuts, Allen wrench)

Product Overview
7-inch HD LCD Monitor
The monitor features a 7-inch high-definition LCD display for clear viewing. It includes control buttons for menu navigation, power, and camera selection. The monitor also has an auto-dimming feature to adjust brightness based on ambient light conditions.

Heavy Duty Backup Camera
The camera is a 1/3" CCD 800 TVL unit, providing accurate color images. It is designed for heavy-duty use with an IP69K waterproof rating, ensuring functionality in all weather conditions. The camera incorporates 18 infrared lights for night vision up to 50 feet in complete darkness and offers a 130° wide viewing angle to minimize blind spots.


Setup and Installation
Monitor Mounting
The monitor offers three mounting options to suit your vehicle's dashboard or windshield:
- U-shaped Bracket: For dashboard mounting, providing a stable base.
- Butterfly-shaped Bracket: Another dashboard mounting option, often used for a lower profile.
- Suction Cup Bracket: For windshield mounting, allowing flexible positioning.
Choose the bracket that best fits your vehicle and desired viewing angle. Ensure the mounting surface is clean and dry before attachment.

Camera Installation
Mount the camera securely at the rear of your vehicle, ensuring a clear, unobstructed view. The camera's robust design and IP69K rating allow for external mounting in various weather conditions.
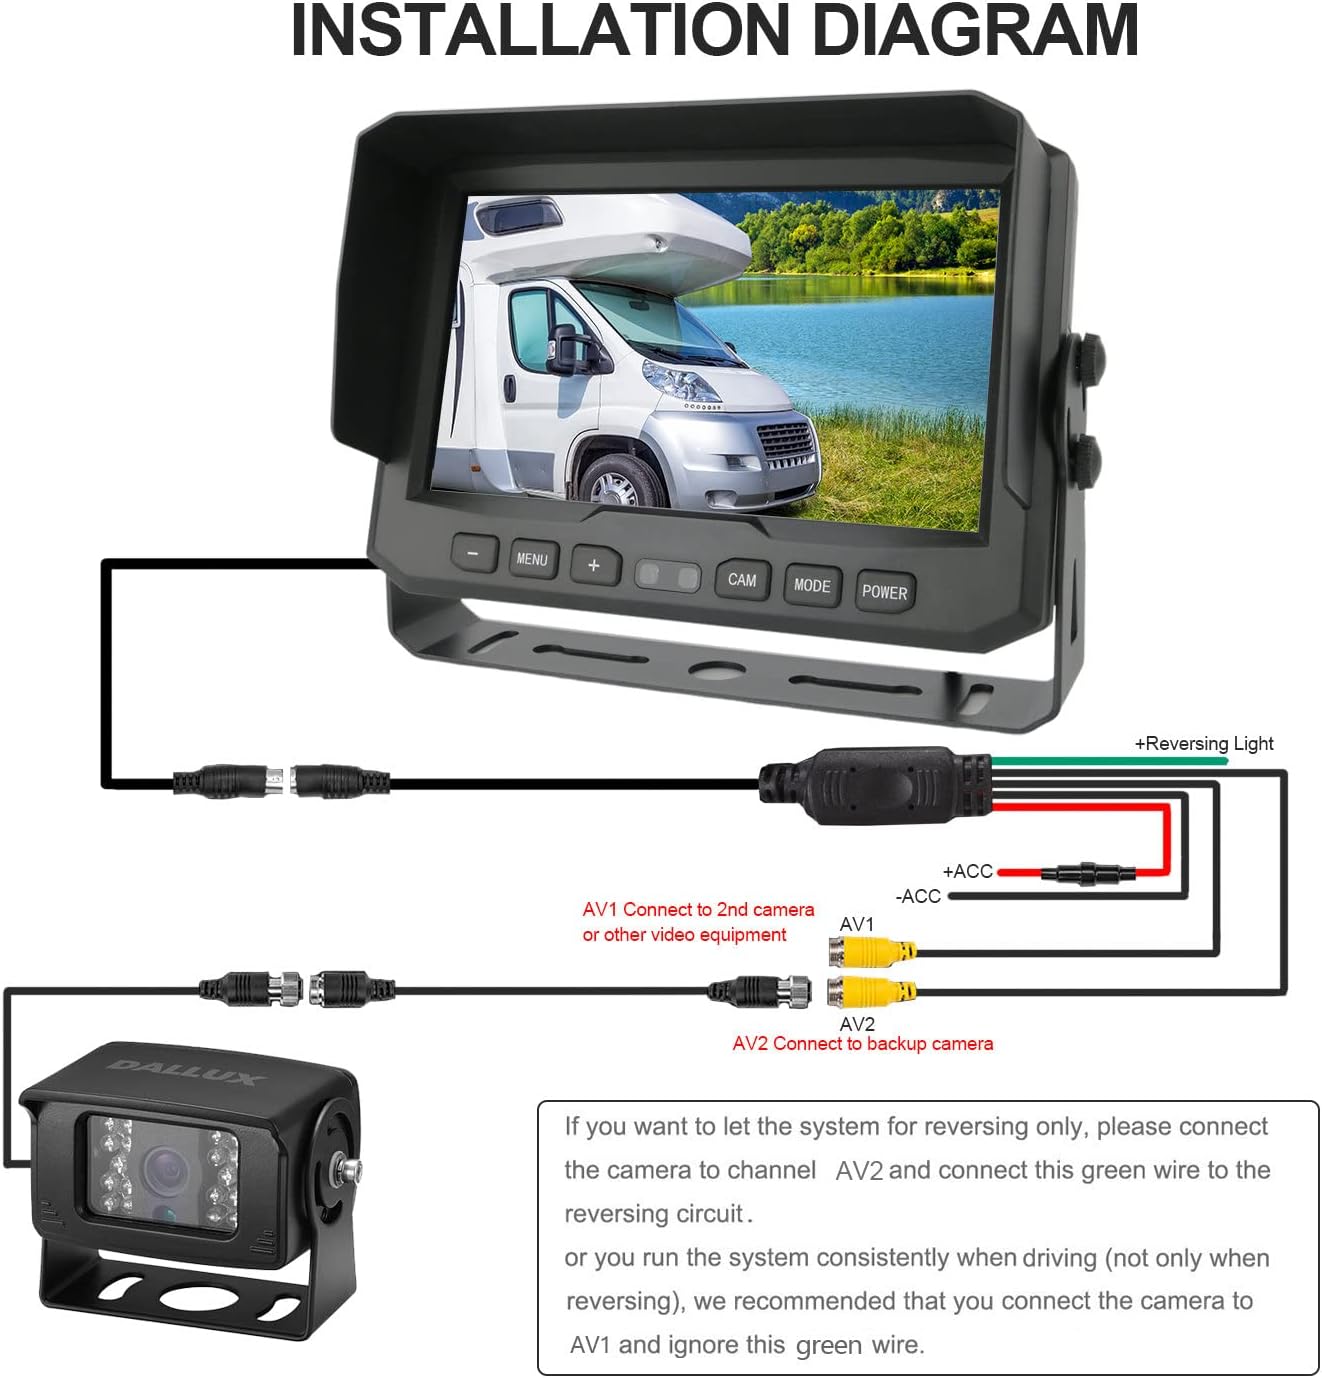
Wiring Diagram and Connections
The system uses a 4-PIN aviation connector cable for a secure and waterproof connection, transmitting both power and video signals. Follow the diagram carefully for correct wiring:
- Connect the camera to the 4-PIN extension cable.
- Connect the extension cable to the monitor's input.
- Connect the monitor's power cord to a 12V/24V power source in your vehicle.
- For automatic activation when reversing, connect the green wire from the monitor's power harness to the vehicle's reversing light circuit.
- If you prefer the system to run continuously (not just when reversing), connect the camera to AV1 input and disregard the green reversing wire connection.
4-PIN Cable Configuration
The included 4-PIN cable is designed for robust performance, providing both power and signal transmission through a single, waterproof, and shock-proof connection. This upgraded cable features a thicker diameter (5mm from standard 4mm) and 32 copper wires with tinfoil wrap for enhanced signal integrity and durability.


Operating Instructions
Monitor Controls
The monitor can be controlled using the buttons on the front panel or the included remote control.
- MENU: Access the monitor's settings menu.
- +/-: Navigate menu options or adjust values.
- CAM: Switch between available camera inputs (AV1, AV2).
- MODE: Change display modes or confirm selections.
- POWER: Turn the monitor on or off.
Adjusting Display Settings
Within the MENU, you can adjust various display parameters:
- Brightness/Contrast/Color: Optimize image quality for different lighting conditions.
- Mirror/Normal Image: The camera supports both mirror (rear view) and normal (front view) image orientations. Adjust this setting on the monitor as needed for your application.
- Auto Dimming: The monitor automatically adjusts its brightness based on ambient light, providing a clear display during the day and a dimmer, less distracting display at night.
Night Vision
The camera's 18 infrared lights activate automatically in low-light conditions, providing clear black and white night vision up to 50 feet. This feature ensures visibility even in complete darkness.
Maintenance
- Cleaning: Use a soft, damp cloth to clean the monitor screen and camera lens. Avoid abrasive cleaners or solvents.
- Cable Inspection: Periodically check all cables and connections for wear, damage, or loose fittings. Ensure waterproof seals are intact.
- Mounting Security: Verify that the monitor and camera mounts remain secure, especially after driving on rough terrain.
Troubleshooting
| Problem | Possible Cause | Solution |
|---|---|---|
| No image on monitor |
|
|
| Image is distorted or flickering |
|
|
| Night vision is unclear |
|
|
| Monitor does not turn on automatically in reverse |
|
|
Specifications
| Feature | Detail |
|---|---|
| Model Number | RCS7001 (DL002 variant) |
| Monitor Screen Size | 7 Inches |
| Display Technology | LCD |
| Camera Sensor | 1/3" CCD |
| Camera Resolution | 800 TVL |
| Camera Viewing Angle | 130 Degrees (Real Angle of View) |
| Night Vision | 18 Infrared Lights, up to 50ft |
| Waterproof Rating | IP69K (Camera) |
| Operating Voltage | 12V - 36V DC |
| Connector Type | 4-PIN Aviation |
| Product Dimensions (Monitor) | 7"L x 1"W x 4"H (approx.) |
| Item Weight | 5.06 pounds (total system) |
| Compatible Devices | Bus, Truck, Van, Trailer, RV, Campers, Motor Home, School bus, Pickup Truck, Travel Trailer, Oversized Truck, Dump Truck, Camping Trailer, 5th (fifth) wheel RV, Excavator, Horse Trailer, Agricultural Machine |
Warranty and Support
For warranty information and technical support, please refer to the documentation provided with your purchase or contact DALLUX customer service directly. Details regarding specific warranty periods and support channels are typically available on the manufacturer's official website or through your retailer.
For further assistance, please visit the DALLUX Store on Amazon.
no relevant documents
Ask a question about this manual
Ask about setup, troubleshooting, compatibility, parts, safety, or missing instructions. Manuals+ will review the question and use this page’s manual context to help answer it.