1. Product Overview
The CHORTAU Dual Dash Cam (Model B-T12F) is designed to provide comprehensive vehicle recording with both front and rear cameras. It features Full HD 1080P front recording, a waterproof rear camera, wide-angle lenses, night vision capabilities, and essential safety functions like G-Sensor, Loop Recording, Parking Monitor, and Motion Detection.

Figure 1: CHORTAU Dual Dash Cam components including the main unit, rear camera, and suction cup mount.
2. Package Contents
Please check the package contents upon unboxing to ensure all components are present:
- CHORTAU Dual Dash Cam (Main Unit)
- Rear Camera
- Suction Mount
- Power Cable (Car Charger)
- Rear Camera Cable
- User Manual (this document)
Note: A Micro SD card is NOT included and is required for operation. The dash cam supports up to 32GB Micro SD cards.

Figure 2: Reminder that a Micro SD card is not included.
3. Setup and Installation
3.1 Inserting the Micro SD Card
Before using the dash cam, insert a Class 10 or higher Micro SD card (up to 32GB) into the designated slot. Ensure the card is inserted correctly with the contacts facing the camera's screen.
- Locate the Micro SD card slot on the side of the dash cam.
- Gently push the Micro SD card into the slot until it clicks into place.
- To remove, push the card in again until it clicks, then release, and it will spring out.

Figure 3: Guide for inserting the Micro SD card.
3.2 Mounting the Dash Cam
The dash cam is designed to be mounted on your car's windshield using the provided suction mount.
- Clean the area on your windshield where you intend to mount the dash cam.
- Attach the suction mount to the dash cam.
- Press the suction cup firmly against the windshield and flip the lever to secure it.
- Adjust the angle of the dash cam to ensure a clear view of the road ahead. The mount allows for 360-degree rotation.
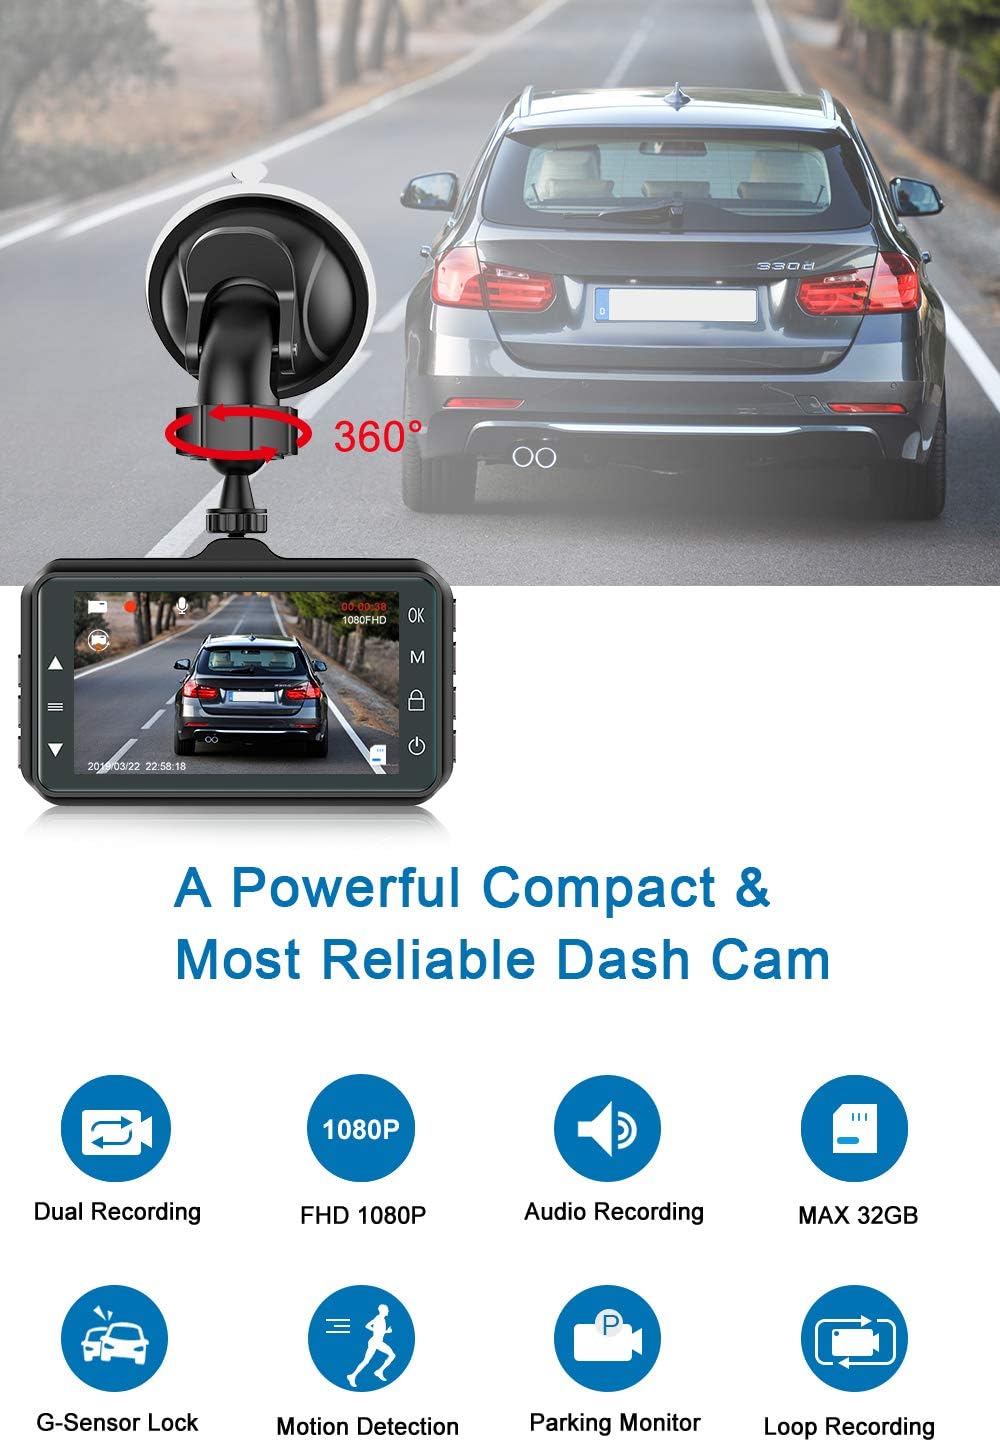
Figure 4: Dash cam mounted on the windshield, showing adjustable angle.
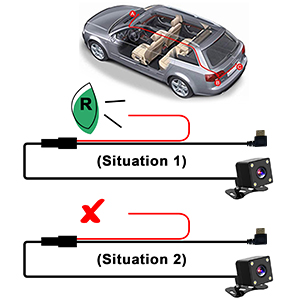
Figure 5: Dash cam and rear camera placement examples.
3.3 Wiring and Power Connection
Connect the dash cam to your car's power supply and install the rear camera.
- Connect the power cable (car charger) to the dash cam and plug the other end into your car's cigarette lighter socket.
- Connect the rear camera cable to the main dash cam unit.
- Route the rear camera cable to the back of your vehicle. For the backup camera function to work, connect the red wire from the rear camera cable to your car's reversing lamp positive terminal. If your car has a built-in reverse system, this red wire connection may not be necessary.
- Mount the rear camera in a suitable location, typically above the license plate or on the rear window, ensuring a clear view.

Figure 6: Illustration of cable routing for easy installation.

Figure 7: Wiring diagram for connecting the rear camera's red wire to the reversing lamp.
4. Operating Instructions
4.1 Power On/Off
The dash cam is designed for automatic operation. It will start recording immediately after your car's ignition is turned on and will save the video and shut down when the engine is turned off.
- Automatic Power On/Off: Connect the dash cam to the car charger. It will power on and begin recording automatically when the car engine starts. It will power off automatically when the engine is turned off.
- Manual Power On/Off: Press and hold the power button on the dash cam to manually turn it on or off.
4.2 Dual Lens Recording
The dash cam simultaneously records footage from both the front and rear cameras, providing comprehensive coverage of your driving environment.
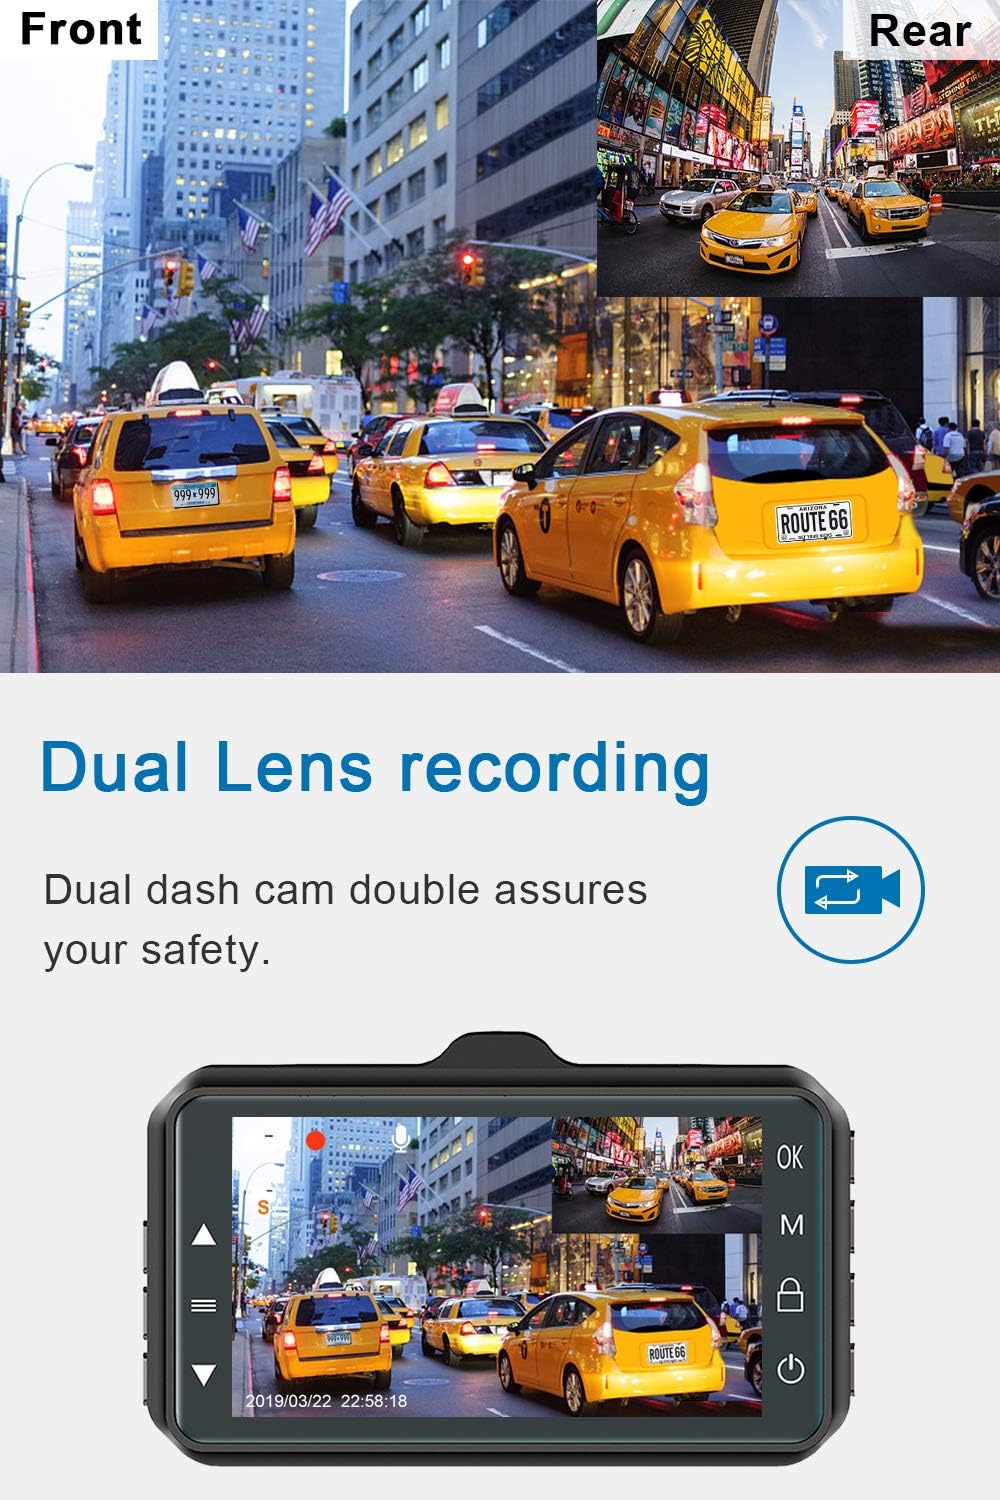
Figure 8: Dual lens recording display, showing both front and rear views.
4.3 Loop Recording
Loop recording ensures continuous recording by overwriting the oldest footage when the Micro SD card reaches its storage limit. This eliminates the need for manual deletion of old files.

Figure 9: Loop recording ensures continuous video capture.
4.4 G-Sensor (Accident Auto-detection)
The built-in G-Sensor automatically detects sudden collisions or impacts. When triggered, it immediately saves the current footage and locks it to an "SOS file" to prevent it from being overwritten by loop recording. This protects critical video evidence in case of an accident.

Figure 10: G-Sensor automatically locks footage during an impact.
4.5 Parking Monitor
When the parking monitor function is enabled, the dash cam will automatically turn on and begin recording if any shake or collision is detected while your vehicle is parked. This provides 24-hour protection for your vehicle.

Figure 11: Parking monitor detects and records events when parked.
4.6 Backup Camera Function
When the rear camera is properly connected to the car's reversing lamp, the dash cam display screen will automatically switch to a full-screen view of the rear camera and display parking guidelines when the vehicle is put into reverse gear. This assists with safe parking.

Figure 12: Backup camera view with parking assist lines.
4.7 Night Vision and WDR
The dash cam is equipped with 4 IR LEDs and Wide Dynamic Range (WDR) technology to enhance video clarity in low-light conditions, ensuring clear capture of license plates and road signs even at night.

Figure 13: Enhanced night vision for clear recordings in low light.
5. Maintenance
- SD Card Formatting: It is recommended to format the Micro SD card regularly (e.g., once a month) to ensure optimal performance and prevent data corruption. This can usually be done through the dash cam's menu settings.
- Cleaning: Use a soft, dry cloth to clean the camera lenses and the dash cam screen. Avoid using abrasive cleaners or solvents.
- Temperature: Avoid exposing the dash cam to extreme temperatures for prolonged periods.
- Firmware Updates: Check the manufacturer's website periodically for any available firmware updates to improve performance or add new features.
6. Troubleshooting
| Problem | Possible Cause / Solution |
|---|---|
| Dash cam does not power on. |
|
| "SD Card FULL" message appears. |
|
| Video quality is poor or blurry. |
|
| Dash cam turns off unexpectedly. |
|
| Rear camera not displaying. |
|

Figure 14: Example of an "SD Card FULL" warning message.
7. Specifications
| Feature | Detail |
|---|---|
| Model Number | B-T12F |
| Front Camera Resolution | 1080p Full HD |
| Front Camera Angle | 170 Degrees Wide Angle |
| Rear Camera Angle | 130 Degrees Wide Angle |
| Display Screen Size | 3 inches |
| Storage Support | Up to 32GB Micro SD Card (Class 10 or higher) |
| Special Features | Night Vision, WDR, G-Sensor, Loop Recording, Parking Monitor, Motion Detection |
| Connectivity | USB |
| Mounting Type | Suction Mount |
| Product Dimensions | 1.3 x 1.7 x 2.9 inches |
| Item Weight | 12.3 ounces |
| Battery | 1 Lithium Ion battery (included) |
8. Warranty and Support
8.1 Warranty Information
CHORTAU offers a lifetime after-sales support for this product. Please refer to the product packaging or official CHORTAU website for specific warranty terms and conditions.

Figure 15: Warranty information.
8.2 Customer Support
For any queries, technical assistance, or support regarding your CHORTAU Dual Dash Cam, please contact our customer service team. We aim to respond within 24 hours.
Contact information can typically be found on the product packaging or the official CHORTAU website.


