1. Introduction
This manual provides detailed instructions for the installation, operation, and maintenance of your ANNKE 8-channel 3K Lite DVR security system. This system is designed to provide reliable surveillance with advanced features such as AI-powered person/vehicle detection, 1080P color night vision cameras, and continuous 24/7 recording to a pre-installed 1TB hard drive.
Please read this manual thoroughly before setting up and using your system to ensure proper functionality and safety.
2. Package Contents
Verify that all items listed below are included in your package. If any items are missing or damaged, please contact ANNKE customer support.
- 1x 3K Lite DVR with 1TB Hard Drive
- 4x 1080P TVI Bullet Cameras
- 4x BNC Cables (60 feet each)
- 1x Ethernet Cable
- 1x HDMI Cable
- 1x USB Mouse
- 2x 12V Power Adapters
- 1x 4-in-1 Power Splitter Cable
- 1x User Manual
- 4x Mounting Screws and Wall Plugs
- 1x 24-Hour Video Surveillance Sticker
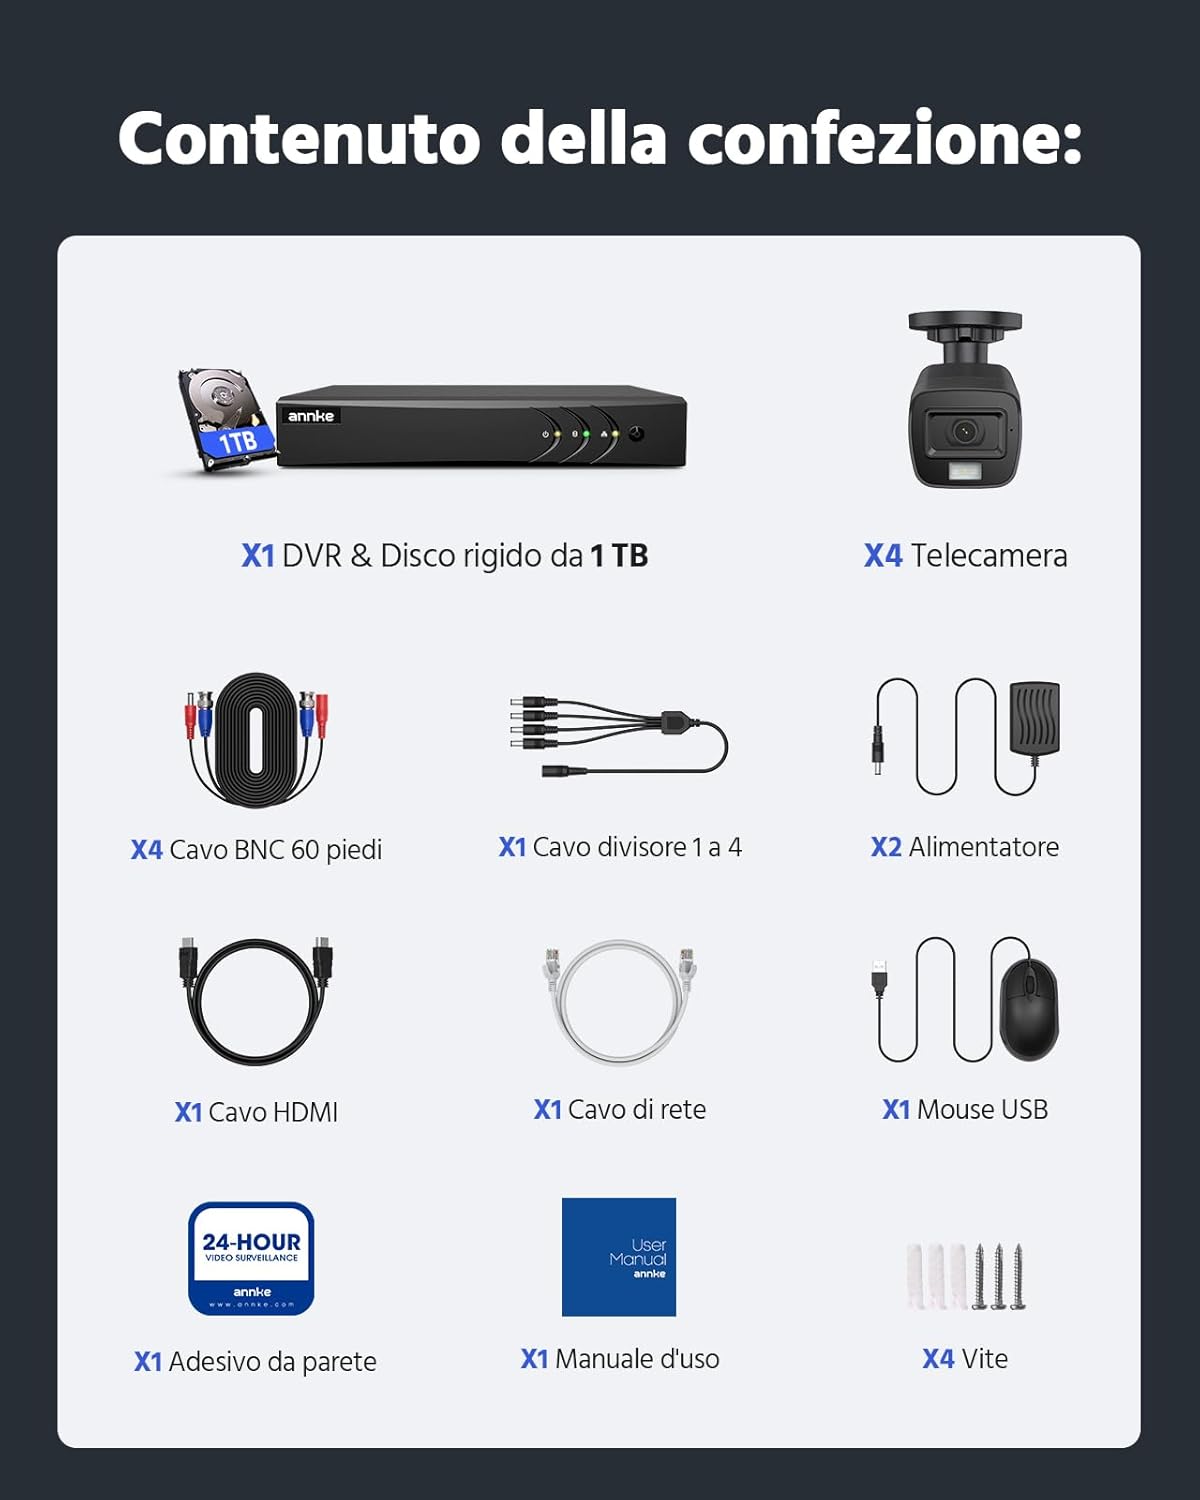
Figure 2.1: All components included in the ANNKE 8CH 3K Lite DVR security system package.
3. System Overview
3.1 DVR Features
- 5-in-1 Hybrid DVR: Supports TVI, AHD, CVI, CVBS, and IP cameras, offering broad compatibility.
- Advanced Video Compression: H.265+ technology optimizes storage space and reduces bandwidth for longer recordings and smoother viewing.
- Pre-installed 1TB HDD: Ensures reliable 24/7 continuous recording, expandable up to 10TB.
- AI Event Analysis: Features intelligent motion detection, line crossing detection, and intrusion detection with person/vehicle filtering to minimize false alarms.

Figure 3.1: The 5-in-1 hybrid DVR supports multiple camera technologies.

Figure 3.2: H.265+ video compression significantly reduces storage requirements.
3.2 Camera Features
- 1080P High Definition: Provides clear and detailed video footage.
- Smart Dual-Light Color Night Vision: Offers clear color night vision with flexible switching between IR (black and white) and color modes.
- IP67 Weatherproof: Robust casing ensures excellent performance in extreme temperatures (-40°C to +60°C) and harsh weather conditions.

Figure 3.3: Smart Dual-Light technology enables clear color night vision.

Figure 3.4: IP67 weatherproof cameras are designed for outdoor use in various conditions.
4. Setup Guide
4.1 Physical Installation
- Connect Cameras to DVR: Use the provided BNC cables to connect each camera to the corresponding video input ports on the back of the DVR.
- Connect Power to Cameras: Use the 4-in-1 power splitter cable and a 12V power adapter to power the cameras. Ensure all cameras receive power.
- Connect DVR to Monitor: Use the HDMI cable to connect the DVR to a monitor or TV for initial setup and local viewing.
- Connect USB Mouse: Plug the USB mouse into a USB port on the DVR for navigation.
- Connect to Network (Optional for Remote Access): Connect the DVR to your router using the Ethernet cable if you plan to use remote viewing features.
- Power On: Connect the remaining 12V power adapter to the DVR and plug it into a power outlet. The system will boot up.
4.2 Initial Configuration
Upon first boot, the DVR will guide you through a setup wizard. Follow the on-screen prompts to:
- Set up a strong password for the administrator account.
- Configure date and time settings.
- Adjust network settings (DHCP is recommended for most home users).
- Format the hard drive (if prompted, this is necessary for recording).
5. Operating Instructions
5.1 Live View
After initial setup, the DVR will display the live view from all connected cameras on your monitor. You can switch between single-camera view, multi-camera view, and customize display layouts using the mouse.
5.2 Recording
- Continuous Recording: The system is pre-configured for 24/7 continuous recording to the 1TB HDD.
- Motion-Triggered Recording: Configure specific channels to record only when motion is detected. This can be set up in the DVR's recording schedule settings.
- AI Detection Recording: Enable person/vehicle detection for specific channels to trigger recording only when relevant events occur.

Figure 5.1: The pre-installed 1TB HDD supports continuous 24/7 recording.
5.3 Playback
Access recorded footage through the DVR's playback menu. You can search by date, time, and event type (e.g., motion, AI detection). Use the timeline to navigate through recordings.
5.4 Remote Access (ANNKE VISION App)
To view your cameras remotely on a smartphone or tablet:
- Download the ANNKE VISION app from Google Play Store or Apple App Store.
- Register an account and log in.
- Add your DVR device by scanning the QR code found on the DVR or in its network settings.
- Follow the app's instructions to complete the device addition. You can now view live feeds and playback recordings from anywhere with an internet connection.

Figure 5.2: Remote viewing on multiple devices via the ANNKE VISION app.
5.5 AI Detection (Person/Vehicle)
The system's AI capabilities allow for precise detection of people and vehicles, reducing false alarms from animals or environmental factors. When enabled, you will receive push notifications and email alerts only for actual threats.
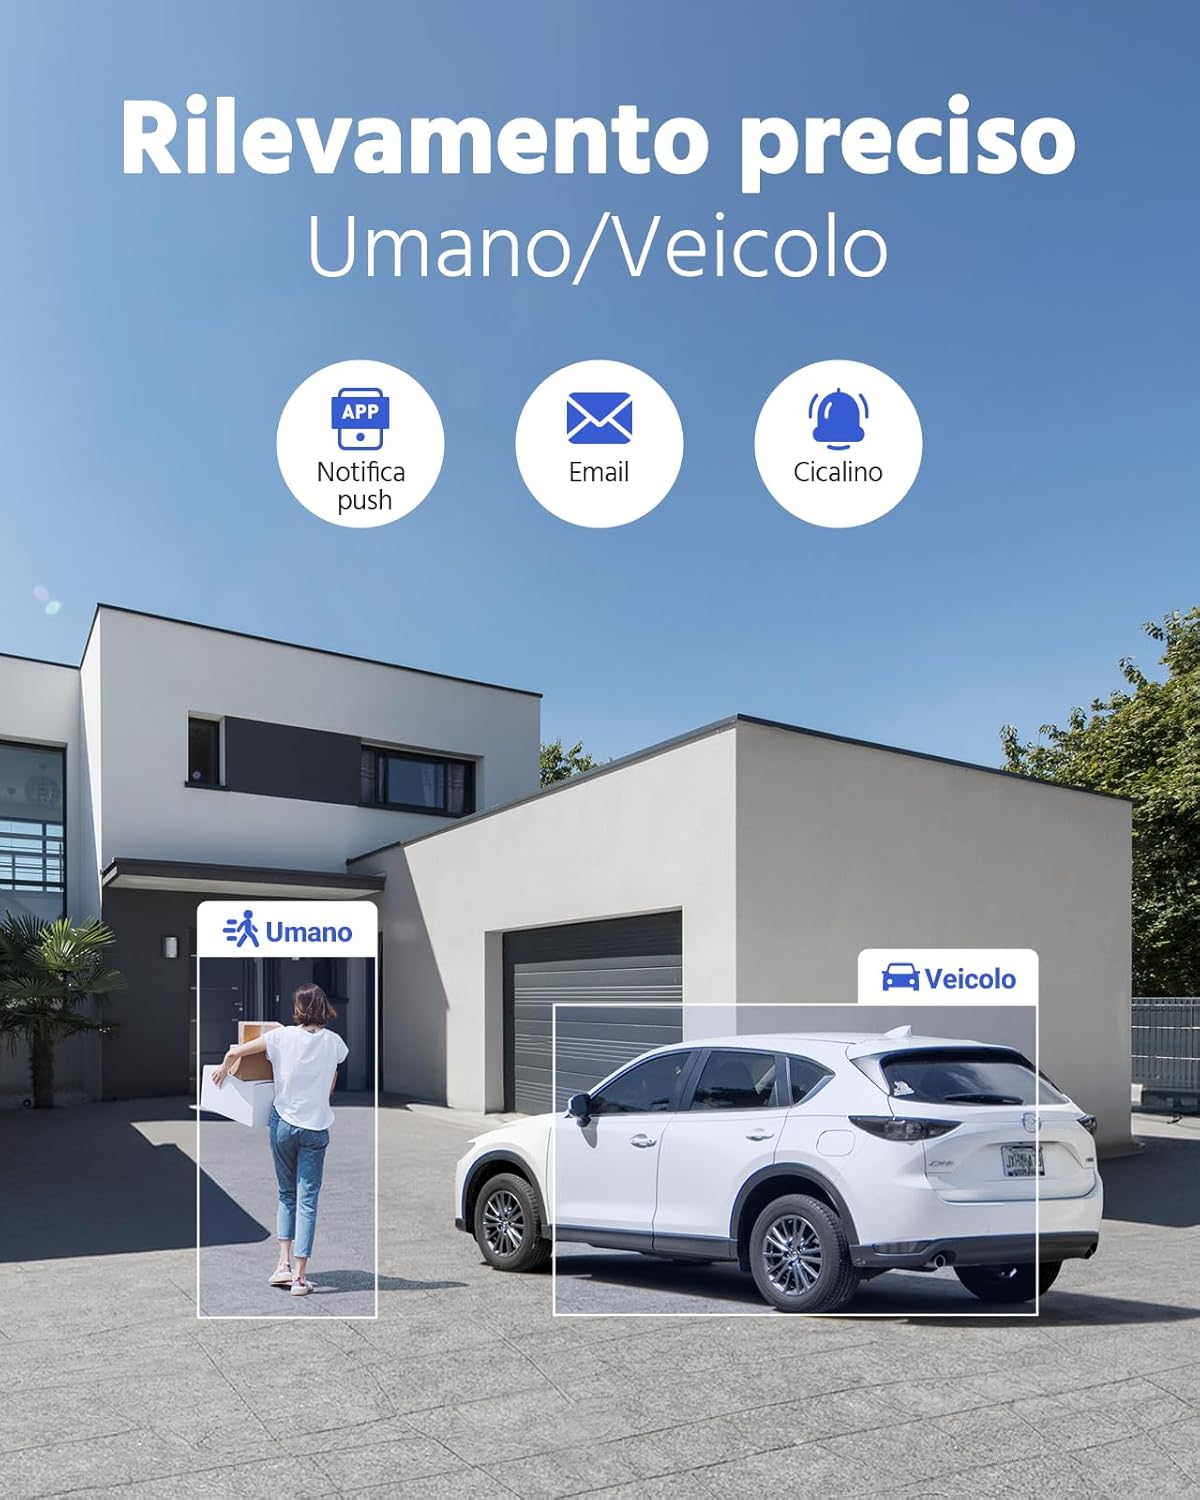
Figure 5.3: AI-powered person and vehicle detection for accurate alerts.
5.6 Privacy Masking
To protect privacy in sensitive areas, you can configure privacy masks within the DVR settings. This feature allows you to block out specific regions in the camera's view from being recorded or displayed.

Figure 5.4: Privacy masking allows you to exclude specific areas from surveillance.
6. Maintenance
6.1 Hard Drive Management
The DVR's hard drive will automatically overwrite the oldest footage when it becomes full. Regularly check the hard drive status in the DVR settings to ensure it is functioning correctly. You can also manually format the HDD if needed (this will erase all recordings).
6.2 Firmware Updates
Periodically check the ANNKE website for firmware updates for your DVR. Keeping your firmware updated ensures optimal performance, security, and access to new features. Follow the instructions provided with the firmware update carefully.
6.3 Cleaning
- Cameras: Gently clean camera lenses with a soft, damp cloth to remove dust or smudges that may affect image quality. Do not use harsh chemicals.
- DVR: Keep the DVR in a well-ventilated area. Clean the exterior with a dry cloth. Do not block ventilation openings.
7. Troubleshooting
This section addresses common issues you might encounter. For more complex problems, please refer to the ANNKE support website or contact customer service.
- No Video Output:
- Check all cable connections (power, HDMI/VGA).
- Ensure the monitor is set to the correct input source.
- Verify that the DVR is powered on. - No Recording:
- Check if the hard drive is installed and formatted correctly.
- Verify recording schedules and settings.
- Ensure cameras are properly connected and receiving power. - Remote Access Not Working:
- Ensure the DVR is connected to the internet via Ethernet cable.
- Check network settings on the DVR and your router.
- Verify that the ANNKE VISION app is correctly configured and the device is added. - Poor Image Quality:
- Clean camera lenses.
- Ensure camera resolution settings are optimal.
- Check cable integrity for any damage. - False Alarms from Motion Detection:
- Adjust motion detection sensitivity.
- Utilize AI person/vehicle filtering.
- Set up privacy masks for areas with frequent irrelevant motion.
8. Specifications
| Feature | Specification |
|---|---|
| Brand | ANNKE |
| Model Number | DW81KT1-54EP |
| DVR Channels | 8 Channels |
| DVR Type | 3K Lite Hybrid (5-in-1) |
| Camera Resolution | 1080p |
| Video Compression | H.265+ |
| Hard Drive | 1TB Pre-installed (Expandable up to 10TB) |
| Special Features | Remote Access, Smart Dual-Light, IP67 Weatherproof, Person/Vehicle Detection, Color Night Vision |
| Connectivity Technology | Wired |
| Power Type | Electric |
| Voltage | 12 Volts |
| Wattage | 35 watts |
| Operating Temperature | -40°C to +60°C (-40°F to 140°F) |
| Product Dimensions | 37 x 30 x 20 cm |
| Item Weight | 4.05 Kilograms |
9. Support
ANNKE is committed to providing excellent customer service and technical support. If you encounter any issues or have questions about your security system, please utilize the following resources:
- Online Support: Visit the official ANNKE support website for FAQs, troubleshooting guides, and firmware downloads.
- Email Support: Contact our support team via email for assistance.
- Lifetime Technical Assistance: ANNKE provides lifetime technical support for its products.

Figure 9.1: ANNKE's commitment to customer support.
Note on Videos: No official product videos from the seller were available in the provided data for embedding in this manual.