
Introduction
The ATMA SUPPLY WE49X20697 Dryer Bearing Kit is a comprehensive solution for maintaining and repairing most top-load GE dryers. This kit contains high-quality replacement parts designed to restore optimal performance and address common operational issues. Proper installation of these components can significantly extend the lifespan of your appliance.
This manual provides step-by-step instructions for replacing key components of your dryer's front bearing system. Please read all instructions carefully before beginning the repair process.
Product Contents
The WE49X20697 dryer repair kit includes the following components:
- 1 x WE3M26 Top Front Bearing
- 1 x WE9M30 Front Drum Felt
- 1 x WE12M29 Drive Belt
- 2 x WE1M1067 Bearing Slides
- 2 x WE1M504 Glide Slides

Figure 1: Complete WE49X20697 Dryer Bearing Kit components.
Compatibility
This kit is compatible with most front-load GE dryers. It is also compatible with Hotpoint and Kenmore dryers. Please note, this kit is not compatible with dryers that have a matching front-load washer.
Common Symptoms Addressed
This repair kit is designed to fix the following common dryer symptoms:
- Noisy operation (squealing, screeching, grinding sounds)
- Marks left on clothes
- Drum will not tumble
- Takes too long to dry
Installation Instructions
Safety First: Always unplug your dryer from the power outlet before beginning any repair or maintenance to prevent electrical shock.
1. Disassembly: Top Panel
- Open the dryer door.
- Locate the two screws on each side of the dryer's front opening, near the top.
- Remove these screws. They are typically long.
- Carefully lift the top panel of the dryer. It may need to be slid slightly to the left or right to disengage from the frame.
2. Disassembly: Front Panel
- With the top panel lifted, locate two small screws at the top rear of the side panels, one on each side.
- Remove these screws.
- Carefully pull the front panel forward and to the left. The front panel is still connected by wiring at the bottom left, so do not fully detach it.
- The front panel will also pop off from the bottom.
3. Front Bearing (Shroud) and Glide Replacement
The front bearing, often referred to as the shroud, is a common source of grinding or squeaking noises when its plastic components wear out or crack.

Figure 2: The front bearing shroud with plastic clips and felt strips.
- Identify the plastic clips holding the shroud in place. These are typically located along the top and sides of the shroud.
- Gently snap these clips off to remove the old shroud. Be mindful of any attached light bulbs.
- Remove the old felt strips and bearing slides from the shroud.
- Install the new felt strips (WE9M30) and bearing slides (WE1M1067, WE1M504) onto the new shroud. These typically snap into place.
- Attach the new shroud to the dryer frame by aligning the clips and pressing firmly until they snap into place. Ensure any light bulbs are properly re-inserted.
4. Drive Belt Replacement
While the dryer is open, it is an opportune time to inspect and replace the drive belt (WE12M29) if it shows signs of wear or damage.
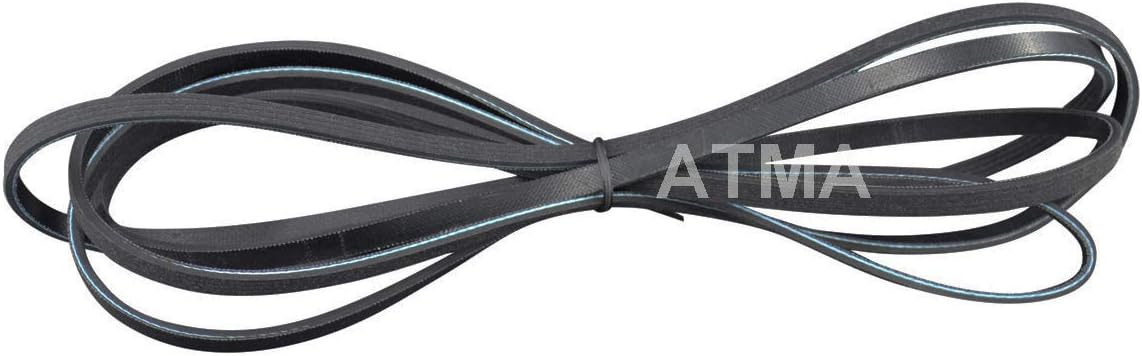
Figure 3: New drive belt (WE12M29).
- Locate the old drive belt around the drum and motor pulley.
- Remove the old belt.
- Place the new drive belt around the drum, ensuring the ribbed side faces the drum.
- Thread the belt around the motor pulley and under the tension pulley. The belt should be taut.
5. Reassembly
- Reattach the front panel. First, align the bottom indents of the front panel with the protrusions on the dryer base. Push down firmly until it snaps into place.
- Ensure the drum is properly seated on top of the new plastic glides. You may need to slightly lift the drum to achieve this.
- Secure the front panel by re-inserting the two small screws at the top rear of the side panels.
- Lower the top panel, ensuring the metal protrusions on the top panel align with the corresponding holes on the dryer frame. You may need to slightly adjust the panel left or right to achieve a flush fit.
- Re-insert the two long screws into the front opening of the dryer, securing the top panel.
Maintenance Tips
Regular maintenance can prevent future issues and ensure efficient dryer operation.
Lint Removal
While the dryer is disassembled, it is an excellent opportunity to remove accumulated lint from the internal components, especially around the exhaust vent. Excessive lint buildup can be a fire hazard and reduce drying efficiency.

Figure 4: Lint accumulation inside the dryer's exhaust vent.
Carefully reach into the exhaust opening and remove any visible lint. Ensure the pathway is clear to maintain proper airflow.
Specifications
- Manufacturer: ATMA SUPPLY
- Part Number: WE49X20697
- Item Weight: 1.05 pounds
- Package Dimensions: 20.5 x 14.5 x 3.05 inches
- Item Model Number: WE49X20697
- Color: Multi
- Included Components: Bearing, Belt, Felt, Slides
Support
If you encounter any problems during installation or have questions regarding the compatibility of this kit with your specific dryer model, please do not hesitate to contact ATMA SUPPLY customer support. We are available to help verify compatibility and provide detailed part instructions to ensure a successful repair.
Each item in this kit features a unique code that is verified before shipping, ensuring product authenticity and quality.