1. Introduction
Thank you for purchasing the Goliath Smart Light Alarm Clock AV-SBEL03. This device combines a light alarm clock with an FM radio, natural sounds, and smart app control to enhance your waking and sleeping experience. It features a realistic sunrise and sunset simulation, multiple alarm settings, and a convenient USB charging port. Please read this manual carefully to ensure proper setup and operation.

Image 1.1: Front view of the Goliath Smart Light Alarm Clock displaying the time.
2. Safety Information
- This device is intended for indoor use only.
- Do not expose the device to water, moisture, or extreme temperatures.
- Use only the provided power adapter or a compatible USB power source.
- Keep the device away from heat sources and direct sunlight.
- Do not attempt to disassemble or repair the device yourself. Contact qualified service personnel.
- Clean the device with a soft, dry cloth. Do not use abrasive cleaners.
3. Package Contents
Please check the package for the following items:
- Goliath Smart Light Alarm Clock AV-SBEL03
- USB Power Cable
- Power Adapter (if included)
- User Manual (this document)
4. Product Overview
Familiarize yourself with the various parts and controls of your Smart Light Alarm Clock.

Image 4.1: Rear and top view of the alarm clock with labeled components.
- Snooze / Reset Button: Activates snooze function or resets settings.
- Sunrise Button: Controls sunrise simulation.
- Alarm Buttons 1 & 2: Set and activate Alarm 1 and Alarm 2.
- Speaker: Outputs audio for FM radio and natural sounds.
- Power Supply Port: Connects to the power adapter.
- USB Port: For charging external devices.
- Settings Button: Accesses general settings.
- Dusk/Sunset Button: Controls sunset simulation.
- Radio / Volume Buttons: Controls FM radio and adjusts volume.
5. Setup
5.1. Power Connection
- Connect the USB power cable to the Power Supply Port on the back of the alarm clock.
- Plug the other end of the USB cable into the provided power adapter.
- Plug the power adapter into a standard wall outlet. The display will light up, indicating the device is powered on.
5.2. App Installation
The Goliath Smart Light Alarm Clock can be controlled via the Smart-Life or TuyaSmart app.
- Download the "Smart-Life" or "TuyaSmart" app from your smartphone's app store (iOS App Store or Google Play Store).
- Register for an account or log in if you already have one.
5.3. Wi-Fi Connection
To enable smart features, connect the alarm clock to your 2.4 GHz Wi-Fi network.
- Ensure your smartphone is connected to a 2.4 GHz Wi-Fi network.
- Open the Smart-Life or TuyaSmart app.
- Follow the in-app instructions to add a new device. Select the appropriate device type (e.g., "Light Alarm Clock" or "Lighting").
- The app will guide you through the pairing process, which may involve putting the alarm clock into pairing mode (refer to app instructions or device manual for specific button presses).
- Once connected, you can control the alarm clock via the app.

Image 5.1: The alarm clock connected to a Wi-Fi network and controlled via an app.
6. Operating Instructions
6.1. Setting the Time
The time can be set manually using the device buttons or automatically via the app after Wi-Fi connection.
- Manual Setting: Press and hold the Settings button. Use the volume buttons to adjust hours and minutes. Press Settings again to confirm.
- App Setting: Once connected to the app, the time will synchronize automatically or can be set within the app interface.
6.2. Sunrise and Sunset Simulation
The alarm clock simulates natural light cycles to aid in waking and sleeping.

Image 6.1: Visual representation of sunrise and sunset light simulations.
- Sunrise Simulation: Press the Sunrise button to activate. The light will gradually increase in brightness over a set period (e.g., 30 minutes) before your alarm time, mimicking a natural sunrise. Adjust intensity and duration via the app.
- Sunset Simulation: Press the Dusk/Sunset button to activate. The light will gradually dim over a set period, helping you relax and fall asleep. Adjust intensity and duration via the app.
6.3. Alarm Settings
The device supports up to 4 alarm times via the app, or 2 directly on the device.
- Setting Alarms (Device): Press and hold Alarm Button 1 or 2. Use the volume buttons to set the alarm time. Press the Alarm button again to select alarm sound (FM radio or natural sound) and light intensity.
- Setting Alarms (App): Open the app, navigate to the alarm settings, and set up to 4 alarms with customizable times, sounds, light intensity, and sunrise simulation duration.
- Snooze Function: When an alarm sounds, press the Snooze/Reset button to temporarily silence it for a few minutes.
- Turning Off Alarm: To turn off a sounding alarm, press the corresponding Alarm button. To disable an alarm completely, use the app or cycle through the alarm settings on the device until it is off.
6.4. FM Radio Operation
Listen to your favorite FM radio stations.
- Press the Radio button to turn on the FM radio.
- Press the Radio button again to scan for stations.
- Use the volume buttons to adjust the frequency or select a preset station.
- Press and hold the Radio button to turn off the FM radio.
6.5. Natural Sounds
Choose from a selection of natural sounds for waking or sleeping.
- Access natural sound settings via the Settings button or the app.
- Cycle through available sounds using the volume buttons.
- Adjust the volume using the volume buttons.
6.6. USB Charging Function
The integrated USB port allows you to charge other devices.

Image 6.2: A smartphone charging via the alarm clock's USB port.
Connect your smartphone, tablet, or other USB-powered device to the USB port on the back of the alarm clock to charge it.
6.7. App Control (Smart-Life / TuyaSmart)
The app provides advanced control and customization options.
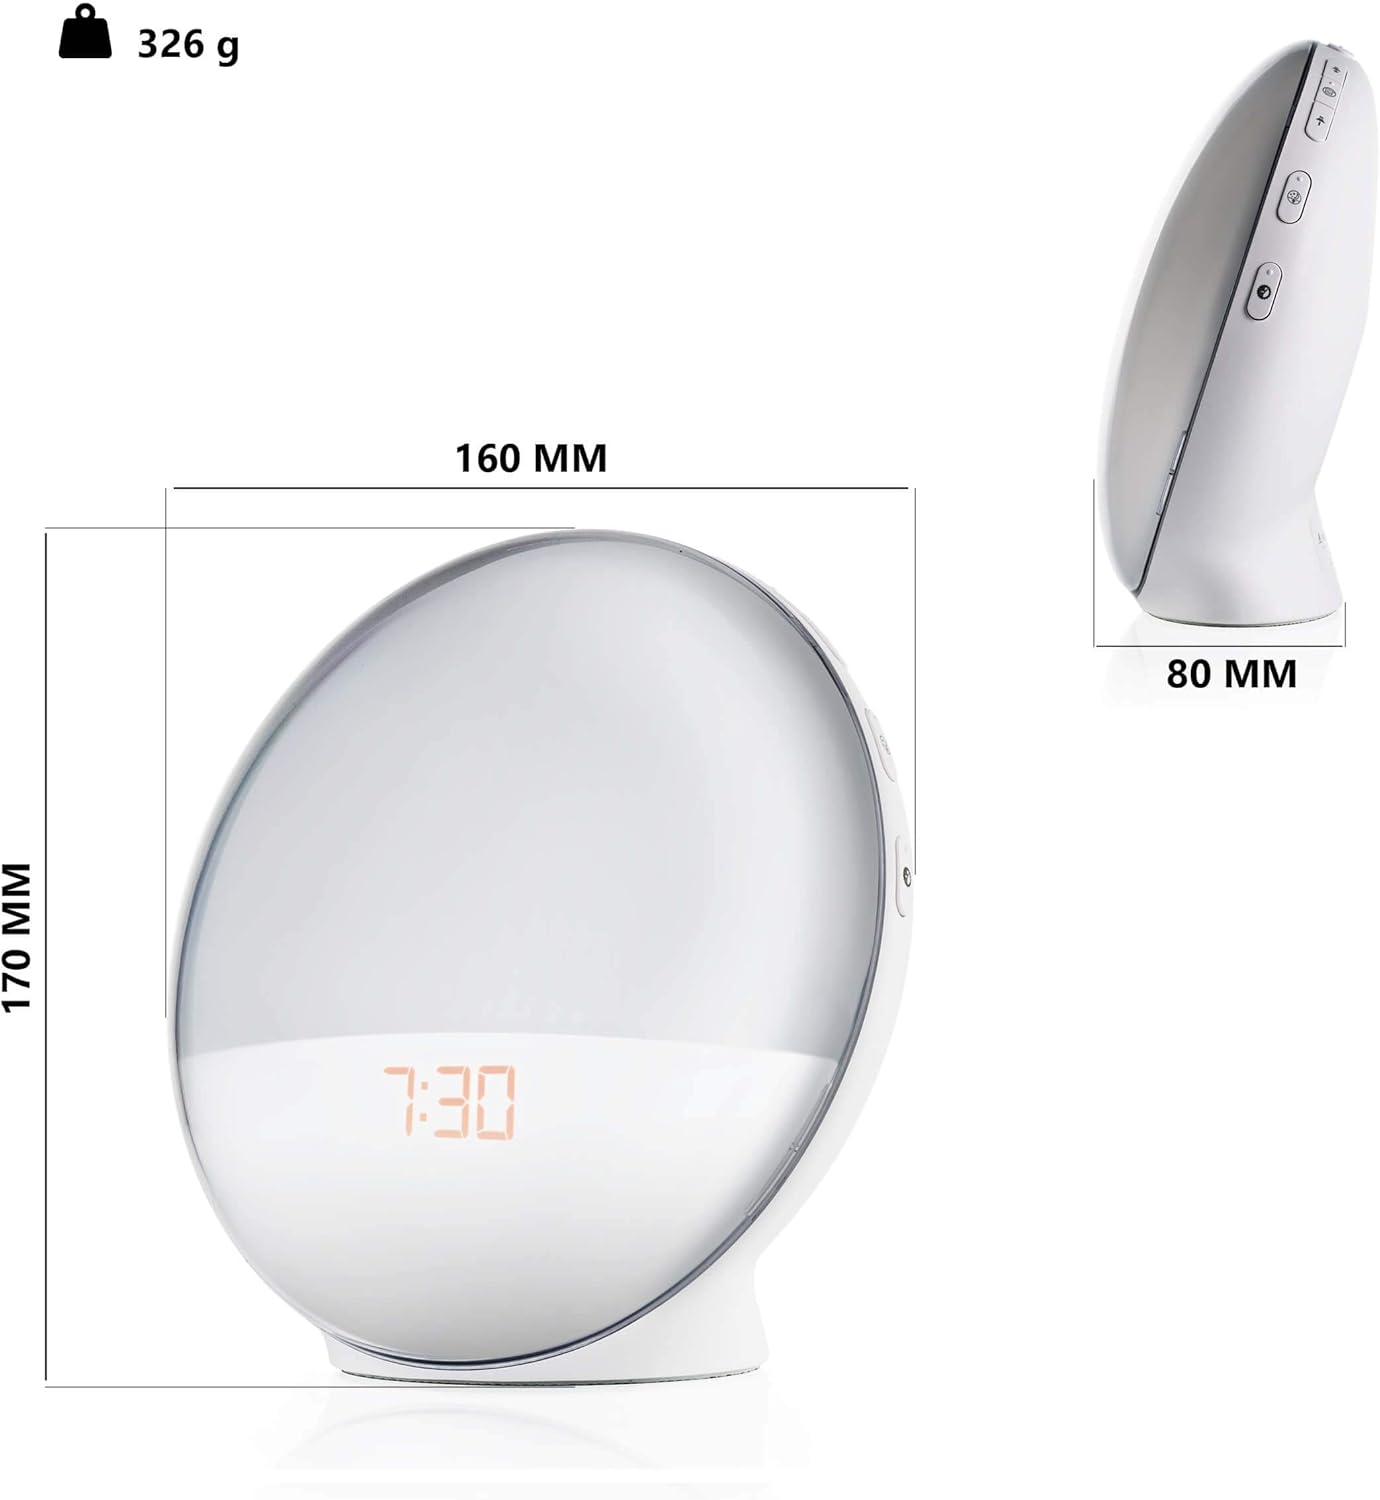
Image 6.3: Smartphone screen showing the app interface for the Smart Light Alarm Clock.
- Remote Control: Adjust settings, alarms, light, and sound from anywhere with an internet connection.
- Customization: Set specific light colors (if supported by the device), adjust brightness levels, and fine-tune alarm parameters.
- Scheduling: Create detailed schedules for alarms, sunrise/sunset simulations, and light modes.
- Voice Control: Integrate with voice assistants (e.g., Google Assistant) for hands-free control (requires compatible smart home hub).
7. Maintenance
- Cleaning: Wipe the device with a soft, dry, lint-free cloth. Do not use liquid cleaners, aerosols, or solvents.
- Storage: If storing the device for an extended period, unplug it from the power source and store it in a cool, dry place.
8. Troubleshooting
- Device not powering on: Ensure the power adapter is securely connected to both the device and a working power outlet.
- Wi-Fi connection issues:
- Ensure your Wi-Fi network is 2.4 GHz. The device does not support 5 GHz networks.
- Check your Wi-Fi password.
- Move the device closer to your Wi-Fi router.
- Restart your router and the alarm clock.
- Follow the app's troubleshooting steps carefully.
- Alarm not sounding/light not activating:
- Verify that the alarm is enabled and set to the correct time in the app or on the device.
- Check the volume level for alarm sounds.
- Ensure the light intensity is not set to zero.
- FM Radio reception is poor: Extend the antenna (if applicable) and try repositioning the device for better signal.
- USB charging not working: Ensure the alarm clock is powered on and the connected device's charging cable is functional.
9. Specifications
| Model Number | AV-SBEL03 |
| Product Dimensions | 16 x 0.03 x 17 cm (approx. 8D x 17B x 8H cm) |
| Item Weight | 326 Grams |
| Base Material | Plastic |
| Lamp Type | LED |
| Switch Type | Push Button |
| Color | White |
| Power Source | USB (via power adapter) |
| Connectivity | Wi-Fi (2.4 GHz) |
10. Warranty and Support
For warranty information and customer support, please refer to the documentation provided with your purchase or contact Goliath customer service through their official website. Keep your proof of purchase for warranty claims.