1. Introduction
This manual provides detailed instructions for the safe and correct assembly, operation, and maintenance of your TOOLPORT 10x10 ft Party Tent, Model FLEX Light. Please read all instructions carefully before beginning assembly and retain this manual for future reference.
2. Safety Information
Important Safety Precautions:
- Always secure the tent to the ground using the provided pegs and guy ropes. Failure to do so may result in damage or injury.
- This tent is suitable for various outdoor conditions; however, it is not designed to withstand extreme winds or heavy snow loads.
- Always check weather conditions before use and disassemble the tent if high winds, heavy rain, or snow are expected.
- Do not use open flames or heating appliances inside the tent.
- Keep children and pets away from the tent during assembly and disassembly.
- Ensure the assembly area is clear of obstacles and overhead power lines.
- At least two people are recommended for safe and efficient assembly.
3. Package Contents
Before starting assembly, verify that all components listed below are present and undamaged. If any parts are missing or damaged, please contact TOOLPORT customer service.
- Galvanized Steel Frame (poles and connectors)
- PE 350 N Roof Tarpaulin (single piece)
- Side Panels
- Gable End Panels with Entrances
- Pegs for ground anchoring
- Guy Ropes
- Assembly Instructions (this manual)
4. Setup Instructions
Follow these steps for a safe and efficient assembly of your party tent. It is recommended to have at least two people for assembly.
4.1. Frame Assembly
The stable steel frame can be quickly assembled without tools thanks to its high-quality click system.
- Unpack all steel poles and connectors.
- Lay out the frame components on a flat, clear surface.
- Connect the horizontal and vertical poles using the provided connectors. Ensure the click system engages securely.
- Assemble the roof structure first, then attach the vertical support poles.

Figure 1: Illustration of the galvanized steel frame structure.
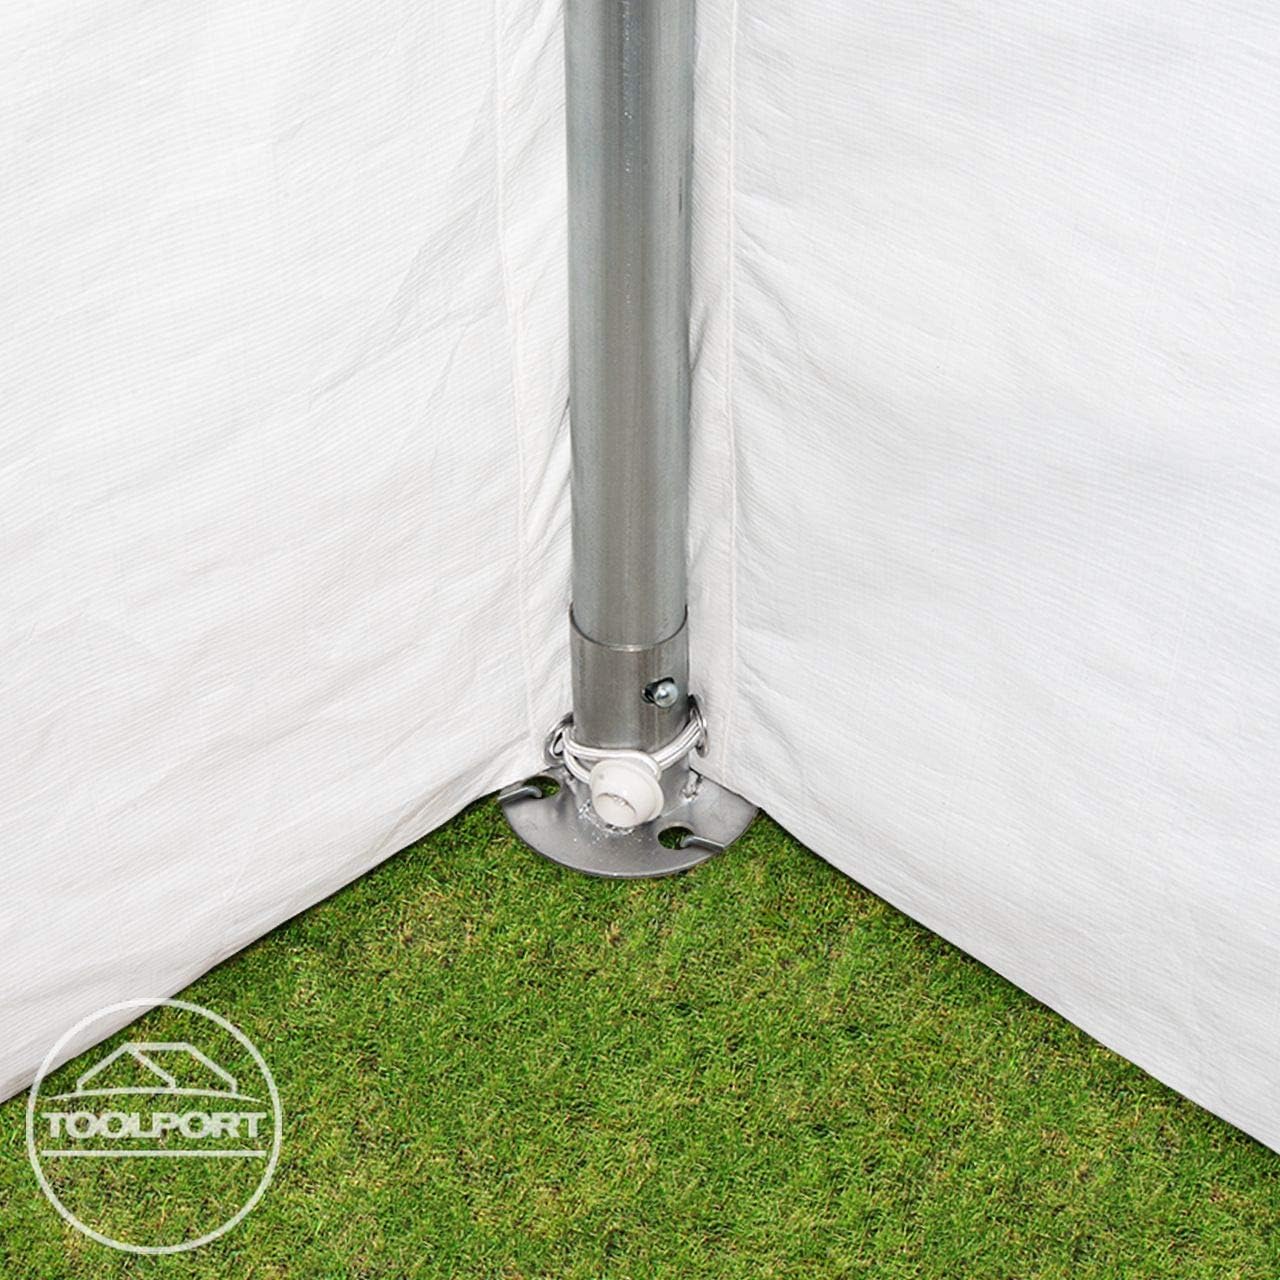
Figure 2: Detail of the click connection system for frame poles.
4.2. Tarpaulin Installation
The roof tarpaulin is made of PE 350 N material and is a single piece for additional stability.
- Carefully unfold the roof tarpaulin and drape it over the assembled roof frame.
- Ensure the tarpaulin is centered and evenly distributed over the frame.
- Attach the roof tarpaulin to the frame using the elastic cords or ties provided.
- Install the full-length side panels and gable end panels. These attach easily and quickly to the frame.

Figure 3: Assembled tent with roof and side panels.

Figure 4: Interior view of the tent.
4.3. Securing the Tent
Proper ground anchoring is crucial for stability and safety.
- Use the provided pegs to secure each footplate of the tent frame to the ground.
- Attach the guy ropes to the designated points on the tent and secure them firmly to the ground using additional pegs.
- Ensure all ropes are taut and evenly tensioned to provide maximum stability.
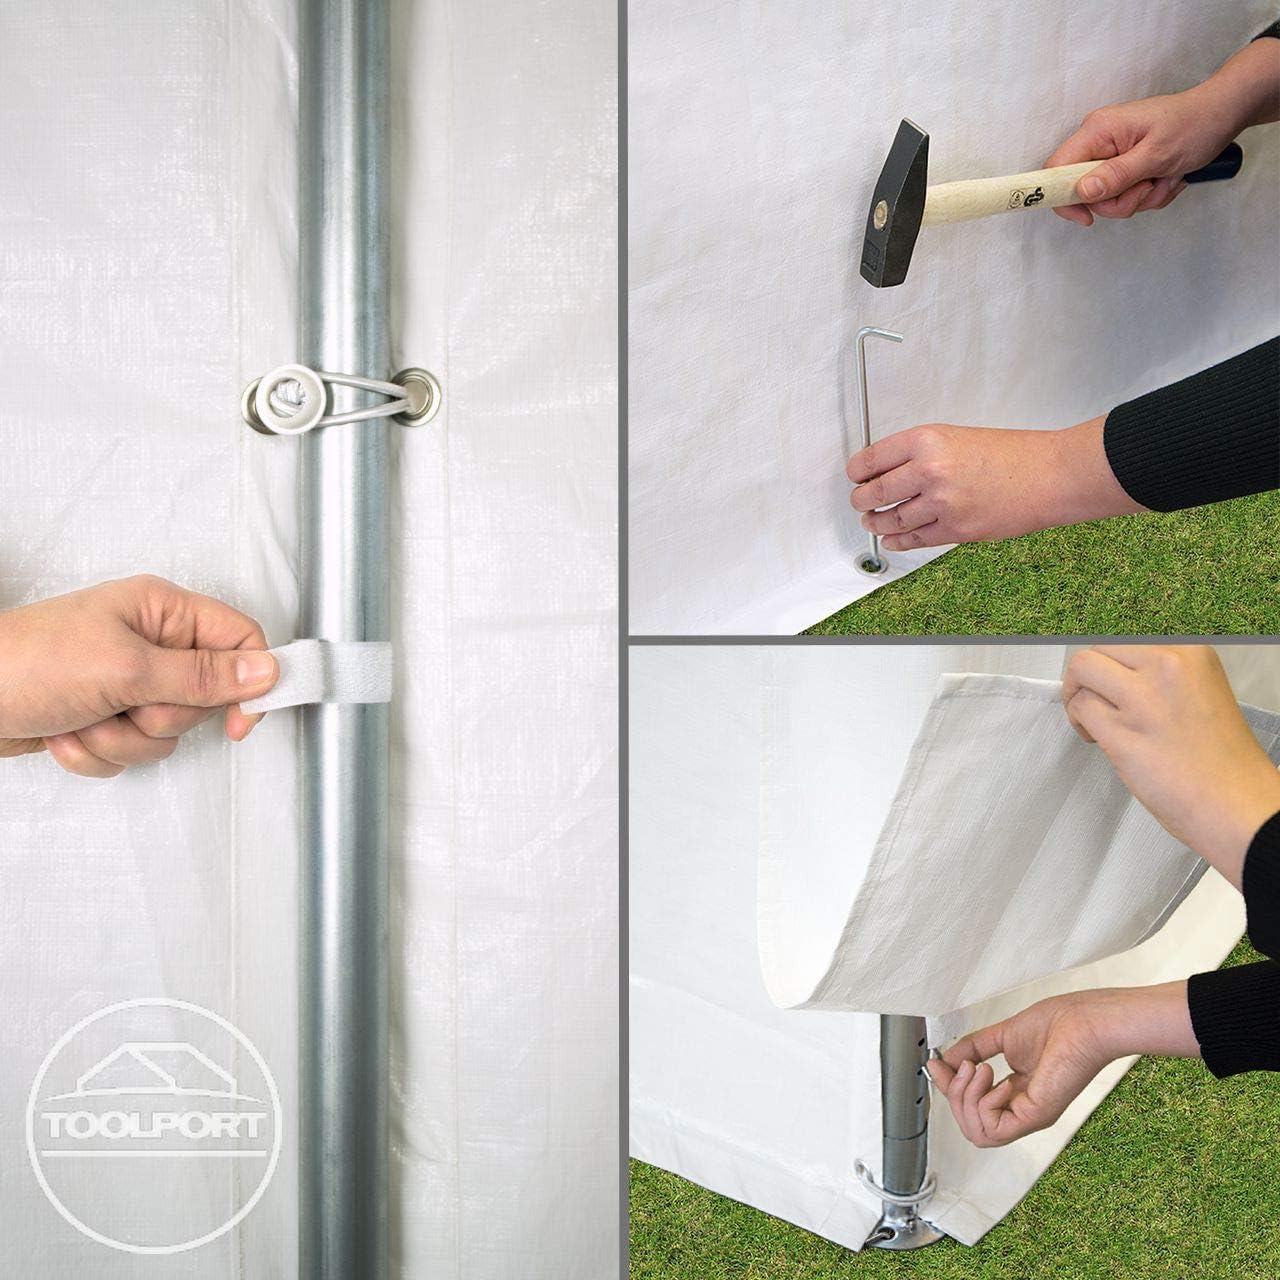
Figure 5: Ground anchoring detail.
5. Operating Instructions (Usage)
Your TOOLPORT Party Tent is designed for temporary outdoor use, ideal for events, parties, or as a temporary shelter.
- Ventilation: Ensure adequate ventilation, especially if using the tent in warm weather or with many occupants.
- Weather Conditions: Monitor weather forecasts. Disassemble the tent if strong winds, heavy rain, or snow are predicted to prevent damage.
- Entry/Exit: Utilize the gable end panels with entrances for convenient access.
6. Maintenance
Regular maintenance will extend the lifespan of your party tent.
- Cleaning: Clean the tarpaulin and side panels with mild soap and water. Do not use harsh chemicals or abrasive cleaners. Allow all parts to dry completely before storage.
- Frame Inspection: Periodically check the steel frame for any signs of rust, bending, or damage. Ensure all connections are secure.
- Storage: When not in use, disassemble the tent and store all components in a dry, cool place, away from direct sunlight and extreme temperatures.
- UV Protection: The PE tarpaulin has a UV protection of +30 (in compliance with EN13758-1), but prolonged exposure to intense sunlight can still degrade the material over time.
7. Troubleshooting
| Problem | Possible Cause | Solution |
|---|---|---|
| Tent unstable or swaying | Insufficient anchoring; loose connections; strong winds. | Ensure all pegs and guy ropes are securely fastened. Check all frame connections. Disassemble in strong winds. |
| Water leakage | Improper tarpaulin installation; damage to tarpaulin. | Re-check tarpaulin fit and tension. Inspect for tears or holes and repair if necessary. |
| Difficulty connecting poles | Misalignment; debris in connection points. | Ensure poles are aligned correctly. Clear any debris from the connection points. Do not force connections. |
8. Specifications
- Brand: TOOLPORT
- Model: FLEX Light
- Size: 10x10 ft (3.0m x 3.0m)
- Item Dimensions (L x W x H): 157"L x 118"W x 114"H (approx. 398.78cm L x 299.72cm W x 289.56cm H)
- Material: Metal (Frame), PE 350 N (Tarpaulin)
- Frame Material: Galvanized Steel
- Color: White
- Water Resistance Level: Waterproof
- Ultraviolet Light Protection: 30+ (in compliance with EN13758-1)
- Item Weight: 35500 Grams (approx. 78.26 lbs)
- Required Assembly: Yes

Figure 6: Tent dimensions diagram.
9. Warranty and Support
For warranty information and customer support, please refer to the official TOOLPORT warranty documentation.
Warranty Information: https://manuals.toolport.eu/Warranty.pdf
For further assistance or inquiries, please visit the TOOLPORT store on Amazon or contact their customer service directly.