1. Introduction
This manual provides detailed instructions for the proper use and maintenance of your AODELAN Wireless Flash Trigger Transmitter and Receiver Set, model FT-8. This device is designed to wirelessly trigger flash units, offering enhanced flexibility for your photography setup. Please read this manual thoroughly before operation to ensure optimal performance and safety.

Image: The AODELAN Wireless Flash Trigger Transmitter and Receiver Set.
2. Product Features
- Extended Range: Operates on a 2.4 GHz frequency, providing a communication range of up to 650 feet (200 meters).
- Multiple Channels: Features 8 distinct channels for interference-free operation.
- High Sync Speed: Supports a maximum flash sync speed of up to 1/250s.
- Broad Compatibility: Compatible with most flash units equipped with a universal hot shoe (excluding Sony flashes) and cameras with a 3.5mm port, including Canon, Nikon, Yongnuo, Godox, Panasonic, Olympus, Pentax, and FUJIFILM speedlites and cameras.
- Adjustable Transmitter: The transmitter features a 90° tilting joint, allowing vertical or horizontal mounting on your camera's hot shoe.
- Wired & Wireless Shutter Release: Offers both wired and wireless shutter release functionalities. Includes a 3.5mm to 3.5mm sync cable for studio flashes and a 3.5mm to PC plug adapter for flashes with a 1/4" mono plug socket.
- User-Friendly Design: Equipped with an internal antenna and clear LED indicators for easy setup and operation.
3. What's Included
The AODELAN Wireless Flash Trigger Set FT-8 package typically includes the following components:
- 1x Wireless Flash Trigger Transmitter
- 1x Wireless Flash Trigger Receiver
- 1x 3.5mm to 3.5mm Sync Cable
- 1x 3.5mm to PC Plug Adapter
- 2x Shutter Release Cables (specific camera models may vary)
- 1x Storage Pouch
- 1x User Manual
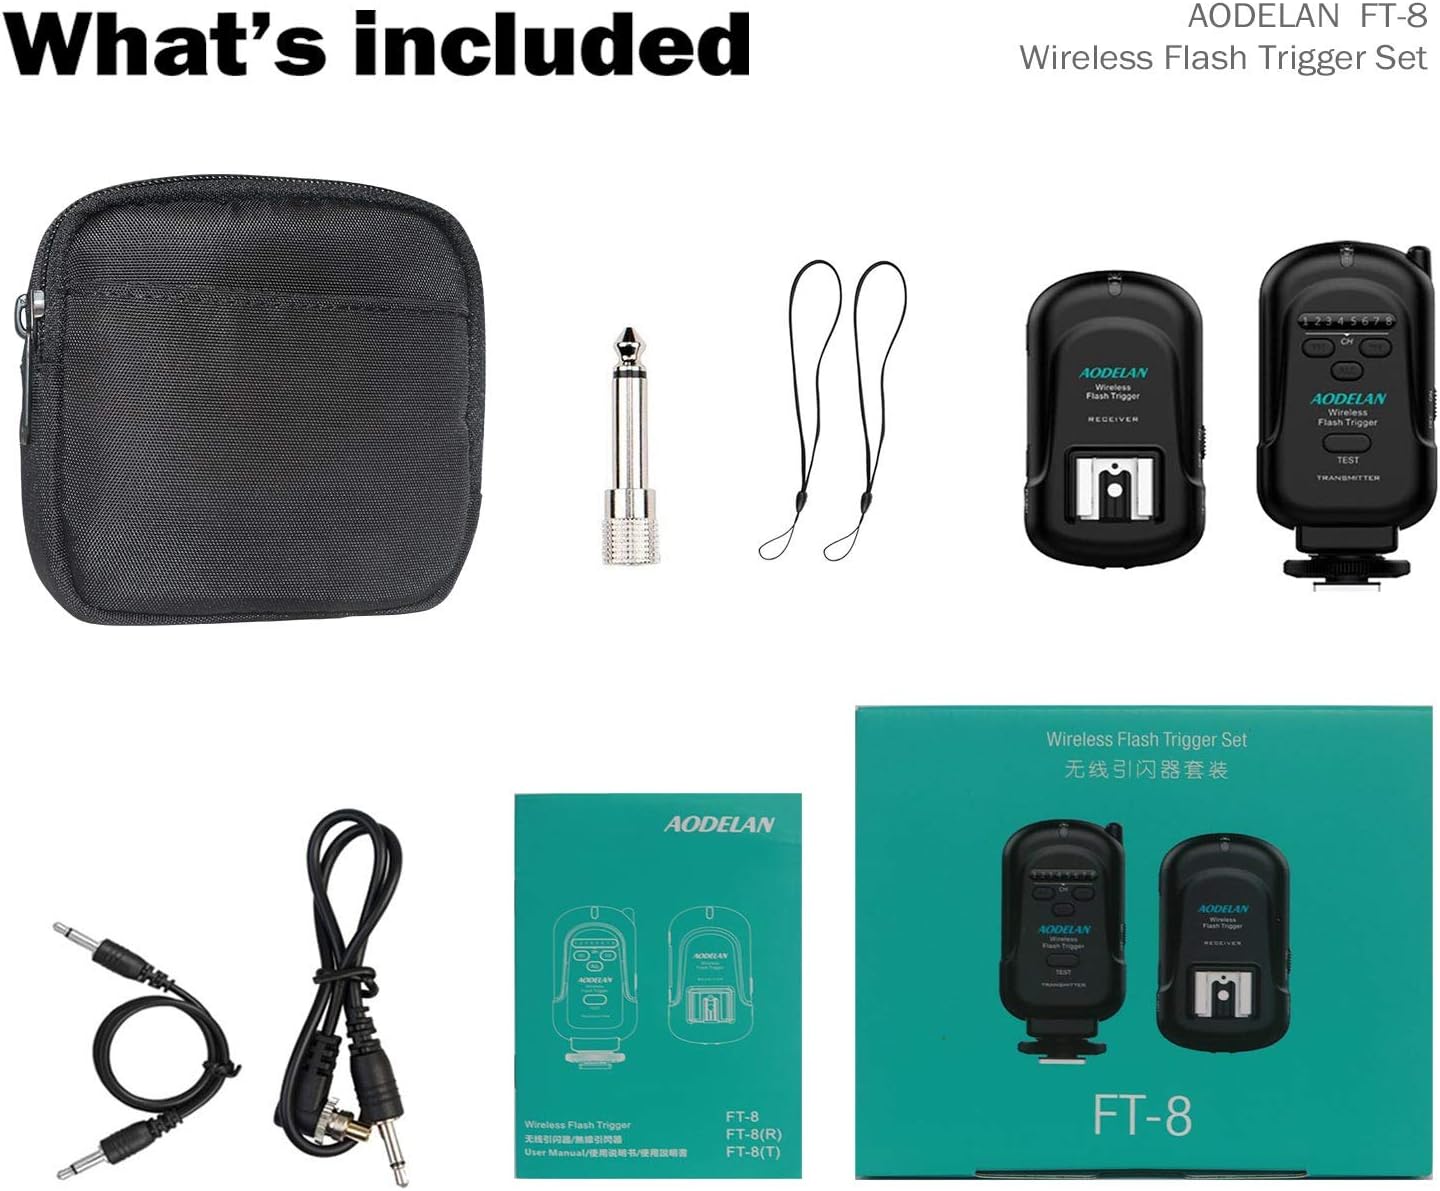
Image: All components included in the AODELAN FT-8 Wireless Flash Trigger Set.
4. Component Identification
4.1. Receiver

Image: Detailed view of the AODELAN Wireless Flash Trigger Receiver with labeled parts.
- Status LED: Indicates power and trigger status.
- Battery Compartment: Houses the batteries.
- Power Switch: Turns the receiver ON/OFF.
- Hot Shoe Connection: For mounting flash units.
- DC Power Port: For external power (if applicable).
- Battery Cover: Secures the battery compartment.
- Locking Ring: Secures the receiver to a hot shoe or stand.
- Cold Shoe & 1/4"-20 Tripod Lug: For mounting on camera hot shoe or light stands.
- Channel Numbers (1-8): Indicates the selected channel.
- 3.5mm Output Port: For connecting to flash units via sync cable.
- Channel Adjustment Buttons (CH): Used to select the operating channel.
4.2. Transmitter

Image: Detailed view of the AODELAN Wireless Flash Trigger Transmitter with labeled parts.
- Status LED: Indicates power and trigger status.
- Channel Numbers (1-8): Displays the selected channel.
- Channel Adjustment Buttons (CH): Used to select the operating channel.
- "ALL" Button: Triggers all receivers simultaneously, regardless of their individual channel settings.
- Test Button: Manually fires the flash for testing purposes.
- Power Switch: Turns the transmitter ON/OFF.
- Battery Compartment: Houses the batteries.
- Battery Cover: Secures the battery compartment.
- Swivel Rotator: Allows the transmitter to tilt 90 degrees.
- Locking Ring: Secures the transmitter to the camera's hot shoe.
- Camera Hot Shoe Connection: For mounting on the camera's hot shoe.
5. Setup Instructions
5.1. Installing Batteries
- Open the battery cover on both the transmitter and receiver.
- Insert the required batteries (typically AA for both units, refer to the unit's markings for confirmation) according to the polarity indicators.
- Close the battery covers securely.
5.2. Mounting the Transmitter
- Slide the transmitter onto your camera's hot shoe.
- Tighten the locking ring to secure the transmitter in place.
- The transmitter's tilting joint allows for 90° rotation for flexible positioning.
5.3. Connecting the Receiver to a Flash Unit
The receiver can be connected to your flash unit in two primary ways:
- Via Hot Shoe: Slide your speedlite flash unit onto the receiver's hot shoe connection. Ensure it is securely seated.
- Via Sync Cable: For studio flashes or speedlites without a hot shoe connection, use the provided 3.5mm to 3.5mm sync cable. Connect one end to the receiver's 3.5mm output port and the other end to the flash unit's sync port. If your flash unit has a 1/4" mono plug socket, use the included 3.5mm to PC plug adapter.

Image: Illustration showing hot shoe and sync cable connection methods for the receiver.

Image: The 3.5mm to 6.3mm adapter used for connecting the receiver to a studio light.
5.4. Setting Channels
- Turn ON both the transmitter and receiver using their respective power switches.
- Use the "CH" (Channel Adjustment) buttons on both the transmitter and receiver to select the same channel number (1-8). The selected channel will be indicated by the channel numbers on the units.
- For simultaneous triggering of multiple receivers, you can set all receivers to different channels and then press the "ALL" button on the transmitter.
6. Operating Instructions
6.1. Basic Flash Triggering
- Ensure the transmitter is mounted on your camera's hot shoe and the receiver is connected to your flash unit, with both units powered ON and set to the same channel.
- Set your camera's flash mode to manual or a compatible mode that allows external flash triggering.
- Press the shutter button on your camera. The transmitter will send a signal to the receiver, triggering the connected flash unit.
- To test the flash without taking a picture, press the "TEST" button on the transmitter. The connected flash should fire.
6.2. Wireless Shutter Release Function
The FT-8 set also supports wireless shutter release for your camera. This requires connecting the receiver to your camera's remote shutter port using the appropriate shutter release cable (included).
- Connect one of the provided shutter release cables to the receiver's 3.5mm output port and the other end to your camera's remote shutter release port.
- Ensure both the transmitter and receiver are powered ON and set to the same channel.
- To trigger the camera's shutter, press the "TEST" button on the transmitter. A half-press may activate autofocus (if supported by your camera and cable), and a full press will trigger the shutter.
7. Maintenance
- Cleaning: Use a soft, dry cloth to clean the units. Avoid using harsh chemicals or abrasive materials.
- Storage: When not in use for extended periods, remove batteries from both the transmitter and receiver to prevent leakage. Store the units in a cool, dry place, away from direct sunlight and extreme temperatures.
- Battery Replacement: Replace batteries when the status LED indicates low power or when the units fail to operate reliably.
- Handle with Care: Avoid dropping the units or subjecting them to strong impacts, as this can damage internal components.
8. Troubleshooting
If you encounter issues with your AODELAN Wireless Flash Trigger Set, refer to the following common problems and solutions:
- Flash not firing / Camera shutter not triggering:
- Ensure both the transmitter and receiver are powered ON.
- Verify that fresh batteries are installed correctly in both units.
- Check that the transmitter and receiver are set to the exact same channel.
- Confirm that the flash unit is properly connected to the receiver (either via hot shoe or sync cable) and is powered ON.
- Ensure the camera's flash mode is set correctly for external flash triggering.
- If using the "ALL" button on the transmitter, ensure receivers are within range.
- For shutter release, ensure the correct cable is connected between the receiver and the camera's remote port, and the camera's drive mode is set to remote.
- Intermittent triggering:
- Check for potential radio interference. Try changing to a different channel.
- Ensure the distance between the transmitter and receiver is within the specified operating range (up to 650ft/200m). Obstacles can reduce this range.
- Verify battery levels. Low batteries can cause unreliable performance.
- Transmitter not rotating 90 degrees:
- Ensure the swivel rotator mechanism is not obstructed or overtightened. Apply gentle, even pressure when adjusting.
9. Specifications
| Feature | Detail |
|---|---|
| Model Number | FT-8 |
| Frequency | 2.4 GHz |
| Channels | 8 |
| Operating Range | Up to 650 feet (200 meters) |
| Max Sync Speed | 1/250s |
| Product Dimensions | 5.91 x 5.12 x 2.36 inches |
| Item Weight | 9.9 ounces |
| Manufacturer | AODELAN |
| ASIN | B07ZD16YBQ |
10. Warranty and Support
For warranty information or technical support, please contact AODELAN customer service directly. Refer to the packaging or the official AODELAN website for the most current contact details.
You can visit the AODELAN Store for more information: AODELAN Store on Amazon.


