vidaXL 170789
vidaXL Chicken Cage Instruction Manual
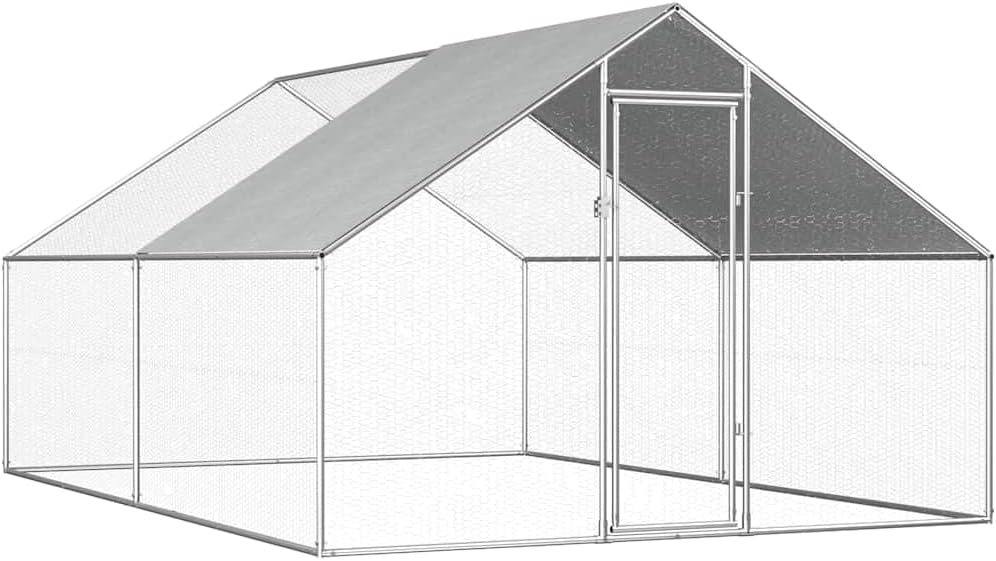
Model: 170789 | Dimensions: 2.75 x 4 x 1.92 m
Product Overview
The vidaXL Chicken Cage is a spacious and practical outdoor enclosure designed for chickens, ducks, and other small animals. It can also serve as an aviary for larger birds. Constructed from high-quality galvanized steel, this cage offers durability and features a 100% polyethylene canopy for protection. The design includes mesh side walls for air circulation and a gate equipped with a secure latch system.
Key Features:
- Durable galvanized steel structure.
- 100% polyethylene roof for weather protection.
- Wire mesh side walls for ventilation.
- Secure latch system on the gate.
- Suitable for various small animals and large birds.
Specifications
| Attribute | Detail |
|---|---|
| Model Number | 170789 |
| Dimensions (W x D x H) | 2.75 x 4 x 1.92 m (approx. 108.3 x 157.5 x 75.6 inches) |
| Color | Silver frame + gray roof |
| Frame Material | Galvanized Steel |
| Roof Material | 100% Polyethylene (PE) |
| Side Walls | Wire Mesh |
| Gate | Equipped with latch system |
| Item Weight | 36.26 kg (approx. 79.9 lbs) |

Setup and Assembly
The vidaXL Chicken Cage is designed for straightforward assembly. It is recommended that two people undertake the assembly process to ensure stability and ease of construction. Before beginning, ensure all components are present and undamaged.
Required Tools (Not Included):
- Wrench or socket set for bolts.
- Wire cutters for mesh.
- Measuring tape.
- Gloves for handling materials.
Assembly Steps:
- Unpack and Verify Components: Carefully unpack all boxes and lay out components. Refer to the included parts list to ensure all pieces are accounted for.
- Assemble the Base Frame: Connect the horizontal and vertical galvanized steel pipes to form the rectangular base of the cage. Secure connections using the provided bolts and nuts.
- Erect the Side and Roof Frames: Attach the upright posts and roof support beams to the base frame. Gradually build the structure, ensuring all connections are tight and stable.
- Install the Gate Frame: Integrate the gate frame into the designated opening. Ensure it swings freely and the latch mechanism aligns correctly.
- Attach Wire Mesh: Unroll the wire mesh and secure it to the frame using wire ties or clips. Start from one end and work your way around, ensuring the mesh is taut and covers all open sides. Trim excess mesh as needed.
- Install Polyethylene Roof: Drape the polyethylene canopy over the roof frame. Secure it firmly to prevent wind uplift, using the provided fasteners or ties. Ensure proper tension for water runoff.
- Final Inspection: Double-check all bolts, connections, and mesh attachments for security. Ensure the gate latches properly.


Operating Instructions
The vidaXL Chicken Cage is designed for straightforward use as an animal enclosure. Follow these guidelines for optimal operation and animal welfare.
Accessing the Enclosure:
- To open the gate, disengage the latch mechanism.
- Ensure the gate is securely latched after entering or exiting to prevent animals from escaping and to protect them from predators.
Animal Placement:
- Introduce animals to the enclosure gradually, allowing them to acclimate to their new environment.
- Ensure adequate space per animal according to species-specific guidelines.
Ventilation and Shelter:
- The wire mesh sides provide natural ventilation. Ensure no obstructions block airflow.
- The polyethylene roof offers protection from sun and rain. Consider additional shade or windbreaks depending on local climate conditions.
Maintenance
Regular maintenance will extend the lifespan of your vidaXL Chicken Cage and ensure a safe environment for your animals.
Routine Checks:
- Daily: Inspect the gate latch for proper function. Check for any visible damage to the mesh or frame.
- Weekly: Clean the interior of the cage, removing waste and debris. Check for any loose bolts or connections and tighten as necessary.
- Monthly: Inspect the polyethylene roof for tears or damage. Ensure it is securely fastened. Check the ground around the base for signs of digging or erosion that could compromise stability.
Cleaning:
- Use mild soap and water to clean the galvanized steel frame and polyethylene roof. Rinse thoroughly.
- For the wire mesh, a stiff brush can help remove stubborn dirt.
- Avoid using harsh chemicals or abrasive cleaners, as these can damage the materials.
Repairs:
- Minor tears in the polyethylene roof can be repaired with strong, weather-resistant tape. For significant damage, consider replacing the roof section.
- Damaged wire mesh sections can be patched with new mesh and wire ties, or the entire section can be replaced if severely compromised.
- Replace any rusted or severely bent frame components immediately to maintain structural integrity.
Troubleshooting
This section addresses common issues that may arise with the vidaXL Chicken Cage.
| Problem | Possible Cause | Solution |
|---|---|---|
| Cage feels unstable or wobbly. | Loose bolts or uneven ground. | Tighten all bolts. Ensure the cage is placed on level ground. If necessary, use shims under the base pipes to level the structure. |
| Gate does not latch securely. | Misalignment of latch components or bent gate frame. | Check for obstructions. Adjust the latch mechanism. If the frame is bent, attempt to gently realign it or replace the affected part. |
| Water pooling on the roof. | Insufficient tension or improper installation of the polyethylene roof. | Re-tension the roof cover, ensuring it is taut and slopes correctly to allow water runoff. Check for any sagging points. |
| Wire mesh is loose or damaged. | Insufficient fastening during assembly or wear and tear. | Re-secure loose sections with additional wire ties or clips. Patch small holes with new mesh or replace severely damaged sections. |
Warranty and Support
For warranty information and customer support, please refer to the documentation provided with your purchase or visit the official vidaXL website. Keep your proof of purchase for any warranty claims.
Contact Information:
- Brand: vidaXL
- Website: www.vidaxl.com (Please check the official website for specific regional support contacts.)
Related Documents - 170789
 |
PawHut 3x8x1.95m Chicken Coop Assembly Instructions Comprehensive assembly instructions for the PawHut 3x8x1.95m Galvanized Metal Chicken Coop. Includes parts list, diagrams, and multilingual support information. |
 |
Aivituvin Rabbit Hutch Assembly Instructions and User Guide Comprehensive assembly guide for the Aivituvin Rabbit Hutch, a versatile wooden pet enclosure suitable for rabbits and guinea pigs. Includes detailed steps, parts list, hardware inventory, and safety warnings. |
 |
COZIWOW CW12H0635-T01 Bird Cage FAQ: Outdoor Aviary Features, Dimensions & Assembly Find answers to common questions about the COZIWOW CW12H0635-T01 bird cage, including its outdoor suitability, dimensions, included parts, assembly instructions, and material specifications. |
 |
Woodland Flappy Pinus Pet Hutch Assembly Instructions Detailed assembly instructions for the Woodland Flappy Pinus pet hutch, including a parts list and step-by-step guide. Features include secure enclosure, resting space, and mobility. |
 |
Assembly Instructions for Large Metal Chicken Coop with Run Detailed assembly instructions for a walk-in metal chicken coop and run, including parts list, hardware, and step-by-step assembly diagrams. Suitable for outdoor use with chickens, ducks, or rabbits. |
 |
Aivituvin AIR 65 Rabbit Hutch: Assembly Instructions and User Guide Detailed assembly instructions and safety notices for the Aivituvin AIR 65 rabbit hutch. Learn how to build your pet's new home with clear steps, parts list, and hardware guide. |
Ask a question about this manual
Ask about setup, troubleshooting, compatibility, parts, safety, or missing instructions. Manuals+ will review the question and use this page’s manual context to help answer it.