1. Introduction
This manual provides instructions for the proper installation, operation, and maintenance of your MEASUREMAN MA031 Digital Pressure Gauge. This device is designed for accurate measurement of hydraulic, oil, water, and air pressure. It is suitable for media that are not corrosive to stainless steel wetted parts.
The gauge features a 3-1/8" dial size, a protective boot, a bright backlight, and 0.25% accuracy. It offers a 5-digit display with four interchangeable units: psi, bar, Mpa, and kpa. The device also includes a battery status display and a 1/4" NPT male stainless steel connection.
2. Safety Information
Read all instructions carefully before operating the device. Failure to follow these instructions may result in damage to the product or personal injury.
- Ensure the pressure medium is compatible with 316 stainless steel to prevent corrosion and damage.
- Do not exceed the maximum pressure rating of the gauge (150% over load protection).
- Handle the gauge with care to avoid physical damage.
- Ensure proper sealing of the 1/4" NPT connection during installation to prevent leaks.
3. Product Components and Display
The MEASUREMAN Digital Pressure Gauge consists of the main display unit, a protective rubber boot, and a 1/4" NPT male connection. The display shows pressure readings, selected units, and battery status.

Figure 3.1: Front view of the MEASUREMAN Digital Pressure Gauge, highlighting its 0.25% accuracy. The display shows "0.000 MPa" and a battery indicator.

Figure 3.2: The gauge display demonstrating the four interchangeable pressure units: psi, bar, Mpa, and kpa. The main gauge shows "0.000 MPa" with a battery icon.
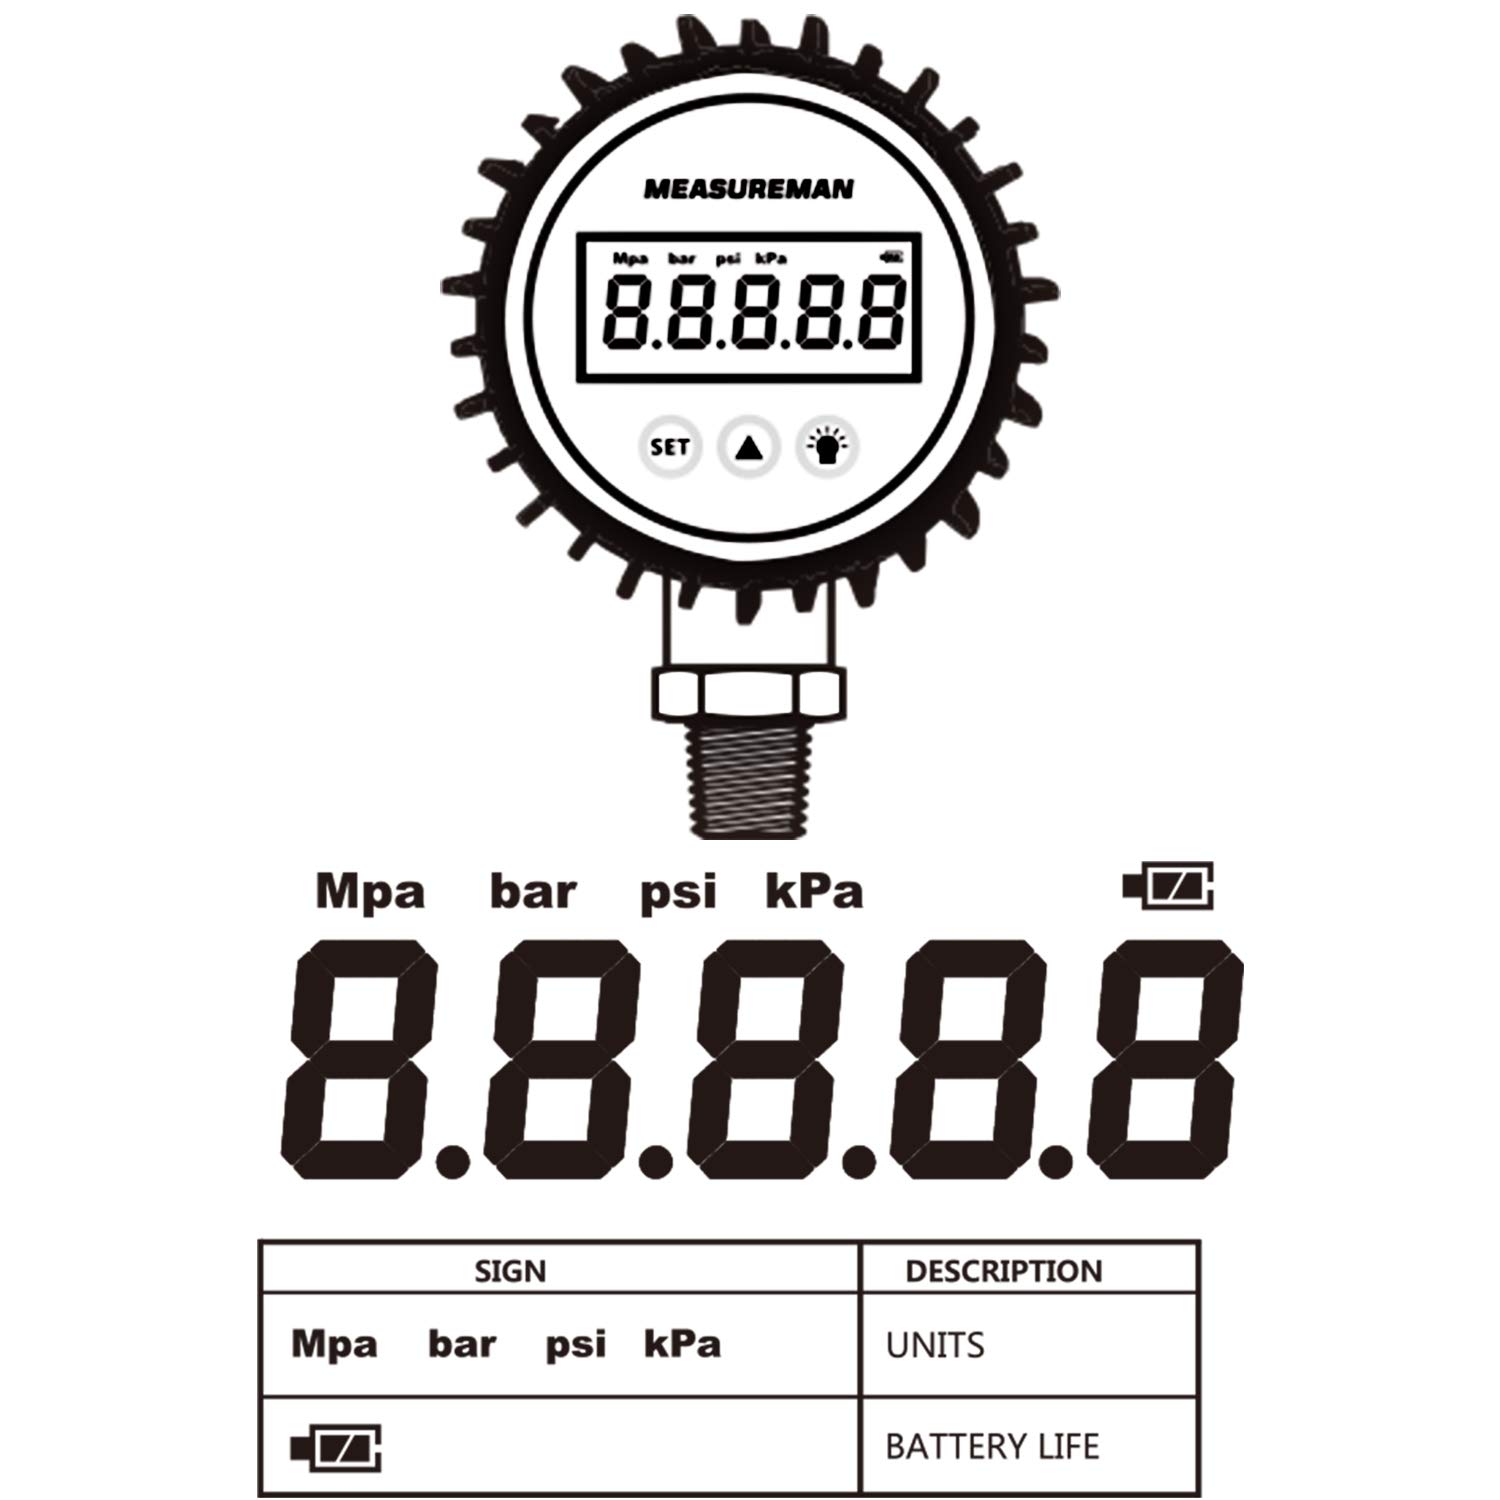
Figure 3.3: A schematic diagram illustrating the various display elements, including Mpa, bar, psi, kpa units, and the battery life indicator.
4. Setup and Installation
4.1. Battery Installation
The gauge requires 2 x AAA 1.5V batteries. To install or replace batteries:
- Carefully remove the protective rubber boot from the gauge.
- Locate the battery compartment cover on the back of the unit.
- Unscrew the three screws securing the metal cover plate.
- Insert the 2 x AAA batteries, ensuring correct polarity.
- Replace the metal cover plate, aligning it correctly, and secure it with the three screws.
- Re-install the protective rubber boot.

Figure 4.1: Rear view of the gauge, indicating the location of the battery compartment for 2 x AAA 1.5V batteries.
4.2. Physical Installation
The gauge features a 1/4" NPT male stainless steel process connection for mounting.
- Ensure the system is depressurized before installation.
- Apply appropriate thread sealant (e.g., PTFE tape) to the 1/4" NPT male threads.
- Thread the gauge into the desired pressure port. Tighten securely but do not overtighten to avoid damaging the threads or the gauge.
- Verify that the gauge is oriented for easy reading.

Figure 4.2: Detailed view of the 1/4" NPT male stainless steel process connection at the bottom of the gauge.
5. Operating Instructions
The gauge has three primary buttons: SET, UNIT/POWER (triangle icon), and BACKLIGHT (light bulb icon).

Figure 5.1: The gauge face showing the three control buttons and a table detailing their functions.
5.1. Button Functions
| Key | Function | Description |
|---|---|---|
| UNIT/POWER (▲) | ON/OFF | Long press to power on or power off the device. |
| UNIT/POWER (▲) | Change Units | Short press to change pressure units circularly (psi, bar, Mpa, kpa). |
| BACKLIGHT (💡) | Backlight | Short press to turn the backlight on for 8 seconds. |
| SET | Zero Calibration | Long press for 5 seconds to calibrate the zero point. Ensure no pressure is applied during calibration. |
5.2. Reading Pressure
Once powered on, the gauge will display the current pressure reading in the selected unit. Allow a few seconds for the reading to stabilize, especially after significant pressure changes.
6. Maintenance
6.1. Cleaning
Clean the exterior of the gauge with a soft, damp cloth. Do not use abrasive cleaners or solvents that could damage the display or housing.
6.2. Battery Replacement
Replace batteries when the battery status indicator shows low power. Refer to section 4.1 for detailed battery installation instructions.
6.3. Storage
When not in use for extended periods, store the gauge in a dry, cool place, away from direct sunlight and extreme temperatures. It is recommended to remove batteries if storing for a very long time to prevent leakage.
7. Troubleshooting
| Problem | Possible Cause | Solution |
|---|---|---|
| Gauge does not power on. | Dead or incorrectly installed batteries. | Check battery polarity and replace batteries if necessary (refer to section 4.1). |
| Inaccurate readings. | Gauge not zeroed; sensor issue; external interference. | Perform zero calibration (section 5.1). Ensure no pressure is applied. If problem persists, contact support. |
| Slow response time. | This is a characteristic of the device. | Allow sufficient time for the reading to stabilize. This is normal operation. |
| Display is dim or flickering. | Low battery power. | Replace batteries (refer to section 4.1). |
8. Specifications
| Feature | Detail |
|---|---|
| Dial Size | 3-1/8" |
| Pressure Range | 0-100psi (also available in 0-3000psi, 0-10000psi variants) |
| Accuracy | 0.25% |
| Display | 5-digit LCD with bright backlight |
| Units | psi, bar, Mpa, kpa (interchangeable) |
| Overload Protection | 150% |
| Connection | 1/4" NPT Male, 316 Stainless Steel |
| Wetted Parts Material | 316 Stainless Steel |
| Power Supply | 2 x AAA 1.5V batteries |
| Product Dimensions | 15.24 x 10.16 x 5.08 cm (6 x 4 x 2 inches) |
| Item Weight | 480.81 g (1.06 lbs) |
| Manufacturer | MEASUREMAN |
| Model Number | MA031 |

Figure 8.1: Dimensional drawing of the digital pressure gauge, showing key measurements in centimeters and inches.

Figure 8.2: Technical drawing providing detailed dimensions of the digital pressure gauge.
9. Key Applications
The MEASUREMAN Digital Pressure Gauge is suitable for a variety of applications where precise pressure measurement is required, provided the media is compatible with stainless steel.
- Hydraulic Systems
- Oil Pressure Monitoring
- Water Pressure Measurement
- Air Pressure Systems
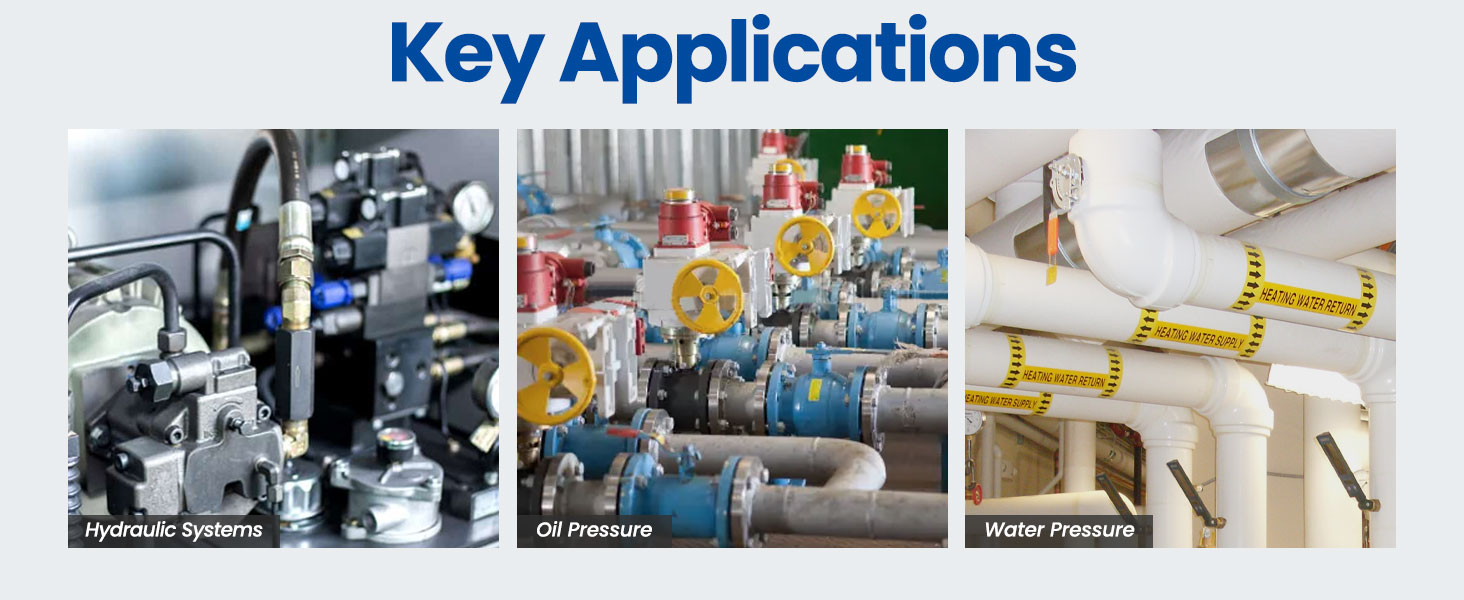
Figure 9.1: Visual examples of typical applications for the digital pressure gauge, including hydraulic systems, oil pressure, and water pressure measurement.
10. Warranty and Support
This product comes with a 1-year warranty from the date of purchase. For warranty claims or technical support, please contact MEASUREMAN customer service. Refer to your purchase documentation for specific contact details.
For additional information or assistance, please visit the MEASUREMAN Store on Amazon.
11. Product Video
Video 11.1: An overview video demonstrating the features and functionality of a digital pressure gauge. This video is provided by Roastove, a seller of similar products.