1. Product Overview
This document provides instructions for the AlveyTech 24 Volt LBD8-2 speed motor control module. This controller is specifically designed as a replacement part for the Dynacraft Hello Kitty SU Electric Scooter. It manages the power delivery to the motor, ensuring proper operation of the scooter.
2. Compatibility
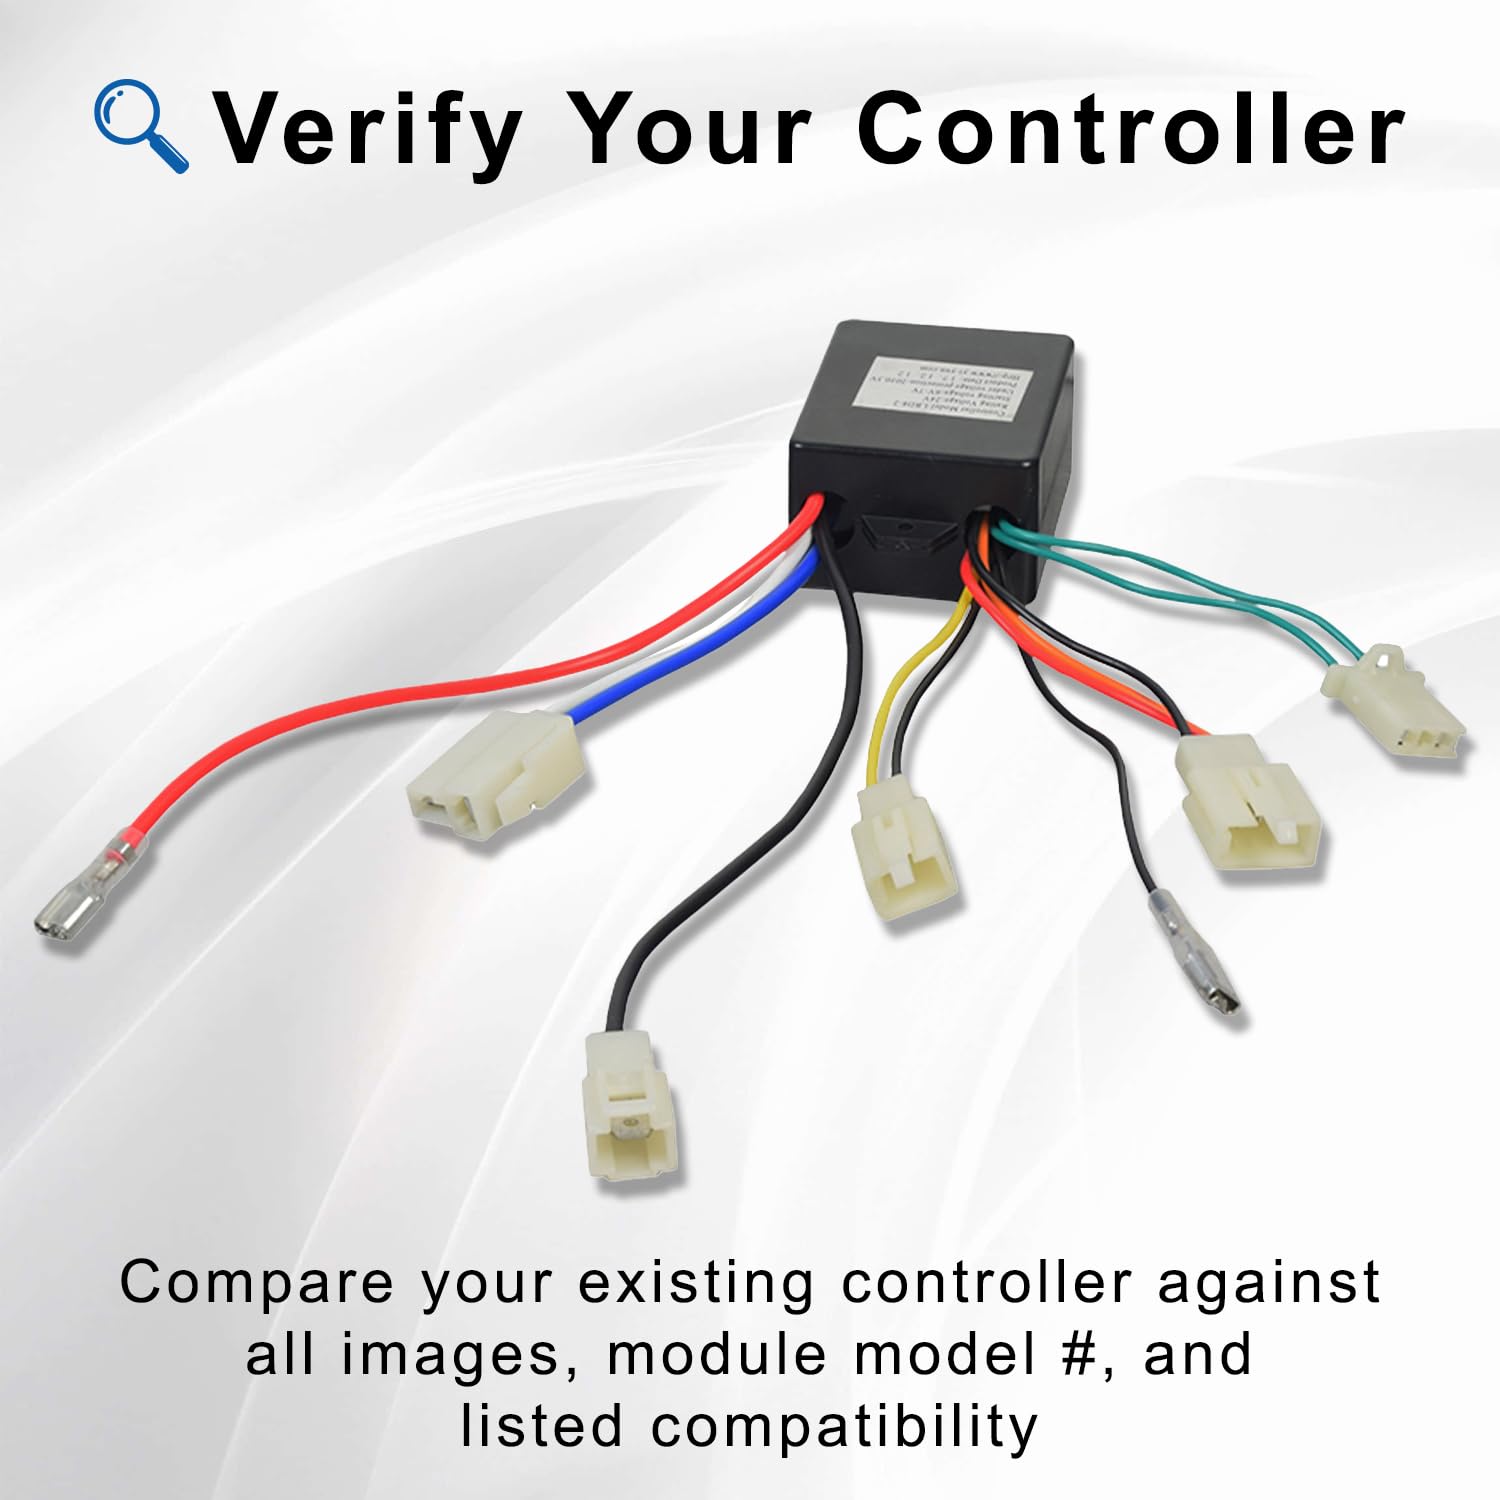
The AlveyTech 24 Volt LBD8-2 controller is compatible exclusively with the Dynacraft Hello Kitty SU Electric Scooter. It is critical to verify your existing controller's model number before ordering or attempting installation.
Important Compatibility Notes:
- This controller is NOT interchangeable with the 12V LBD8, 12V LBD8-1, 24V LBD8-3, or any other controller versions.
- This controller will NOT work on the Dynacraft Hello Kitty City Cruiser Electric Scooter.
- Always compare your existing controller's model number and physical appearance against the images provided to ensure a correct match.


3. Key Features
The AlveyTech LBD8-2 controller offers the following features:
- Voltage: 24 Volt
- Model: LBD8-2
- Throttle Connector: 2-wire configuration
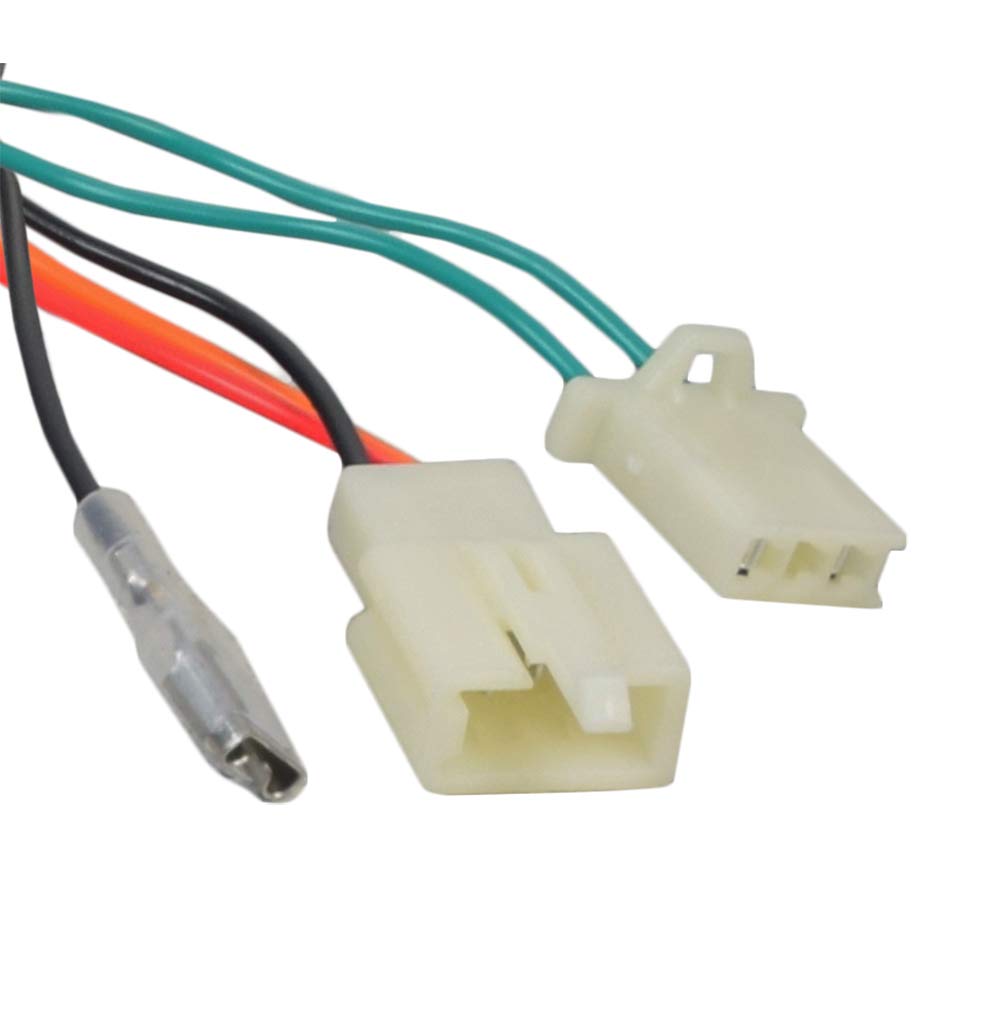
- Total Connectors: 7 connectors for various scooter components

4. Setup and Installation
Installation of the controller requires basic electrical knowledge and tools. If you are unsure about any step, it is recommended to seek professional assistance.
4.1 Safety Precautions
- Always disconnect the scooter's battery before beginning any installation or maintenance.
- Wear appropriate safety gear, including eye protection.
- Ensure the work area is dry and well-lit.
4.2 Installation Steps
- Locate the existing controller on your Dynacraft Hello Kitty SU Electric Scooter.
- Carefully disconnect all 7 connectors from the old controller, noting their positions and corresponding wires. It may be helpful to take photos before disconnecting.
- Remove the old controller from its mounting location.
- Position the new AlveyTech LBD8-2 controller in the same location.
- Connect the 7 connectors from the scooter's wiring harness to the new controller. Ensure the 2-wire throttle connector is correctly attached. Refer to the images below for connector types.
- Secure the new controller in place.
- Reconnect the scooter's battery.
- Test the scooter's functionality in a safe, open area.


5. Operating Instructions
To properly engage the motor of the Dynacraft Hello Kitty SU Electric Scooter with this controller, a specific starting procedure is required:
- Kick Start: Due to the low wattage power of the motor, a kick start is needed before twisting the throttle.
- Throttle Engagement: After initiating a kick start, twist the throttle to engage the motor.
This kick-start requirement is a normal operational characteristic and does not indicate a faulty controller or throttle.
6. Maintenance
To ensure the longevity and optimal performance of your AlveyTech LBD8-2 controller, consider the following general maintenance guidelines:
- Keep Clean: Periodically inspect the controller and its connections for dirt, dust, or moisture. Clean with a dry, soft cloth if necessary.
- Check Connections: Ensure all wiring connections remain secure and free from corrosion. Loose connections can lead to intermittent operation or damage.
- Avoid Exposure: Protect the controller from direct exposure to water, extreme temperatures, and physical impact.
7. Troubleshooting
If you experience issues with your scooter after installing the new controller, consider the following common causes:
- Faulty Batteries: Ensure your scooter's batteries are fully charged and in good working condition. Weak or dead batteries are a common cause of power issues.
- Faulty Throttle: Test the throttle for proper function. A malfunctioning throttle may not send the correct signals to the controller.
- Controller Malfunction: While less common for a new part, a controller itself could be faulty. Re-check all connections and ensure the correct model was installed.
Always ensure all connections are firm and correctly seated. If problems persist, consult a qualified technician.

8. Specifications
| Specification | Detail |
|---|---|
| Model | LBD8-2 (Manufacturer Model: Z09-1724) |
| Rated Voltage | 24 Volts |
| Starting Voltage | 6 - 7 Volts |
| Product Dimensions | 8"W x 5"H |
| UPC | 636643392556 |
| ASIN | B07Z9JWFFS |
9. Warranty and Support
Specific warranty information for the AlveyTech 24 Volt LBD8-2 Controller is not provided in this manual. For details regarding warranty coverage, returns, or technical support, please contact AlveyTech directly or refer to the retailer's policy where the product was purchased.