Introduction
Thank you for choosing the Ensenior 6-Pack 6 Inch LED Recessed Lights. These ultra-thin, dimmable lights are designed for easy installation and provide high brightness with energy efficiency. This manual provides essential information for safe and proper installation, operation, and maintenance of your new lighting fixtures.
Safety Warnings
- WARNING: Risk of electric shock. Disconnect power at the circuit breaker before installation or servicing.
- CAUTION: Risk of fire. Use only with 120V, 60Hz circuits. Do not use with dimmers not compatible with LED lighting.
- Consult a qualified electrician if you are unfamiliar with proper electrical wiring connections.
- Ensure all connections are made in accordance with local and national electrical codes.
- IC Rated for direct contact with insulation.
- Damp Rated: Suitable for damp locations, but avoid direct water contact to prevent damage and reduced lifespan.
Package Contents
Verify that all components are present before beginning installation:
- 6 x LED Recessed Lights
- 6 x Junction Boxes
- 1 x Instruction Manual
- 1 x Cutting Template

Image: Overview of the Ensenior 6-Pack LED Recessed Light and its components, including the ultra-thin light fixture and the separate junction box.
Setup and Installation
Tools Required
- Drill with Phillips head bit (or screwdriver)
- Wire cutters/strippers
- Hammer (if removing existing outlet box)
- Drywall saw (or box cutter)
- Wire nuts (if not using smart connectors)
- Safety glasses and gloves (recommended)
Pre-Installation Steps
- Turn off Power: Locate the circuit breaker controlling the light fixture you intend to replace. Flip the breaker to the OFF position to ensure no power is supplied to the wiring. Verify with a voltage tester if unsure.
- Remove Existing Fixture: Carefully remove the existing light fixture. This may involve unscrewing a globe, removing light bulbs, and then detaching the fixture from the ceiling. Disconnect any existing wiring.
- Prepare Wiring: If replacing an existing fixture, you may need to remove the old outlet box. Ensure the existing wires are properly stripped for connection.
Video: "How to Replace Existing Lights with Ensenior Low Profile LED Recessed Lights" by Ensenior Direct. This video demonstrates the process of removing an old light fixture and preparing the ceiling for a new recessed light installation.
Cutting the Hole
- Use the provided cutting template to mark the desired hole size on the ceiling.
- Carefully cut the hole using a drywall saw or box cutter. Start with a smaller hole and gradually enlarge it if necessary, as it's easier to make a hole bigger than smaller.
- Be mindful of any wires or studs behind the drywall while cutting.

Image: A hand holding the cutting template against a ceiling, indicating where to cut the hole for the recessed light fixture.
Wiring the Junction Box
- Open the junction box provided with the Ensenior light.
- Connect the house wiring (black, white, and ground/bare copper) to the corresponding smart connectors inside the junction box. Match black to black, white to white, and ground to green.
- Ensure a secure connection by pushing the wires firmly into the connectors until you hear a click or feel a pop.
- Tuck all wires neatly into the junction box and close the lid.
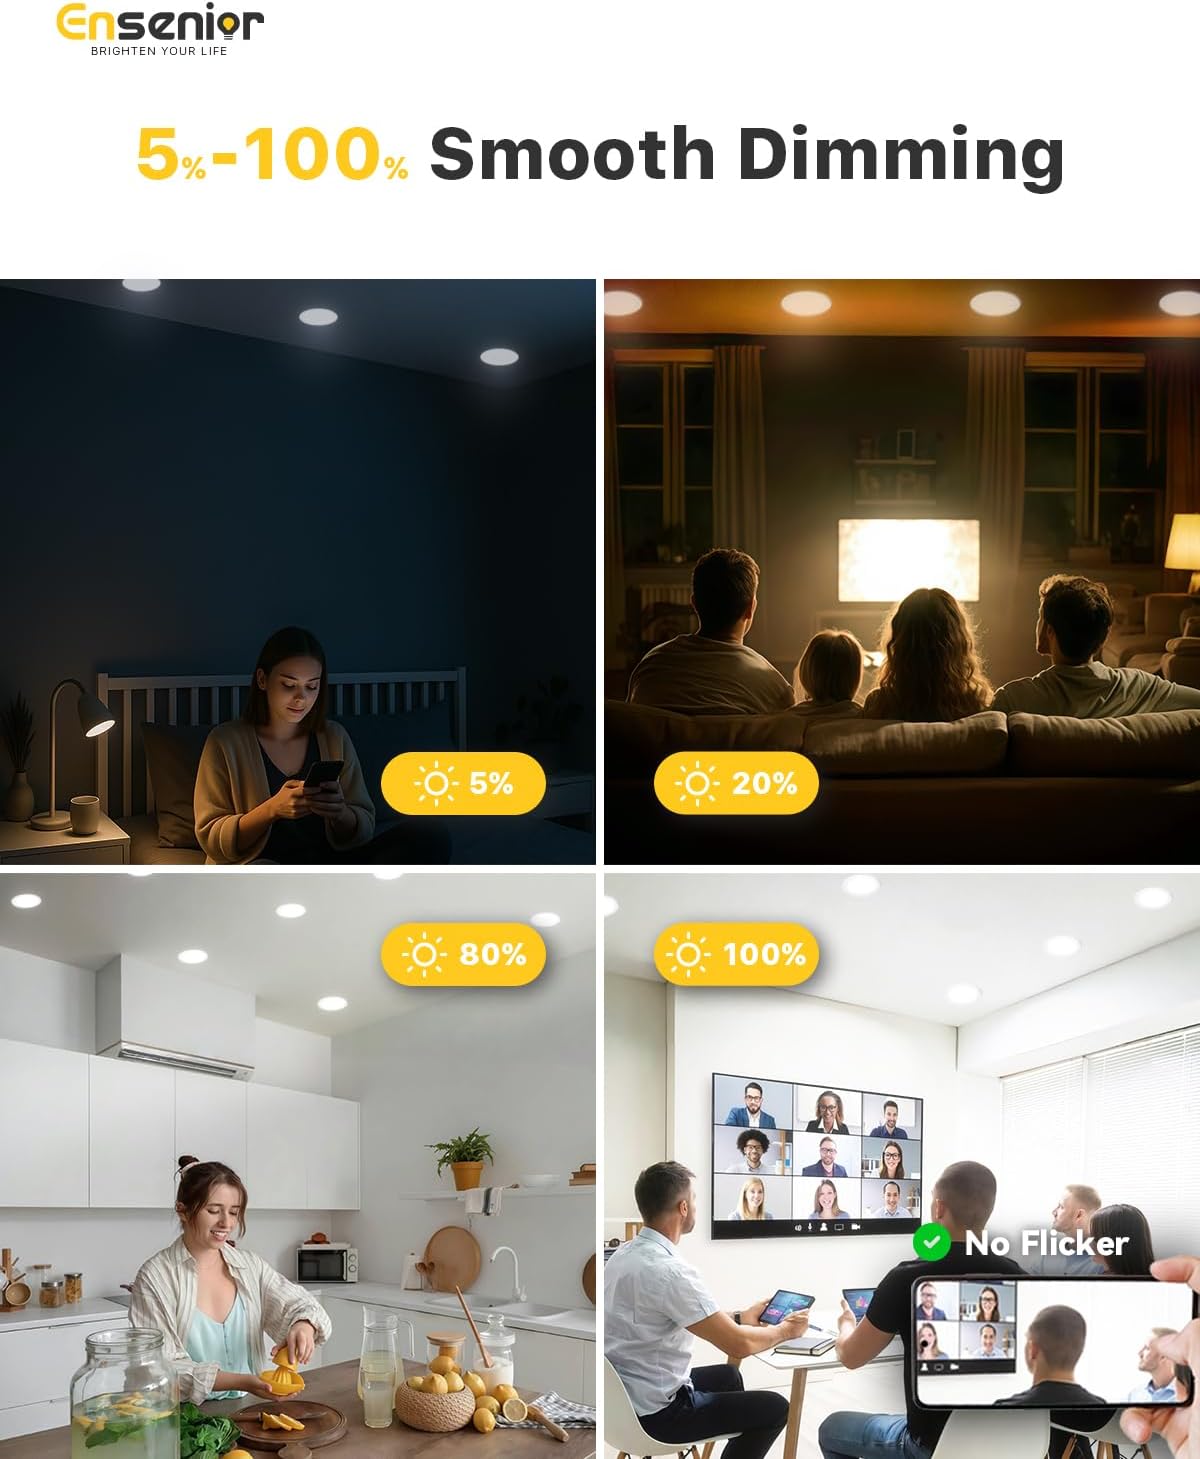
Image: Close-up of a hand connecting electrical wires to the smart connectors inside the junction box, demonstrating the color-coded wiring process.
Mounting the Light
- Connect the cable from the junction box to the light fixture using the male/female connectors.
- Push the junction box into the ceiling hole.
- Fold the spring clips on the light fixture upwards and insert the light into the ceiling hole. The clips will spring back down, securing the light flush against the ceiling.

Image: A hand pushing the recessed light fixture into the ceiling hole, showing how the spring clips secure it in place.
Operating Instructions
Color Temperature Selection
The Ensenior recessed lights offer 5 CCT (Correlated Color Temperature) options, allowing you to customize the light output to your preference. This selection is made via a switch located on the side of the junction box:
- 2700K: Warm White (ideal for bedrooms)
- 3000K: Soft White (ideal for bathrooms)
- 3500K: Neutral White (ideal for studies)
- 4000K: Cool White (ideal for kitchens)
- 5000K: Daylight (ideal for living rooms and offices)
Select your desired color temperature before fully installing the junction box into the ceiling.

Image: A close-up of the junction box showing the switch for selecting between 5 different color temperatures (2700K, 3000K, 3500K, 4000K, 5000K).
Dimming Functionality
These LED recessed lights are 5%-100% smoothly dimmable and compatible with most standard dimmers. Ensure your dimmer switch is compatible with LED lighting for optimal performance and to avoid flickering or humming.

Image: A table listing compatible dimmer models from brands like Lutron and Zooz, indicating whether they use Forward Phase Control (FP) or Reverse Phase Control (RP).
Maintenance
The Ensenior LED recessed lights are designed for long-lasting performance with a lifespan of 50,000 hours. Minimal maintenance is required.
- Cleaning: Ensure the power is off before cleaning. Use a soft, dry cloth to wipe the surface of the light fixture. Avoid abrasive cleaners or solvents that may damage the finish.
- Inspection: Periodically inspect the lights for any signs of damage or loose connections. If any issues are found, disconnect power and consult a qualified electrician.
Troubleshooting
| Problem | Possible Cause | Solution |
|---|---|---|
| Light does not turn on | No power supply; Loose wiring; Faulty light fixture | Check circuit breaker; Verify wire connections; Contact customer service for replacement. |
| Light flickers or hums | Incompatible dimmer switch; Loose wiring | Replace with a compatible LED dimmer; Check and secure wire connections. |
| Light output is too dim/bright | Incorrect CCT setting; Dimmer setting too low/high | Adjust CCT switch on junction box; Adjust dimmer switch. |
Specifications
| Feature | Detail |
|---|---|
| Brand | Ensenior |
| Model Number | 6I-5000K-6PACK |
| Size | 6 Inch |
| Color Temperature | 5000K Daylight (adjustable to 2700K, 3000K, 3500K, 4000K) |
| Brightness | 1200 Lumens |
| Wattage | 12 Watts |
| Dimmable | 5%-100% Smooth Dimming |
| Lifespan | 50,000 Hours |
| Certifications | ETL, FCC, IC Rated |
| Damp Rated | Yes |
| Material | Aluminum |
| Item Dimensions L x W x H | 6.69"L x 6.69"W x 0.94"H |
| UPC | 791300312695 |
Warranty
Ensenior provides a 5-year manufacturer's warranty for these LED recessed lights. This warranty covers defects in materials and workmanship under normal use. For warranty claims or further details, please contact Ensenior customer service.
Customer Support
For any questions, technical assistance, or warranty inquiries, please contact Ensenior customer service. We offer 7/24 customer service and aim to provide one-on-one support within 12 hours.
Visit the Ensenior Store on Amazon for more information and products.